Do you dream of authentic Japanese flavor right in your kitchen?
Prepare the true original homemade teriyaki sauce with our easy and quick recipe.
Forget commercial sauces that are often too sweet or thick: discover the secret to creating that perfectly balanced, glossy, and incredibly flavorful Japanese glaze, ideal for enhancing chicken, salmon, beef, tofu, or vegetables.
Follow our detailed steps to bring an authentic taste to the table that will amaze everyone!
- Difficulty: Very easy
- Cost: Very economical
- Rest time: 30 Minutes
- Preparation time: 10 Minutes
- Portions: 4
- Cooking methods: Boiling, Stovetop
- Cuisine: Italian
- Seasonality: All seasons
- Energy 60.03 (Kcal)
- Carbohydrates 9.81 (g) of which sugars 8.86 (g)
- Proteins 0.85 (g)
- Fat 0.00 (g) of which saturated 0.00 (g)of which unsaturated 0.00 (g)
- Fibers 0.00 (g)
- Sodium 500.93 (mg)
Indicative values for a portion of 35 g processed in an automated way starting from the nutritional information available on the CREA* and FoodData Central** databases. It is not food and / or nutritional advice.
* CREATES Food and Nutrition Research Center: https://www.crea.gov.it/alimenti-e-nutrizione https://www.alimentinutrizione.it ** U.S. Department of Agriculture, Agricultural Research Service. FoodData Central, 2019. https://fdc.nal.usda.gov
Ingredients
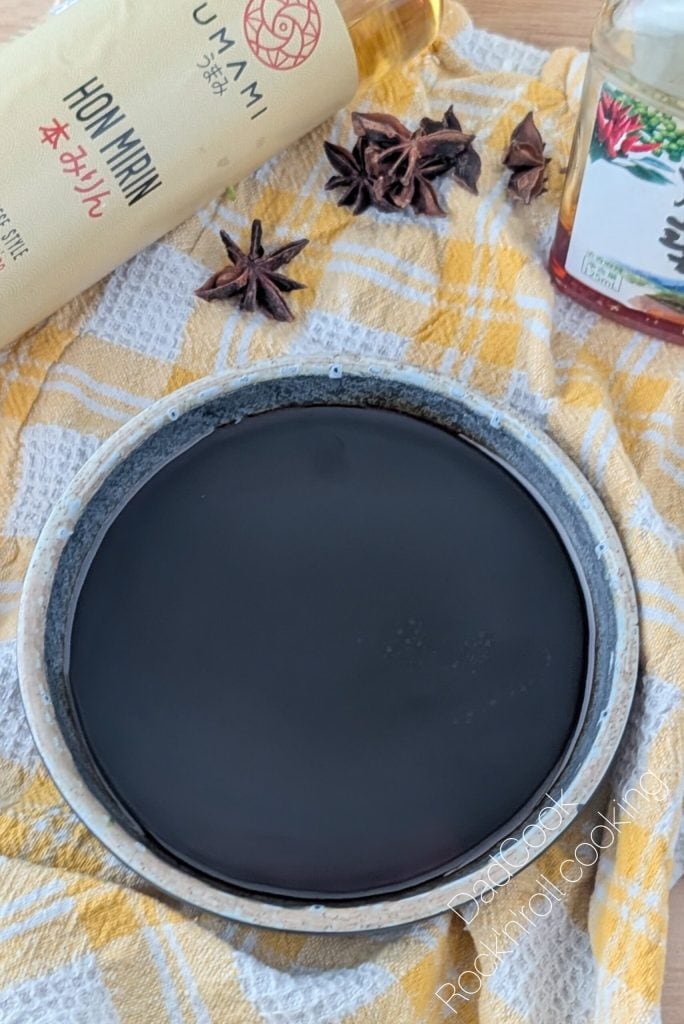
- 3/8 cup soy sauce
- 3/8 cup mirin
- 3/8 cup sake
- 1/4 cup sugar
- 1 teaspoon cornstarch
Tools
- 1 Saucepan Jeetee
- 1 Whisk PINTINOX
Steps
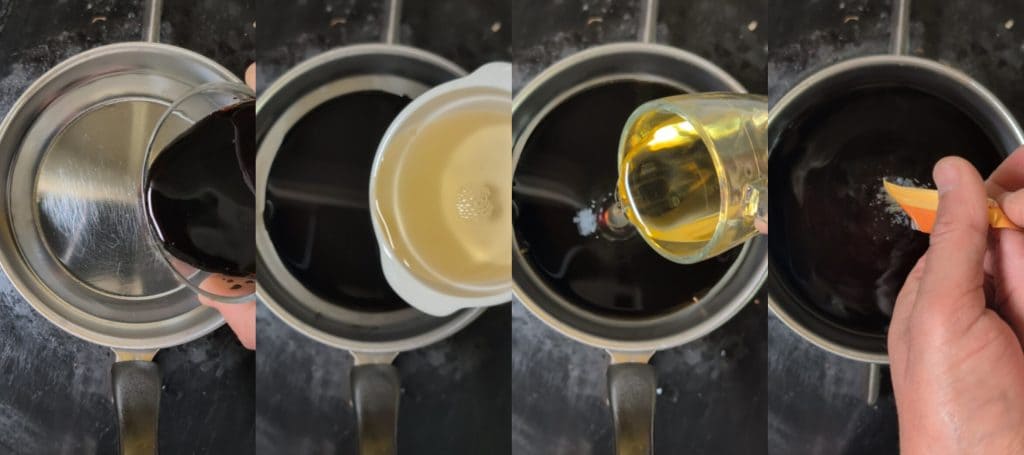
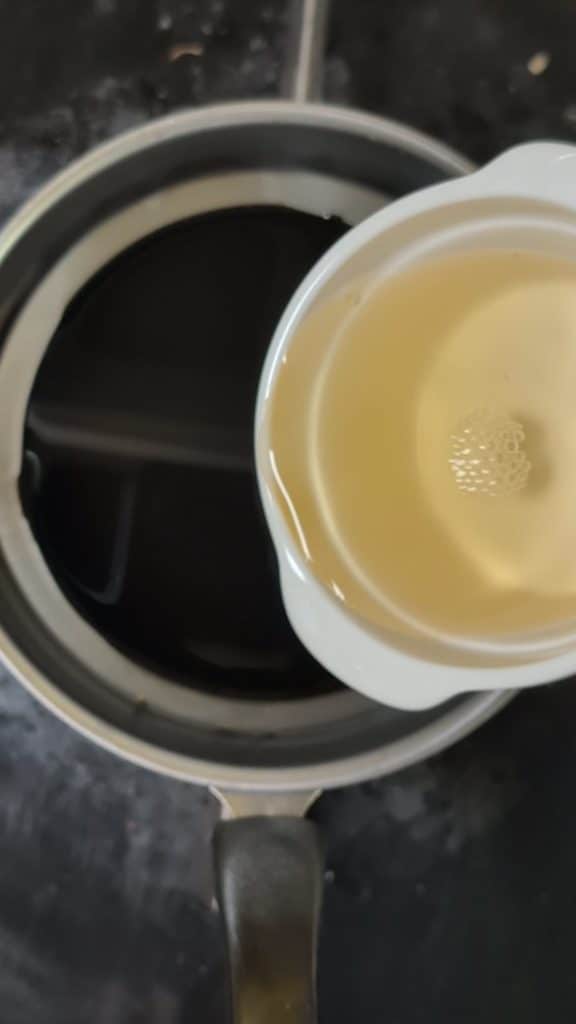
Combine the Liquid Ingredients and Sugar: Pour the soy sauce (3/8 cup), mirin (3/8 cup), sake (3/8 cup), and sugar (1/4 cup) into the saucepan.
Heat and Dissolve: Place the saucepan over medium-low heat.
Gently stir with the whisk or a spoon until the sugar has completely dissolved. Avoid bringing to a strong boil at this stage.
Simmer for Traditional Glaze: Once the sugar is dissolved, bring the mixture to a very light simmer, then immediately lower the heat to the minimum.
Let it gently simmer for 5-10 minutes.
The sauce will slightly reduce and acquire a syrupy consistency that will thicken further upon cooling.
This is the consistency of traditional teriyaki glaze. Remove from heat and let it cool.
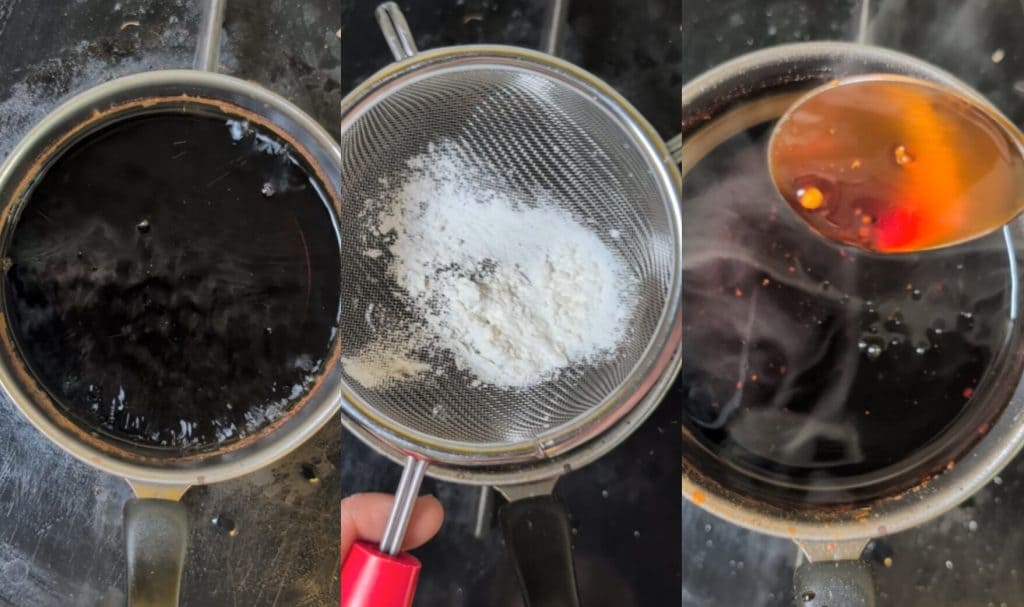
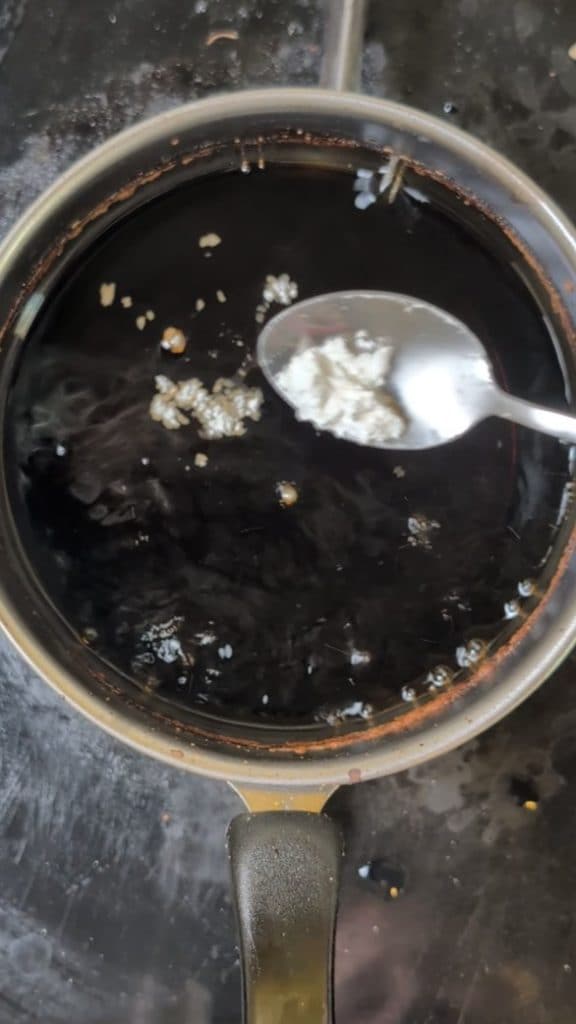
Quick Thickening Option with Cornstarch.
If you prefer a thicker sauce right away (similar to some commercial sauces) instead of the glaze obtained by reduction:
While the soy sauce, mirin, sake, and sugar base gently simmers (after dissolving the sugar), prepare the slurry: in a separate small bowl, mix 1 level teaspoon of cornstarch with 2 teaspoons of cold water until no lumps remain.
Slowly pour the slurry into the hot sauce in the saucepan, continuously stirring with the whisk.
Continue to cook over low heat for 1-2 minutes, always stirring, until the sauce visibly thickens.
Remove from heat and let it cool.
(Note: This version will be thicker and less “glaze-like” than the traditional one).
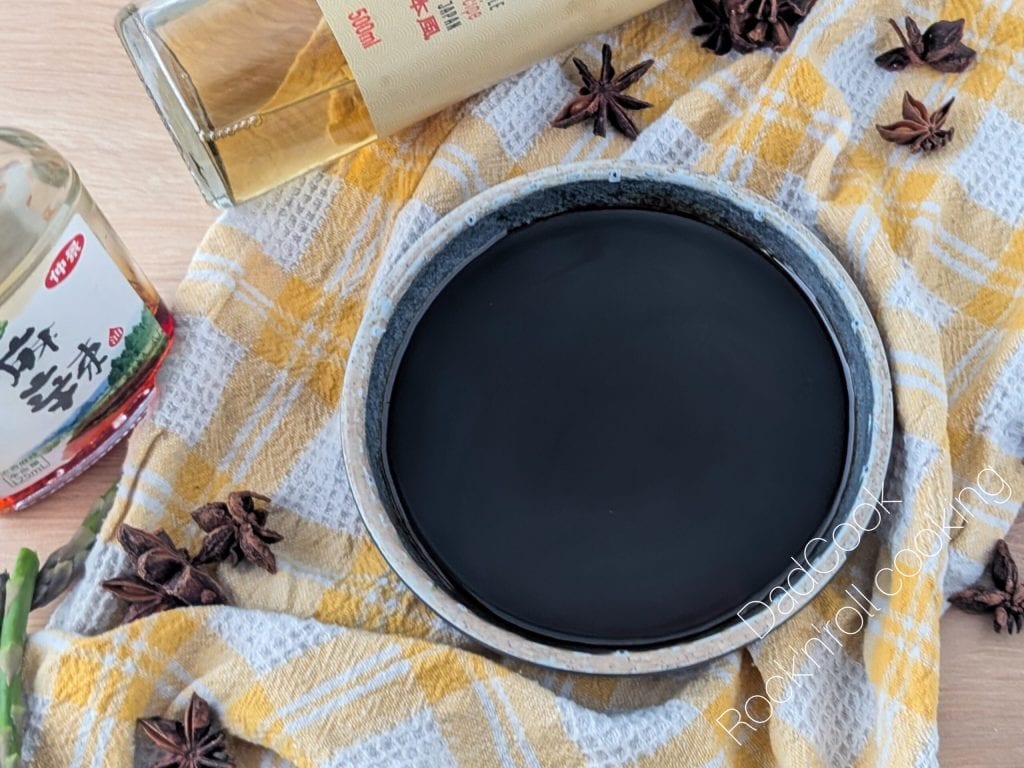
Transfer and Cooling: Pour the still hot teriyaki sauce into a heat-resistant bowl or directly into a clean glass jar with an airtight seal.
Let it cool completely at room temperature. You will notice that the sauce will tend to thicken further as it cools.
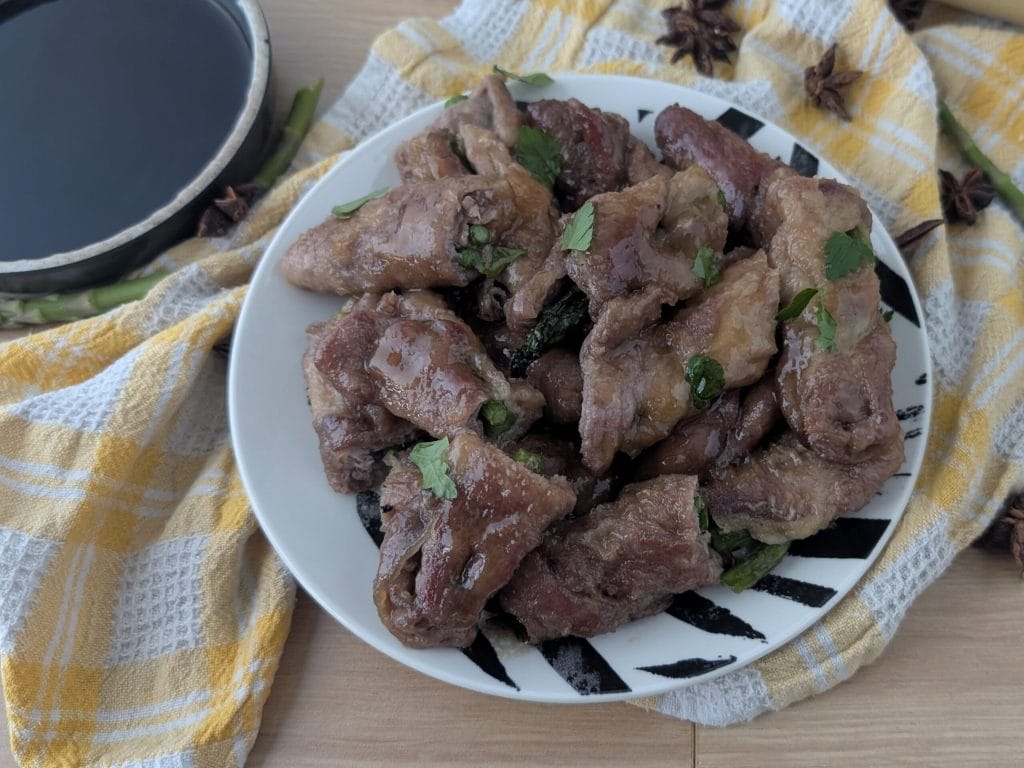
Use for Flavoring Recipes: Once cooled, your homemade teriyaki sauce is ready to give an authentic Japanese touch to your dishes!

Tips, Variations, and Storage for Your Perfect Teriyaki Sauce
Useful Tips for Use
Here’s how you can best enhance your dishes and flavor your recipes with homemade teriyaki sauce:
Perfect Glazing: It’s ideal for generously brushing chicken (classic for Yakitori), salmon, mackerel, eel, beef or pork meatballs, tofu, or vegetables like eggplant and asparagus during the last minutes of cooking (grill, oven, pan). Repeat 2-3 times for a super shiny and caramelized result.
Stir-Fry Seasoning: Add it as a finishing touch to mixed vegetables, noodles (Yakisoba), shrimp, or quick stir-fried meat pieces in a wok or pan. * Sauce for Donburi: Pour it over a bowl of hot white rice topped with grilled meat (e.g., to recreate the taste of beef Gyudon), fish, or tofu for an authentic Japanese flavor.
Quick Marinade: Although not the most classic teriyaki use (which is glazing during cooking), you can use it to marinate chicken skewers, beef, or pork slices for about 30-60 minutes before cooking to flavor more deeply.
Dipping Sauce: Serve it in a small bowl, as is or slightly diluted with a drop of water if too thick, as an accompaniment for Japanese dumplings (gyoza), spring rolls, tempura, or simply for grilled chicken or vegetable pieces.
Want to Customize Your Sauce?
Try these additions: Fresh Aromas: Add 1-2 teaspoons of freshly grated ginger and/or 1 finely minced garlic clove to the saucepan along with the other ingredients before starting cooking. They will simmer together with the sauce.
Different Sweeteners: You can replace white sugar with brown sugar (it will give a slightly more caramelized flavor), honey, or maple syrup. Keep in mind that the taste will change, and you may need to adjust the quantities slightly.
Spicy Touch: If you love spicy, add a pinch of red chili flakes or a touch of Sriracha or Gochujang (the latter will add a Korean note) during cooking.
General Notes and Tips
Personal Taste: Taste the sauce towards the end of cooking and adjust if necessary. Too sweet? One idea is to add a drop of rice vinegar (not too much!). Too salty? Dilute with a little water.
Desired Consistency: Remember the difference between traditional glaze (obtained by reduction, more liquid when hot) and the version thickened with cornstarch (thicker right away).
Ingredients: The quality of soy sauce and mirin affects the final result.
Storage) Method: Once the sauce has completely cooled, transfer it to a clean glass jar with an airtight seal.
Duration: Store the tightly closed jar in the refrigerator. Homemade teriyaki sauce will keep for several weeks (approximately 2-4 weeks). As with all homemade preserves, always check appearance and smell before use.
FAQ (Frequently Asked Questions)
Frequently Asked Questions (FAQ) about Homemade Teriyaki Sauce
Can I make teriyaki sauce without Mirin or Sake?
Mirin is crucial for the authentic sweetness and gloss of Japanese teriyaki sauce. Replacing it is difficult; you might increase the sugar and use a bit of sake or white wine, but the distinctive flavor will change. Sake adds depth; you can omit it or replace it with dry white wine or water, accepting a slight variation in the final taste of your homemade sauce.
Why isn’t my teriyaki sauce as thick as store-bought?
The original teriyaki sauce recipe produces a flavorful glaze, not a thick sauce. The consistency develops slightly with simmering and accentuates upon cooling. Commercial sauces are often thickened artificially. If you want a thicker consistency right away, you can follow the optional cornstarch (cornstarch) option indicated in our recipe.
How long does homemade teriyaki sauce last?
If properly transferred to a clean glass jar with an airtight seal, homemade teriyaki sauce keeps well in the refrigerator for several weeks, generally between 2 and 4 weeks. As with all homemade preparations, always rely on your visual and olfactory judgment before use.
What are the advantages over industrial teriyaki sauce?
Making teriyaki sauce at home allows you to fully control the ingredients. You’ll get a fresher and more balanced flavor, without preservatives, flavor enhancers, or excessive amounts of sugar/syrups often present in industrial products. Additionally, you can customize the level of sweetness and saltiness according to your taste.
Is this teriyaki sauce recipe gluten-free?
It depends solely on the soy sauce you use. Most traditional soy sauces contain wheat. To make this recipe gluten-free, you must use a gluten-free certified soy sauce, such as Tamari 100% soy. Mirin, sake, and sugar are naturally gluten-free, but it’s always wise to check the labels of individual products if you follow a strict gluten-free diet.
Can I use this sauce as a marinade?
Yes, you can use homemade teriyaki sauce for a quick marinade (for example, 30-60 minutes at room temperature or a couple of hours in the fridge) to flavor meat, fish, or tofu before cooking. Keep in mind, however, that the more traditional Japanese use is as a glaze, applied repeatedly during the final stages of cooking to create a glossy and caramelized layer.
