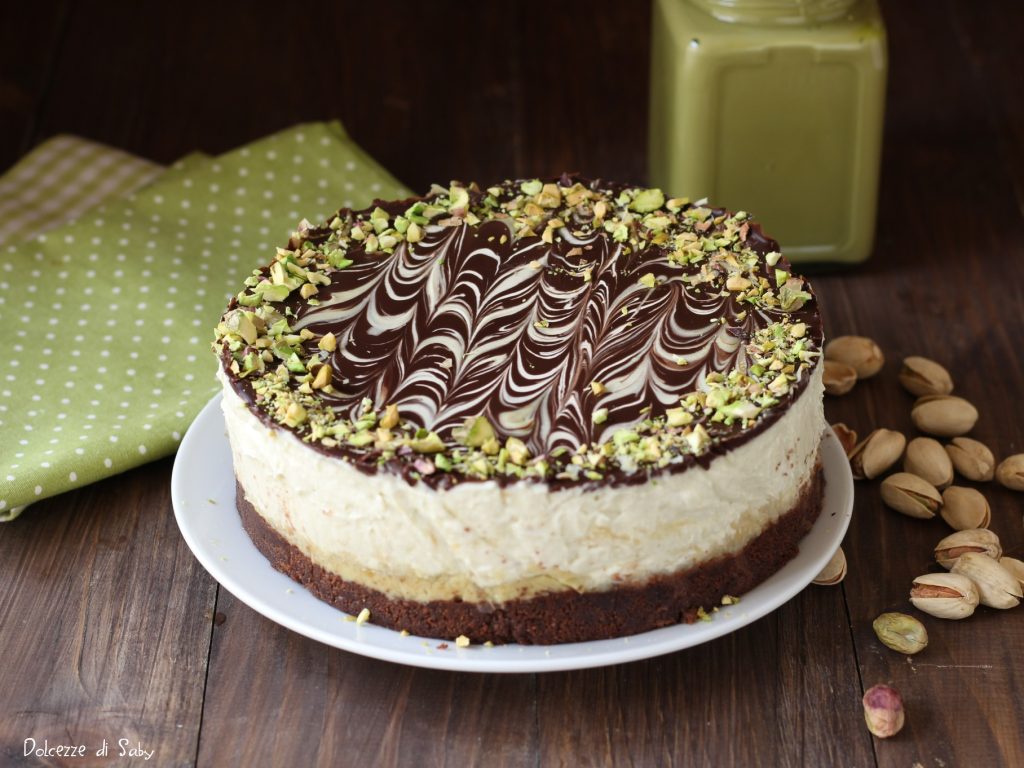
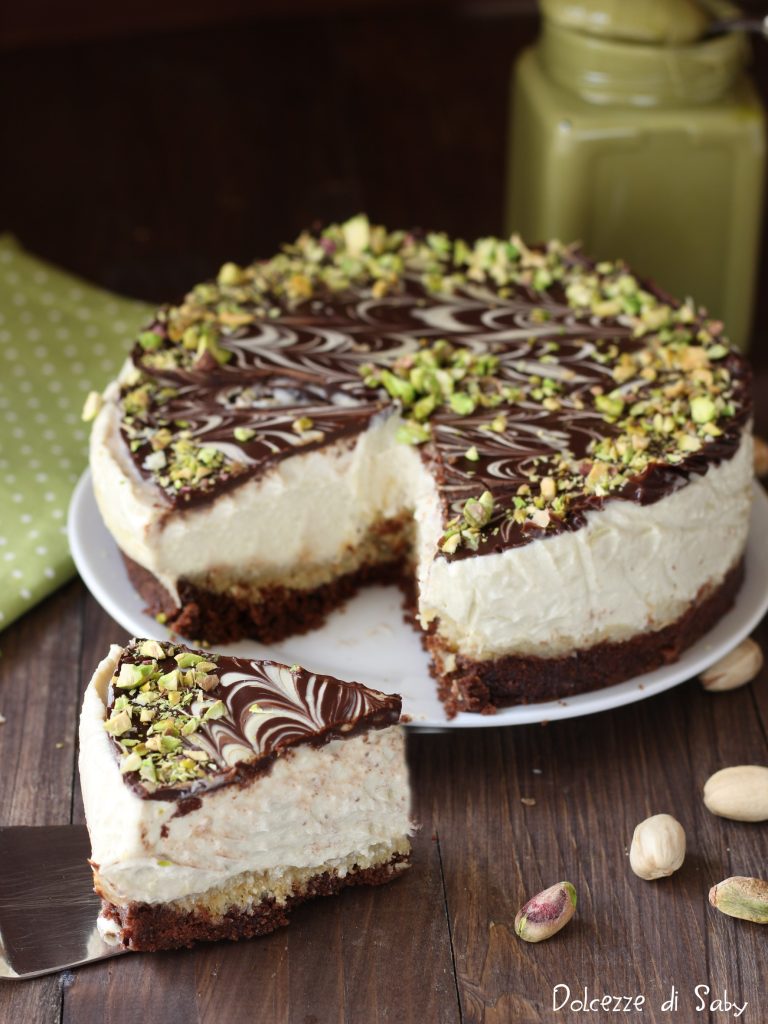
Okay, I couldn’t resist trying the trend of the moment: Dubai chocolate. The recipe will come soon, and of course, the no-bake Dubai Cheesecake. I admit I was very skeptical, knowing oriental desserts, I thought it would be very sweet, so before making it, I went to an Arab patisserie in my city to try it, and I must say I changed my mind. The Dubai cheesecake or Dubai cake is very delicious, so I decided to recreate it at home with some modifications. Now let’s see together how to prepare it in the following recipe.
- Difficulty: Easy
- Cost: Medium
- Rest time: 2 Hours
- Preparation time: 20 Minutes
- Portions: 10
- Cooking methods: Bain-marie
- Cuisine: Italian
- Seasonality: Autumn, Winter, All seasons
Ingredients
I start by saying that besides the classic ingredients for cheesecake, you need angel hair called Kadayif, which I believe can now be easily found in Italy as well, as they are a staple in oriental desserts. For this recipe, you need the fresh ones found in the refrigerated section, because there are also cooked ones. I used an 8-inch pan, but with these quantities, you can easily use a 9.5-inch pan; the cream will be less high, but the ingredients will be sufficient.
- 6.35 oz cocoa biscuits
- 6.35 tbsp melted butter
- 2.82 oz kadayif (angel hair)
- 1 knob butter
- 2.82 oz pistachio spread
- 17.64 oz spreadable cheese (I used Quark, but mascarpone is also fine)
- 2.82 oz pistachio spread
- 3.53 oz whipping cream (sweetened)
- 3.53 oz dark chocolate
- 2.82 oz butter
- as needed pistachio spread
- as needed pistachio crumbs
Tools
- 1 Parchment paper
- 1 Frying pan
- 1 Springform pan 8 inch
- 1 Mixer
Steps
Start preparing your Dubai cheesecake by lining a pan with parchment paper for the base and cling film for the sides. I used an 8-inch pan, but a 9.5-inch pan is also fine. Crumble the cocoa biscuits, add the butter, and pour them into the pan to form the base. Then place in the fridge for at least 30 minutes. Meanwhile, chop the angel hair into pieces and brown them in a pan with butter until golden, then let them cool well. Once they are completely cool, add in the pistachio, and mix well.
Pour this mix over the biscuits and put it back in the fridge.
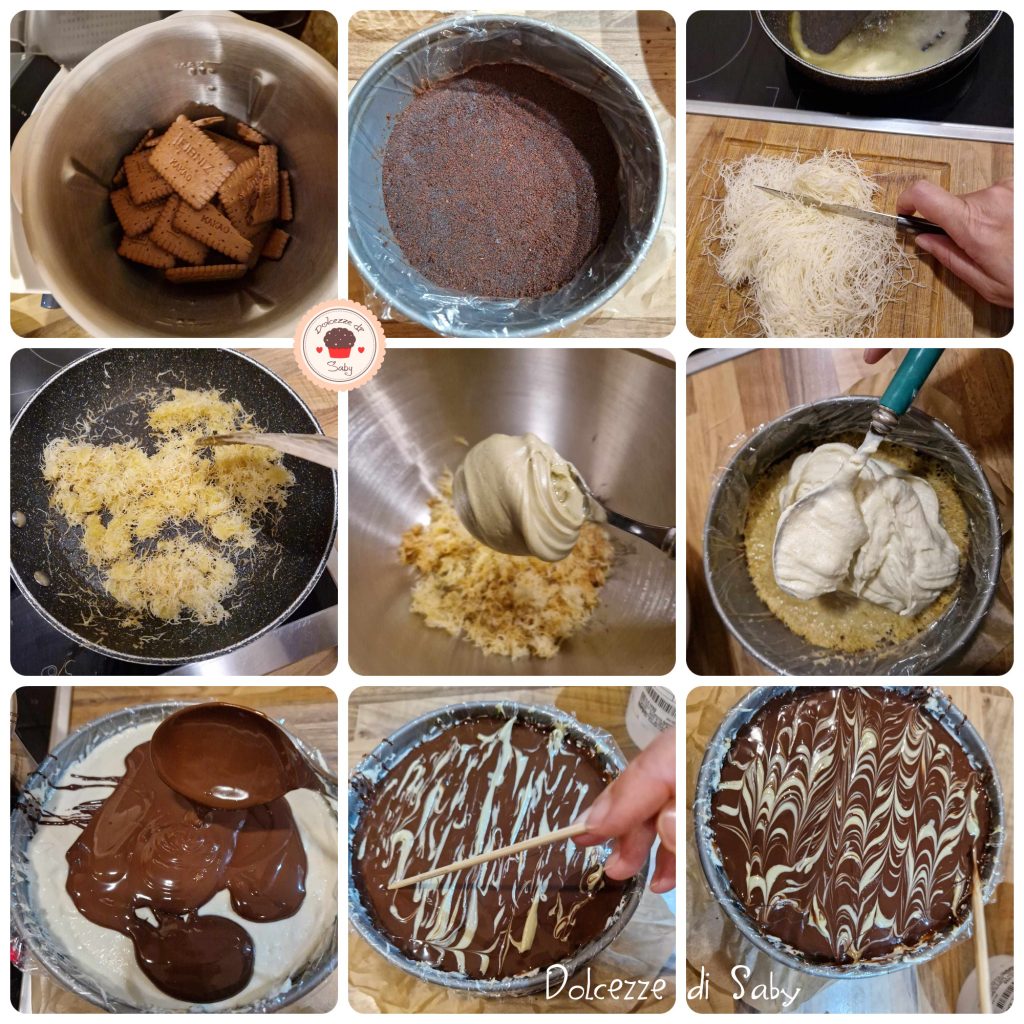
At this point, focus on the cream: whip the cream until stiff. Separately, pour the cream cheese with the pistachio spread into a bowl and mix at low speed. Then combine the whipped cream with the recently made cream, preferably with a spoon, and blend everything together.
ATTENTION: at this point, I recommend tasting the cream because different types are available on the market with varying qualities and pistachio content. So, if needed, add sugar or more pistachio spread to suit your taste.
Then chill the cream in the fridge for about 15 minutes.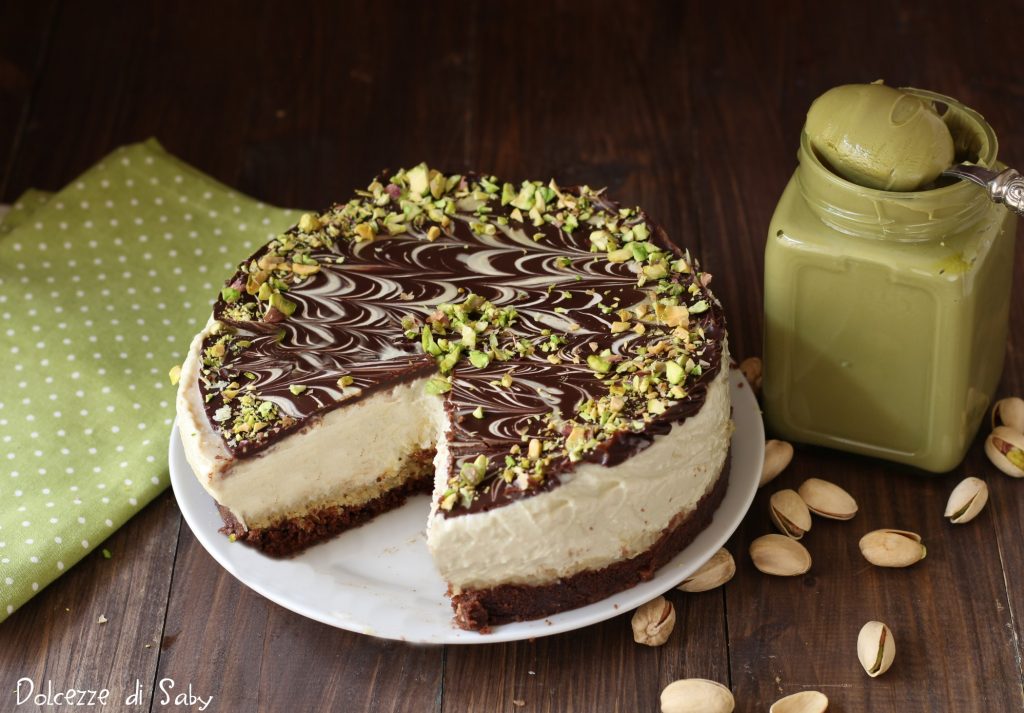
Now pour the cream over the base, level it, and refrigerate for another 15 minutes. Focus on preparing the chocolate topping. Place the chocolate in a bowl and let it melt in a bain-marie, then add a knob of butter and mix vigorously to blend well.
Then take your cheesecake from the fridge and gently pour the melted chocolate over the entire surface, aiming to create a uniform and thin layer. Now decorate the still warm chocolate with pistachio spread using a toothpick. Finally, garnish with pistachio crumbs and return to the fridge one last time.
At this point, your Dubai cheesecake is ready to be served. Carefully open the springform, perhaps using a knife to separate the cheesecake from the edge first, remove the parchment paper, and place your Dubai cheesecake on a serving plate.
REMEMBER, to cut it, you’ll need a good knife, which you’ll first dip in boiling water. Wet the knife in boiling water for each slice, it will help prevent the chocolate from breaking.
Saby recommends…
My Dubai Cheesecake was really good, but next time I’ll use just the angel hair with pistachio spread as the base, without biscuits.