Have you ever tried Strawberry Vanilla Jam? No?? You don’t know what you’re missing!!! It’s absolutely amazing, and homemade jam is unbeatable. Get ready because it’s completely different from store-bought.
A necessary premise, I love jam without chunks and somewhat fluid, so I blend it, with little sugar and no thickeners. This results in longer cooking, but it’s worth it.
Of course, if you want, you can increase the sugar, add an apple cut into pieces to thicken it faster, and if you prefer it with chunks, don’t blend it 😉
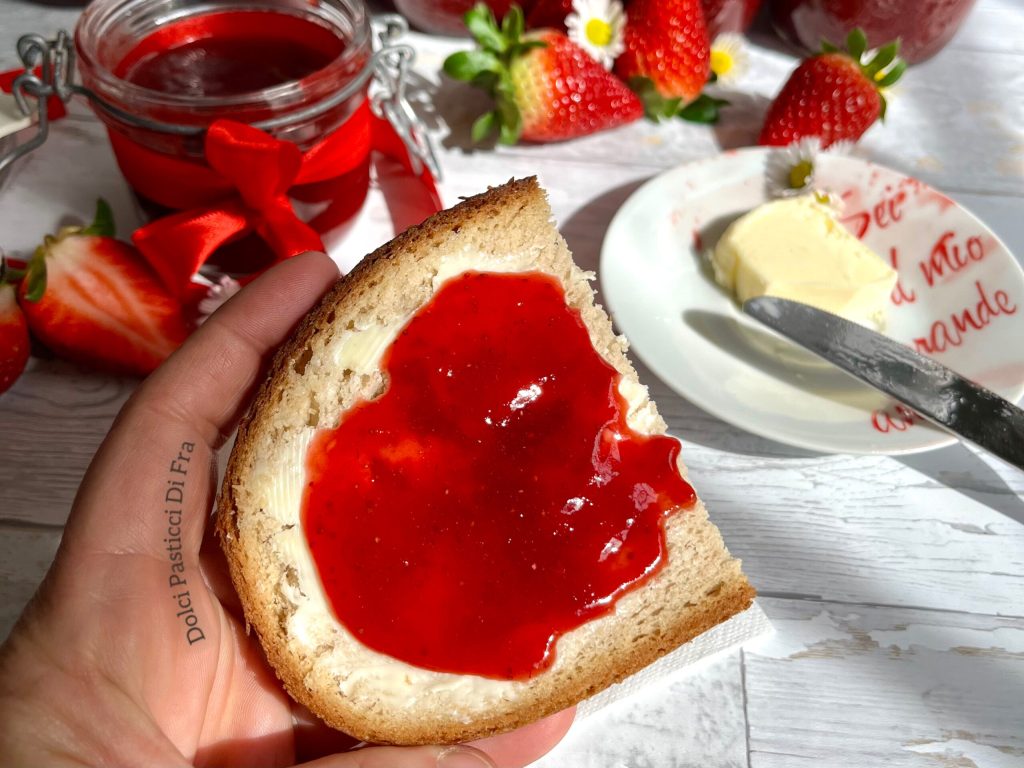
This jam is great spread on bread or toast, perfect for a pie where it will thicken more without drying out, or I often use it to spread on my layered cakes.
Shall we prepare it together?
- Difficulty: Very easy
- Cost: Economic
- Rest time: 2 Hours
- Preparation time: 20 Minutes
- Cooking methods: Stove
- Cuisine: Italian
- Seasonality: Spring, Summer
Ingredients
- 2.2 lbs strawberries (Weight after cleaning)
- 1 lemon (large or 1 and 1/2, juice)
- 1 3/4 cups sugar
- 1 pod vanilla
Steps
First wash the strawberries thoroughly in plenty of water, drain and dry them with a cloth.
Remove the leaves and any bruised parts, then cut them into chunks, place them in a large bowl, and mix with the sugar, lemon peel, and juice.
Cover with plastic wrap and let macerate in the fridge for one or two hours.* I tried letting them macerate longer, it becomes even more flavorful, but they produce a lot of liquid, greatly increasing the cooking time.
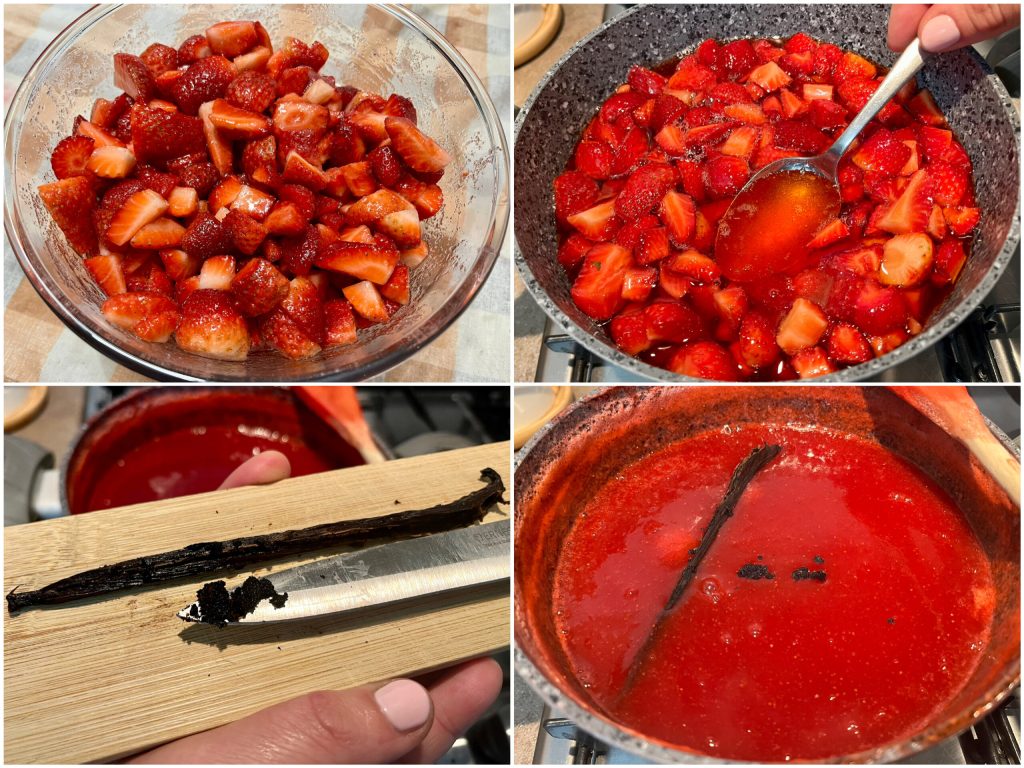
After resting, pour the strawberries with their liquid into a large pot and place on high heat. When they start to boil, lower the heat and cook, stirring occasionally.
After about an hour from boiling, remove the pot from the heat, remove the lemon peels, and blend everything with an immersion blender (if you don’t want chunks).
Slice the vanilla pod lengthwise, scrape out the seeds with the tip of a knife, and add both the seeds and the opened pod to the strawberries.
Return to the heat and continue cooking for about another hour, which may vary slightly depending on the water content of the strawberries.
While the jam is cooking, take care of the jars.
When making homemade preserves, it’s essential to sterilize jars and lids to avoid health risks.
You have two options.
1 IN THE OVEN: Place the clean jars on the oven rack at 257°F (125°C) for 30 minutes, adding the lids for the last 10 minutes (the most convenient method).
2 BOILING: Boil the jars in a large pot, completely covered by water for 30 minutes. Like my mom used to do, I also put a cloth to separate them to avoid breakage.When you’re nearing the end of the jam’s cooking, do the saucer test, like the grandmothers did.
Pour a spoonful of jam onto a saucer and let it cool, then tilt it; if it has the right consistency (so it doesn’t slide away), your jam is ready.
It’s time to jar it. Remove the vanilla pod and pour with a ladle without filling to the brim, being careful to keep the outer edges clean.
Close immediately with the lid and turn the jar upside down.
Let it cool upside down, and when they are cold, check that a vacuum has formed, meaning the center of the lid should not click.With this amount, I made three 8.8 oz (250 g) jars. If you have a little jam left for another jar, store it in the fridge.
Your jam, if well preserved, should last about 1 year, but it will likely finish very soon 🤭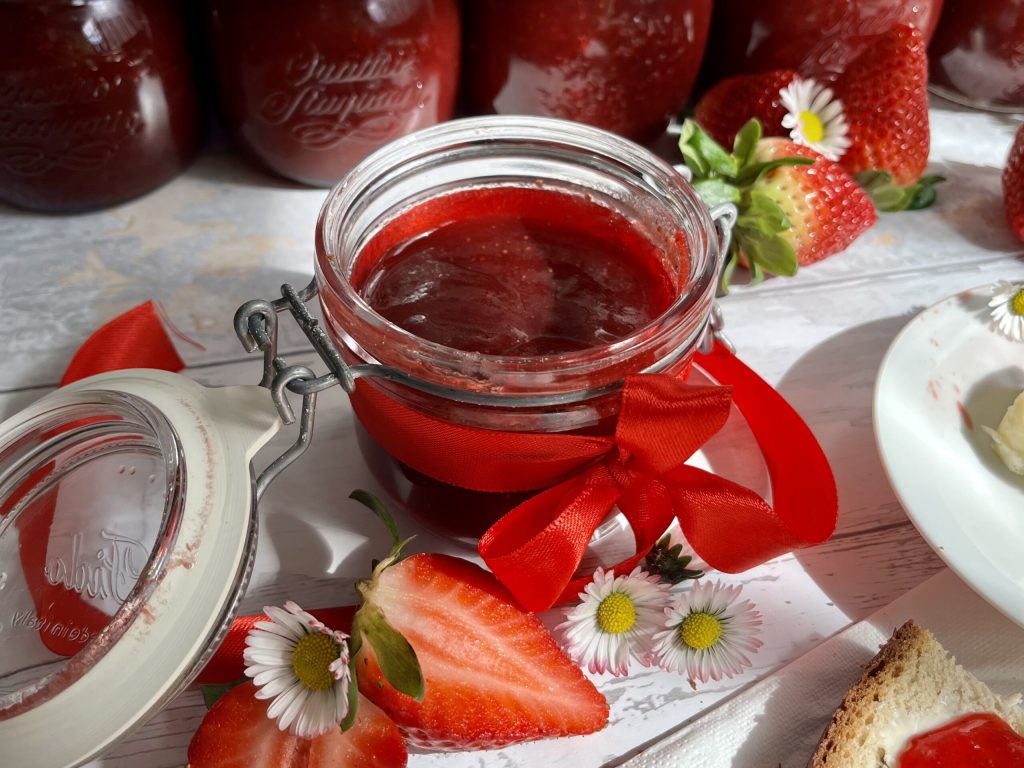
👉If you’ve tried my recipe, let me know in the comments, but most importantly, let me know if you liked it!!
👉 Follow me on Instagram to stay updated on new recipes and many other sweet ideas!!
