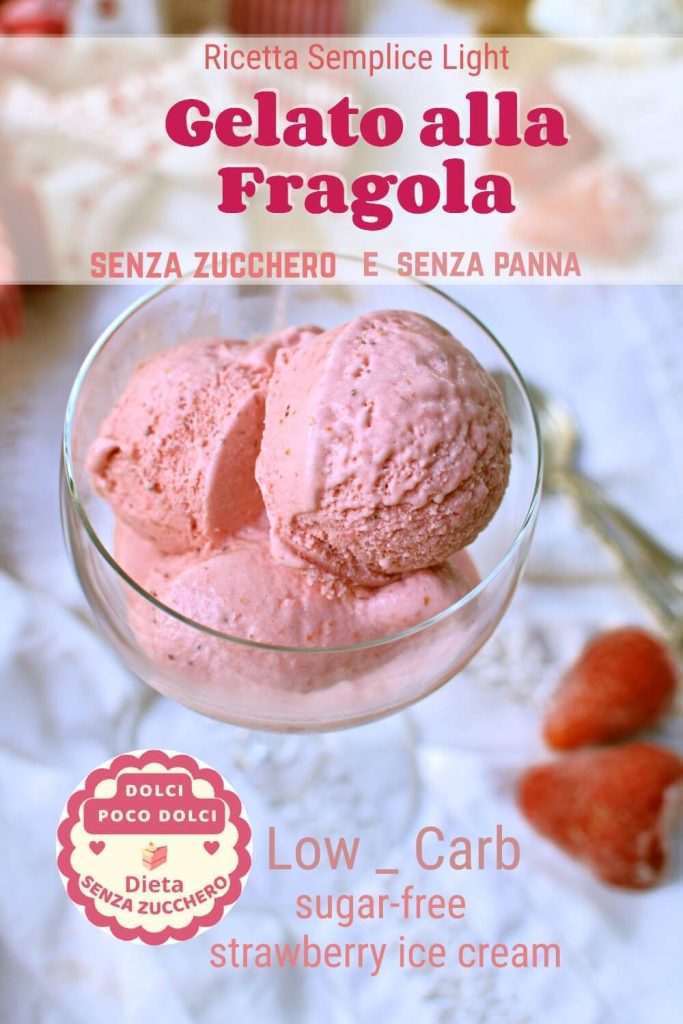
In this recipe I show how I prepared a sugar-free strawberry ice cream, starting from a meringue made with pasteurized egg whites that I personally tested.
The result? A super creamy ice cream, with no added sugars, using mascarpone and whipped egg whites for a velvety texture. It’s ideal for those following a low-carb diet and may also be suitable for diabetics (always with moderate portions).
If you enjoyed the Sugar-Free Strawberry Ice Cream, also check out:
- Difficulty: Easy
- Cost: Affordable
- Preparation time: 20 Minutes
- Portions: 4
- Cooking methods: Bain-marie
- Cuisine: Italian
- Seasonality: Spring, Summer
- Energy 141.81 (Kcal)
- Carbohydrates 10.82 (g) of which sugars 5.91 (g)
- Proteins 3.98 (g)
- Fat 10.19 (g) of which saturated 5.84 (g)of which unsaturated 0.12 (g)
- Fibers 1.25 (g)
- Sodium 58.27 (mg)
Indicative values for a portion of 115 g processed in an automated way starting from the nutritional information available on the CREA* and FoodData Central** databases. It is not food and / or nutritional advice.
* CREATES Food and Nutrition Research Center: https://www.crea.gov.it/alimenti-e-nutrizione https://www.alimentinutrizione.it ** U.S. Department of Agriculture, Agricultural Research Service. FoodData Central, 2019. https://fdc.nal.usda.gov
Ingredients
- 3 egg whites (about 3 large egg whites (about 3.5 oz / 100 g))
- 2 1/2 tsp sweetener (I used Dulci Light granulated, but you can use your preferred sweetener)
- 1/2 teaspoon cream of tartar (optional, to stabilize the egg whites)
- 1 1/2 cups strawberries (fresh (about 8.8 oz / 250 g))
- 3.5 oz mascarpone (light)
Tools for Strawberry Ice Cream
- electric beaters
- kitchen thermometer
- hand blender / food processor
- powerful ice cream maker for 2 liters
Steps for Strawberry Ice Cream
Prepare the meringue:
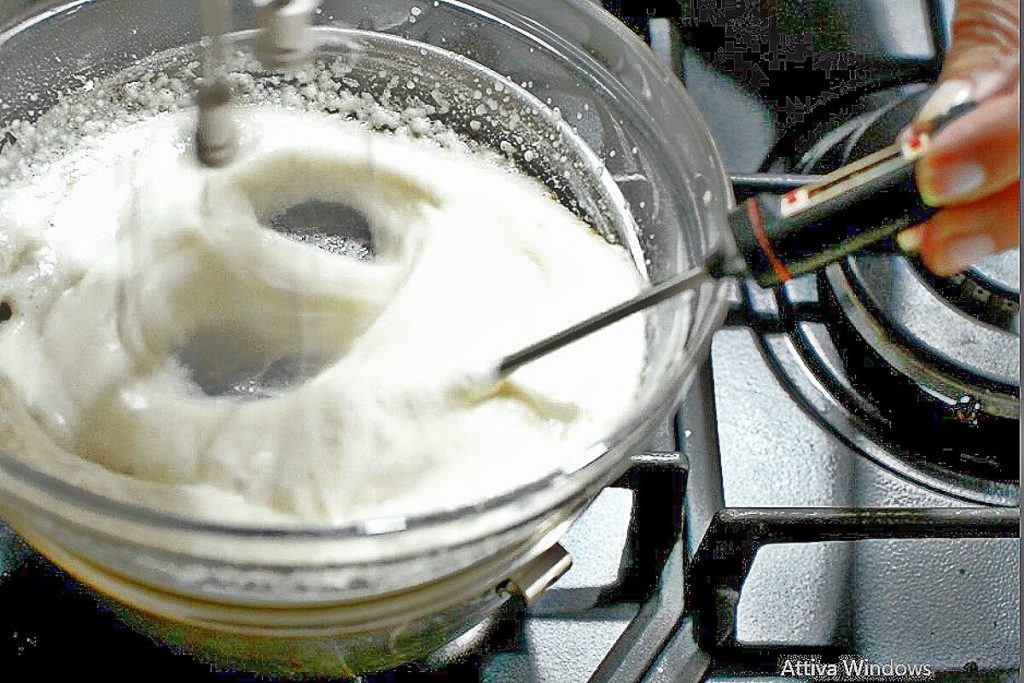
Put the egg whites in a glass bowl, then place it over a pot containing about two fingers of water, turn on the heat and start working the egg whites with electric beaters. Add the powdered sweetener and the cream of tartar.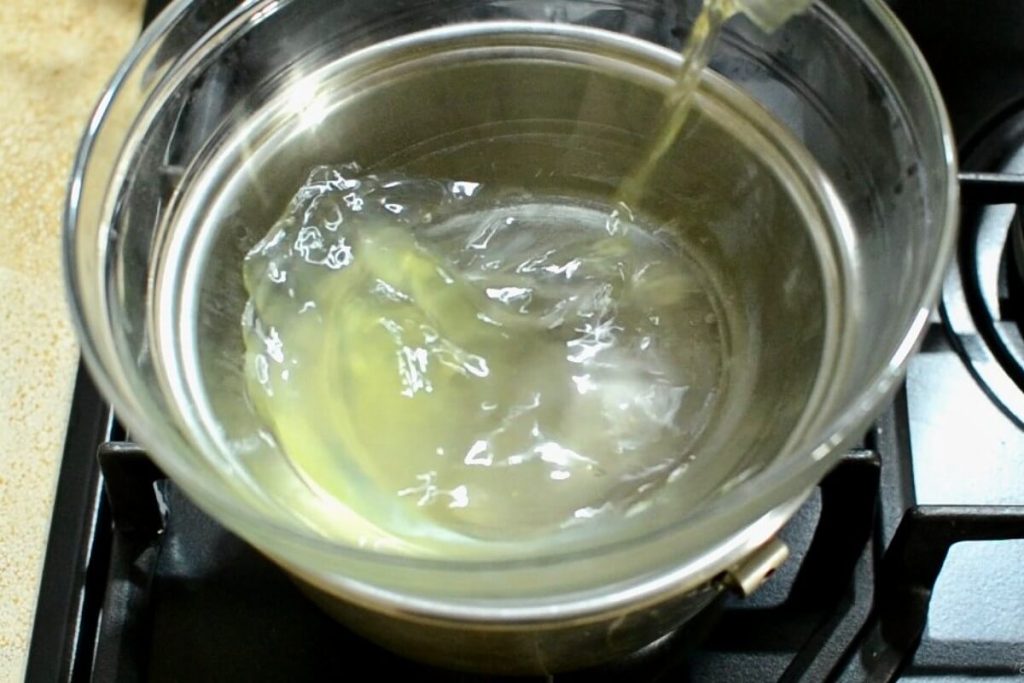
Check the temperature with a kitchen thermometer; when it reaches 149°F (65 °C) turn off the heat and remove the meringue from the bain-marie. Immerse the bowl in cold water and continue working with the electric beaters until the meringue is well chilled.
Prepare the strawberries
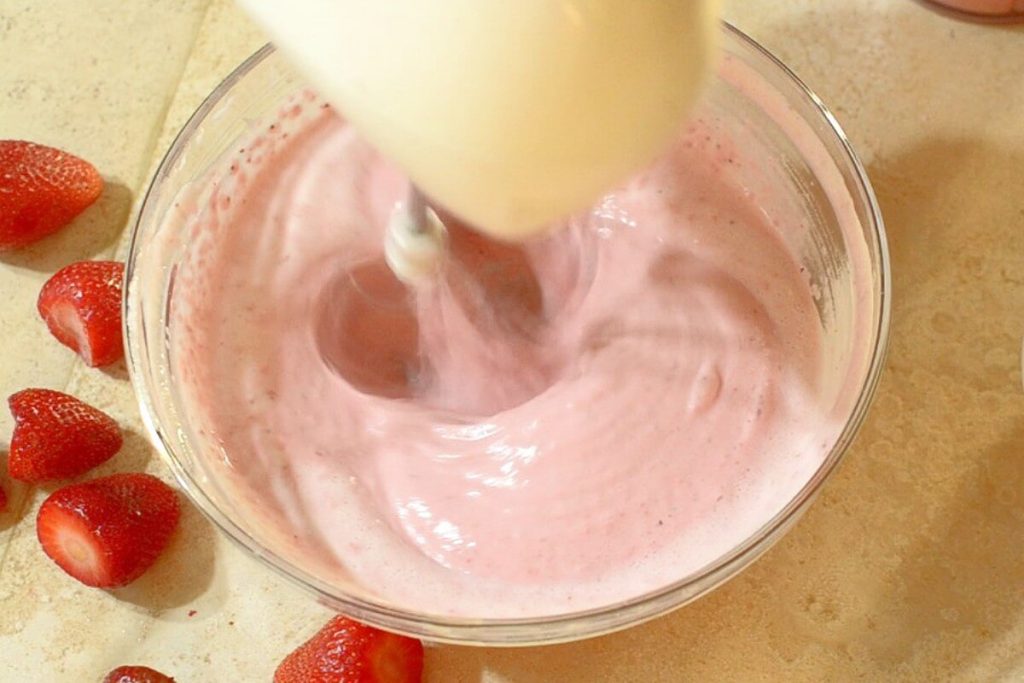
Blend the strawberries and the mascarpone with a chopper or blender until you obtain a smooth purée.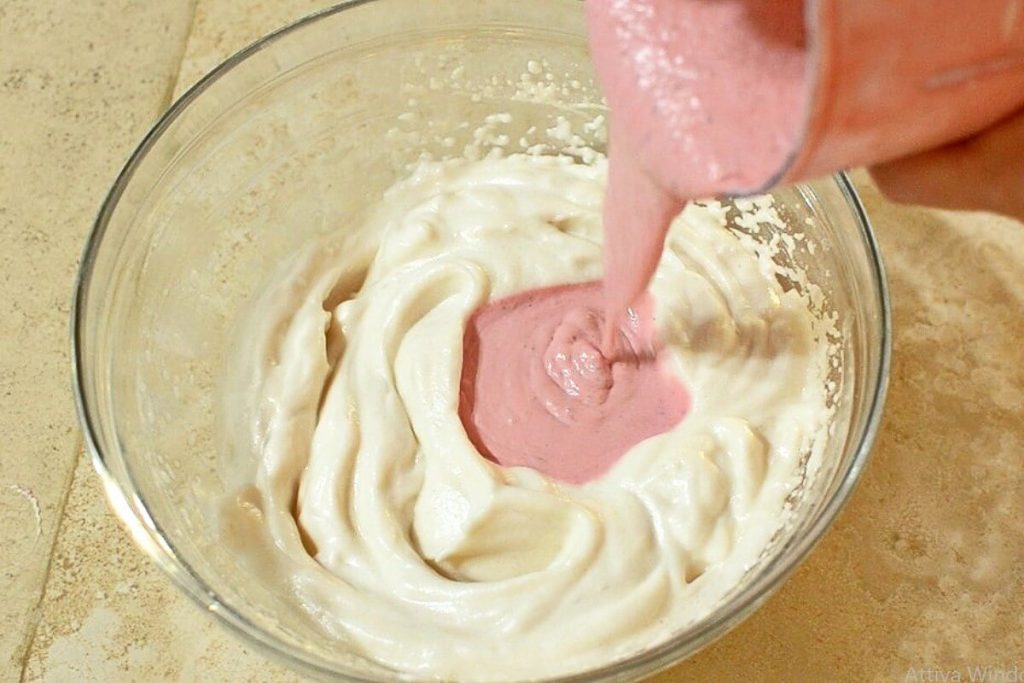
Then pour the mixture over the cold meringue and work for a few moments with the electric beaters.
Ice cream maker:
Pour the mixture into the ice cream maker and churn for about 15 minutes or until you obtain a creamy, scoopable ice cream.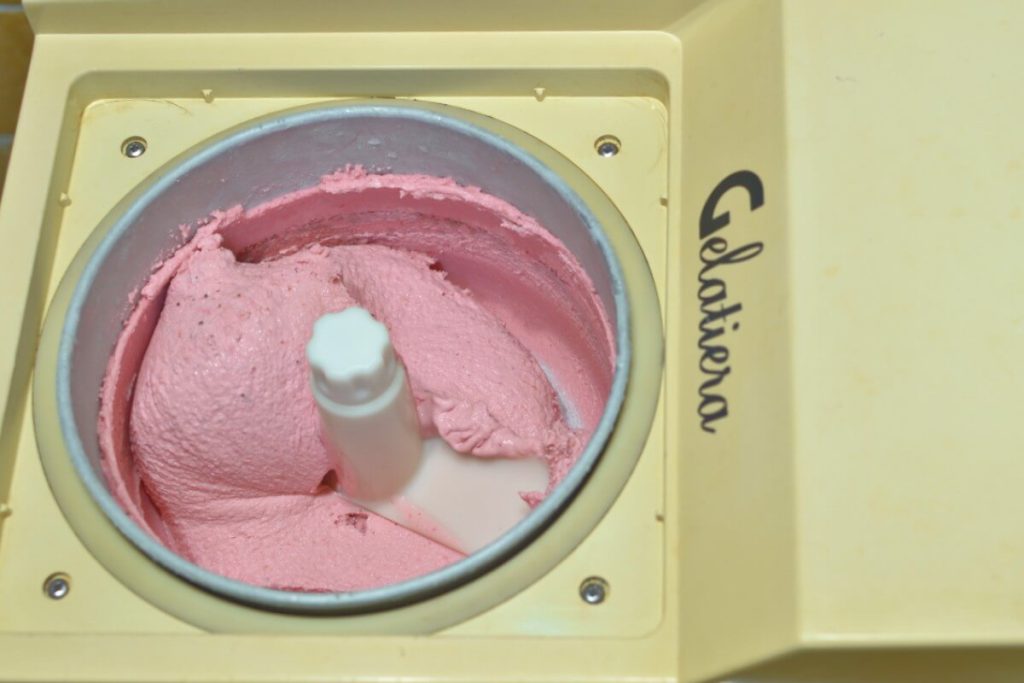
Freezing:
If you prefer a firmer texture, place the ice cream in the freezer for one hour. Remember that, without cream, it may harden a bit more than traditional ice cream.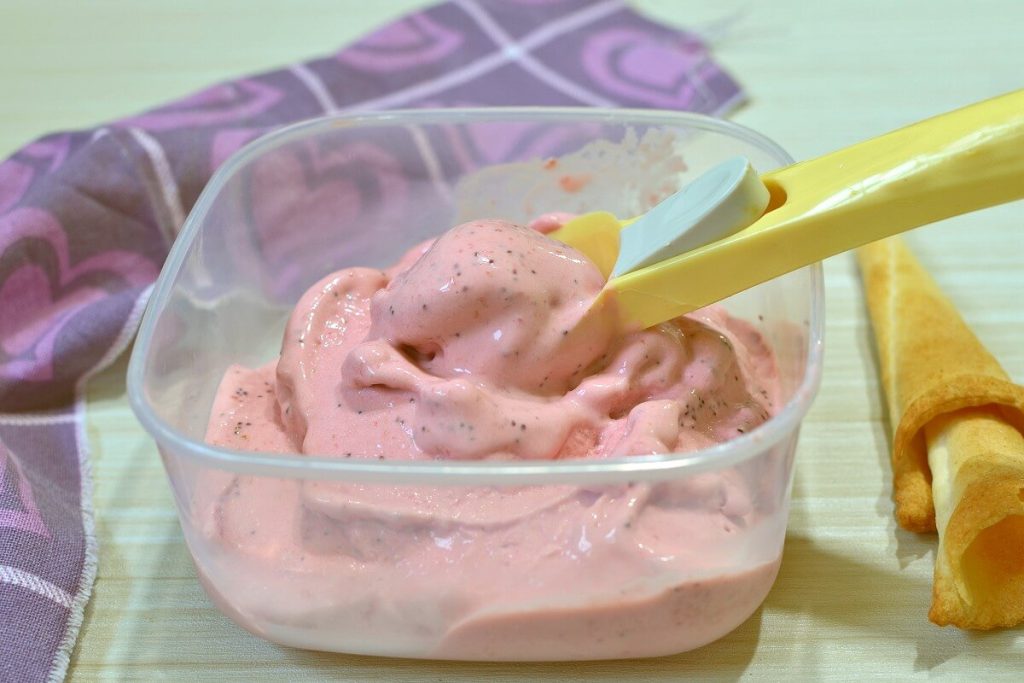
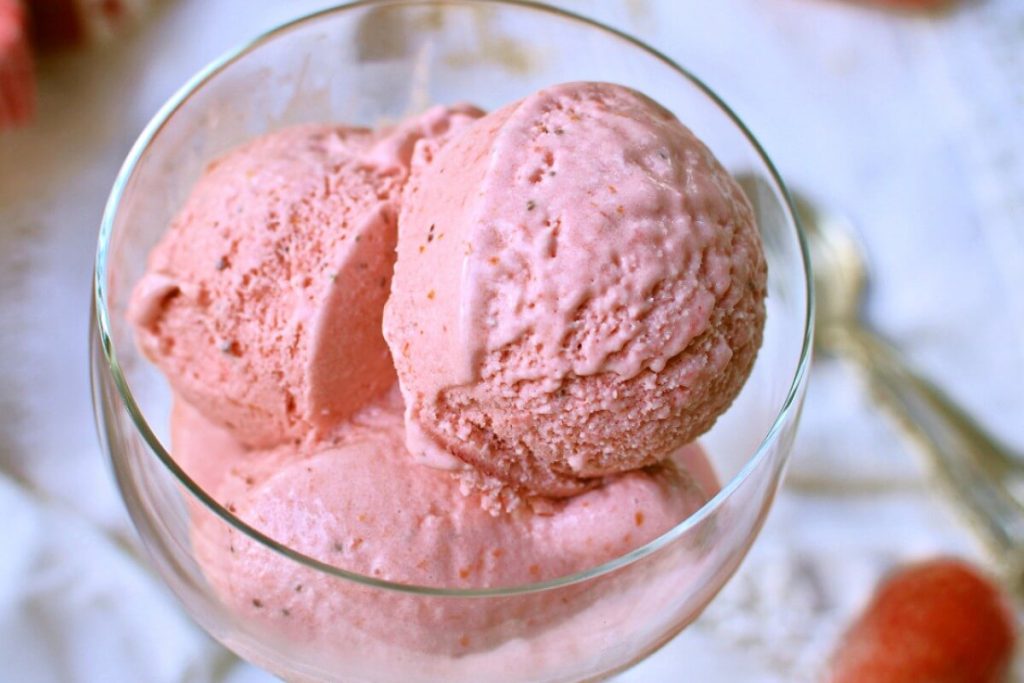
You can enjoy the ice cream in the traditional way, scooped with an ice cream scoop and served in glasses, sundae bowls or cups, or in cones or waffle cones. In any case, the taste won’t change — it will always be creamy and indulgent.
If you don’t have an ice cream maker you can still make this ice cream: simply place it in the freezer and stir every 30 minutes to prevent ice crystals. You can also put it directly in the cups of a chopper and blend every 15–20 minutes. This speeds things up and produces a result similar to using an ice cream maker (but be careful not to leave it too long in the freezer between blends, or the blades may get too cold and struggle to turn).
Tips for a Perfect Ice Cream
Pay attention to freezing:
This ice cream, being without cream, tends to become harder after a few hours in the freezer. I recommend consuming it within 2 hours of preparation or letting it soften a little before serving.
Add other fruits:
If you want to vary it, you can also add a little blueberries or raspberries for a mixed berry version, or a pinch of vanilla for an aromatic note.
To make it creamier:
If you want it even creamier, you can add a little guar gum (0.3 g, about 1/8 teaspoon) during preparation to improve the texture.
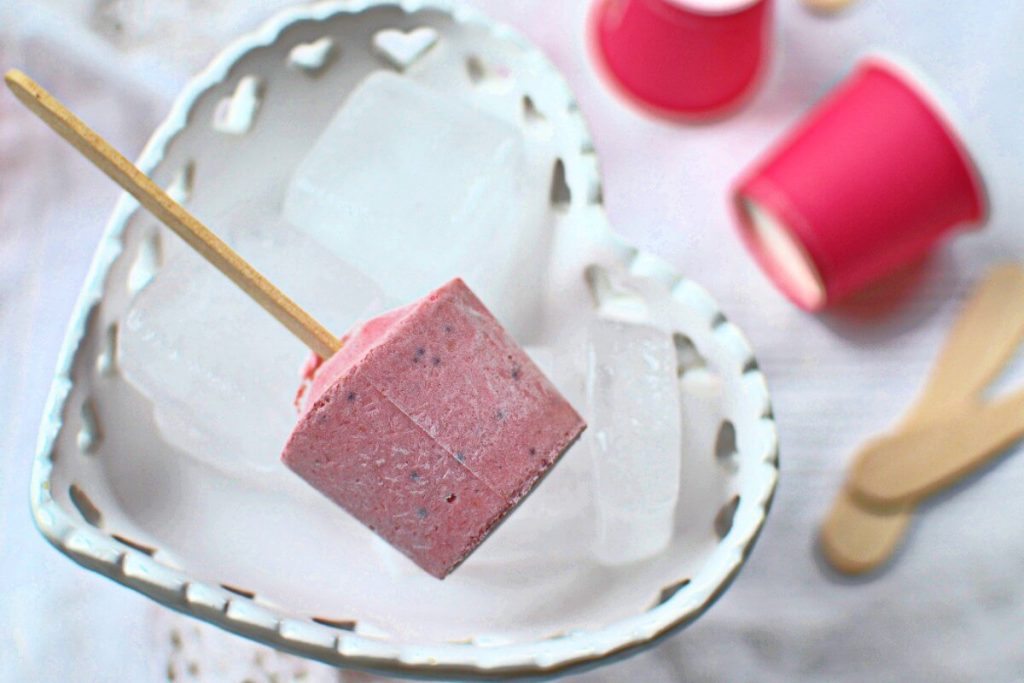
Clever portions: ice cream on a stick in little cups!
Pour the mixture into paper coffee cups, insert a wooden stick and freeze. This way you get convenient single portions that work like ice cream bars. They melt gently in the mouth and you don’t need to defrost the whole container: a practical and fun solution for kids and adults!
Variations of the Strawberry Ice Cream:
Lactose-free strawberry ice cream:
You can replace the mascarpone with a lactose-free version or with a plant-based cream cheese such as soy cream cheese to make the ice cream suitable for those with lactose intolerance.
Vegan ice cream:
For a fully plant-based version, replace the mascarpone with a cashew cream or a coconut cream.
Keto ice cream:
If you want a keto version, reduce carbs further by replacing strawberries with a smaller amount of low-glycemic berries such as blueberries or raspberries, and use a sweetener like erythritol or stevia to keep carbs under 5 g per serving.
Storage of the Ice Cream:
Store the ice cream in the freezer in an airtight container or in single-serve cups with sticks. For the creamiest result, consume within 2–3 days. After that it tends to get harder due to the absence of sugar and cream, but it remains safe to eat for up to two weeks.
FAQ (Questions and Answers)
Useful questions:
Can I use other sweeteners instead of the sweetener listed?
Yes, you can use stevia, erythritol or any other natural sweetener you prefer (I still recommend turning it into powdered sweetener using a powerful blade processor; I’ve been using this grinder for years and it still works like new).
Can I make the Sugar-Free Strawberry Ice Cream without an ice cream maker?
Yes! If you don’t have an ice cream maker, pour the mixture into a suitable container and place it in the freezer. Every 30 minutes, stir the ice cream with a fork to avoid ice crystals and achieve a creamier texture. You can also use a blender with blades, an immersion blender or electric beaters.
Why does the Sugar-Free Strawberry Ice Cream get hard?
Without cream and sugar, the mixture freezes more solidly. It softens if left at room temperature for a few minutes or you can enjoy it as an on-a-stick portion, which melts gradually while you eat it. Right after making it I put it in these paper cups (they come in 1000 and last forever), place them in the freezer for 15 minutes, then insert a wooden stick in the center of each (you can find them easily on Amazon; here’s the link to the ones I use). You can make every flavor and I assure you you’ll need to make many because everyone will love them. At my house we make on-a-stick ice creams almost all year round!
