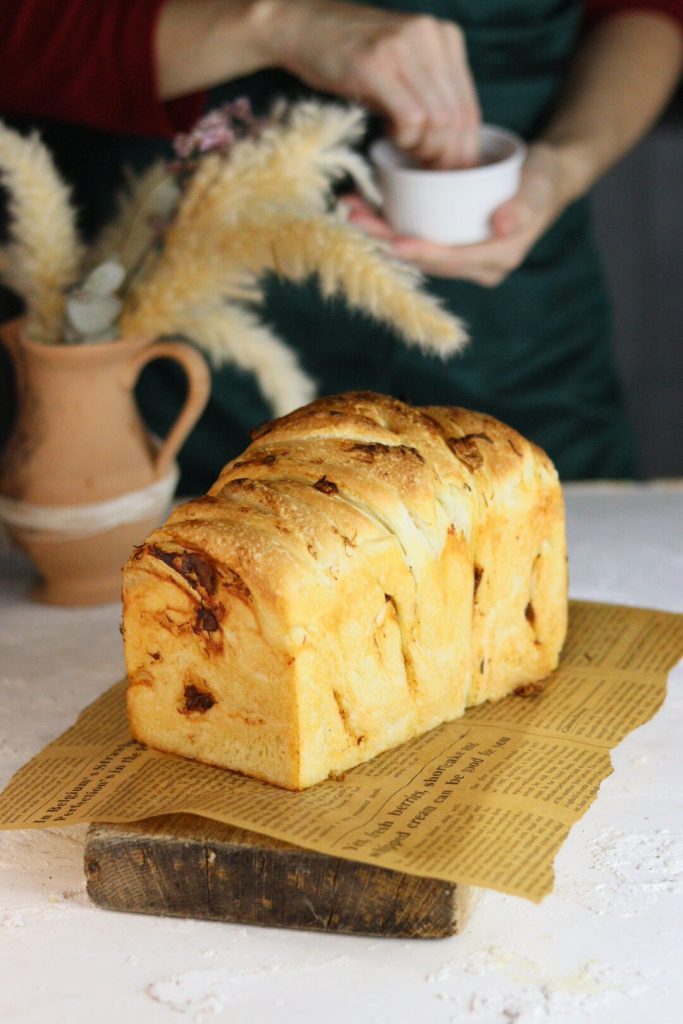
EASY AND DELICIOUS GARLIC BREAD
The garlic bread famous in American TV series, easy to make and explained in great detail.
For months I wanted to make the garlic bread I see and hear about in many famous TV series, especially in America: it is prepared for Thanksgiving Day in the States and is paired with dark beers.
There are many ways to prepare it: making a soft loaf bread like I did or more simply cutting a soft ciabatta in half and covering it with butter and garlic and then grilling to your heart’s content. In short, there are many ways to serve garlic bread and I will certainly make many variations on my blog because it was very well received at home.
EMIMETTOAIFORNELLI recommends:
- Difficulty: Easy
- Cost: Economical
- Rest time: 6 Hours
- Preparation time: 2 Hours
- Portions: 1
- Cooking methods: Oven
- Cuisine: Italian
- Seasonality: All seasons, Thanksgiving
Ingredients
- 3 1/3 cups all-purpose flour
- 7/8 cup water
- 2 tbsp olive oil
- 1 egg
- 1 tsp dry yeast (10 g fresh yeast)
- 1 tbsp salt
- 90 g liquid sourdough starter
- 3/4 cup water
- 1 package garlic
- 3 tbsp butter
Tools
- Loaf Pans for Sandwich Bread
- Rolling Pin
Steps
For those using sourdough starter, the night before you will need to refresh it and once it has risen to one and a half times, straight in the fridge. In the morning take it out and let it acclimate for an hour before incorporating it into your dough. N.B. THE TIMES DESCRIBED are for dry yeast, with liquid sourdough, they are longer.
For those using dry yeast, subtract 50 g of water from the TOTAL described and then proceed as described on the package.
In the bowl of the stand mixer (or with electric beaters, dough hook), pour the water and yeast, dissolve and then add the flour, oil, and egg, always mixing with the dough hook. Leave the salt aside.
Once the dough is well mixed, let it rest for half an hour.
At this point add the salt and knead for a few more minutes.
Let it rest for another 30 minutes.I am used to doing this in my dough because it makes it softer, but if you don’t have time you can skip this step.
If you decide to do it, here you find everything explained –> EASY FOLDING IN BOWL
Let it rest until it doubles; if using sourdough, rest for an hour and then in the fridge all night and the next day take it out and let it acclimate for a couple of hours.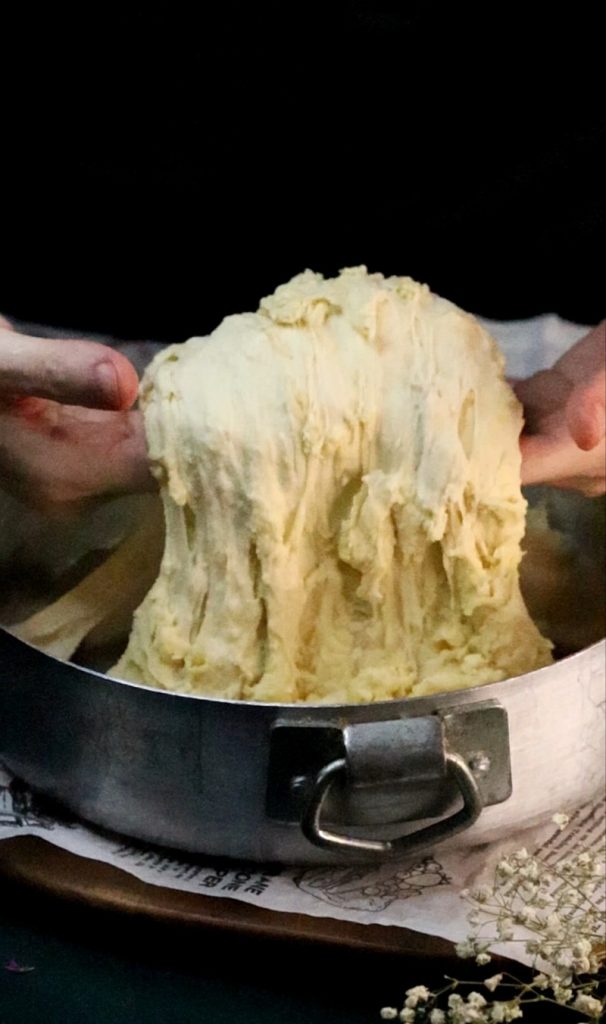
Take a head of garlic, clean the ends and place it on a square of parchment paper, wrap it well and cook: I used an air fryer (392°F for 10 minutes), but you can use the microwave (without parchment paper, directly in a microwave-safe dish on high power for 5 minutes) or, finally, in the oven (392°F for 15 minutes).
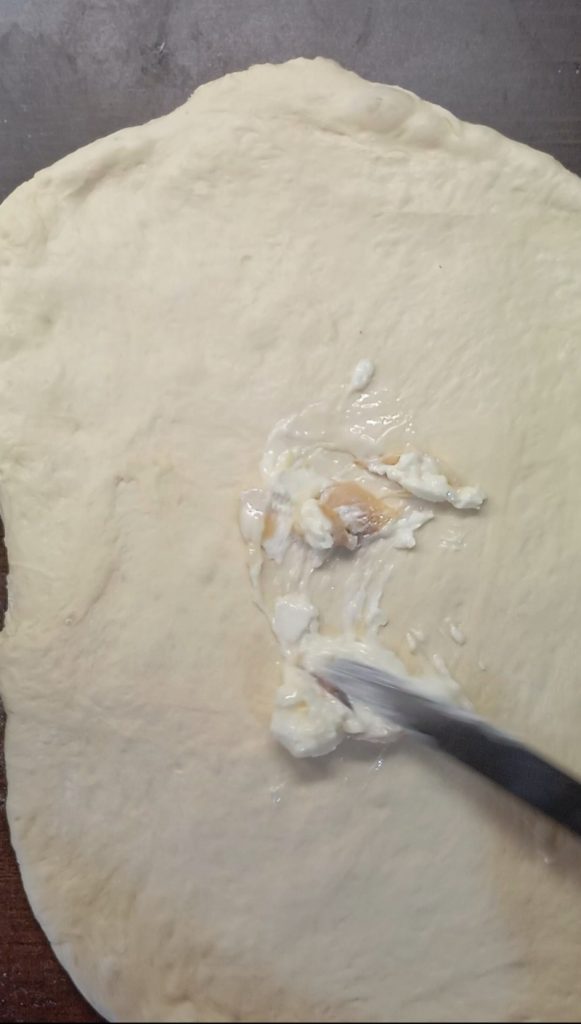
Once cooked, peel and place on a plate with the butter left to soften out of the fridge for half an hour. Mix with a fork until a spreadable cream is formed (Warning, you will be tempted to taste, it’s addictive!!)
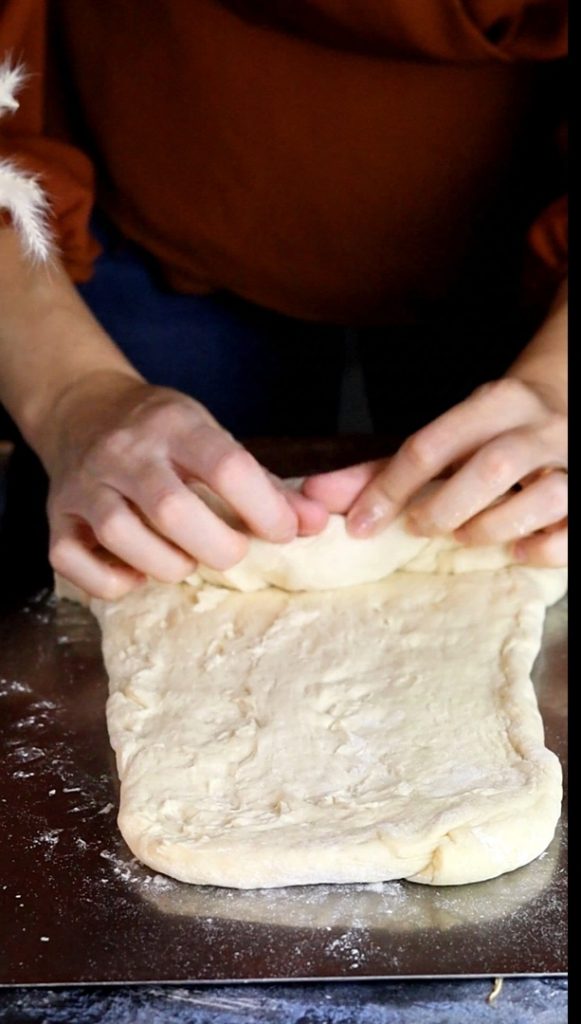
Once doubled, deflate on a lightly floured work surface and with the help of a rolling pin form a square, brush over your butter and garlic cream.
Then cut the square in half and cut out many small squares of dough: roll each square and place it in the loaf pan (or a plumcake pan works well too).
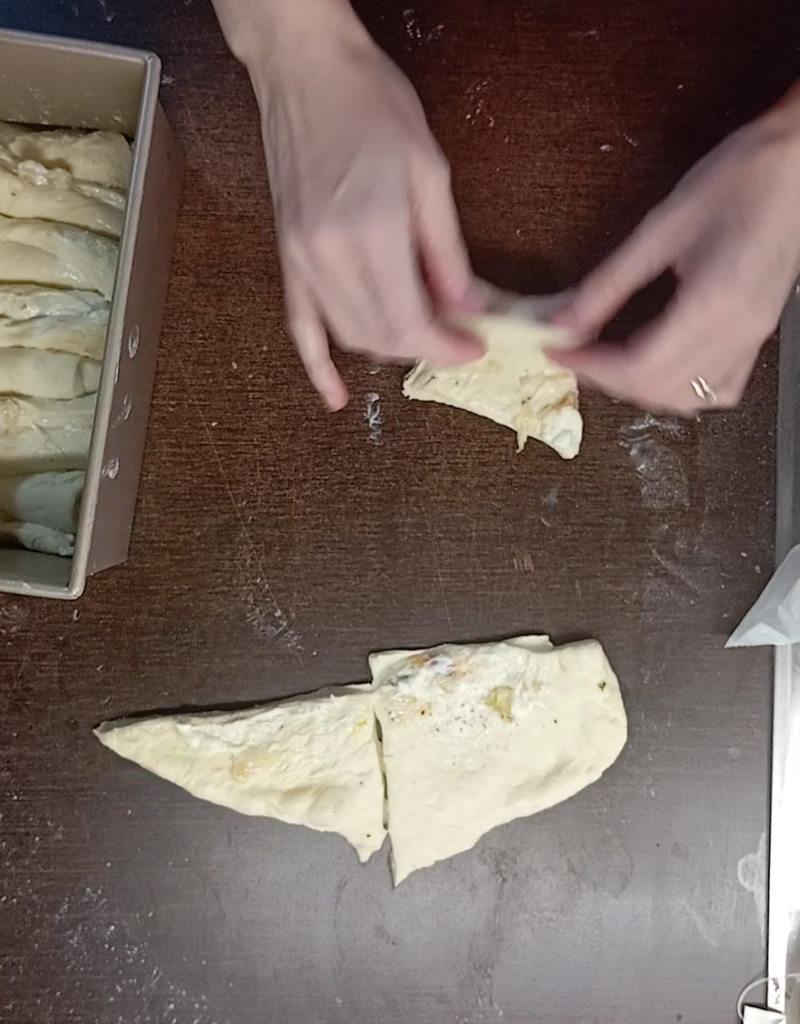
N.B. if you don’t want to divide and make the squares, just brush the butter with garlic over the dough and roll the dough on itself and place it in the pan.
Let it rise until the dough reaches a couple of centimeters from the edge.
Preheat the oven to 392°F (create a little steam with a small pot that you then remove after about 15 minutes of baking) and bake our sandwich bread.
Our EASY AND DELICIOUS GARLIC BREAD is ready when it has cooled well.
Storage
It can be stored in a bread box and can also be sliced and frozen.