EASY SHEET PAN PIZZA EXPLAINED STEP BY STEP
Pizza is the most loved recipe worldwide, explained simply for everyone.
How many times is Friday or Saturday dedicated to pizza? Whether it’s on a paddle, on a plate, by the slice, or in a pan, pizza is happiness, love, and joy among friends. With a good beer, it’s the best thing ever.
In short, the quintessential Italian symbol, envied by the whole world, and I believe it 🙂
There are many ways to make pizza: starting with the base, which is the dough, you can form dough balls for the classic round pizza on a plate, or the paddle pizza that is stretched lengthwise and usually cooked on a baking stone (this is for true experts due to the movements needed to put the pizza in the oven), and then there’s the pizza stretched directly in a pan, which is my favorite, especially when there’s company for dinner.
Today, I present it to you in a no-fuss version: mix, stretch, top, and bake.
A small note: for those using yeast, you can also make the dough on the same day, but those using sourdough know that the times will be longer: refresh in the early morning so that by lunchtime you can start kneading and respect all the rest times; if you can’t refresh in the morning for various reasons, do it in the evening, let it rise by one and a half times, and finish letting the starter rise in the fridge.
Be sure to wait at least an hour at room temperature before incorporating it into the dough.
Let’s see how I made it. 🙂
EMIMETTOAIFORNELLI recommends:
- Difficulty: Easy
- Cost: Economical
- Rest time: 8 Hours
- Preparation time: 30 Minutes
- Portions: 1
- Cooking methods: Oven
- Cuisine: Italian
- Seasonality: All seasons
Ingredients
- 4 cups all-purpose flour
- 1.75 cups water
- 0.07 oz dry yeast (5 for fresh yeast)
- 2 tbsp olive oil
- 3.2 oz liquid sourdough starter (already refreshed)
- 1 quart tomato pulp
- 2 packs mozzarella (lactose-free)
- 2 tsp salt
Tools
- Baking sheet
Steps
Before proceeding, it’s necessary to explain a few things:
– For those using the starter, refresh as usual with a 1:1:1 ratio and, once doubled, add it to the recipe.
– For those using dry yeast and need to activate it, subtract 50 g of water from the total recipe, and then follow the instructions on the package.
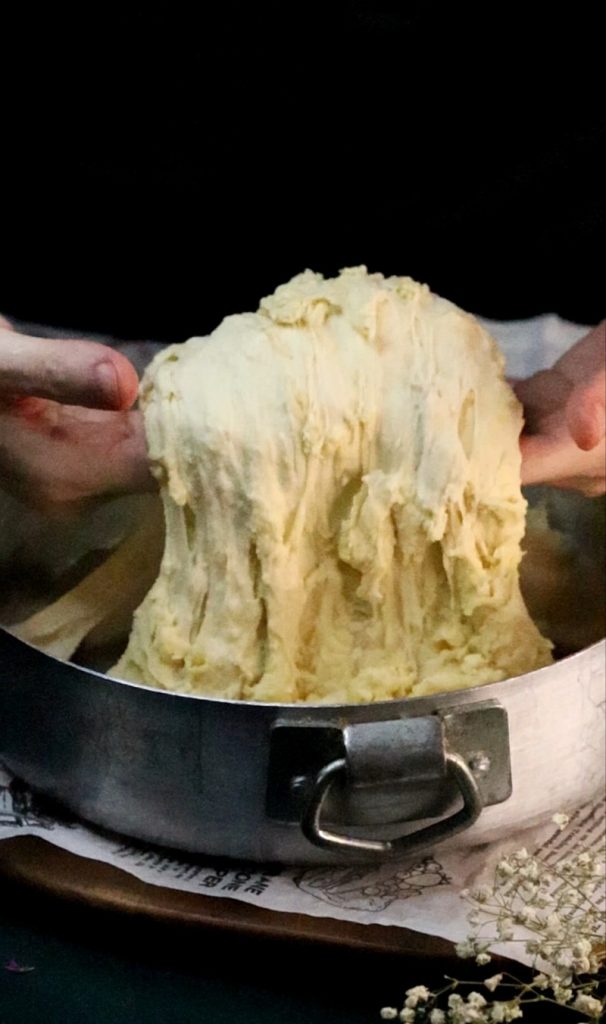
I always use the stand mixer, which is very convenient, but the dough can also be made directly in a bowl, using a spoon.
(on my Instagram profile you can find many videos in the highlighted stories)
For those using the starter: dissolve the yeast in the water, then pour in the flour, oil, and start mixing with the hook attachment. Let the machine work until a soft ball forms (it doesn’t need to be well-defined, we’ll do the folds in the bowl later).
For those using dry yeast: pour the flour, crumble the yeast if using fresh, or pour the dissolved one into the water, add water and oil, and continue as explained above.
Let the dough rest in the bowl for 30 minutes and then add the salt. Let the machine work until fully absorbed.
If you don’t have a stand mixer, you’ll have to do all the work by hand, incorporating each ingredient, but the rest times are the same.
Now let’s do the folds in the bowl:
you will need to perform three rounds of folds at intervals of 30/45 minutes from each other.
The folds in the bowl are formed by taking the dough from the bottom up and then placing it back in the center; as always, you will find many demonstration videos in the stories on INSTAGRAM.
This step is very important to make the dough more digestible, but if you want to get pizza on the same day, let it double at room temperature.
Those using the starter know it needs to sleep in the fridge all night, so:
Once the folds are done, let the dough rest for an hour and then you can put it in the fridge.
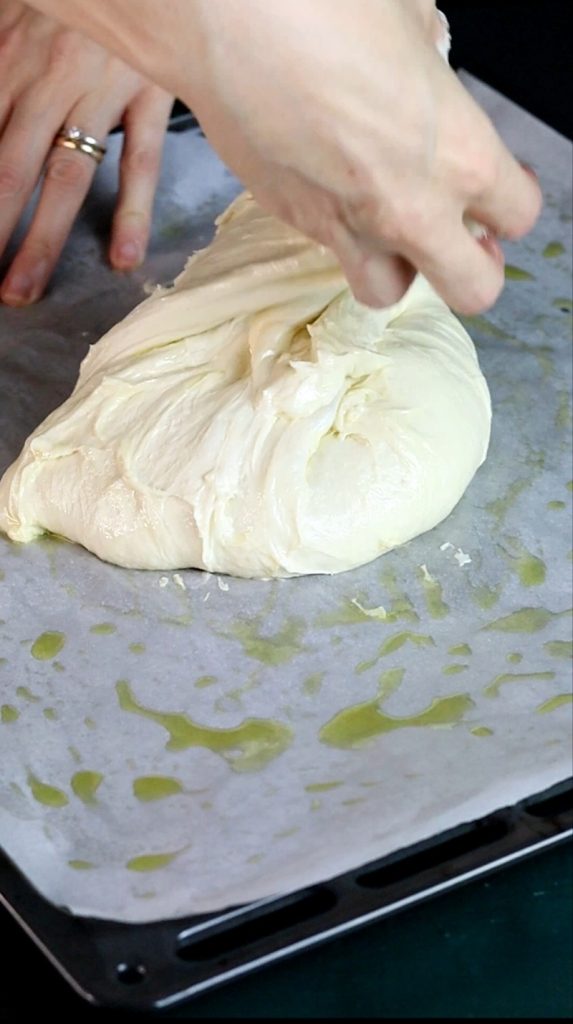
In the morning, take the dough out of the fridge and let it acclimate for 2/3 hours at room temperature. In the meantime, grease a baking sheet; then pour the dough into the sheet and make a fold to give structure; if you have made a lot of dough, divide it with well-oiled hands among several sheets.
Let it rest for 30 minutes.
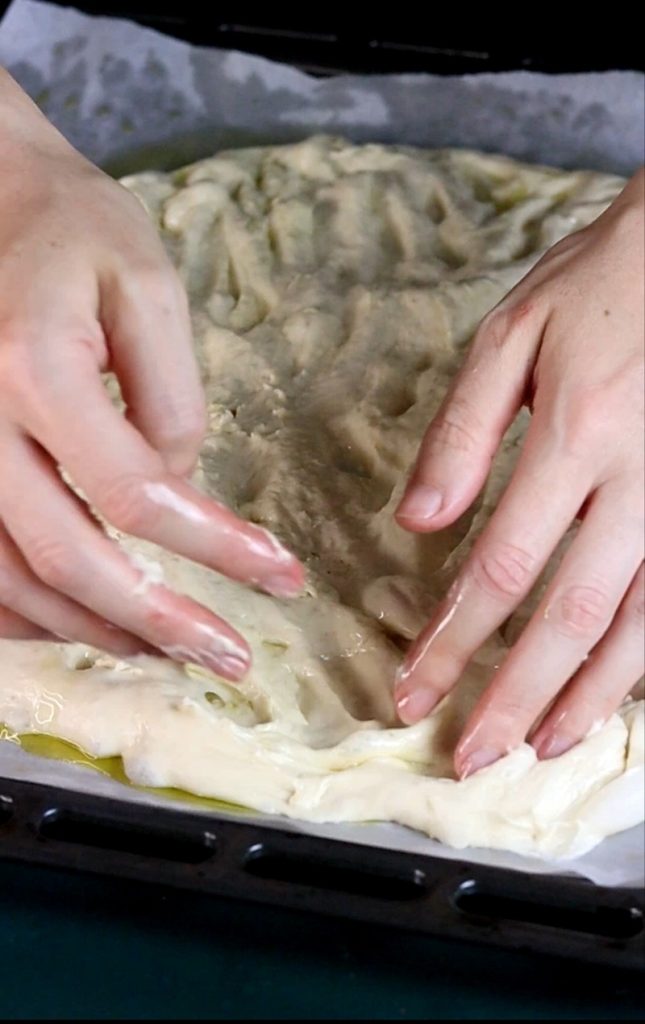
At this point, oil your fingers well and stretch the dough. Don’t worry if it tends to shrink back a bit, it’s normal. Wait 10 minutes and stretch again until the entire sheet is filled.
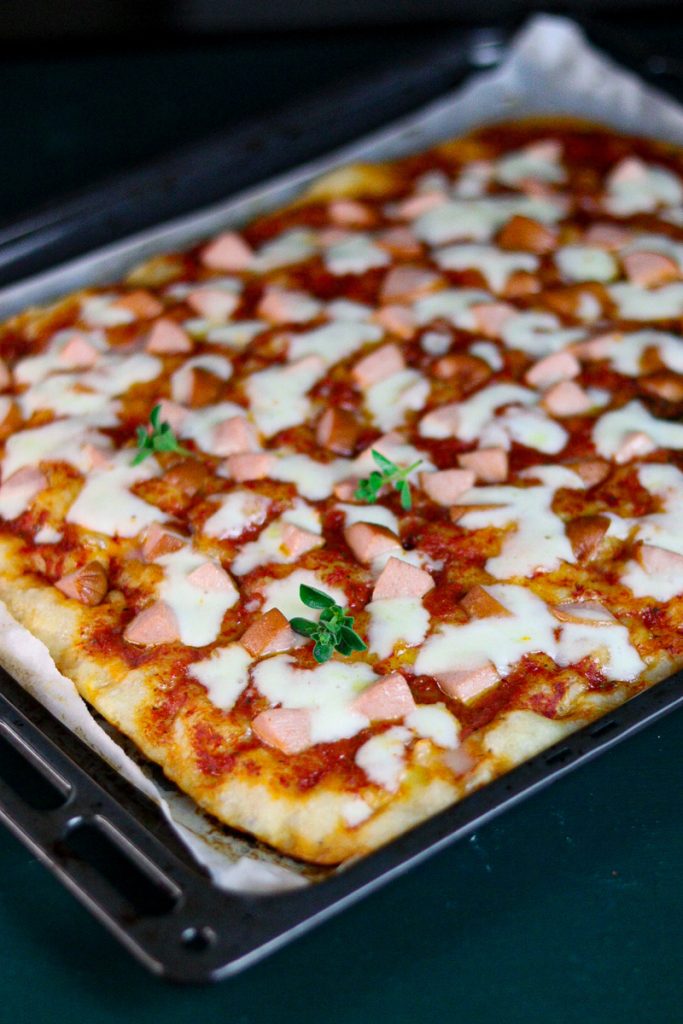
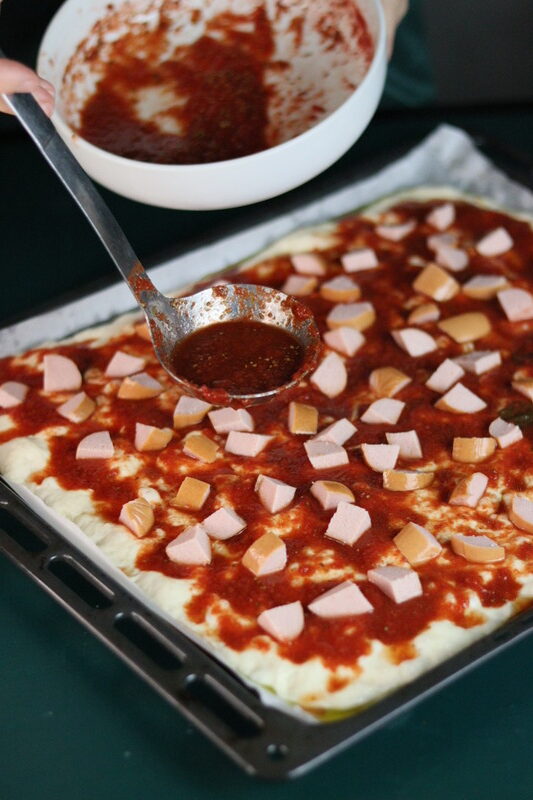
Preheat the oven to 392°F (200°C), at this point top the pizza as you like: I made the sauce by reducing the tomato pulp a bit, with salt and oregano/basil. Pour it onto the pizza leaving just a couple of centimeters for the edge. If you want, you can add sausages like I did, or olives, etc.
Place the pizza on the lowest rack of the oven and wait about 15/20 minutes for the bottom to color well, remove, sprinkle the previously shredded mozzarella, and complete cooking in the middle part of the oven for another 10 minutes.
The times are very indicative, so try to adjust according to the oven you have at home.
The EASY SHEET PAN PIZZA EXPLAINED STEP BY STEP is ready to be sliced and enjoyed.
Storage
The pizza keeps well sealed and stored in the fridge, or you can freeze it in bags and put it in the freezer for about a month.