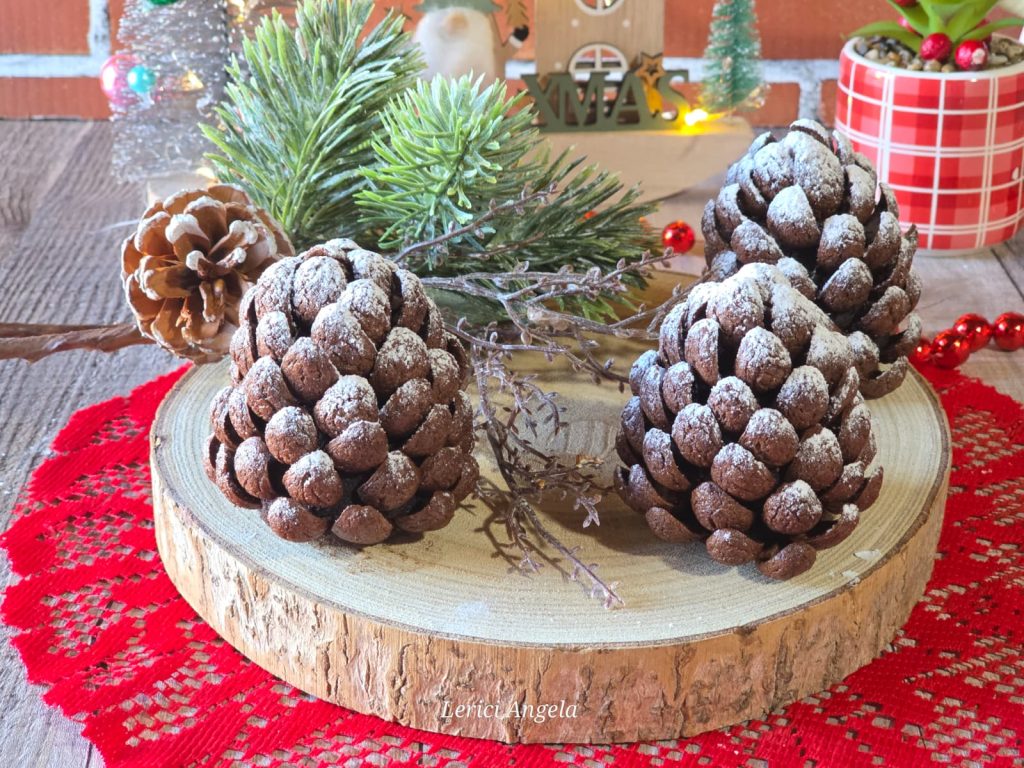
Chocolate Pinecones. There’s something magical about bringing nature to the plate, especially during the cold months. These chocolate pinecones are not only a delicious dessert but a small no-bake masterpiece that will enchant your guests.
Whether you’re looking for a creative way to recycle leftover sponge cake or want to have fun with classic cookies, these three variations will allow you to create an edible and scenic centerpiece.
It often happens: you bake a cake or a bundt cake and end up with those leftover sponge cake or base pieces that seem destined to end up in the breakfast milk.
But why not turn them into something extraordinary?
This version of my pinecones was born precisely from the desire to do creative recycling in the kitchen.
If you don’t have cake scraps on hand, don’t give up on these delights!
You can achieve an equally delicious result using simple digestive biscuits.
It’s an anti-waste recipe that will make you look great: the cake scraps become the soft heart of a scenic dessert.
Thanks to the mix of cocoa and melted butter, the texture becomes similar to that of an artisanal truffle: moist, rich, and irresistible.
In fact, I propose two variations to satisfy all palates.
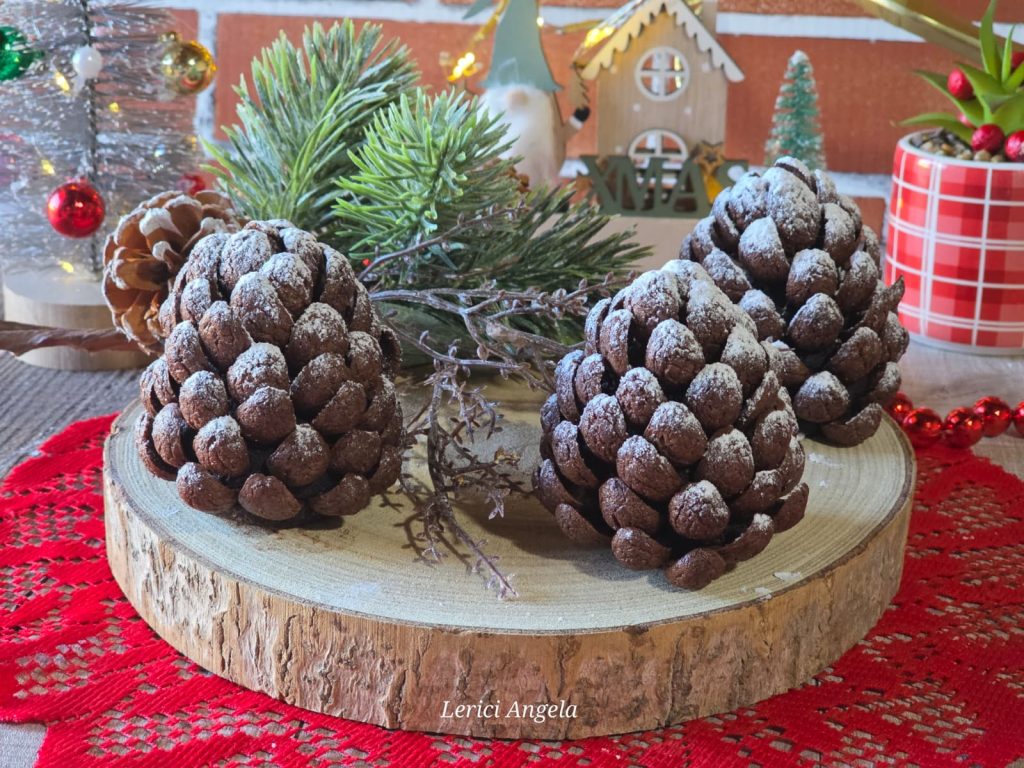
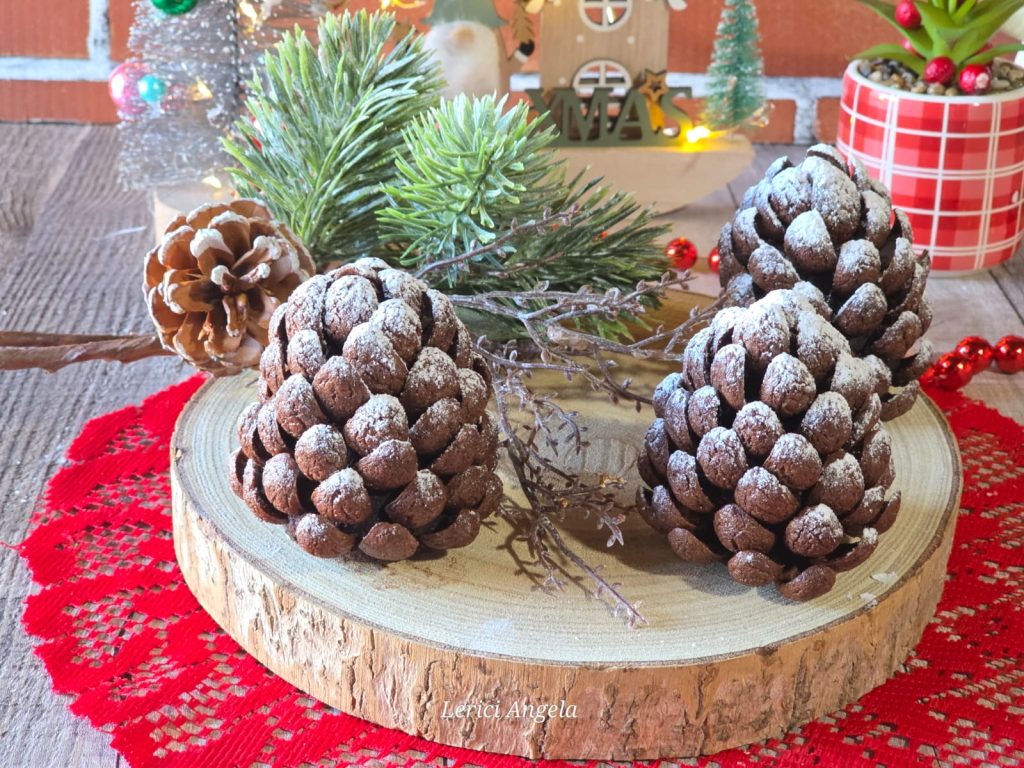
A pinch of powdered sugar like fresh snow, and you’re done
- Difficulty: Very Easy
- Rest time: 30 Minutes
- Preparation time: 20 Minutes
- Portions: 6 Pieces
- Cooking methods: No Bake
- Cuisine: Italian
Ingredients
Sponge Cake Pinecones
- 10.5 oz sponge cake (or leftover bundt cake)
- tablespoons unsweetened cocoa powder (2/3 for an intense forest color)
- 2 oz butter (melted)
- to taste powdered sugar (for dusting)
- 1 tablespoon chocolate (melted or milk or liqueur to adjust the compactness)
- to taste cereal (with cocoa)
- 10.5 oz digestive biscuits (finely ground)
- 2 oz unsweetened cocoa powder
- 1 oz butter (melted and cooled)
- 1/2 cup milk (to add gradually to adjust softness)
- to taste chocolate cereal
- to taste powdered sugar
Tools
- Bowl
Steps
Pinecones with sponge cake 5/6 pinecones
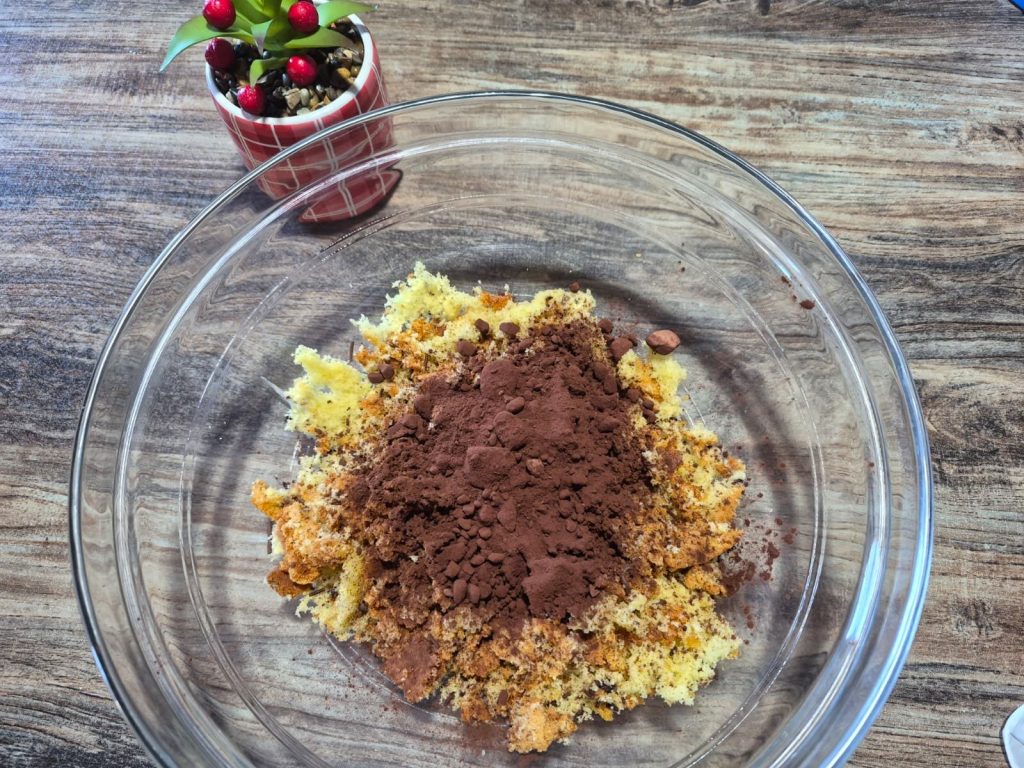
Take your sponge cake (or bundt cake) and crumble it carefully into a large bowl.
You can do this with your hands, feeling the softness of the dough, or with a mixer for finer and more uniform crumbs.
Add the 2-3 tablespoons of unsweetened cocoa.
Mix well until the crumbs have taken on that dark, deep color typical of the underbrush.
Pour the melted butter over the crumbs. Now, add the tablespoon of melted chocolate (or milk/liqueur) little by little.
Knead with your hands until the mixture becomes compact and malleable like clay: it should not crumble, but neither should it be too sticky.
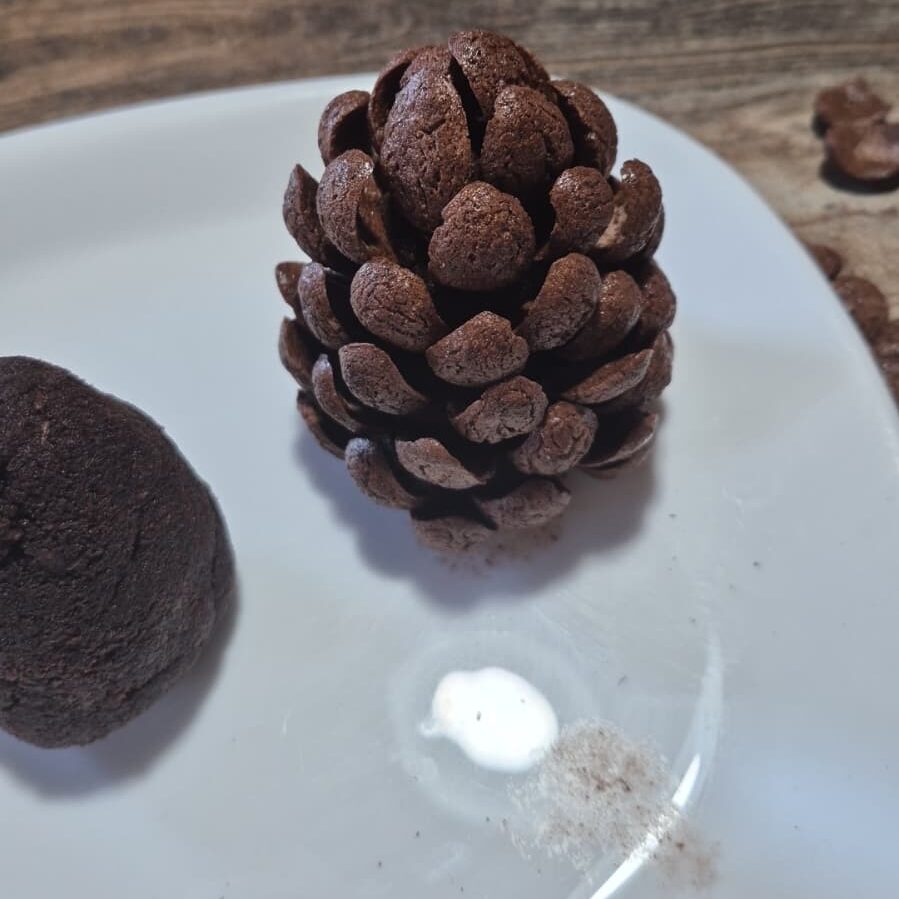
Take a portion of the mixture (about 2.5-3 oz per pinecone) and mold it between your palms to form a cone. Make sure the base is flat so the pinecone can stand proudly on the serving plate.
Take the chocolate cereal.
Starting strictly from the bottom, insert the cereals into the mixture one by one, tilting them slightly upwards. Proceed in concentric circles, staggering the petals from one round to the next to perfectly mimic the structure of a real pinecone.
Once completed, let the pinecones rest in the fridge for at least 30 minutes to firm up. Just before serving, sift powdered sugar over them: the fresh snow will make your little masterpiece ready to be admired (and devoured!).
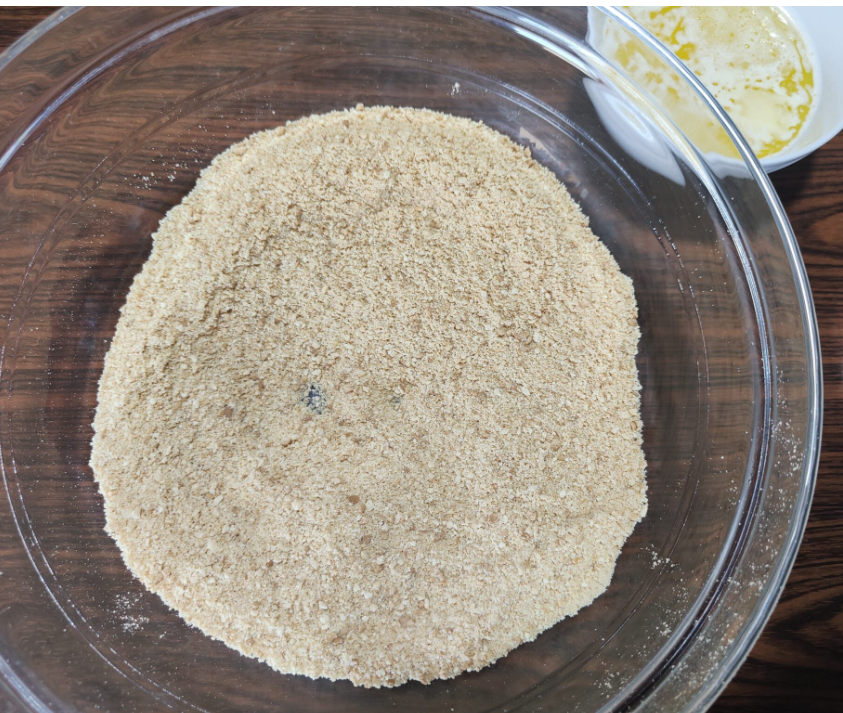
Start by grinding the 10.5 oz of digestive biscuits.
For this recipe, it’s ideal to turn them into a powder that’s not too fine: leaving a few small grains will give the pinecone a more rustic and pleasant texture to bite into.
In a large bowl, mix the biscuit powder with the 2 oz of unsweetened cocoa. Ensure the color is homogeneous: it will be the chromatic base of your pinecone.
Add the 1 oz of melted butter and start incorporating the 1/2 cup of milk gradually. You may need less. If the mixture seems too dry, add a splash more milk; if it’s too soft, let it rest in the fridge for 10 minutes before shaping it.
Knead energetically: the biscuits will begin to absorb the liquids, transforming into a dark, shiny, and highly fragrant mass.
Divide the mixture into 6 equal parts.
Work each piece with your hands until forming cones about 3 inches high. Try to sharpen the top well to make the pinecone more sleek.
Take the chocolate cereal.
Start from the bottom and insert the first row of “boats” horizontally. From the second row upwards, try to slot them into the spaces left by the previous row (checkerboard pattern). The higher you go towards the tip, the closer the cereals should be to each other.
After a brief rest in the fridge, give the final touch with powdered sugar.
The magic is complete: the contrast between the deep brown of the cocoa and the white of the sugar will make them irresistible.
Enjoy your meal.
Tips
If you decide to make them smaller, remember that:
You will need to slightly break the cereals or look for smaller ones for the top (the tip), otherwise they will look disproportionate.
The decoration time will increase, as you will have to handle more small pieces.
Don’t worry if some petals are crooked. Start from the bottom with larger and whole cereals, and use slightly more broken or smaller ones for the tip. This will give a much more realistic look.
If you sprinkle the sugar too early, the chocolate’s moisture will absorb it and make it invisible. Sprinkle the sugar over the pinecones just a minute before serving.
If you want the “snow” to last longer, use a pinch of cornstarch mixed with the powdered sugar, or the “water-repellent” powdered sugar (the kind already available for panettone).
Curiosities
If you’re an adult: Add a tablespoon of Rum or coffee liqueur to the mixture.
For a winter fragrance: Add a pinch of cinnamon or finely grated orange zest.
If you want a surprise: Hide a whole toasted hazelnut in the center of the cone.
Place them on a wooden tray or dark plate.
Surround them with fresh rosemary sprigs (which look like pine needles) and a few red berries or cinnamon sticks. The “edible centerpiece” effect will leave everyone speechless.
Storage
In the fridge: They keep well for 3-4 days in an airtight container.
Warning: Do not put them in the fridge after adding the powdered sugar, or it will become a transparent cream!
For more recipes and tips
If you enjoyed this recipe, click on many stars, thank you so much.
Join my group: https://www.facebook.com/groups/488624465780860
or on my page: https://www.facebook.com/gustoamoreefantasie
Return to Home page
