Chocolate Christmas Pine Cones are an easy, delicious, and scenic recipe!
A no-bake treat perfect for decorating the festive table, to use as a centerpiece or place card, and also as a sweet gift.
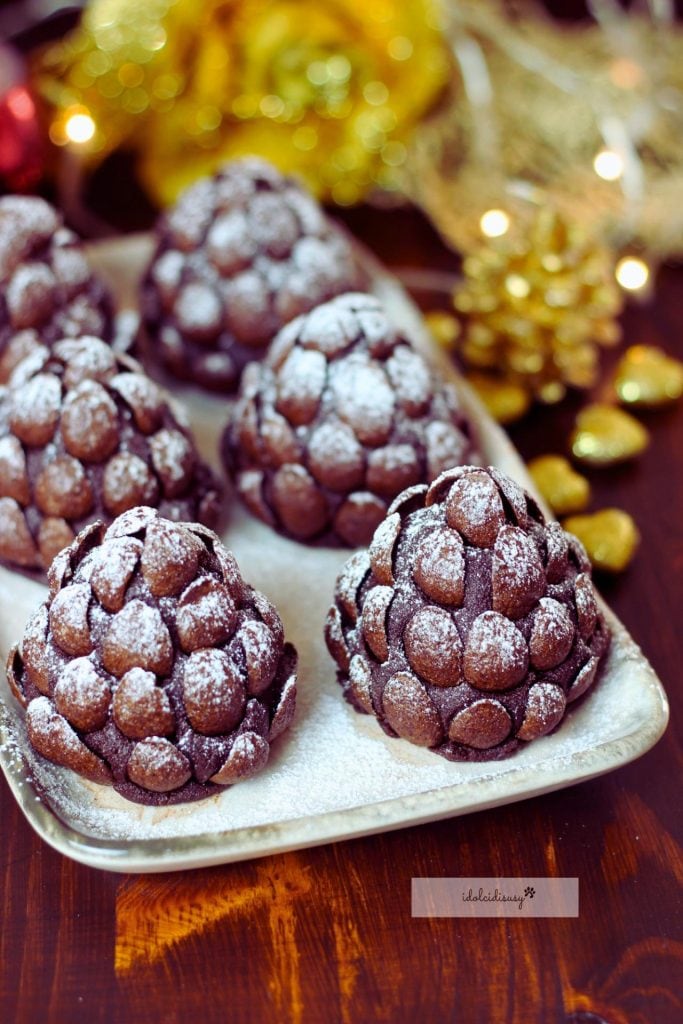
The mixture is simple and quick: dry cookies, cocoa, sugar, milk, and butter, just like for the coconut and dark chocolate balls, and they are decorated with chocolate boat-shaped cereals, which give them the shape of real pine cones.
They are also perfect to make with children, and you’ll see they’ll have a lot of fun modeling and decorating them!
Let’s prepare them together: here’s the recipe.
See you soon,
Susy 🎅
Here are more Christmas recipes:
- Difficulty: Very Easy
- Cost: Very Economical
- Preparation time: 20 Minutes
- Portions: 6 Pieces
- Cooking methods: No-Bake
- Cuisine: Italian
- Seasonality: Christmas, New Year's Eve
Ingredients for the Christmas Pine Cones
- 7 oz biscuits, shortbread
- 4 oz sugar
- 2 tbsps unsweetened cocoa powder
- 3.5 oz butter
- 1 oz milk
- as needed cereals (I used Coco Pops)
- as needed powdered sugar
You’ll Need
- Food Processor
- Bowl
- Spatula
- Small Pan to melt the butter
- Knife to divide the dough
- Parchment Paper
- Tray to arrange the pine cones
Procedure for the Christmas Pine Cones
1. Melt the butter and set aside.
2. Grind the biscuits in the food processor until they become a fine flour, then transfer them to a bowl and add the sugar and cocoa. Mix with a spatula or with your hands.
3. Add the melted butter and milk, then mix with the spatula until you get a soft and homogeneous mixture.
4. Transfer the mixture onto the parchment paper and, with your hands, compact it into a loaf. Use a knife to divide it into six equal parts and create balls.
5. With your hands, shape each ball into a small pyramid: it will be the base of the chocolate Christmas pine cones.
6. Insert the boat-shaped chocolate cereals (like Coco Pops) starting from the base up to the tip, to mimic real pine cones.
7. Once ready, place them on a plate and sprinkle with powdered sugar to create the typical “snow” effect.
Beautiful, fragrant, and delicious: the chocolate Christmas pine cones are perfect as a homemade gift or to decorate the festive table! 🎄
Storage and Useful Tips
Chocolate Christmas pine cones can be stored in the refrigerator for a couple of days, in an airtight container or covered with cling film.
I recommend taking them out 10–15 minutes before serving so they return to soft and delicious.
Gluten-free version: replace the dry biscuits with gluten-free cookies and ensure that the chocolate cereals are also gluten-free.
Freshness effect: for a more intense aroma, you can add grated orange zest or a few drops of vanilla essence to the mixture.
You can package them in transparent bags, tied with a ribbon, for a sweet homemade Christmas gift: they will be an original and appreciated present!
Frequently Asked Questions for the Christmas Pine Cones
Can I use other cereals?
Of course! You can use any boat-shaped or puffed chocolate cereal, as long as it is crunchy to create the pine cone effect.
Can they be frozen?
Better not: the cold tends to ruin the crunchiness of the cereals. I recommend storing them only in the refrigerator.