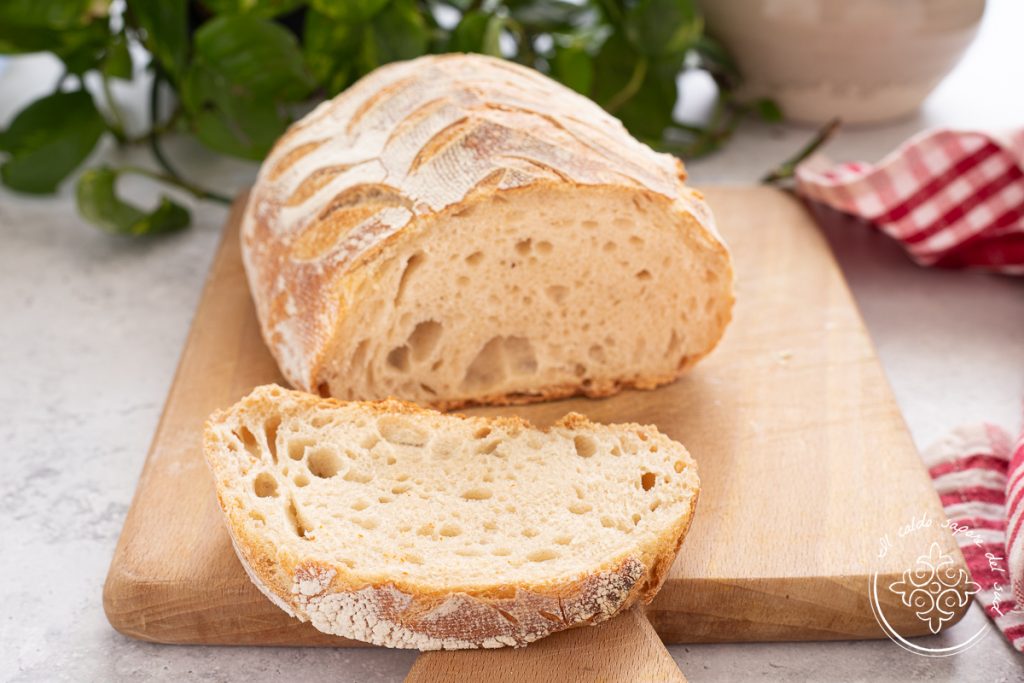
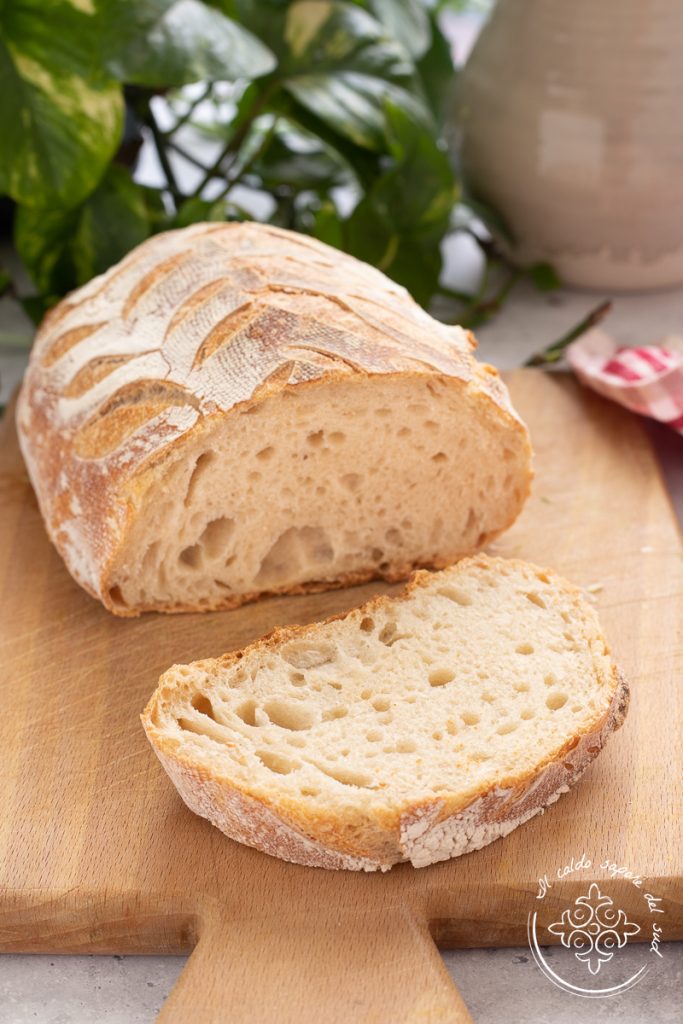
Fridge-to-oven baked bread on a baking stone, made with durum wheat semolina and sourdough starter.
Bread is my passion; making it relaxes me and gives me great satisfaction. Where I come from, rustic homemade bread — my favourite — is traditionally made with re-milled durum wheat semolina and sourdough starter, and the flavour is truly unique and exceptional.
Today we will prepare it together, using the fridge-to-oven method, with a slow proof including time in the refrigerator. We will make a single rustic loaf, high hydration, long fermentation with sourdough starter, baked using the “fridge-to-oven” technique on a baking stone, so our bread will be very similar to a baker’s loaf.
Ready? Arm yourself with patience and the result will be a guaranteed success!!!
Before heading to the kitchen, if you want to stay updated on my recipes you can follow my page Facebook and my profile Instagram.
If you love homemade bread, also check out:
–Very soft milk rolls;
–Durum semolina bread with firm crumb and sourdough;
–High-hydration durum semolina walnut bread with sourdough;
–Durum semolina bread with sun-dried tomatoes;
–Durum semolina bread with black olives;
–Durum semolina sourdough bread, fridge-to-oven baking.-
- Difficulty: Medium
- Cost: Affordable
- Rest time: 18 Hours
- Preparation time: 30 Minutes
- Cooking time: 45 Minutes
- Portions: 4.0 lbs of bread
- Cuisine: Italian
Ingredients to make bread using the fridge-to-oven method
- 8 1/3 cups re-milled durum wheat semolina (durum wheat)
- 3 5/8 cups Water
- 2 1/4 tsp Salt
- 5.3 oz Sourdough starter
- 1 tsp Malt (or honey)
Tools
- Stand mixer
- Baking stone
Preparation of bread using the fridge-to-oven method
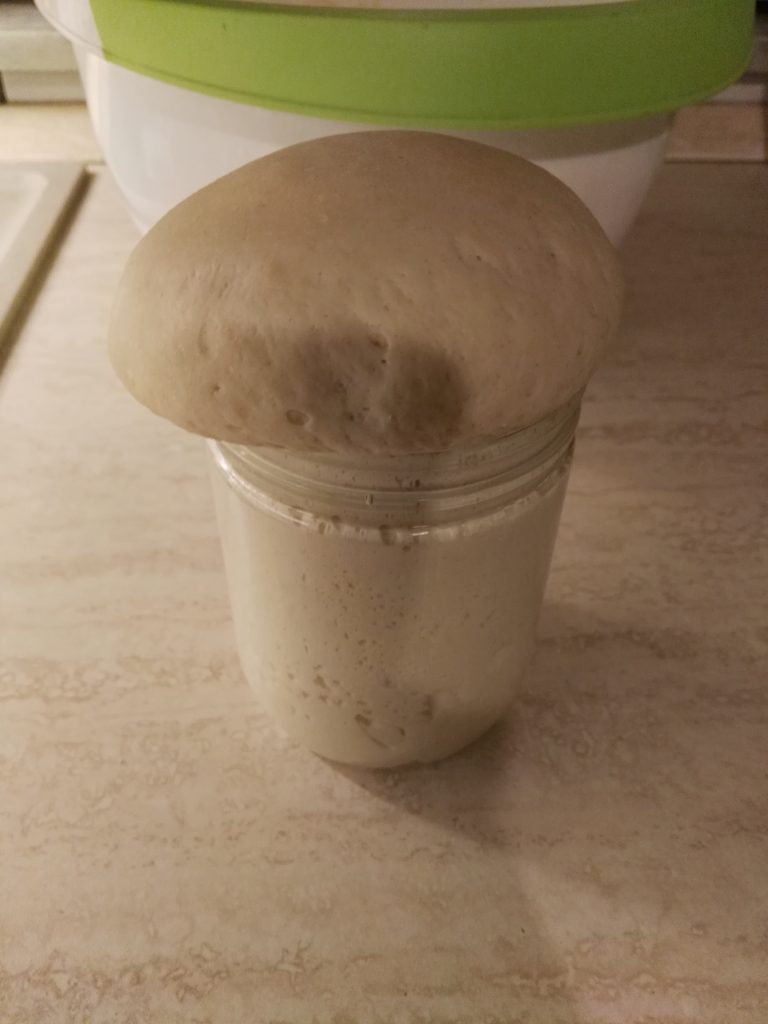
Refresh your sourdough starter and keep it warm; in the photo you can see it well risen and mature.
Prepare the flour you will use for the bread.
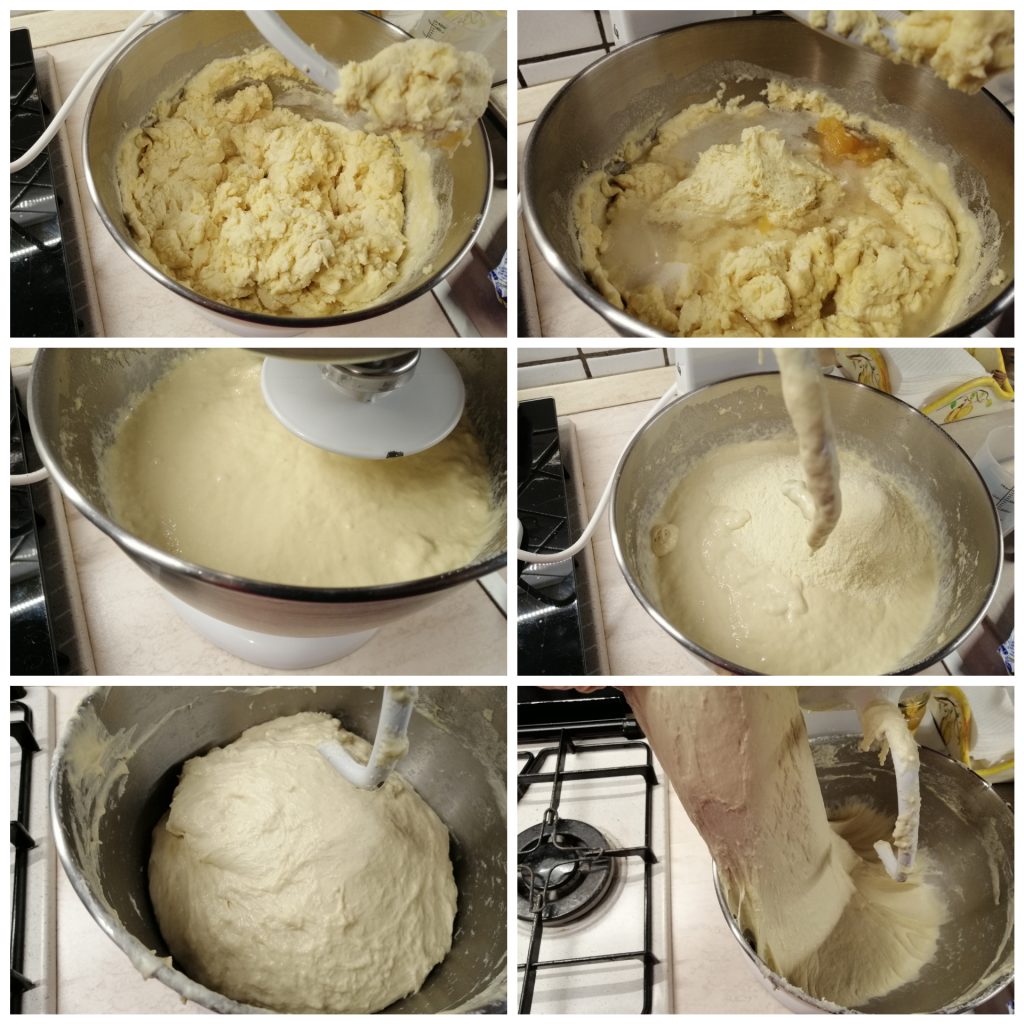
Put 600 g (about 5 cups) of the semolina and two-thirds of the water into the bowl of the stand mixer, and work until the dough begins to form a gluten network.
After that time add the rest of the water, the torn sourdough starter, the salt, the malt, and start the machine at medium speed.
Work for about 15 minutes. The dough will begin to become elastic; add the remaining flour and increase the speed.
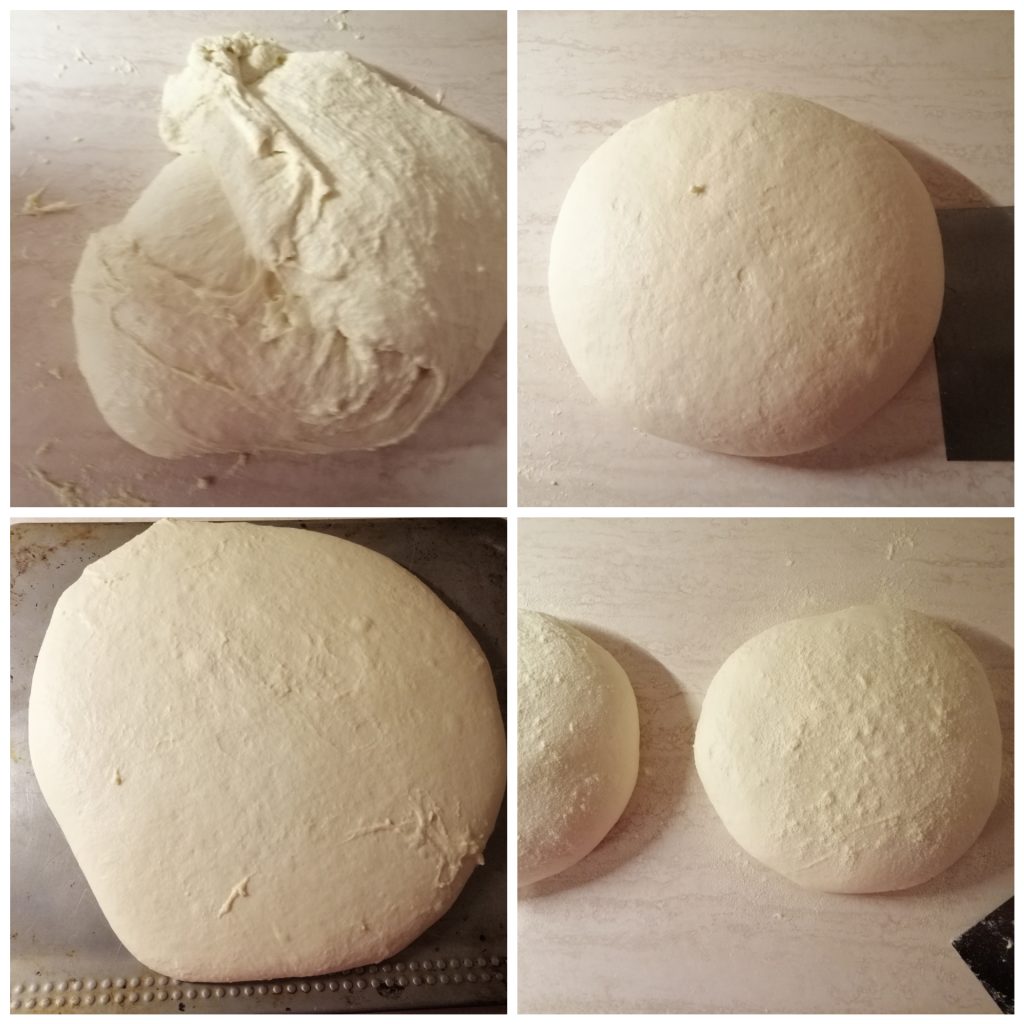
When you see an elastic, cohesive, firm, dry dough that pulls away from the sides of the bowl, you can turn it out onto a work surface.
Shape a nice ball, move it onto a baking sheet and put it in the oven with the light on for two hours; this step will dry the mass a bit, help it firm up and start the fermentation.
After that time take the dough back — it will have spread and flattened on the baking sheet, which is normal — divide it into two parts and form two balls.
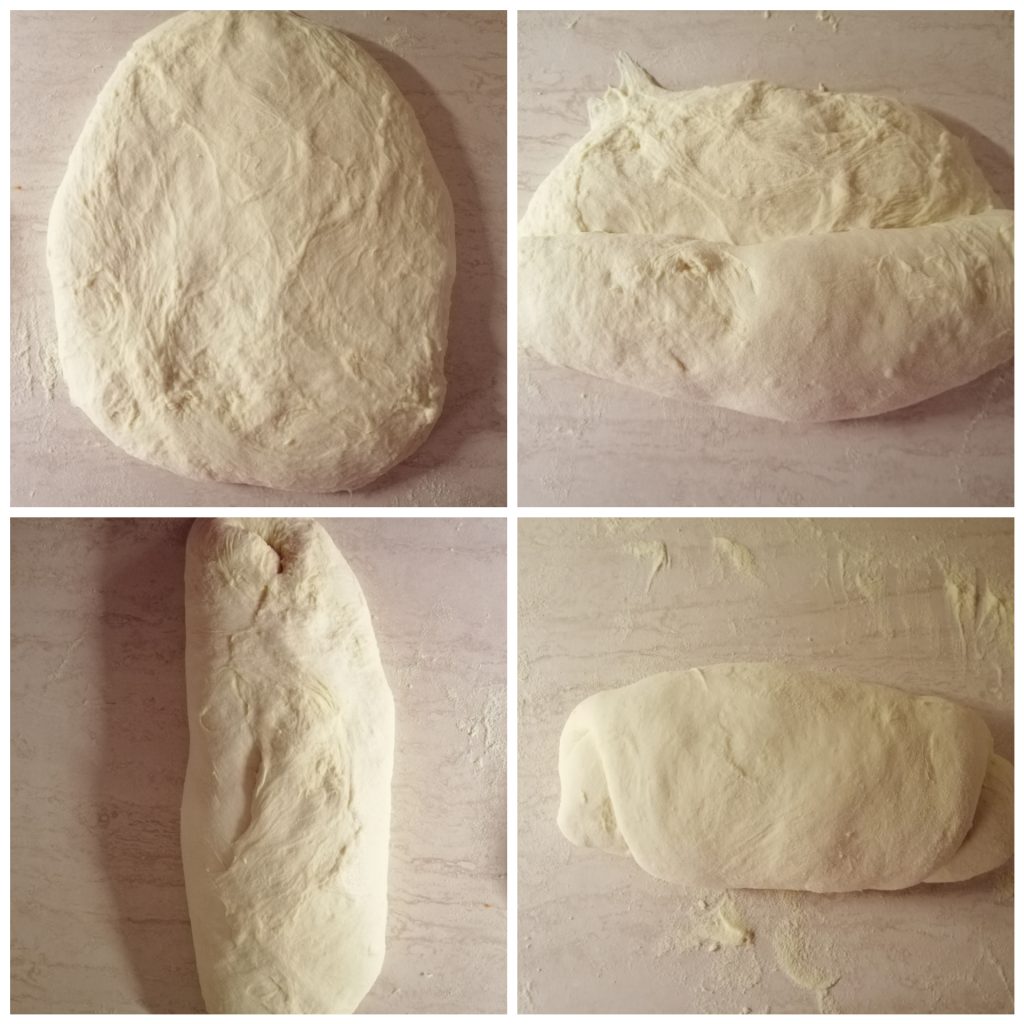
Flour the work surface, open the first loaf and roll it onto itself to form a cylinder, rotate the cylinder by 90°, place it with the short side toward you, spread it slightly and roll it again tightly.
Repeat with the other loaf shape.
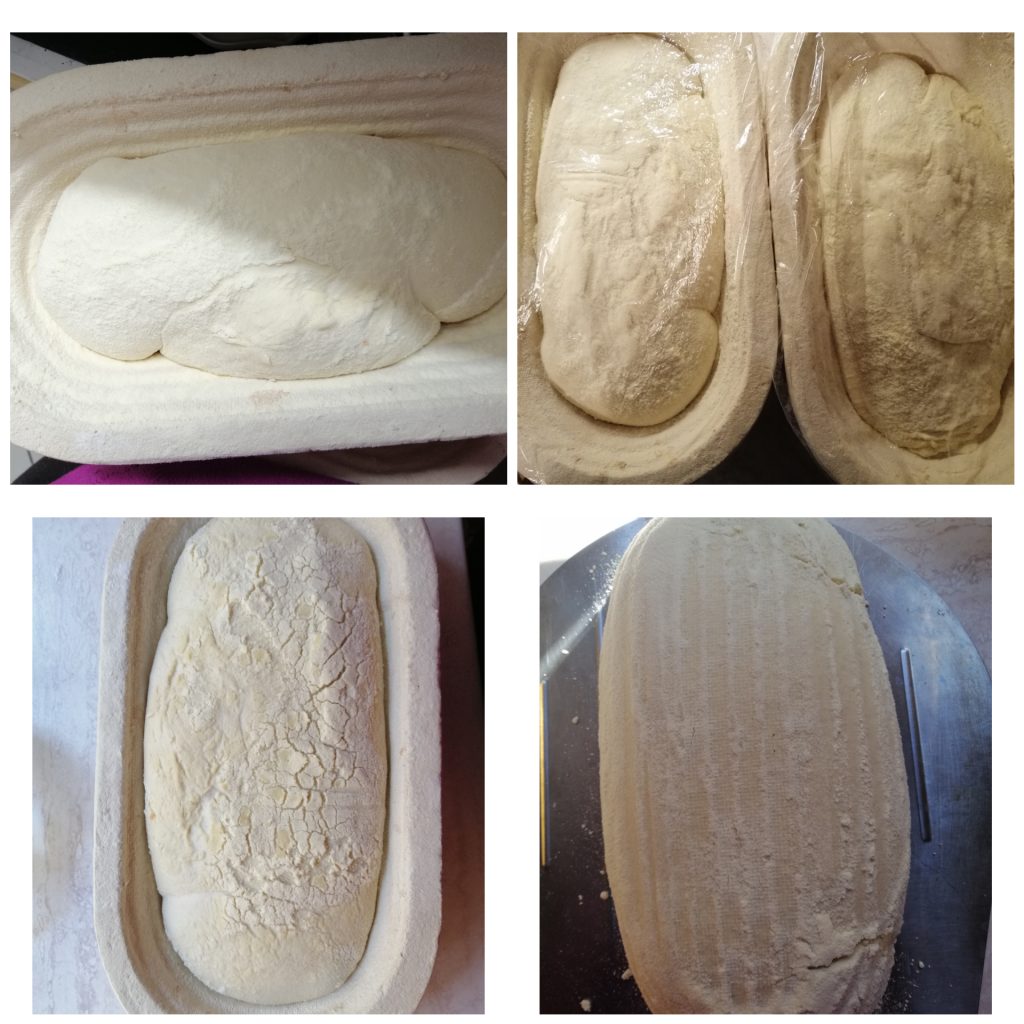
Flour the two proofing baskets very well and also the loaves; don’t be stingy with the flour.
Place the bread in the baskets with the seam side up.
Put them in the oven with the light on for 2 hours; after that time you will see the dough has started to rise.
Cover with plastic wrap and move them to the refrigerator, placing them at mid-height.
Let them rest for about 12 hours, then take them out and allow them to come to room temperature; if the fermentation hasn’t finished, wait until it completes.
When doubled, preheat the oven to 428°F (place a baking stone or a baking dish at mid-height) and let it heat for at least 30 minutes.
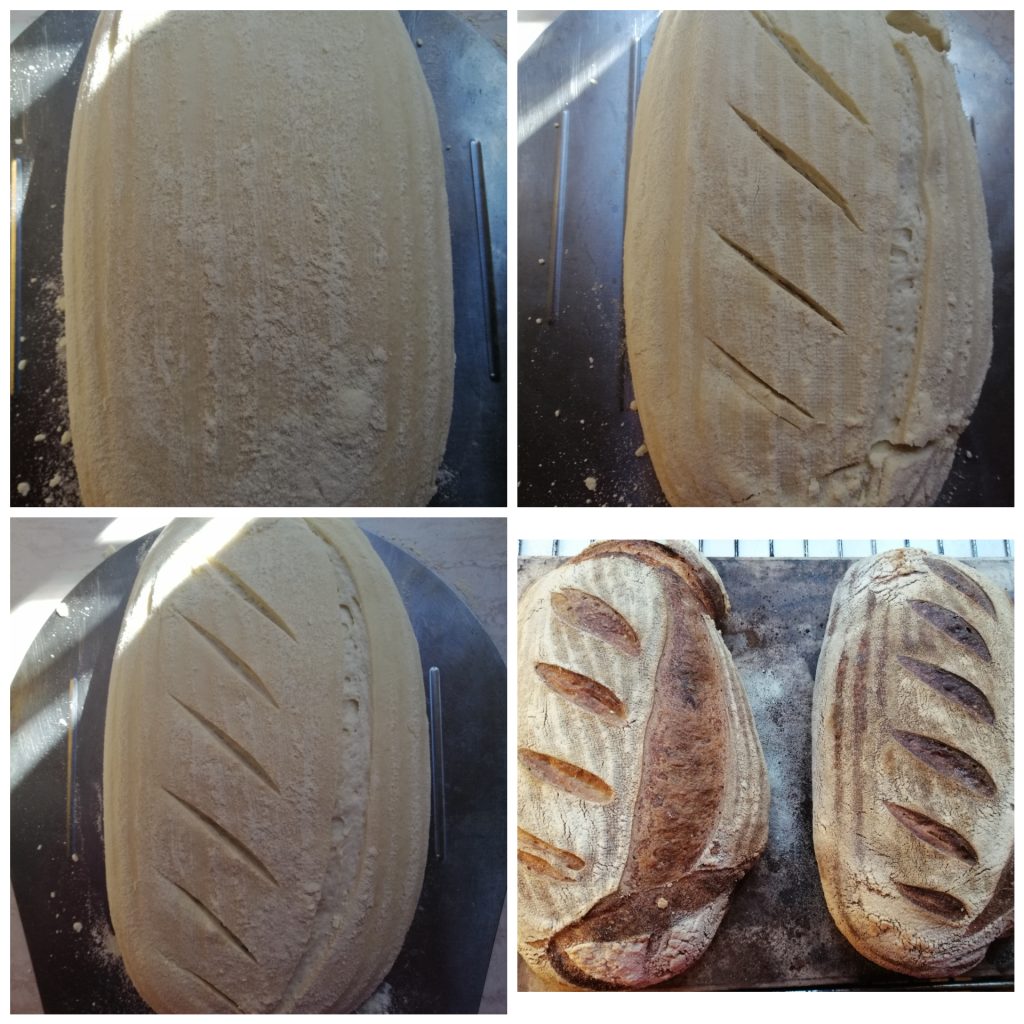
Turn the loaves out onto a floured board or a peel.
With a lame make deep slashes as you like (this will prevent unsightly cracks on the crust during baking) and gently slide the loaf onto the hot baking stone.
(From the moment you turn the loaf onto the peel until you put it in the oven you must be very quick to avoid excessive flattening).
Bake preferably with convection at 428°F for the first 30 minutes, then gradually reduce to 356°F and bake for the next 15 minutes.
After the time is up, take a loaf with a potholder and “tap” the bottom; if it sounds pleasantly hollow, turn off the oven, put it back inside and let it cool slowly with the oven slightly open.
Our delicious bread is ready. In winter it will keep very well wrapped in a cotton cloth for two or three days; in summer it will unfortunately dry out sooner. I do not recommend storing it in plastic bags as it would deteriorate; better portion and freeze to use as needed.
From here you can return to the HOME and discover new recipes!
Also see:
–Sicilian mafalde, re-milled semolina bread;
–Cucciddatu, re-milled durum semolina bread;