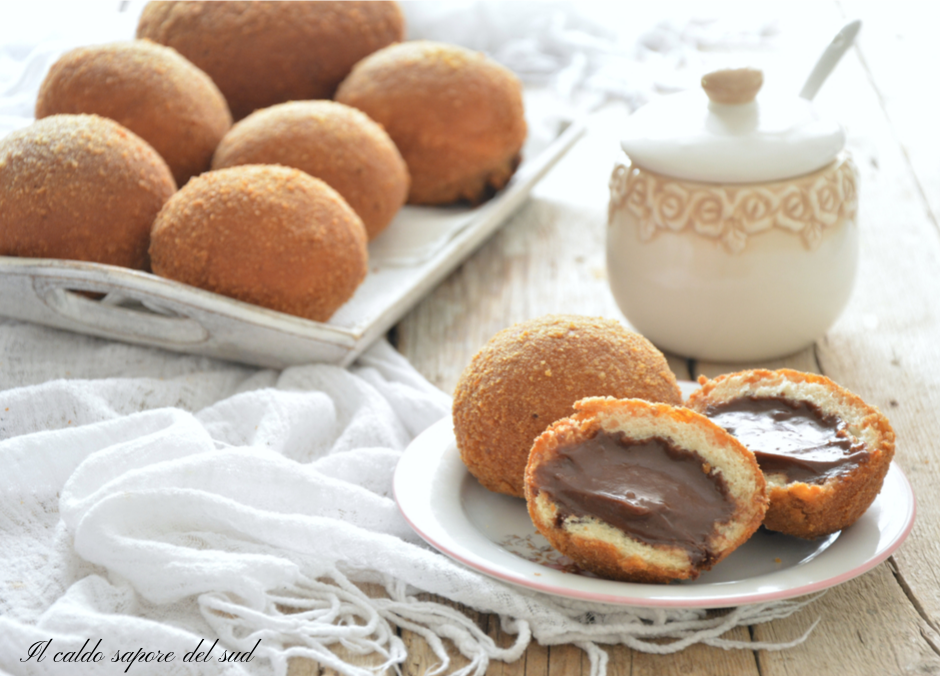
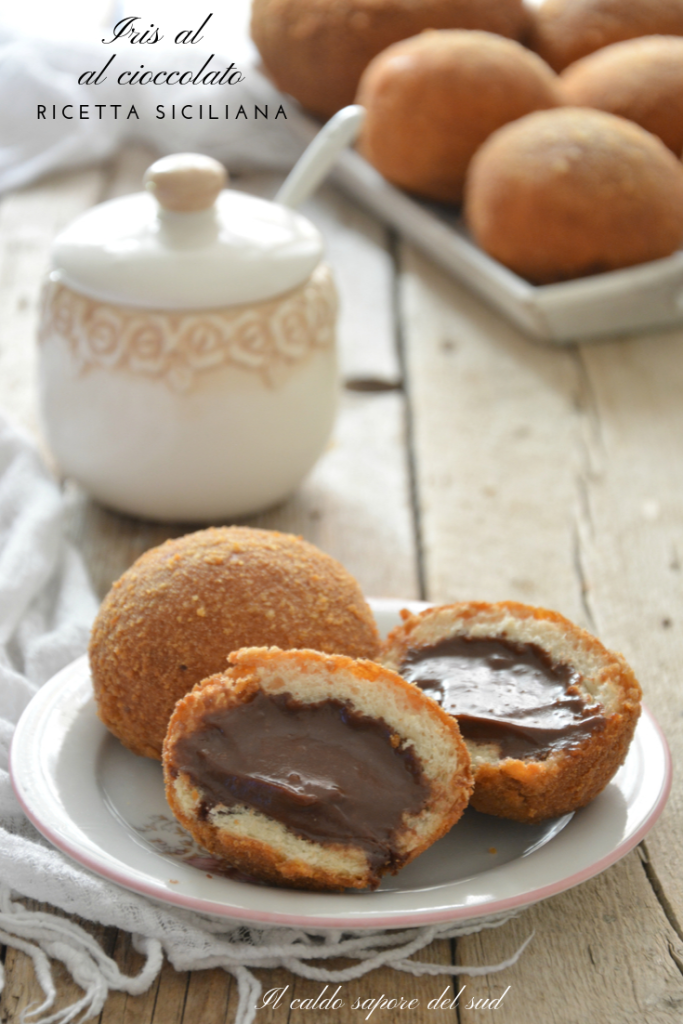
Catanese Iris with Chocolate Cream, another recipe that is part of the great Sicilian cuisine and grandmother’s recipes and which, together with the iris with white cream, the Catanese ricotta ravioli and the Palermitan fried iris and more, enrich Sicilian rosticceria in its sweet version.
But let’s talk about the Catanese chocolate iris, which differ from those with white cream, just like the Catanese sweet panzerotti with white cream and cocoa. The two recipes are indeed very similar in the base, but different in the filling: the first made with dark chocolate cream and the second with pastry cream, but with few eggs.
As I mentioned above, there are two different types of iris: one tied to the Palermitan culinary tradition and one tied to the Catanese tradition. If the Palermitan iris are filled with ricotta and made with brioche dough, the Catanese iris, poorer and more rustic but just as good, are made with soft milk rolls and cream.
They are anyway simple, economical pastries, born to recover leftover white bread or drier, staler brioches, formed by a crisp crust breaded and fried and filled with a delicious and rich filling.
Now, if you’re ready and curious, follow me in the kitchen to prepare the chocolate iris, but before we get to the stove I remind you that if you want to stay updated on all my other recipes, you can follow my Facebook page and my Instagram profile.
You can also check out these Sicilian recipes:
- Difficulty: Easy
- Cost: Affordable
- Preparation time: 3 Hours 30 Minutes
- Portions: 14-16 small irises
- Cooking methods: Frying
- Cuisine: Italian
Ingredients
- 4 cups Type 0 flour
- 1 1/3 cups Milk
- 6 tbsp Lard
- 5 tbsp Sugar
- 2 tsp Salt
- 1 tsp Active dry yeast (or 12 g fresh yeast)
- 2 1/8 cups Milk
- 1 egg
- 3/4 cup Sugar
- 2/3 cup Type 00 flour
- 7 oz Dark chocolate
- 1 packet Vanillin (or 1 tsp vanilla extract)
- 2 tbsp Milk (only if necessary to adjust consistency)
- as needed Lemon zest (or orange)
- 1 1/4 cup Type 00 flour
- 1 1/4 cups Water
- 2 cups Breadcrumbs
- as needed Vegetable oil
Tools
- Pot
- Whisk
- Pan high-sided for frying
- Bowl Large
- Slotted spoon
- Oven
- Scissors
Preparation
First of all you will need to prepare the milk rolls, but if you prefer you can also buy them ready-made.
If you want to make them yourself, you will find the recipe with step-by-step photos HERE.
Prepare all the ingredients, put the flour in the bowl, add the milk and dissolve the yeast in it, mix roughly and then add the rest of the ingredients. Knead in the bowl for about ten minutes trying to obtain a formed and fairly smooth dough; with resting the gluten network will perfect. Place in the oven with the light on (the oven temperature will rise to about 79°F, helping the proofing) for an hour or until doubled.
After the time has passed, once the dough has doubled, turn it out onto a work surface, knead a few more minutes and then divide into many rolls of about 60 g each (unless you need larger rolls).
Shape many dough balls and let them rise until doubled.
After the time has passed, preheat the oven to 356°F in conventional mode, brush the rolls with milk and bake. After a couple of minutes lower to 320°F; at this temperature, if well risen, they should not crack and will grow well.
Remove the rolls from the oven when fully golden; it will take about 15/20 minutes.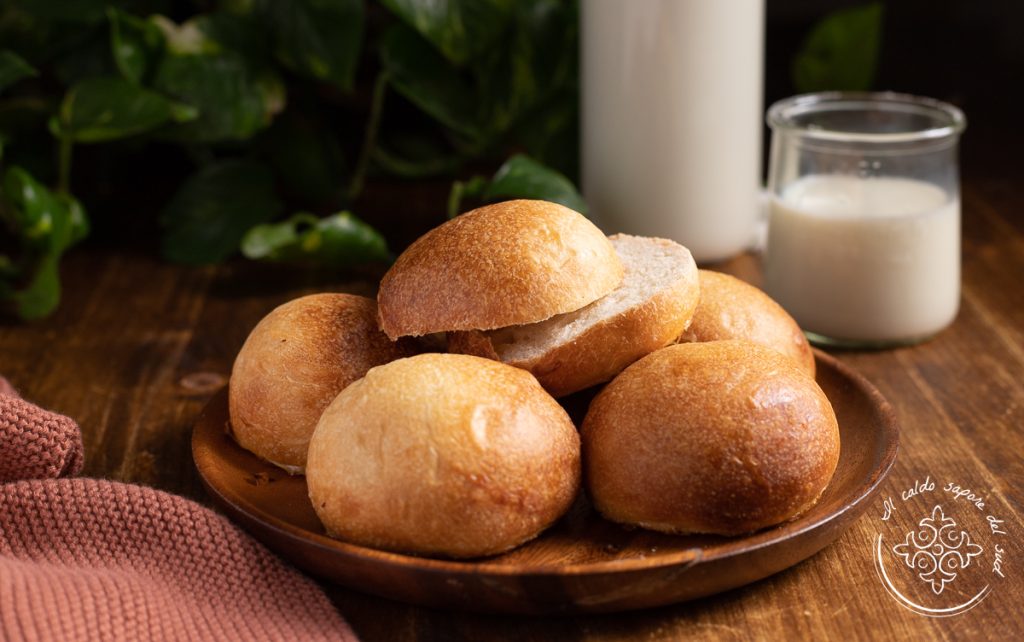
In a little milk, blend the flour, sugar, egg and vanilla. When the mixture is homogeneous, add the remaining milk, mix evenly and add the lemon zest.
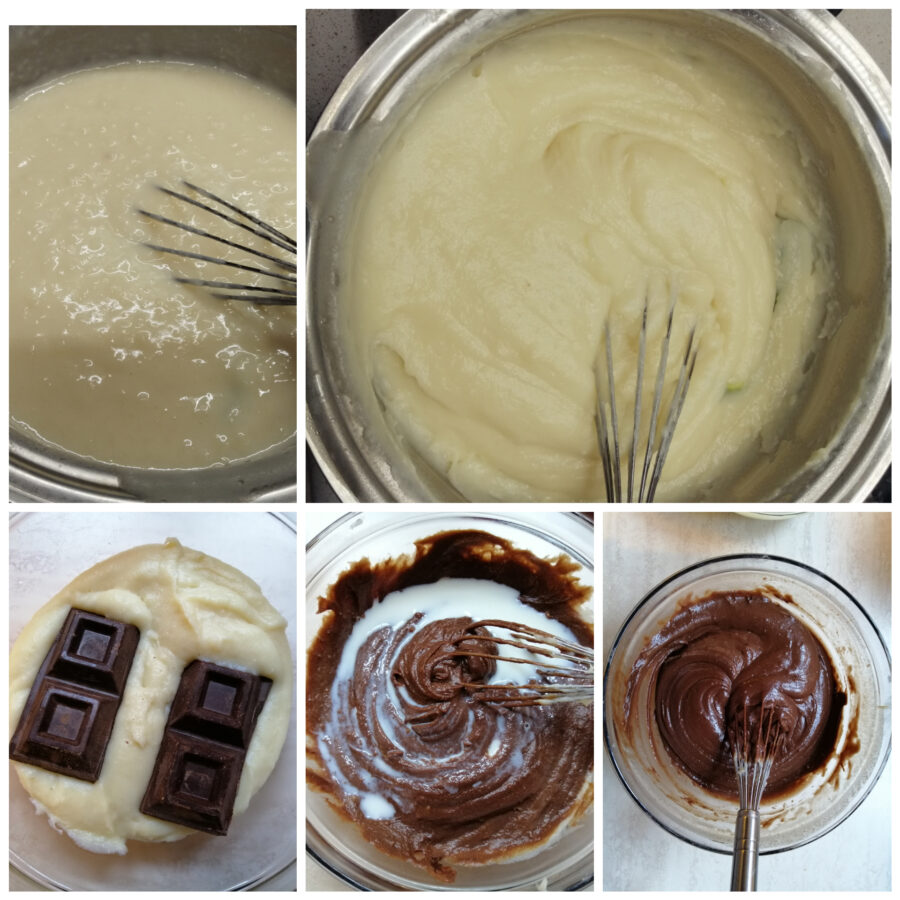
Let it thicken over moderate heat, stirring continuously; when the cream begins to set you will notice lumps, but by continuing to stir they will disappear.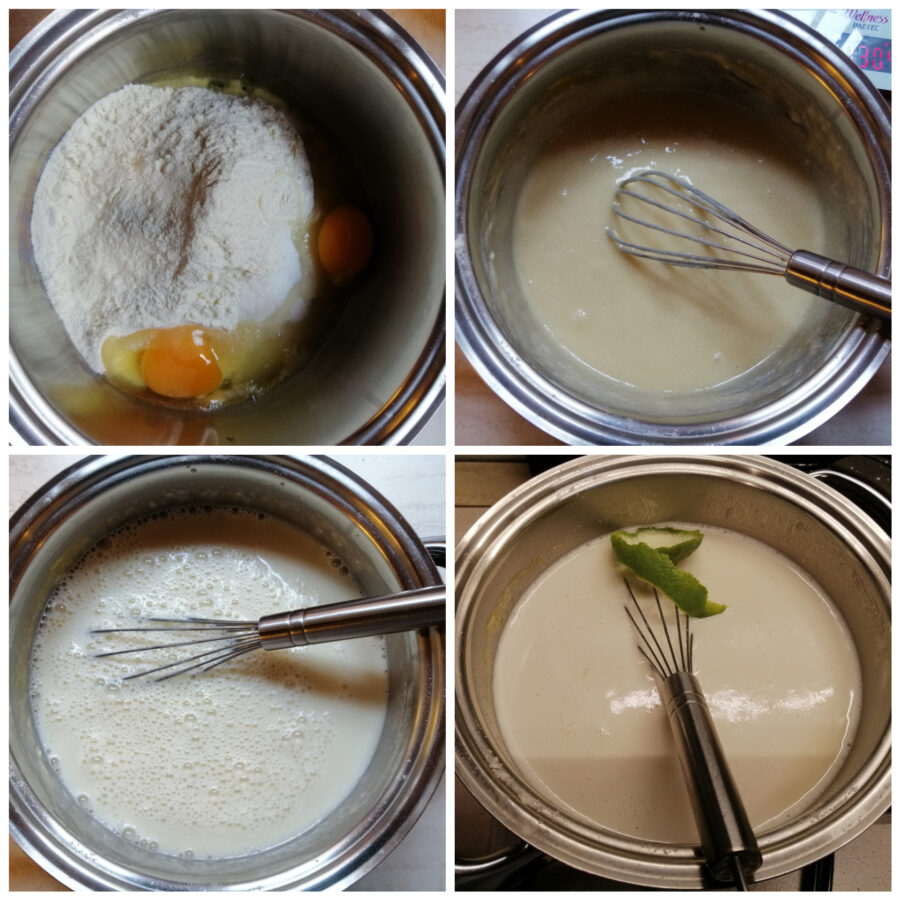
Turn off the heat and let the cream cool in a bowl, then add the chocolate. Stir so that it melts; as the cream cools it will become firmer—adjust the consistency by adding milk little by little until you reach the desired texture (a stable cream, but not too hard).
We have prepared our rolls. Usually in cafés you will find iris in two sizes: large ones about half a hand, made with a roll of about 120 g, and small ones made with 60 g rolls.
I recommend this size, very balanced, with a perfect cream-to-bread ratio.
Cut the bottom of the roll with sharp scissors as if to create a little lid and set it aside.
Hollow out the roll and remove the crumb.
With the help of a small spoon or a piping bag, fill the rolls with the cream and close with the little lids you set aside.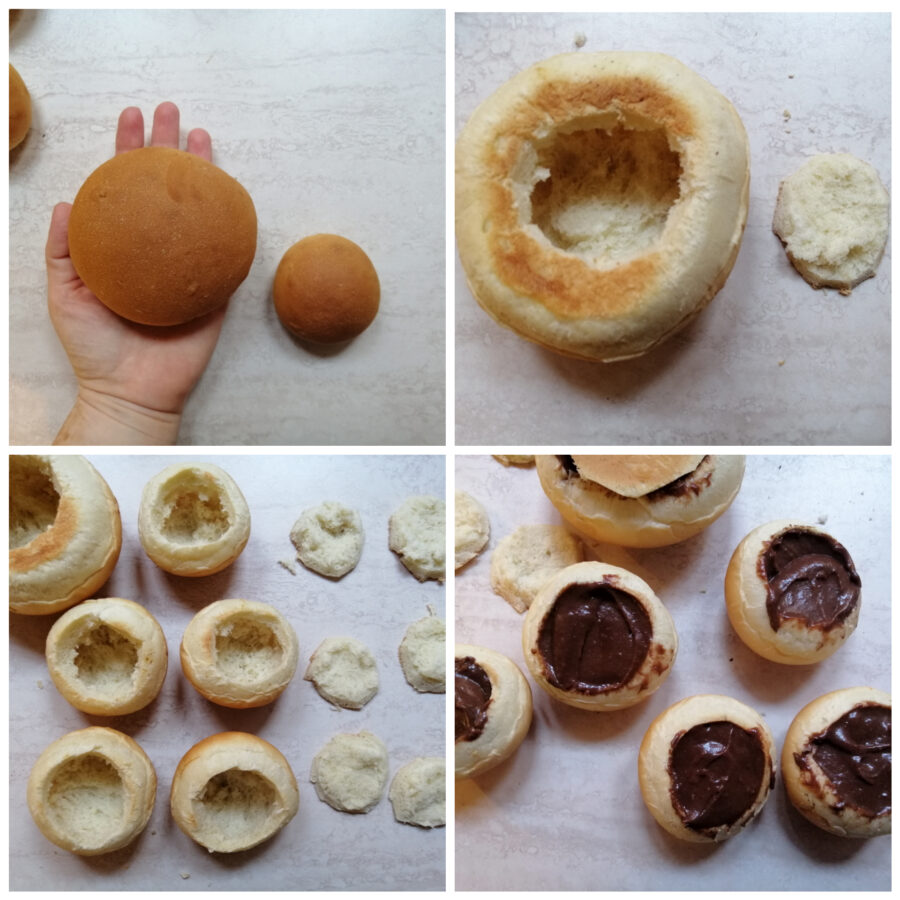
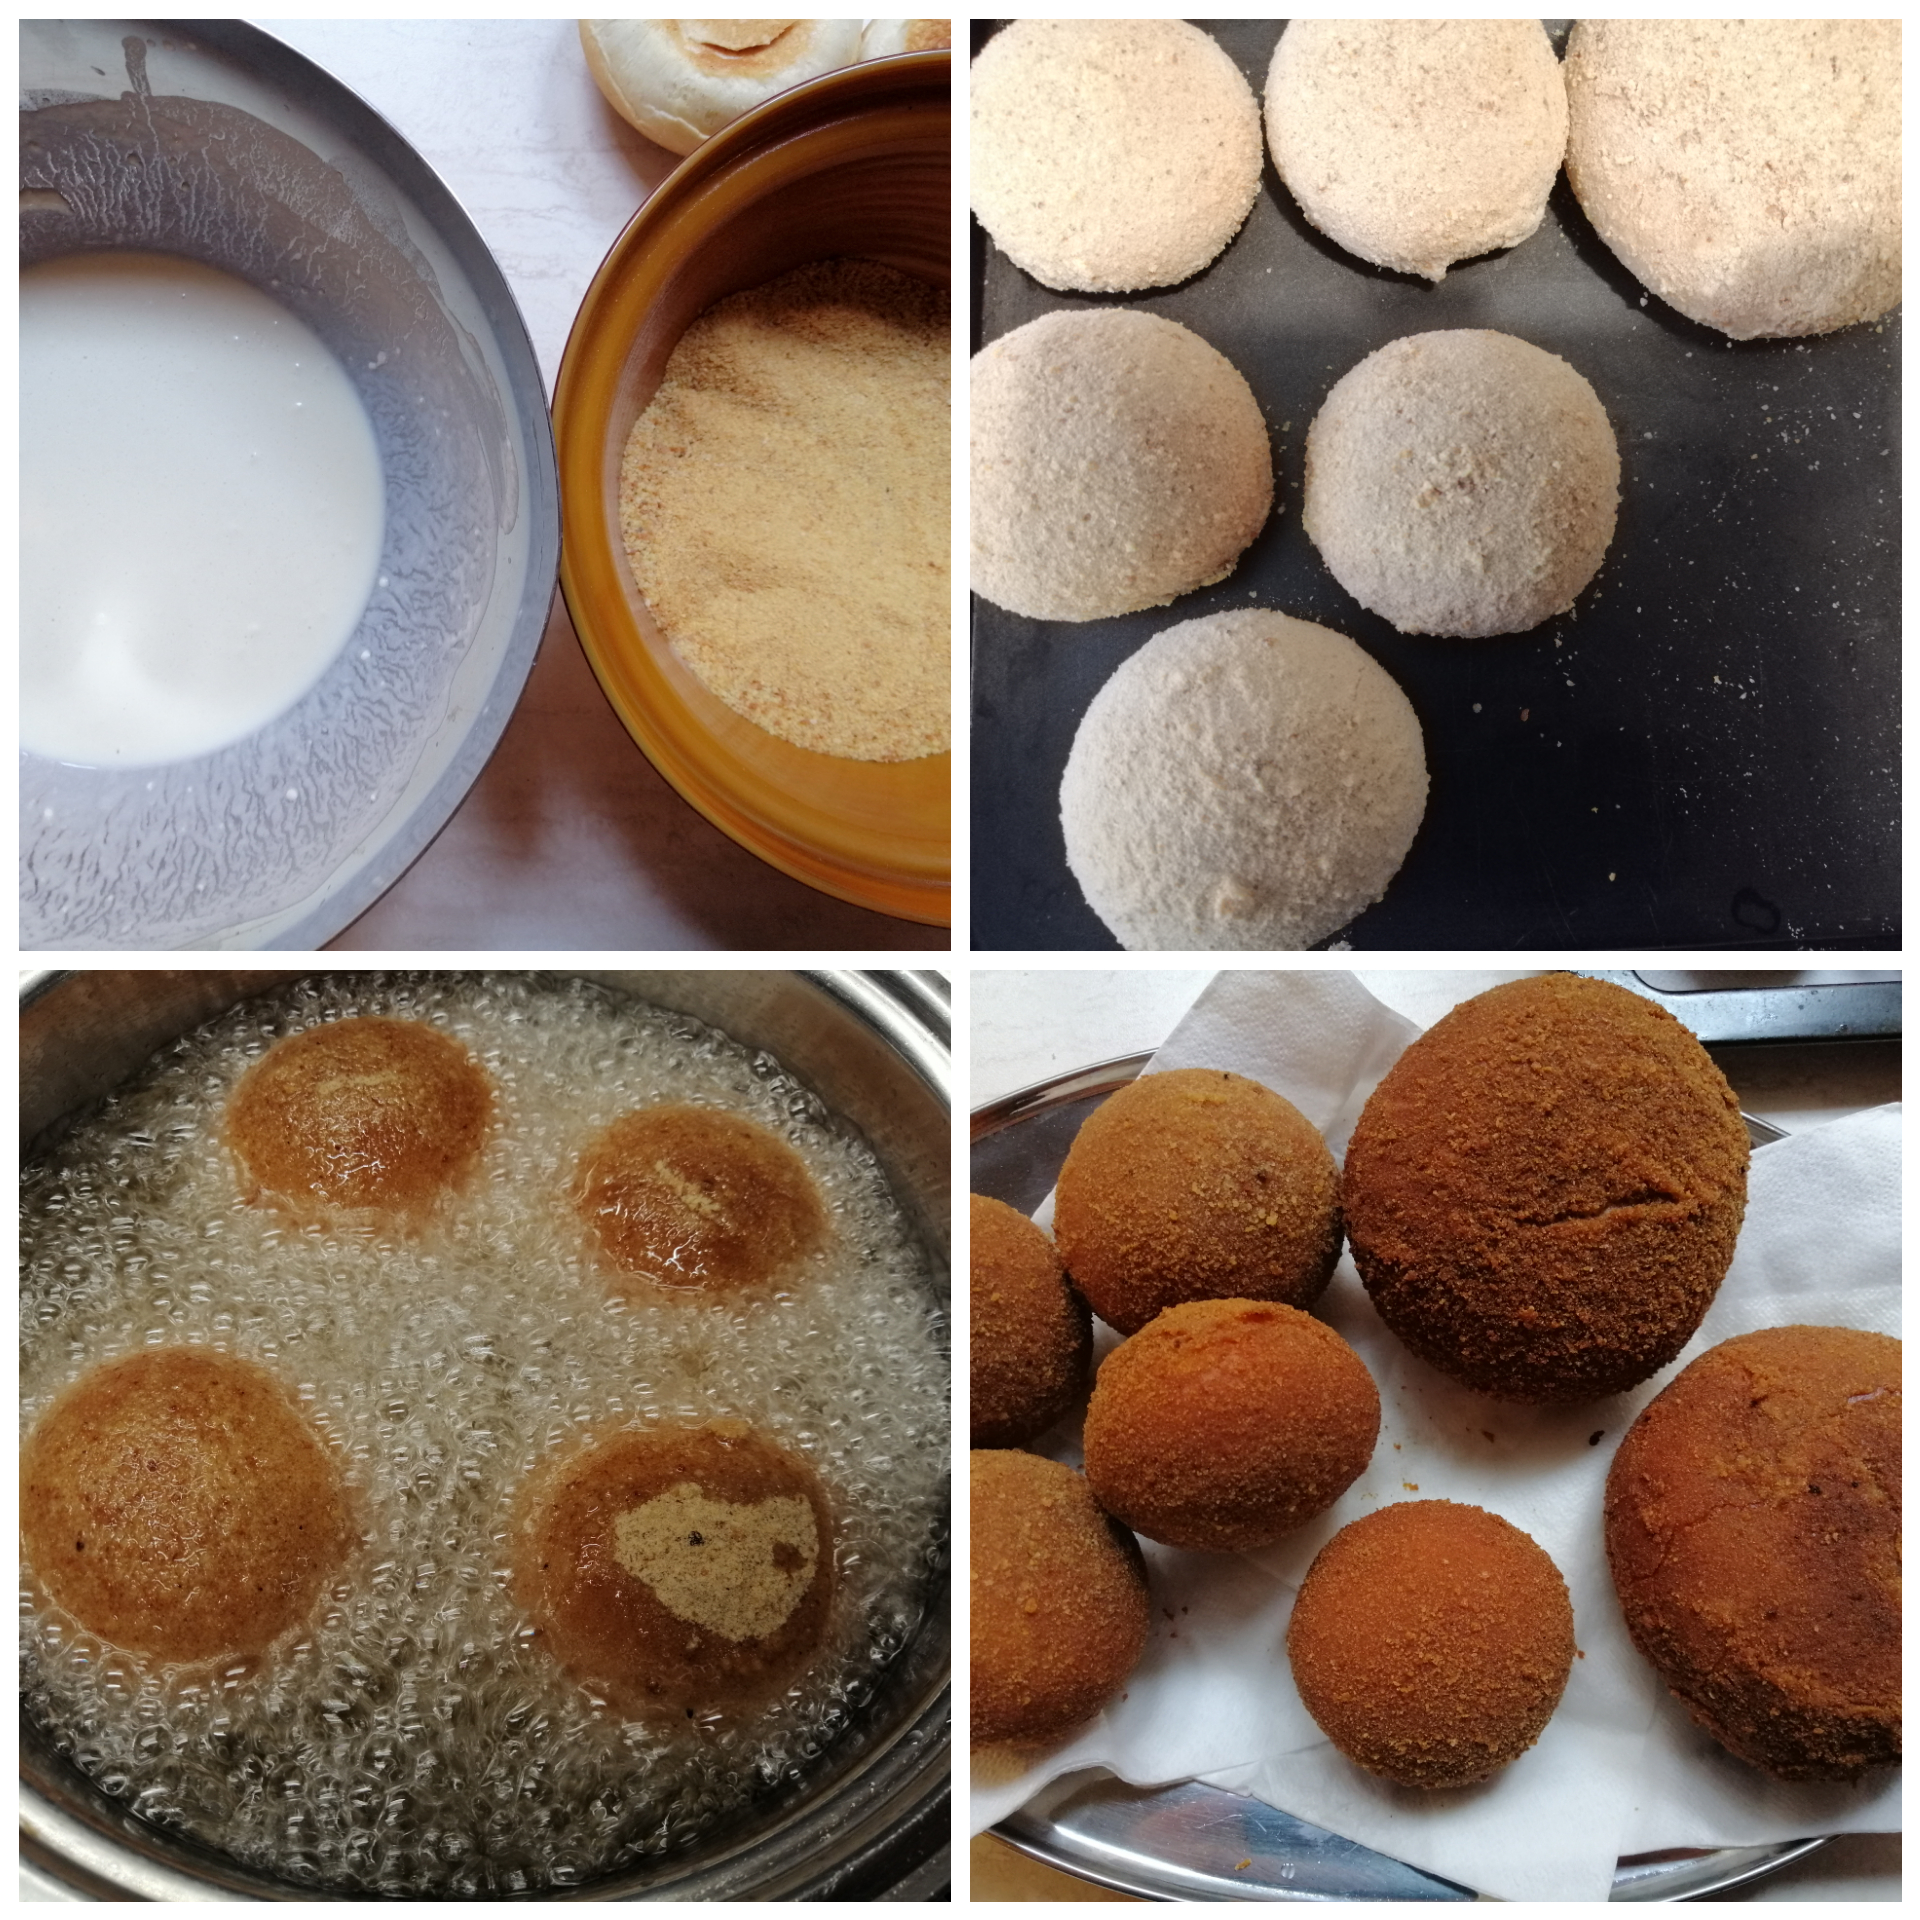
Prepare a batter by adding the water to the flour little by little, stirring continuously with a whisk.
Pass the rolls first in the batter and then in the breadcrumbs, making sure they adhere well.
Heat the oil in a high-sided pan; dip the tip of a wooden spoon—if it makes many bubbles, we are ready to fry the iris.
After plunging them into the oil, turn them to achieve an even golden color, then remove with a slotted spoon, place on absorbent paper and then on a tray.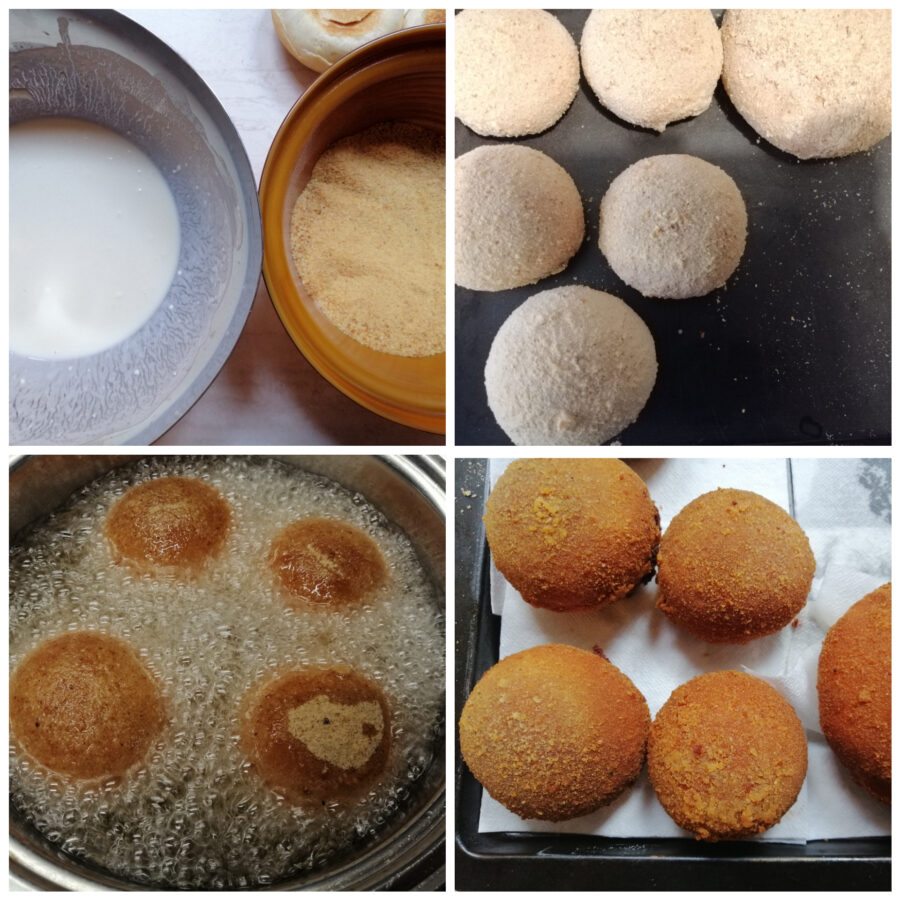
Our Iris are ready, excellent to enjoy hot, fragrant and with a delicious crunchy crust!
Storage and tips
I recommend preparing the rolls the day before; this way they will be more compact when used. Iris should be eaten freshly made or at most the same day, so they remain fragrant, delicious and crunchy. You can store leftovers at room temperature and consume them within the next day, although they won’t be as good as when freshly made.
If you want to stay updated on my recipes, follow me also on:
Pinterest; Twitter, YouTube and TikTok.
From here you can return to the HOME and discover new recipes!
