Grandma’s sourdough starter recipe. Here’s how to make sourdough starter: let’s create the starter together as grandmothers used to and then prepare Bread, Panettone, Colomba and much more…
The natural sourdough starter, also called pasta madre or lievito madre, is a dough of flour and water which, subjected to spontaneous contamination by the microorganisms present in the raw materials, air, and environment, develops an indigenous microflora dominated by lactic acid bacteria. Feeding on the elements present in the flour mixed with water, they grow and multiply and in this process produce carbon dioxide, which, trapped in the network formed by gluten, allows leavening.
The starter can be produced in solid form or in liquid form (“licoli”); with experience everyone will choose which is best for them. In this explanation I will talk about the solid starter, with which I have acquired good practice over the years.
This is a brief summary, a simple, practical and quick explanation of what the starter is in plain words. Creating a good starter is not a quick process, but a procedure that requires care and dedication and a renewal at least once a day for the first 20 days, in order to balance the microflora present in the acidified dough, which at the beginning is not edible and may contain pathogens. Once a good starter is obtained, you will need to care for it often and ensure it is always vigorous, perhaps renewing it with strong flours such as type 0 to use it at its best and obtain perfect leavening, without acidic smell or bitter taste.
These are brief notes, but by following the tutorial you will find every necessary piece of information step by step to obtain a perfect, active starter.
If you are ready and want to start this adventure, let’s go together, but first I remind you that if you want to stay updated on all my recipes, you can follow my Facebook page (here) and my Instagram profile (here).
Also see:
- Cost: Very economical
- Preparation time: 5 Minutes
- Cuisine: Italian
Ingredients
- as needed Water
- as needed Flour
- 1 teaspoon Honey (for the starter)
Preparation
As I said, the starter is born thanks to spontaneous fermentation of water and flour, so normally no starter culture is required; we will add a teaspoon of honey to speed up the process.
If you are ready to start this adventure, take a transparent jar and pour in about 1/2 cup (about 2 oz) of flour — preferably type 0 (very nourishing for yeasts), about 1/4 cup of water (about 1.8 fl oz), and one teaspoon of honey. Mix very well, cover with a cloth and leave for 24–36 hours in the warmest part of the house.
The 24–36 hour times indicate that precise values cannot be given for the fermentation process, as this depends on many factors, especially room temperature.
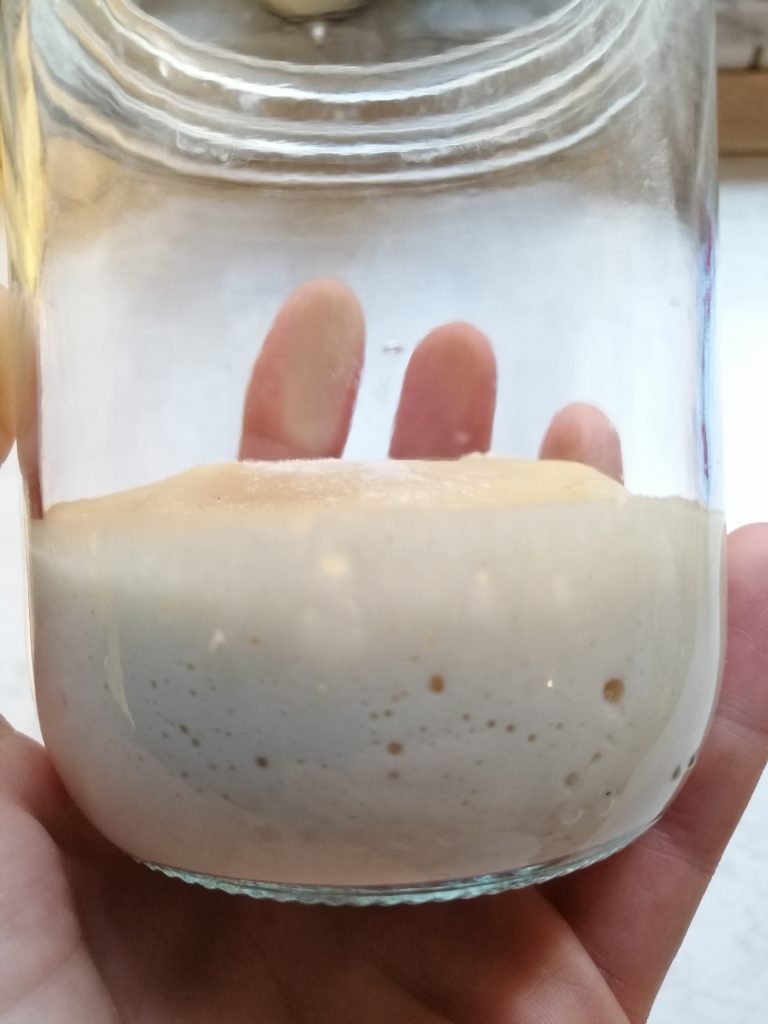
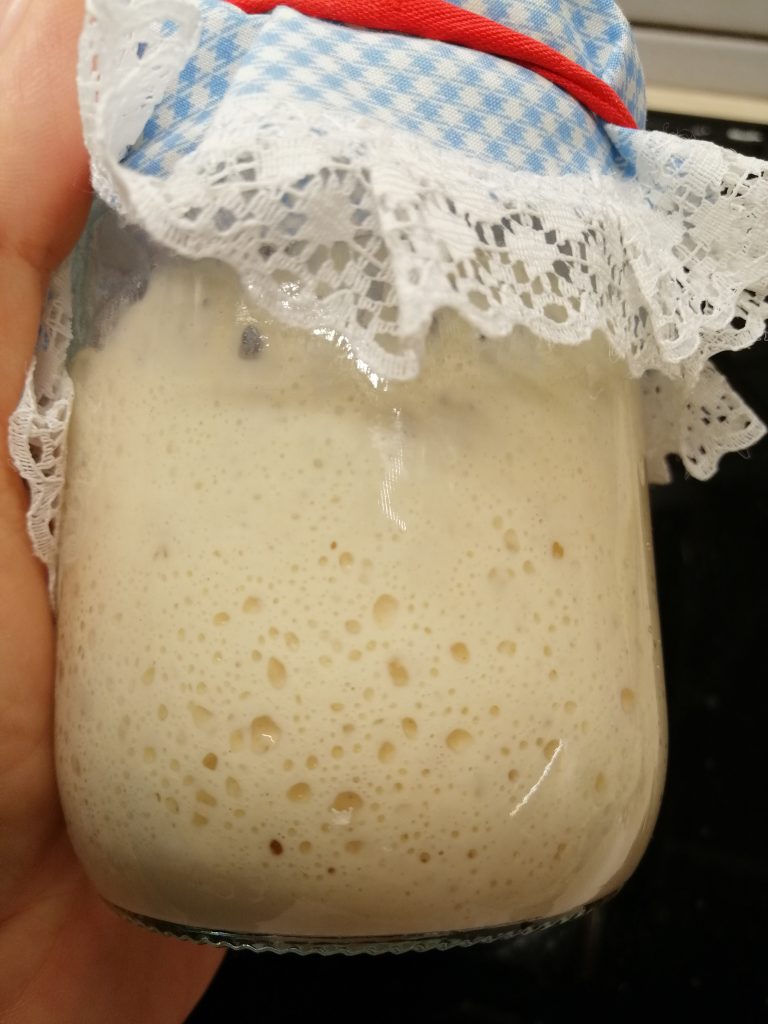
When fermentation has occurred, you will see bubbles in the dough and smell a strong acidic odor: our starter is born. Now we only have to manage its growth, which consists of a daily series of refreshments.
Regular refreshments will transform our awful-smelling mixture into a wonderful and fragrant mature starter by balancing its flora.
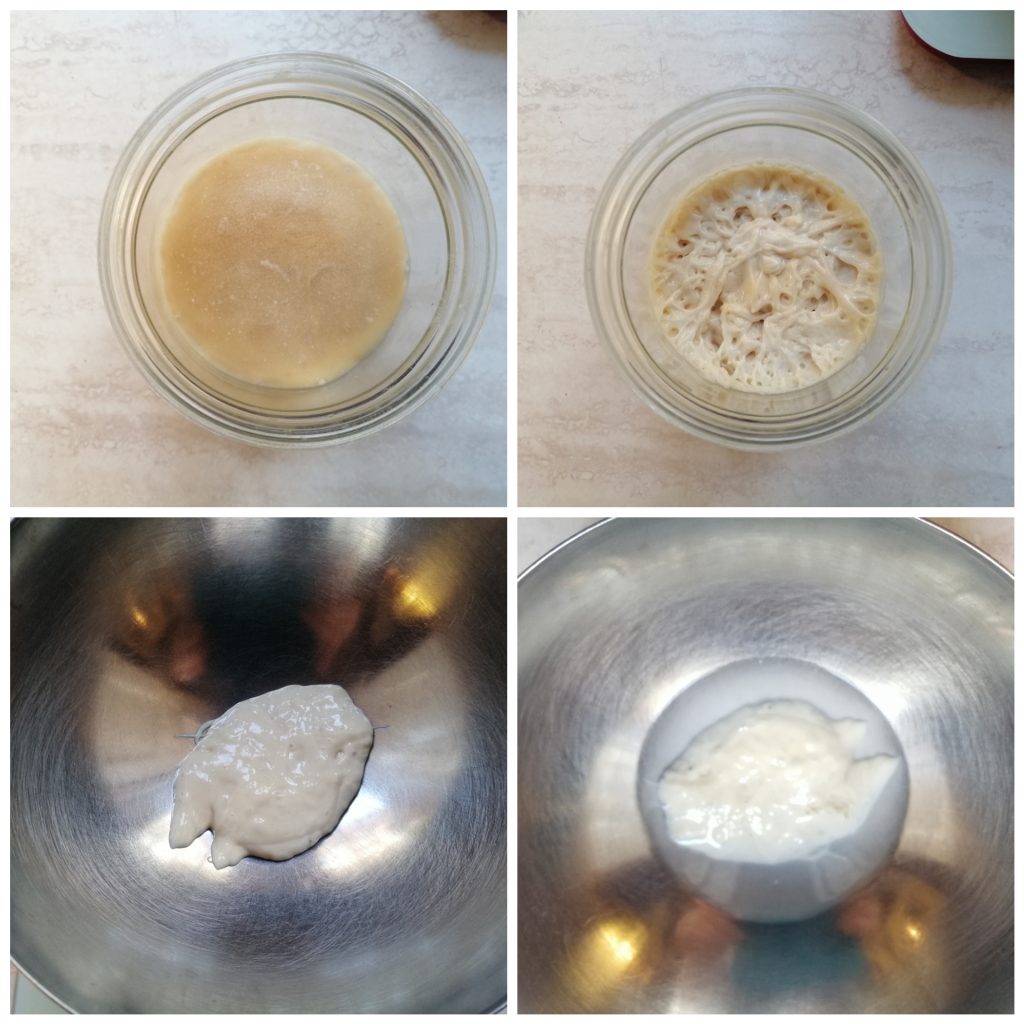
From this moment on you should carry out consecutive refreshments for at least 15–20 days. Each time you see the dough acidified and full of bubbles, take about 1.8 oz (about 1/3–1/2 cup) from the center of the fermented mixture, add about 1.8 oz (about 1/3–1/2 cup) of flour and about 2 tablespoons of water.
Form a ball and place it in a clean jar covered with a cloth.
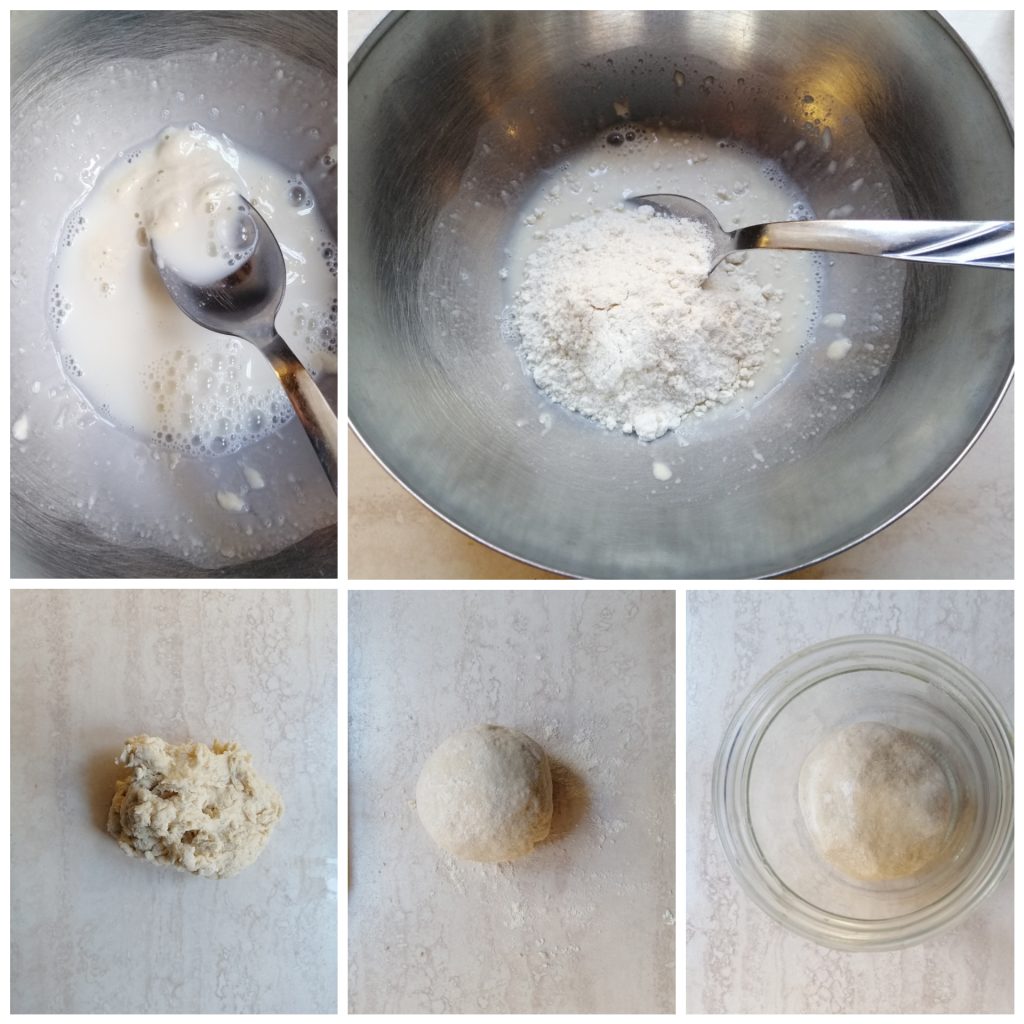
At the first fermentations it may take one or two days: remove the dry part of the dough, take about 1.8 oz (about 1/3–1/2 cup) from the center and proceed with another refresh as above; discard the rest.
In the first stages the dough will mainly acidify, and this is good. Later, as it matures, in addition to acidifying it will increase in volume (it will rise) and then deflate again. If possible (but not mandatory) refresh when the dough is swollen and still elastic.
Remember that every time you refresh your starter, your hands, the work surface and the utensils you use must be clean to avoid contaminations that could initially compromise success and later unbalance its bacterial equilibrium.
Repeat these steps for at least 15–20 days.
The starter will be ready when it can double its volume in three hours at a temperature of 79°/82°F and it no longer has a pungent acidic smell.
Now you can start making bread, pizzas or focaccias. To create delicate enriched doughs like brioche or panettone, you should wait until your starter is at least three months old and has been continually cared for.
During the first month after creating the starter, try to refresh it every day, keeping it at room temperature if it’s not too hot.
Afterwards, a weekly maintenance refresh and storage in the fridge will be enough, remembering to refresh it two or three consecutive times before baking to avoid bread with an overly acidic or bitter taste.
I always keep about 7 oz (around 3/4 cup) of starter in the fridge, which I consider the minimum necessary to guarantee a good biochemical balance for the starter. I refresh it all, use half, and put half back in the fridge in a clean jar, waiting half an hour after closing the dough.
Usually for 1 kg (2.2 lb) of flour you need about 200 g (about 7 oz / ~3/4 cup) of starter and 600 g (about 21 oz / 2 1/2 cups) of water.
To refresh means: weigh the starter, add an equal weight of flour and half that weight in water, mix and wait for the volume to double before using. Always make the necessary calculations to leave a piece aside that will be the starter to refresh the next time.
If you have any doubts, contact me on the page or on Facebook; I’ll be happy to help and clarify things!!
Notes
Store leftover omelet in the fridge and consume within 24 hours.
From here, you can return to the HOME and discover new recipes!
If you want to stay updated on my recipes, follow me on: