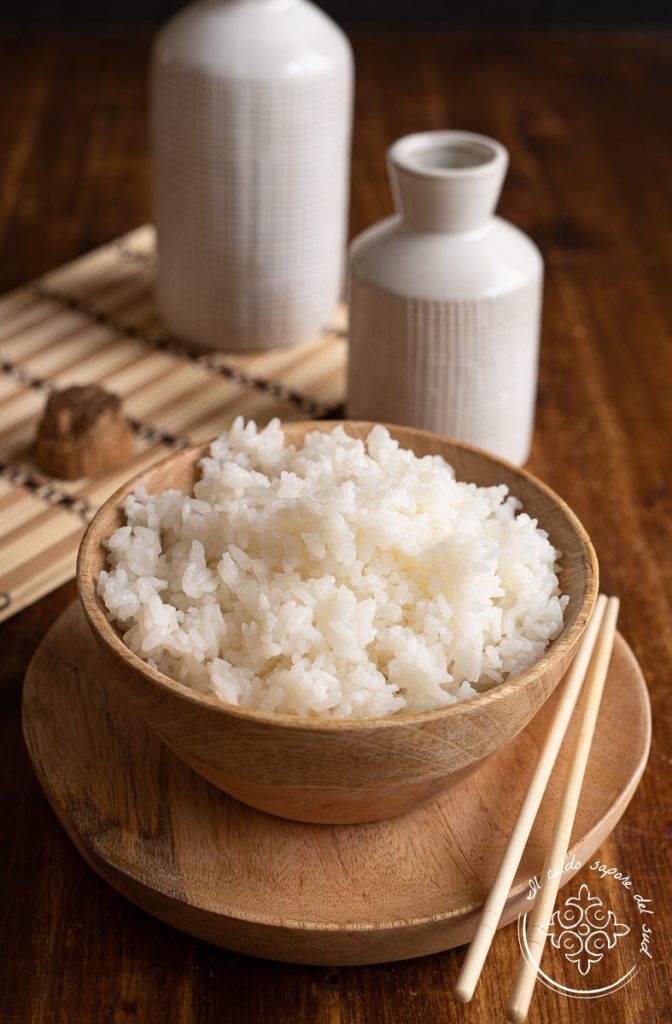
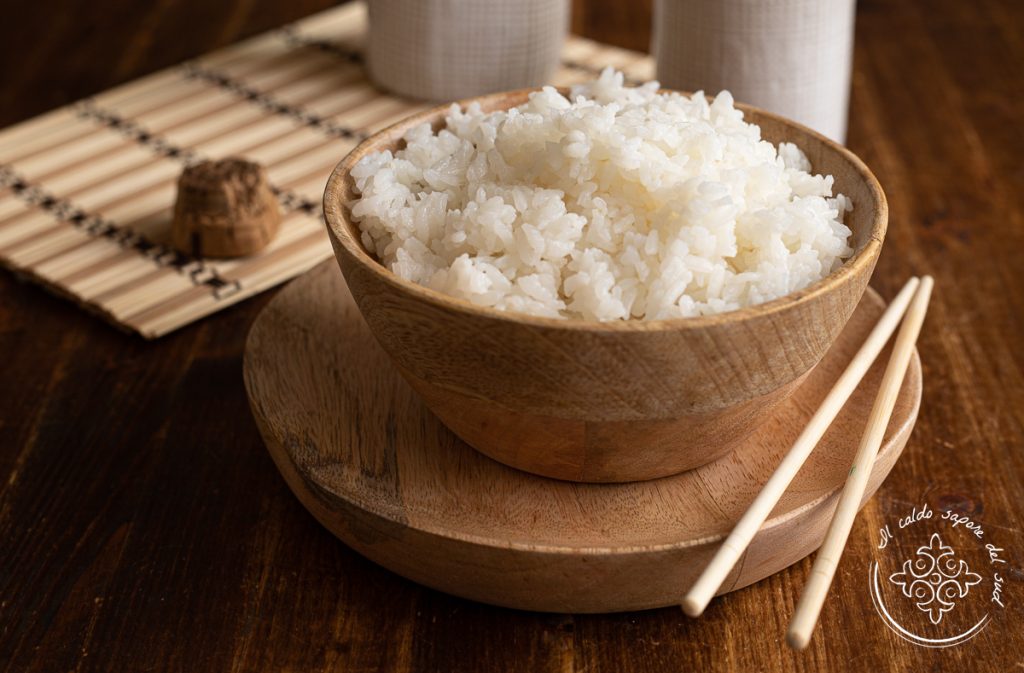
Sushi rice is the foundation of Japanese cuisine and is the main ingredient in preparing sushi, the famous dish made with rice and raw fish, as well as recipes like the well-known homemade Onigiri. To achieve an authentic result, it is essential to know how to cook sushi rice correctly, respecting doses, times and precise steps.
The ideal rice to use is Kome rice, a short-grain, starch-rich variety perfect for getting the right texture. If you can’t find it, you can also use Italian varieties such as Roma or Originario rice, which still give a good result.
Once cooked following a specific technique, sushi rice should be seasoned with sushizu, a mix of rice vinegar, sugar and salt that gives aroma, shine and the typical texture of homemade sushi.
This preparation is the essential base for many Japanese specialties, such as
nigiri sushi, futomaki, hosomaki and the more modern sushi balls. But how do you cook sushi rice perfectly? Understanding how to prepare it correctly is essential for balanced, well-packed sushi.
By following a few simple rules, you can prepare perfect sushi rice and finally give free rein to your kitchen experiments. Let’s see step by step how to do it.
Before you rush to the stove, remember that if you want to stay updated on my recipes you can follow my Facebook page (here) and my Instagram profile (here).
Love Asian cuisine? Also check out:
- Difficulty: Very easy
- Cost: Very inexpensive
- Rest time: 10 Minutes
- Preparation time: 10 Minutes
- Portions: 5
- Cooking methods: Stove
- Cuisine: Japanese
- Seasonality: All seasons
Ingredients to cook sushi rice
- 2 1/2 cups sushi rice (about 500 g)
- 1/3 cup rice vinegar (or apple cider vinegar; about 5 tbsp + 1 tsp (80 g / 80 ml))
- 2 3/4 tbsp sugar (about 35 g)
- 1 tsp salt (about 5 g)
- 2 1/2 cups water (about 600 ml)
Tools
- Pot
- Plate wooden or hangiri
- Spatula wooden or Shamoji
- Fan
- Colanders large
How to cook sushi rice
In the list of tools for cooking sushi there are some items with strange names; don’t worry, you can replace them easily.
Hangiri is a wide, shallow round wooden basin used to cool the rice evenly.
Uchiwa: a fan used to cool the rice more quickly;
Shamoji: is a spatula used to break up blocks of hot cooked rice. It should be wet and helps the seasoning penetrate between the rice grains.
Put the rice in a bowl, cover it with cold water, rinse and drain it. Repeat this process 8–10 times or until the water runs clear, then transfer the rice to a pot and add the water, which should be 120% of the weight of the raw rice (for example, for 500 g of rice use 600 ml / about 2 1/2 cups of water).
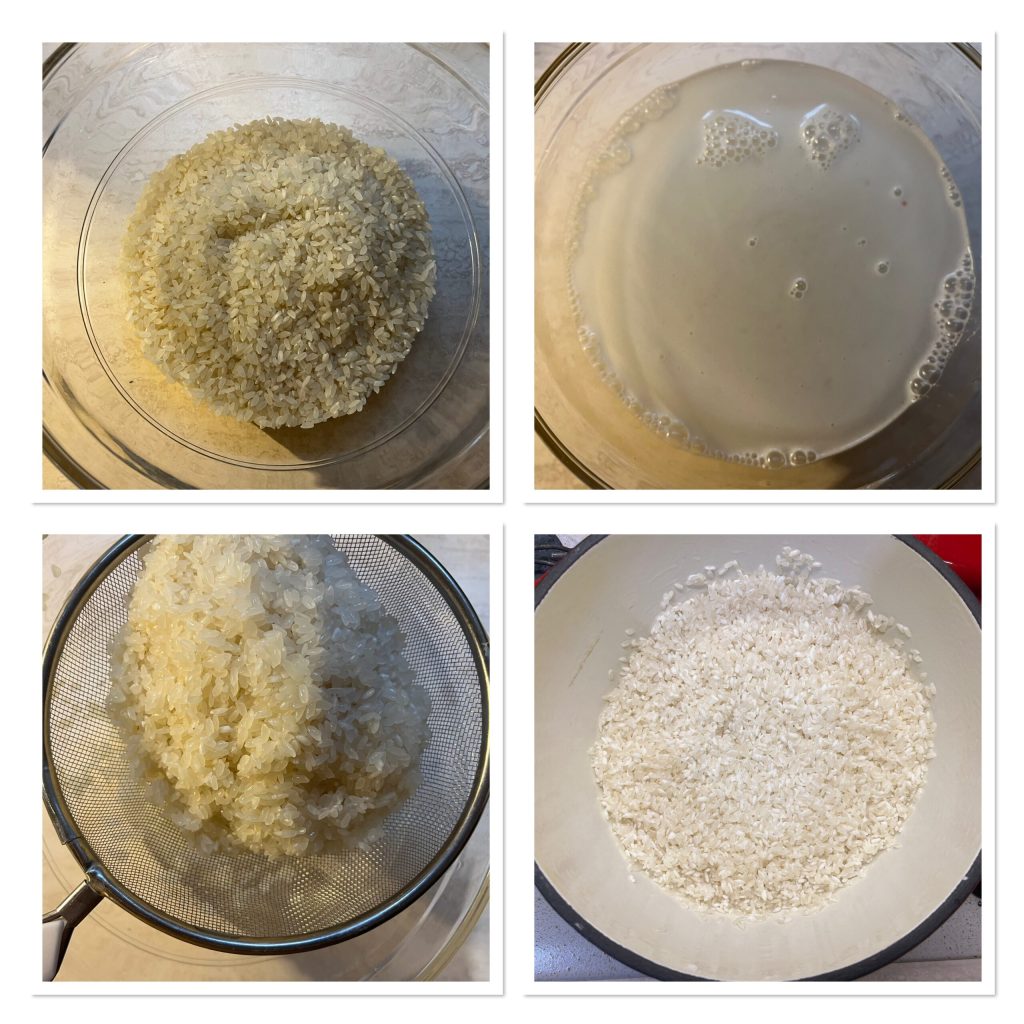
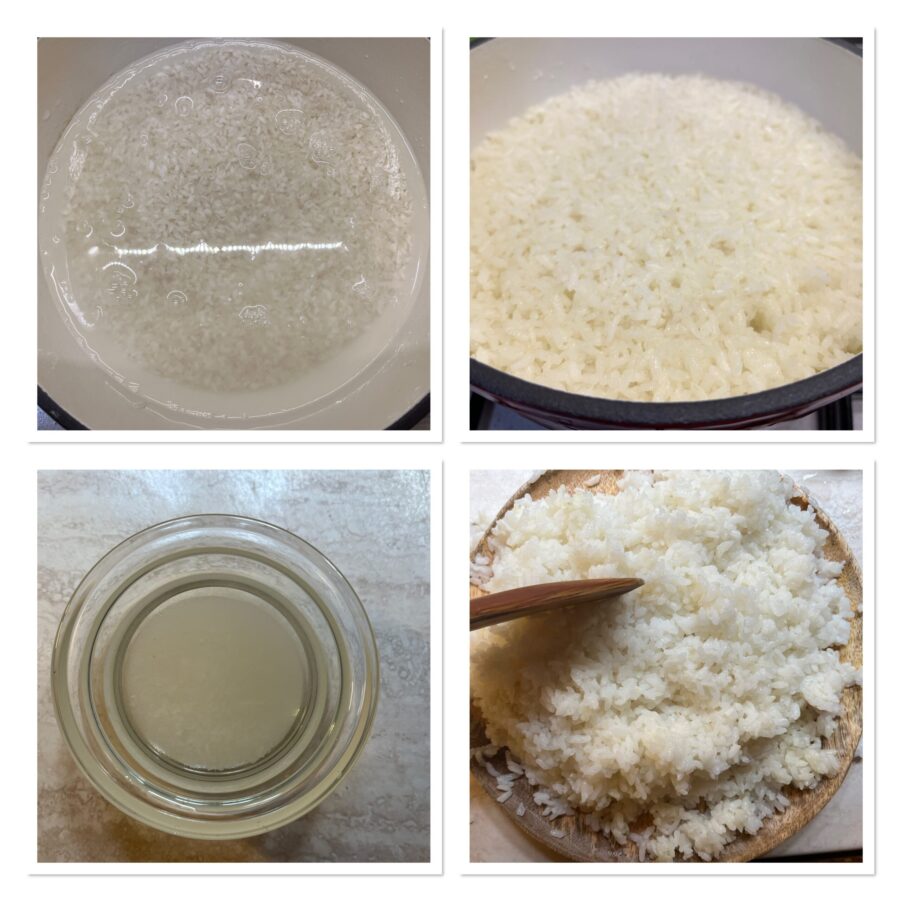
Place the lid on the pot, bring to a boil over high heat, then lower to the minimum and cook for 15 minutes, never stirring the rice and never removing the lid. After 20 minutes move the pot off the heat and let it rest still covered for 10 minutes; the rice will absorb all the steam this way (you should never open the lid during the entire procedure). Meanwhile prepare a vinaigrette by mixing rice vinegar (you can substitute apple cider vinegar), sugar and salt together.
Prepare the hangiri, the traditional wooden vessel where the rice is seasoned, by wiping it with a damp cloth or paper and move the rice into it. If you don’t have a hangiri, replace it with a wide, shallow container that is not stainless steel; I used a very large wooden plate.
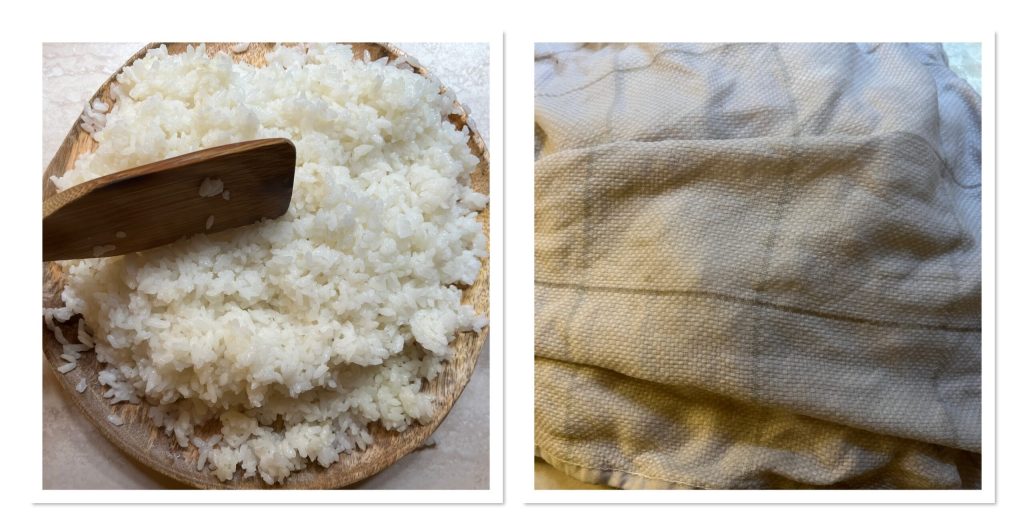
Pour the seasoning over the rice and use the traditional Japanese spatula, the shamoji, to combine everything. But don’t stir; you risk breaking the grains—rather make slicing motions with the spatula and move the rice (you will see that once the seasoning is poured the rice will lighten and become glossy and the grains will tend to separate a bit). If you don’t have a shamoji you can use a wooden paddle like mine or, at worst, a plastic spatula.
Cool the rice with a fan (Uchiwa) or with something similar.
When lukewarm, cover the rice with a damp kitchen towel, this will prevent the rice from drying out; alternatively use damp parchment paper or cheesecloth and start having fun: take a few portions of sushi at a time and keep the rest covered.
With these quantities you will get about 6–7 sushi rolls, to be cut into slices about 1 inch wide.
Some types of sushi.
– uramaki: the uramaki recipe was created in America in the 1970s and is also known as the “California roll”. Rice on the outside and a filling of nori seaweed, fish and vegetables on the inside. They are, as the name suggests, rolls turned inside out.
hosomaki: a typical roll filled with rice, raw or cooked fish or vegetables, wrapped in nori seaweed.
– futomaki: fairly large and flavorful rolls; sliced into rounds that are less thick but wider, they offer a triumph of taste and vivacity on the palate.
nigiri: small rice patties shaped by hand and topped with thinly sliced raw fish.
– temaki: served directly in the hand, as the name suggests; the temaki is large and recognizable by its cone shape overflowing with ingredients.
– onigiri: triangular rice pockets usually filled with tuna or salmon, often sprinkled with sesame seeds and finished with a strip of nori seaweed.
Storage notes and tips
You can prepare sushi rice well in advance, even up to 24 hours before you will use it, but in that case you must store it in the refrigerator in an airtight container.
Errors to avoid when preparing sushi rice:
– not washing the rice until excess starch is removed;
– stirring the rice during cooking;
– lifting the lid while it cooks;
– using wine vinegar instead of rice vinegar;
– seasoning the rice while it’s still on the heat;
From here, you can return to the HOME and discover new recipes!