Homemade kefir yogurt. You may have already heard about Kefir Grains, their nutritional properties and benefits, and their relationship with other natural fermentations such as Kombucha, Kimchi, fermented red cabbage and sourdough starter. But once you have the grains, what next? How do you make kefir yogurt? Today I’ll explain how to make kefir or kefir yogurt, but before starting you should know what we’re talking about.
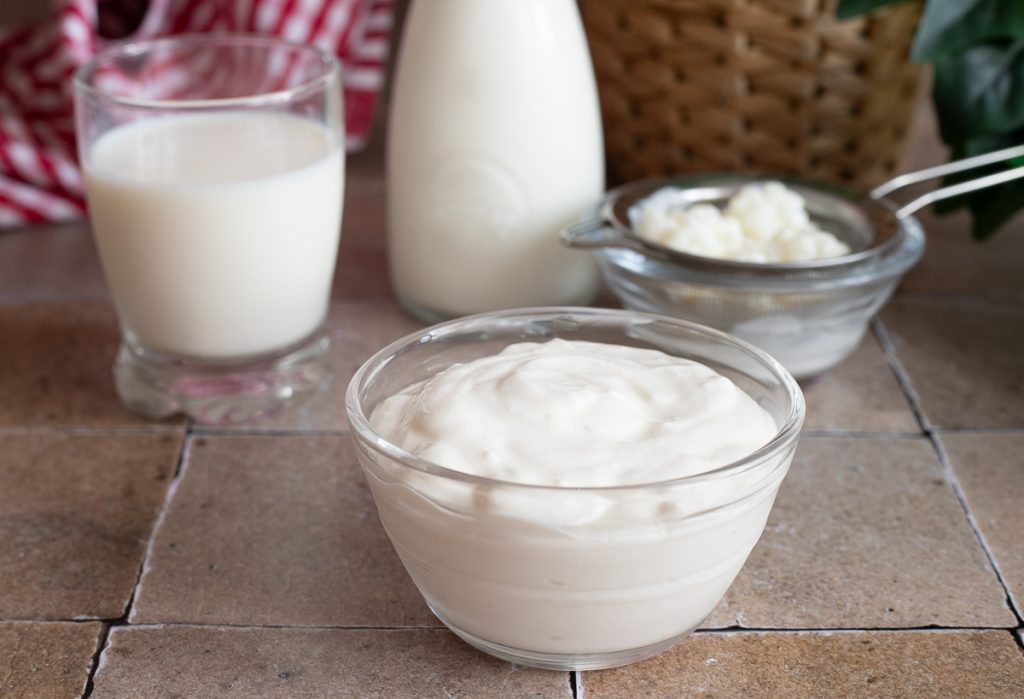
Kefir is fermented milk — a milk-based beverage with a more or less thick and creamy texture, similar to yogurt, but with a slightly tangier taste and a stronger aroma. This drink, produced from milk and kefir grains (which are colonies of bacteria and yeasts living symbiotically in a polysaccharide matrix), is very healthy, rich in lactic ferments and probiotics, vitamins and minerals. Now let’s go to the kitchen: I’ll tell you how to obtain kefir yogurt and how to give it a more or less dense and creamy texture. As always, before rolling up our sleeves, if you want to stay updated on my recipes you can follow my Facebook page and my Instagram profile.
Also see how many recipes you can make using kefir yogurt:
- Difficulty: Very easy
- Cost: Very inexpensive
- Rest time: 1 Day
- Preparation time: 5 Minutes
- Cooking methods: No-cook
- Cuisine: Italian
- Seasonality: All seasons
Ingredients
- 4 1/4 cups milk
- 2 oz milk kefir (grains)
Tools
- Bowls
- Strainer
- Cheesecloth
Preparation
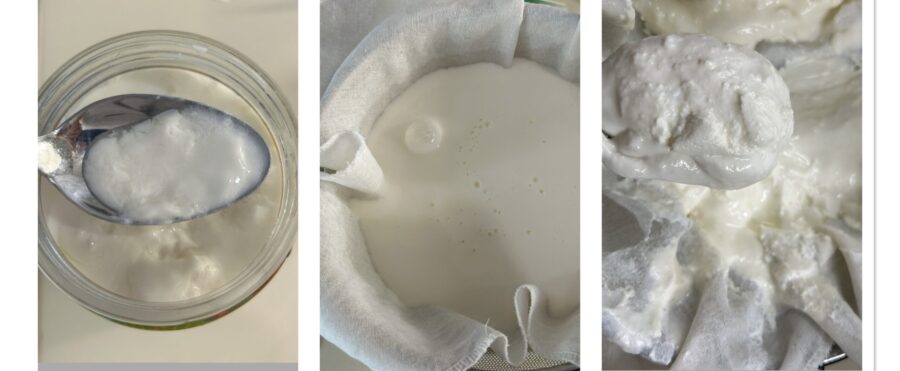
To start producing kefir milk and consequently grow the grains, you will need one or two tablespoons of kefir grains or at least 5% by weight of the milk, two glass or plastic jars, a strainer, a spoon and of course milk (pasteurized, whole microfiltered, UHT, raw; whole, semi-skimmed or skimmed; cow, goat or donkey). Depending on the milk you choose, you’ll get fermented milk with its characteristic flavor — pick your preferred variant. Collect the grains in one of the jars and add milk at room temperature.

Cover with a lid or with cheesecloth secured by an elastic band and place at room temperature, between about 64–75°F to ferment until coagulation, which occurs after roughly 24 hours. If it’s cold or there are few grains, the times will lengthen considerably; if it’s hot they will shorten. For a stronger-tasting kefir, leave it fermenting for 2 days; remember that timing varies with ambient temperature. After fermentation time has passed, strain with the strainer (better if plastic), pouring the fermented milk into another jar and repeat the cycle with the grains. The fermented and strained milk is ready to be consumed or stored in the refrigerator. I recommend sweetening it with honey for a truly exceptional taste. During refrigeration fermentation continues, though much more slowly, and after a few days in the fridge the kefir milk will taste slightly more acidic.
For a creamier kefir, strain the yogurt through folded cotton cheesecloth and you will see that depending on how much whey drains off you will obtain a more or less dense and creamy yogurt. I recommend straining the yogurt in the refrigerator; it will take a few hours for the process to complete and this way the yogurt won’t become excessively sour.
I remind you that choosing plastic and glass materials is essential for successful kefir: because it is quite acidic, contact with metals can compromise its quality.
I suggest keeping the proportions between grains and milk constant; this way you will keep the flavor of homemade kefir consistent, or at least this will happen in winter and in the cooler seasons.
The grains do not expire and, above all, time and ambient temperature greatly influence the final result: in summer it may be ready in fewer hours and may acidify more easily.
Storage notes and tips
Kefir yogurt is stored in the refrigerator, where its fermentation will continue more slowly; therefore, to avoid excessive acidification, consume it soon. You can also use kefir in your cooking preparations as a substitute for classic yogurt.
If you want to stay updated on my recipes and site news, follow me on Facebook, Instagram, Pinterest, X, TikTok and YouTube.
From here, you can return to the HOME page and discover new recipes.
From here, you can return to the HOME page and discover new recipes.