Pan di Ramerino, the original recipe for sweet rosemary bread. The typical Florentine sweet bread for Easter is a soft roll fragrant and full of raisins, with origins dating back to the Middle Ages and somewhat reminiscent of English hot cross buns. Traditionally sold by bakers on Maundy Thursday, today it is available year-round. Easter sweets are prepared in every region: in Sicily, for example, they make Cuddura ccu l’ova or the more famous cassata of ricotta, among others. In Campania the Neapolitan Pastiera rules, as in Sardinia the Pardulas, but listing all the traditional Italian Easter sweets is truly impossible. Today we will focus on the well-known Tuscan Pan di Ramerino, which I had the chance to taste a few weeks ago in Florence and wanted to recreate with you. As with all regional recipes, the Pan di Ramerino recipe is not unique and varies from town to town and family to family. I chose the recipe that was given to me by the Florentine lady who hosted me and, since I loved it so much, I share it with you today. Ready to get your hands in the dough? Let’s go to the kitchen, but as always before discovering how to make Pan di Ramerino, I remind you that if you want to stay updated on my recipes, you can follow my Facebook page and my Instagram profile.
Looking for more tasty Easter recipes? Check these out:

- Difficulty: Easy
- Cost: Very inexpensive
- Rest time: 3 Hours
- Preparation time: 1 Day 6 Hours
- Portions: 12
- Cooking methods: Oven
- Cuisine: Italian
- Seasonality: Spring, Easter
Ingredients
- 2.5 cups Manitoba flour (or strong/bread flour)
- 2.5 cups type 0 flour
- 7 tbsp extra-virgin olive oil
- 1/2 cup granulated sugar
- 1 3/4 tsp salt
- 1 sprig rosemary
- 1 1/3 cups raisins (about 7 oz)
- 1 1/4 tsp active dry yeast (or 12 g fresh)
- 1 1/2 cups warm water
Tools
- Bowl
- Oven
- Baking sheets
- Sieve
- Bench scraper
Preparing Pan di Ramerino
To make Pan di Ramerino you can knead by hand or use a stand mixer; using a mixer will make the work easier.
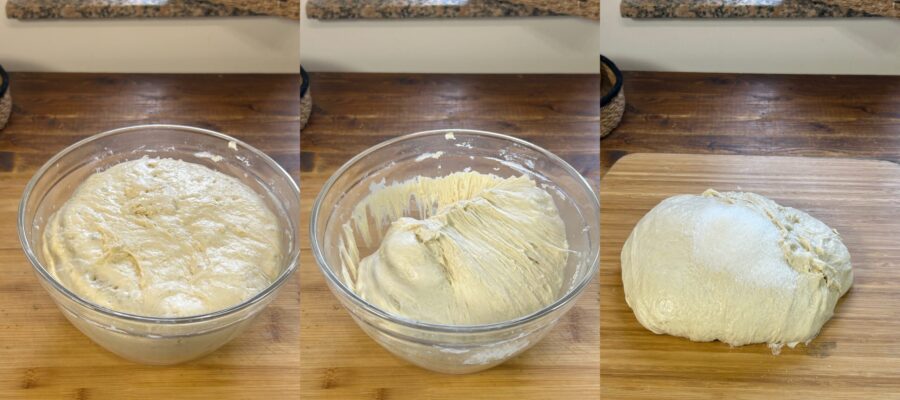
Let’s start with the basic bread dough: I kneaded by hand, but the steps would be identical if using a stand mixer. Pour both flours into a large bowl, add 2/3 of the warm water and the yeast.
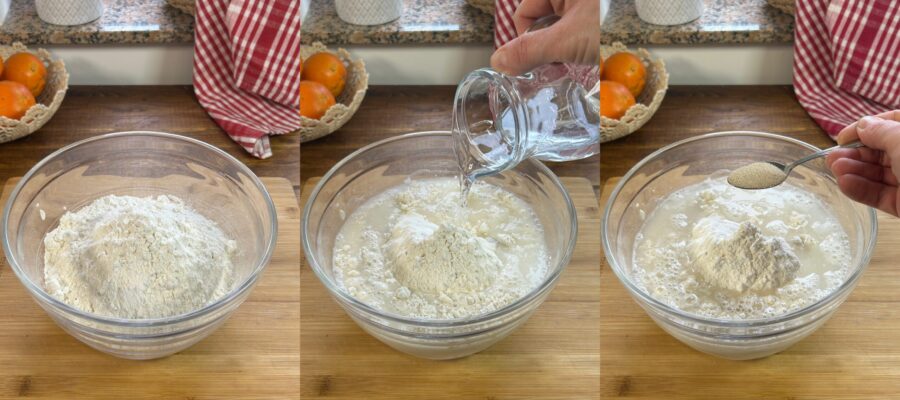
Mix to dissolve the yeast and combine with the rest of the flour, add the salt, the remaining water and mix again using a spoon.
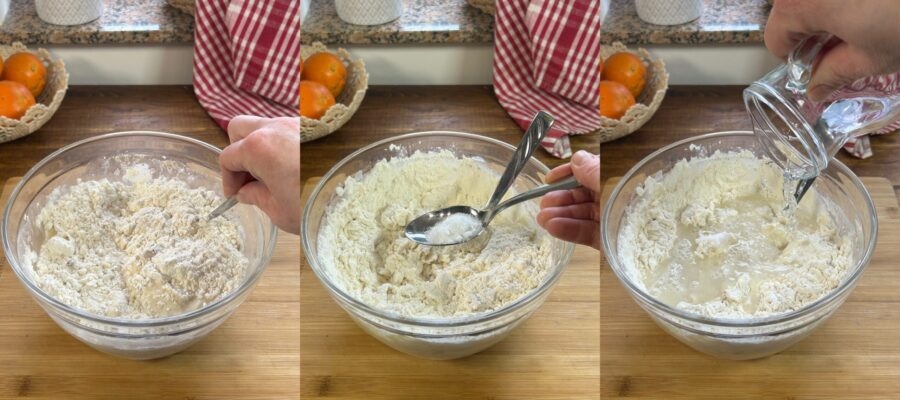
Work the dough for a few seconds and cover it with a cloth, then let it rest for 10 minutes.
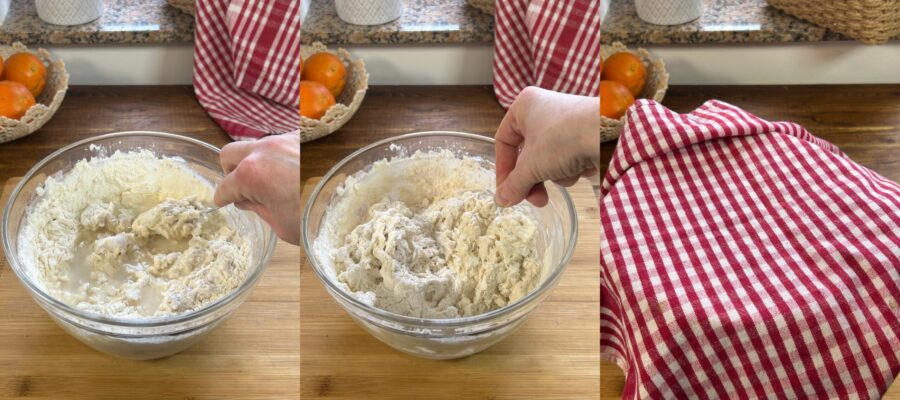
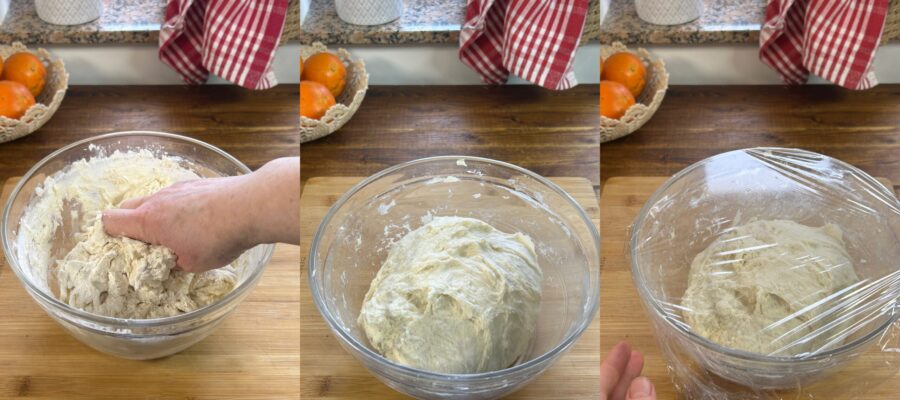
After resting, knead quickly in the bowl for a few minutes until you obtain an elastic, homogeneous dough. Cover with plastic wrap and place in a warm spot to rise until doubled. In the oven with the light on, it should take about 2 hours.
Strip the rosemary needles from the sprig, collect them in a glass container and add the oil. Heat in the microwave at 250 W for 5 minutes, or place on the stovetop for 10 minutes over very low heat. The oil should not fry, but simply absorb the rosemary aroma. After heating, let cool and strain through a sieve.
(The traditional recipe calls for finely chopping fresh rosemary needles and adding them directly to the dough; I prefer the infusion step described above to avoid the needles being unpleasant).

Once the dough has doubled, and never before, deflate it and turn it out onto the work surface without adding flour.
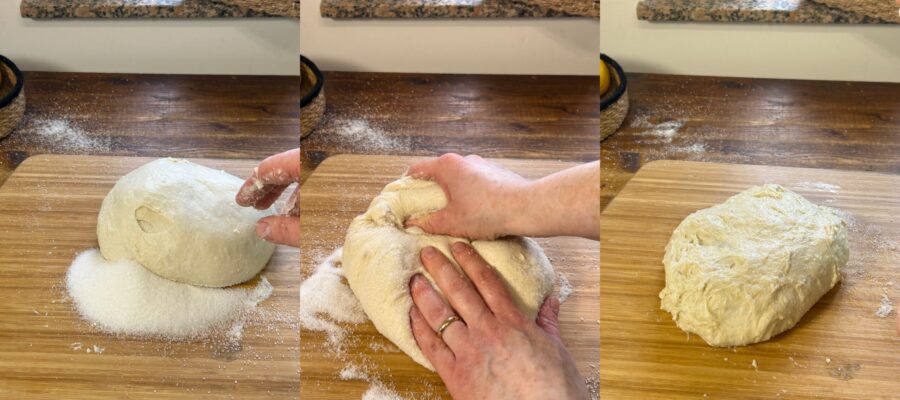
Pour the sugar on the work surface and gently incorporate it into the dough; the dough will soon appear wet and torn, as if you had added water (this happens because the sugar melts). Continue working without adding flour until you obtain a well-developed dough where you no longer feel sugar grains.
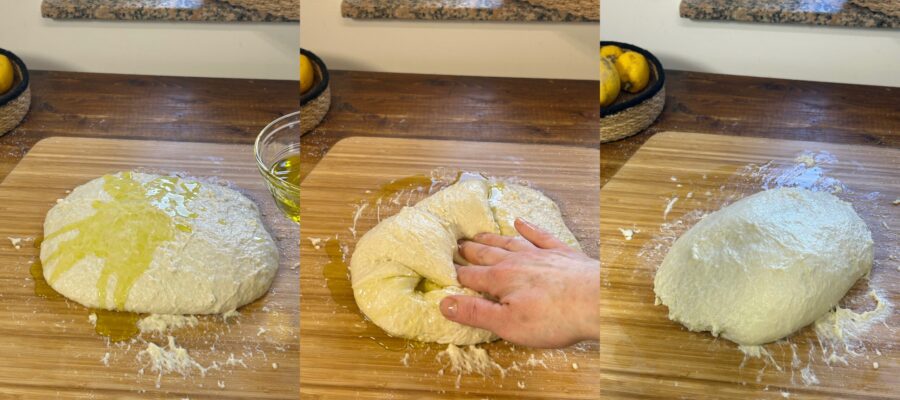
Add the flavored oil a few tablespoons at a time until fully absorbed. Proceed patiently and do not lose the dough’s structure. At this stage, using a stand mixer can make the work easier.
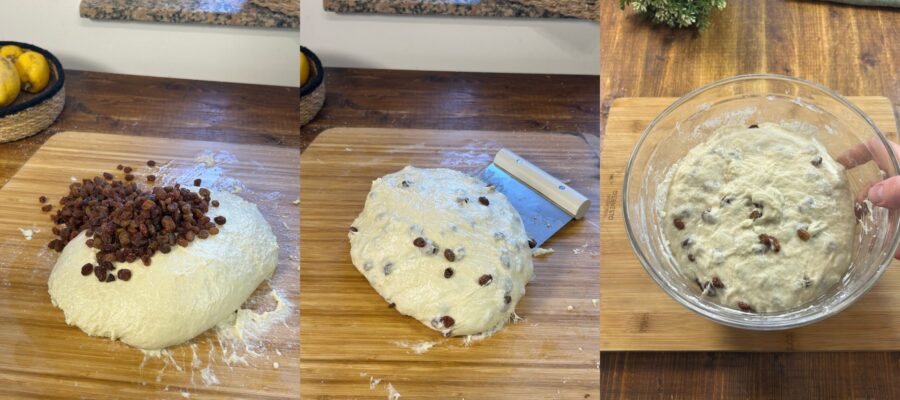
Once all the oil is absorbed and you have a dry, elastic mass, add the raisins and incorporate them (I don’t rehydrate them because I don’t like them too moist, but if you prefer you can soak them for about ten minutes before using). Shape the entire dough with a bench scraper and place it back in the bowl in a warm spot for 20 minutes.
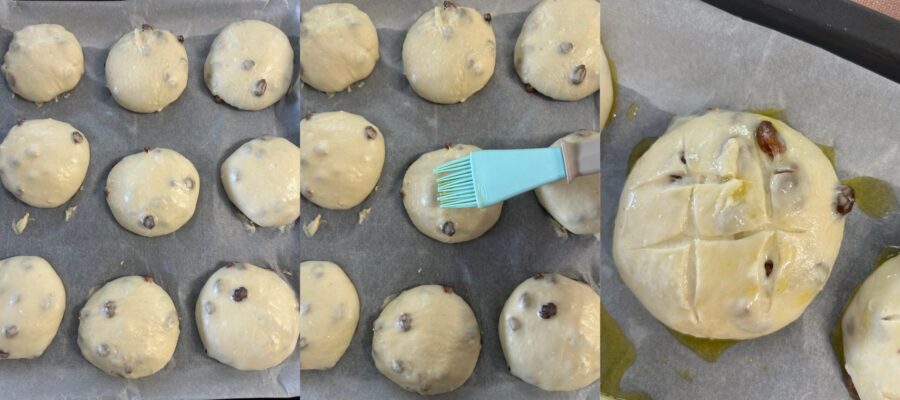
Portion the dough into 12 balls of about 100 g each, using a bench scraper to shape them into the classic rounded form. Let rest for 10 minutes and repeat the shaping. Place the balls on a baking sheet lined with parchment paper and let rise in a warm spot for another hour.

Brush the rolls with olive oil, make two horizontal and two vertical cuts to form a lattice resembling a cross, and bake in a hot oven at 392°F (200°C), static mode, for about 20 minutes.
When the rolls are golden, remove from the oven and let cool slightly before enjoying.
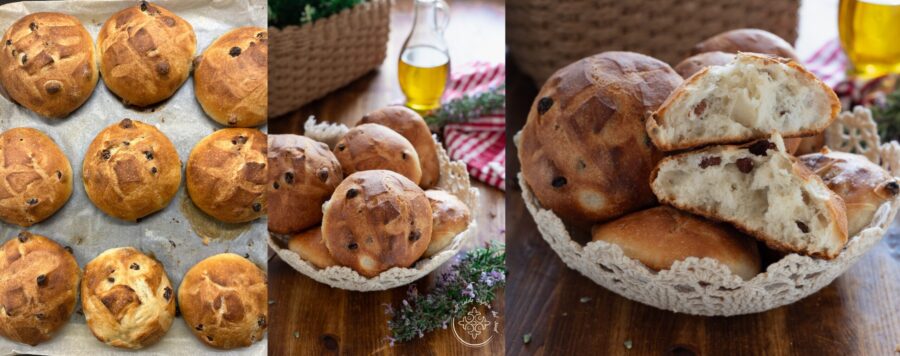
Traditionally, Pan di Ramerino is brushed with olive oil—sometimes several times, even during baking; I omitted that step. Recently, to give the bread a shiny color, it has become common to brush it before baking with beaten egg, but I prefer the traditional olive oil version.
Storage, notes and tips.
Store Pan di Ramerino for up to two days under a glass dome; the more time passes, the firmer it will become.
I do not recommend freezing the bread, as it would be damaged.
If you want to stay updated on my recipes, follow me also on:
pinterest; twitter; you tube; tiktok.
From here, you can return to the HOME and discover new recipes!