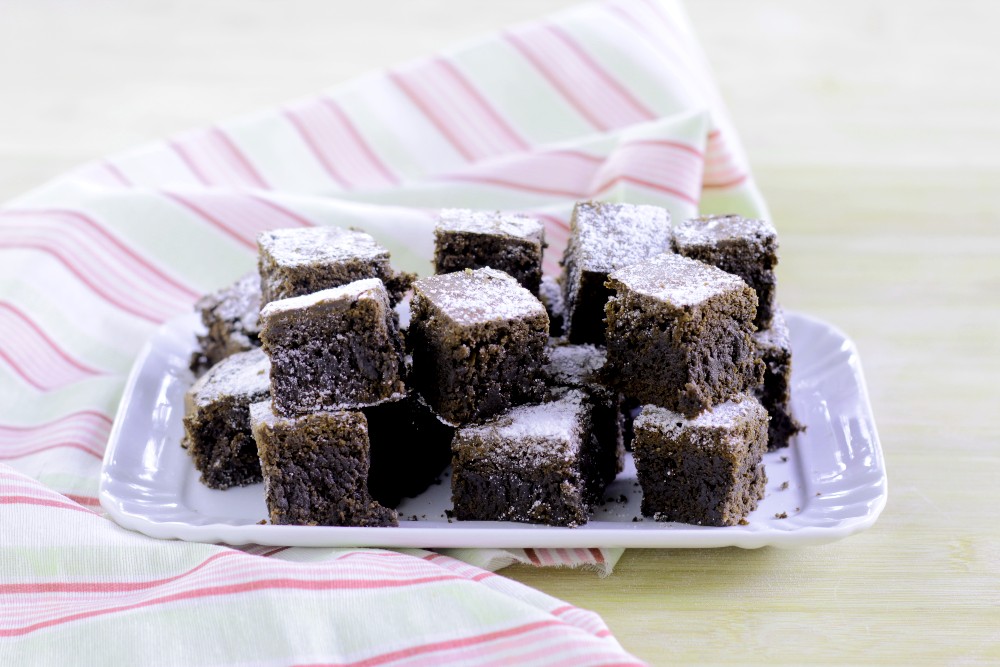
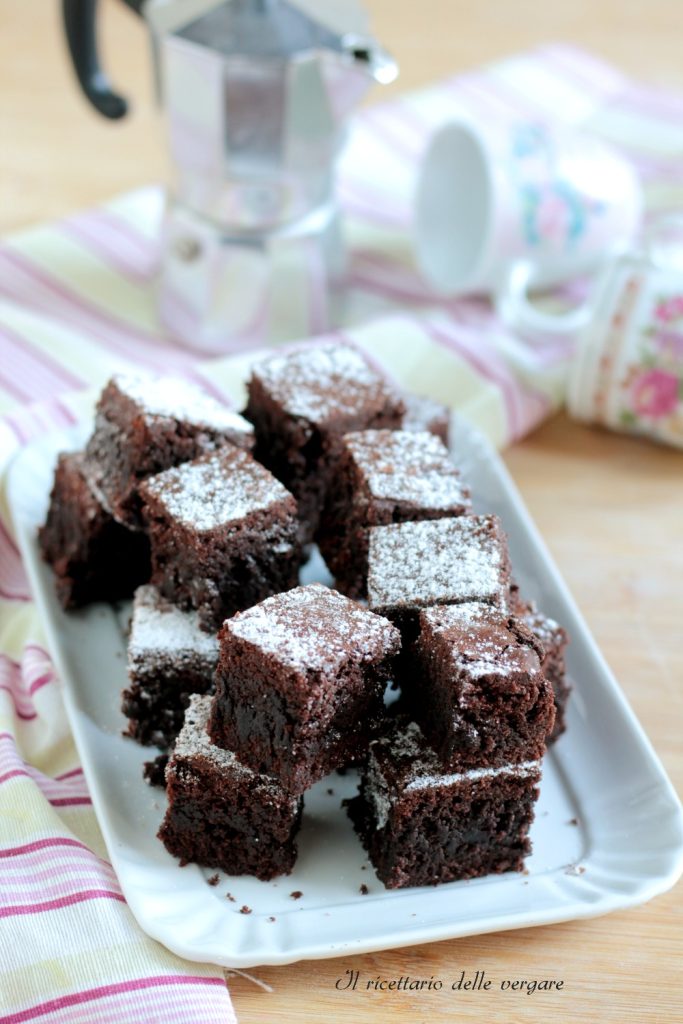
If you’re looking for the ultimate dessert for true cocoa lovers, this Dark Chocolate Brownie Cake is the answer. In this version I chose to use a 8 in round pan: the result is a low, elegant and incredibly intense cake that marries the typical indulgence of the American brownie with the refinement of a dessert to finish a meal.
The secret of success lies entirely in its almost truffle-like texture. Thanks to the use of very little flour and a generous amount of quality chocolate, you’ll get a moist interior that melts in the mouth, protected by that thin glossy shell that slightly cracks when you slice it.
OTHER RECIPES TO TRY
- Difficulty: Very easy
- Cost: Budget-friendly
- Preparation time: 10 Minutes
- Portions: for an 8 in cake pan
- Cooking methods: Oven
- Cuisine: Italian
- Seasonality: All seasons
- Energy 304.95 (Kcal)
- Carbohydrates 26.07 (g) of which sugars 15.56 (g)
- Proteins 5.23 (g)
- Fat 20.87 (g) of which saturated 13.01 (g)of which unsaturated 7.41 (g)
- Fibers 3.72 (g)
- Sodium 65.75 (mg)
Indicative values for a portion of 59 g processed in an automated way starting from the nutritional information available on the CREA* and FoodData Central** databases. It is not food and / or nutritional advice.
* CREATES Food and Nutrition Research Center: https://www.crea.gov.it/alimenti-e-nutrizione https://www.alimentinutrizione.it ** U.S. Department of Agriculture, Agricultural Research Service. FoodData Central, 2019. https://fdc.nal.usda.gov
Ingredients for Dark Chocolate Brownies
- 5.6 oz dark chocolate
- 1/2 cup butter
- 2/3 cup granulated sugar
- 2 eggs (medium, about 110 g total)
- 1/2 cup all-purpose flour
- 3 tbsp unsweetened cocoa powder
- 1 pinch salt
Tools for Dark Chocolate Brownies
- Cake pan
- Parchment paper
- Scale
- Small saucepan
Steps for Dark Chocolate Brownies
Making these Dark Chocolate Brownies is very simple and requires very few tools, but the final result tastes like a high-patisserie creation.
Melting the chocolate and butter
Start by roughly chopping the 5.6 oz of dark chocolate with a knife. Place it in a heatproof bowl together with 1/2 cup of butter cut into cubes. Melt everything in a double boiler (place the bowl over a saucepan with simmering water, making sure the bottom of the bowl does not touch the water) or in the microwave at medium power, heating in 30-second bursts and stirring each time.When you have a smooth, glossy, lump-free cream, set it aside and let it cool slightly. This step is crucial: if the chocolate is too hot, it will cook the eggs in the next step.
The base of the dessert
In a large bowl, break the 2 eggs and add 2/3 cup of sugar. Use a whisk and mix energetically for a couple of minutes. There’s no need to whisk the mixture as for sponge cake; the goal is simply to combine the two ingredients until the sugar begins to dissolve and the mixture looks slightly paler.Combining the mixtures
Pour the chocolate-and-butter mixture (now warm) into the bowl with the eggs and sugar. Gently mix with a hand whisk or a spatula, starting from the center and working toward the edges, until you have a single, dark, homogeneous batter. You’ll already smell the delicious chocolate!Adding the dry ingredients
Now it’s time to add texture. Place a fine sieve over the bowl and add 1/2 cup of flour, 3 tbsp of unsweetened cocoa powder and a pinch of salt. Sifting is a step I recommend you don’t skip: cocoa often forms small lumps that would ruin the texture of the cake.With a spatula, fold the dry ingredients in with slow upward motions. One important tip: stop as soon as you no longer see white streaks of flour. Overworking the batter at this stage would make the brownie chewy.
Baking and the toothpick trick
Take your 8 in round pan (you can also use a small rectangular or square pan), butter it lightly or line it with parchment paper (you can wet and wring the paper well to make it stick perfectly to curved edges). Pour the batter, level it with the back of a spoon and bake in a preheated conventional oven at 347°F.
Bake for about 22-25 minutes.Around 20 minutes, perform the “toothpick test”: insert it into the center of the cake. If it comes out with moist crumbs attached, the brownie is ready! If it comes out completely liquid, leave it for another 3 minutes. If it comes out dry, take it out immediately: it’s already a bit overbaked.
Final resting
Once out of the oven, resist the temptation to taste it right away! Let the cake cool completely in the pan. This will allow the fats in the chocolate and butter to stabilize, creating that dense and rich structure we love so much. Once cold, remove it from the pan and cut into slices or squares ready to serve.For a perfect cut, warm the knife blade slightly under hot water and dry it before each cut!
My tips for a perfect result:
Shape: The 8 in round pan allows you to obtain perfect wedges, ideal to serve with a dollop of whipped cream or a scoop of ice cream.
Baking: This is the crucial step. Do not exceed 22-25 minutes: the toothpick should come out with a few moist crumbs attached. That moisture is what makes the cake irresistible!
Resting: Let it cool well before unmolding. The chocolate needs time to stabilize and give you that unique melt-in-the-mouth texture.
FAQ (Questions and Answers)
Can I decorate the Brownie cake?
Contrast with red berries: Arrange a crown of fresh raspberries or strawberries around the edge of the cake. The bright red creates a wonderful color contrast with the dark brown of the chocolate, and the fruit’s acidity cleanses the palate from the brownie sweetness.
Crunch and texture: If you like textural contrasts, sprinkle a handful of toasted hazelnut praline or pistachios on top of the cake. You can fix them with a drizzle of leftover melted chocolate.
Minimal powdered sugar: If you prefer simplicity, use a stencil (or a paper doily) to create a pattern with powdered sugar. On such a dark base, a lace or geometric effect really stands out.
Indulgent dollops: When serving, accompany each slice with a small dollop of lightly sweetened whipped cream or a scoop of vanilla ice cream. The residual warmth of the slice (if you warm it slightly) will melt the ice cream creating a delicious cream.
