Homemade Checkerboard Cookies: The Perfect Recipe for Two-Tone Cookies
The checkerboard cookies are one of those classic homemade pastry recipes that offer great satisfaction. Although they are not a “quick and easy” preparation, the final result is incredibly spectacular and the taste reminds you of the famous industrial two-tone cookies, but with the genuineness of ingredients you choose yourself. Half vanilla and half cocoa, they are irresistibly tasty!
Why Prepare Checkerboard Cookies?
Making these cookies is a fun and relaxing way to spend time in the kitchen, combining the useful with the enjoyable. This recipe is indeed a real “must” precisely for its wow effect! They are extremely spectacular and therefore perfect to impress friends and family during special occasions and celebrations or as a culinary gift. Moreover, they are super versatile: perfect to dip in milk in the morning, or as a delicious snack in the afternoon with tea or hot chocolate.
The Importance of Step-by-Step Photos
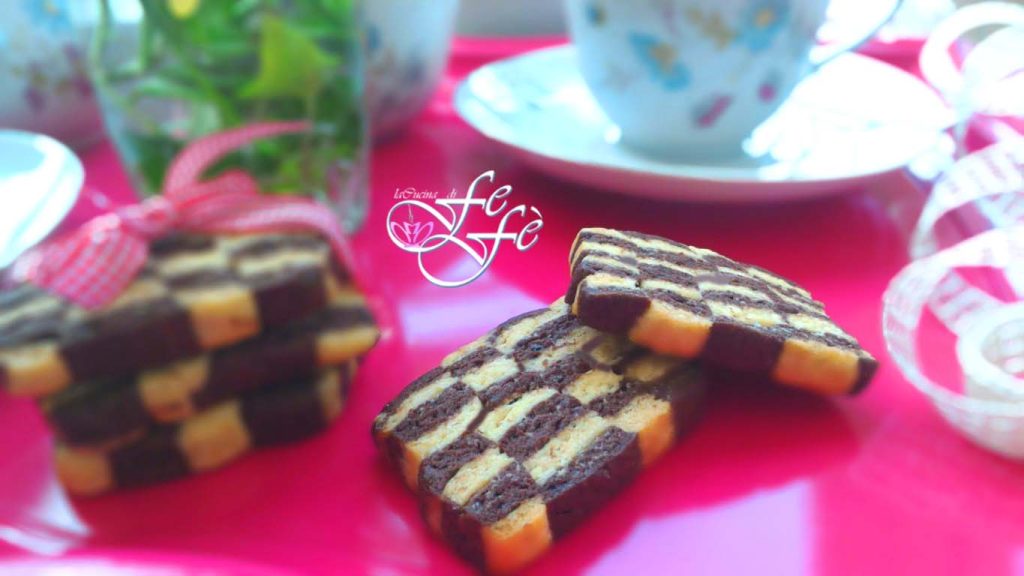
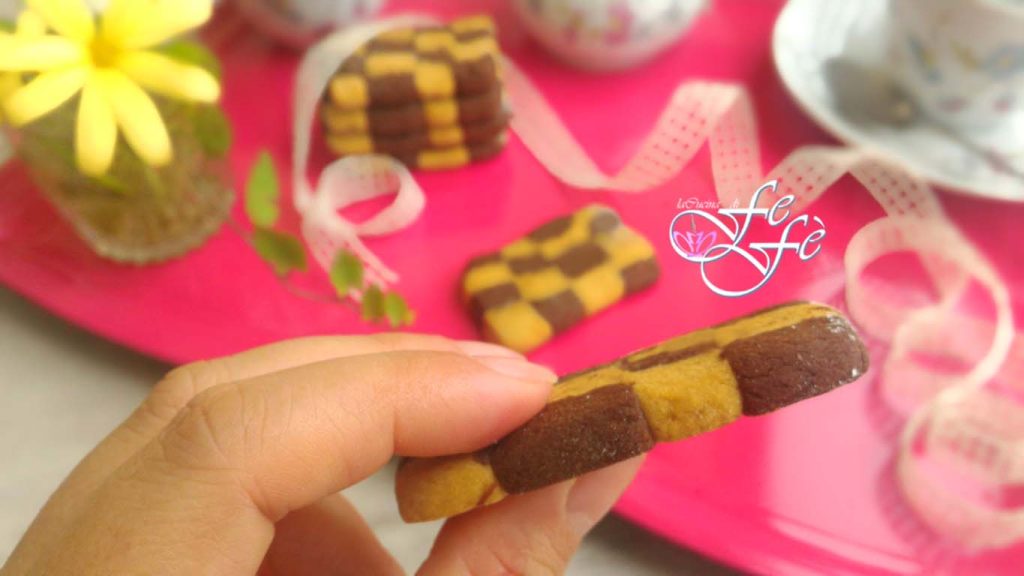
Due to the particularity of the procedure, photographing each step is essential to understand how to compose the vanilla and cocoa shortcrust dough rectangles. Therefore, in the recipe, I provide you all the photographic steps to avoid mistakes in the layering and to achieve a perfect geometry. Rolling out the dough more or less wide, you can unleash your creativity, creating even denser checkerboard patterns and playing with the final visual effect.
If you love creating super tasty and spectacular cookies, try these recipes too:

- Difficulty: Difficult
- Cost: Very Economical
- Rest time: 45 Minutes
- Preparation time: 1 Hour
- Portions: 25 Pieces
- Cooking methods: Electric Oven
- Cuisine: Italian
- Seasonality: All Seasons
Ingredients
- 1 3/8 cups all-purpose flour
- 1/4 cup sugar
- 1 egg
- 1/3 cup butter
- 2 teaspoons vanilla extract
- 1 pinch salt
- 1 1/4 cups all-purpose flour
- 1/4 cup unsweetened cocoa powder
- 1/3 cup sugar
- 1 egg
- 1/3 cup butter
- 1 pinch salt
Tools
- 2 Mixing Bowls
- 1 Knife
- 2 Cling Film
- 1 Rolling Pin
- 1 Baking Sheet
- 1 Parchment Paper
Preparation
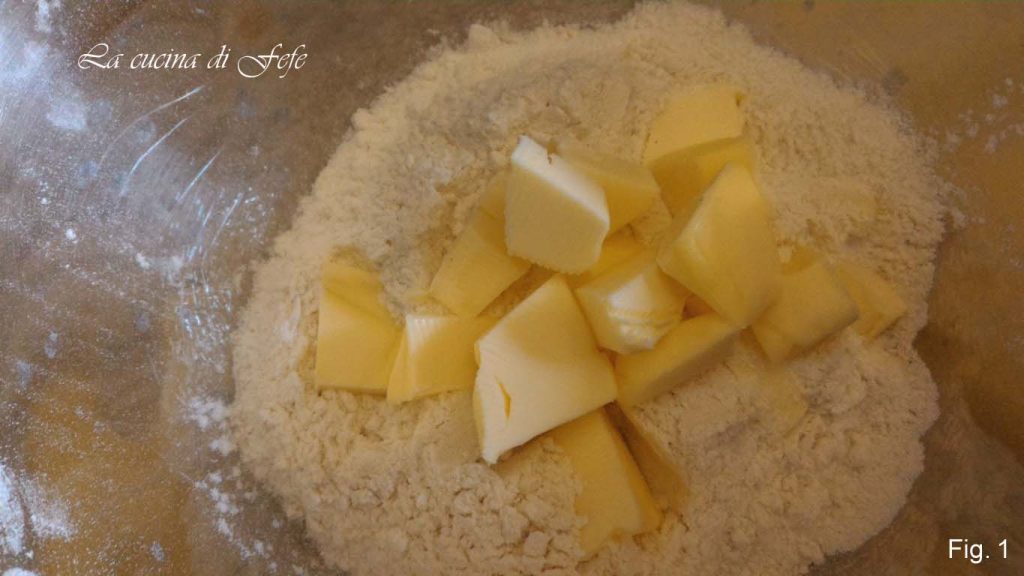
Start by preparing the vanilla dough. In a large bowl, work the flour with the cold butter cut into cubes.
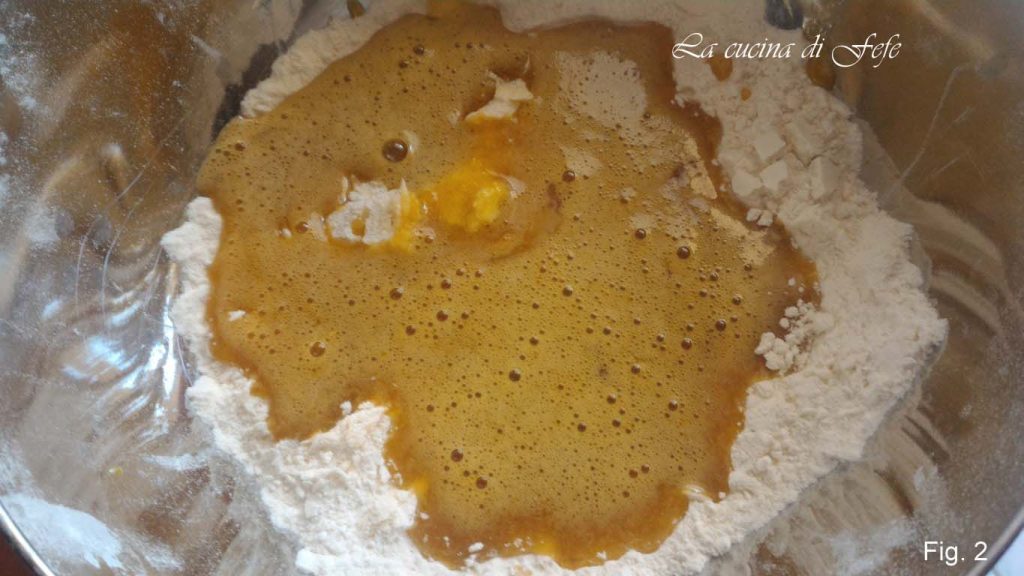
Once you have a sandy mixture, incorporate the egg previously beaten with sugar, a pinch of salt, and the vanilla extract.
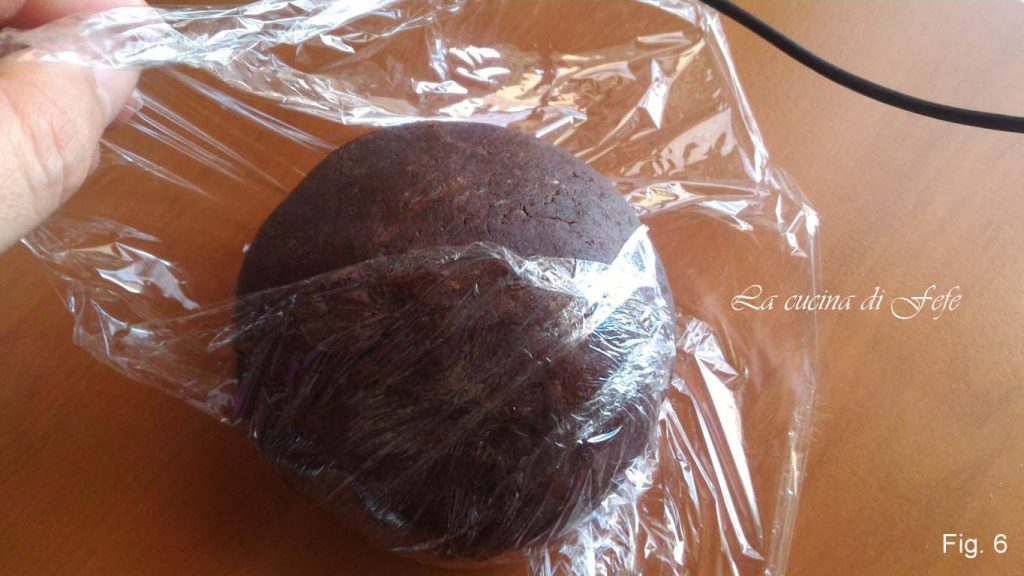
Knead on a lightly floured work surface until you get a smooth and homogeneous ball. Cover with cling film and let rest for 30′ in the fridge.

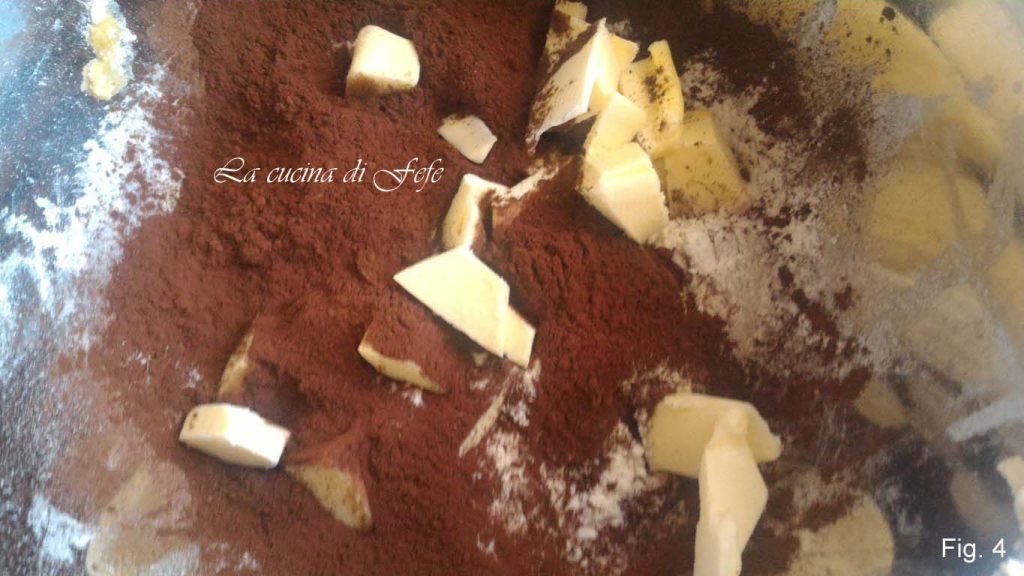
Proceed to prepare the cocoa dough: in another bowl, sift the cocoa and mix it with the flour. Then add the cold butter in cubes.
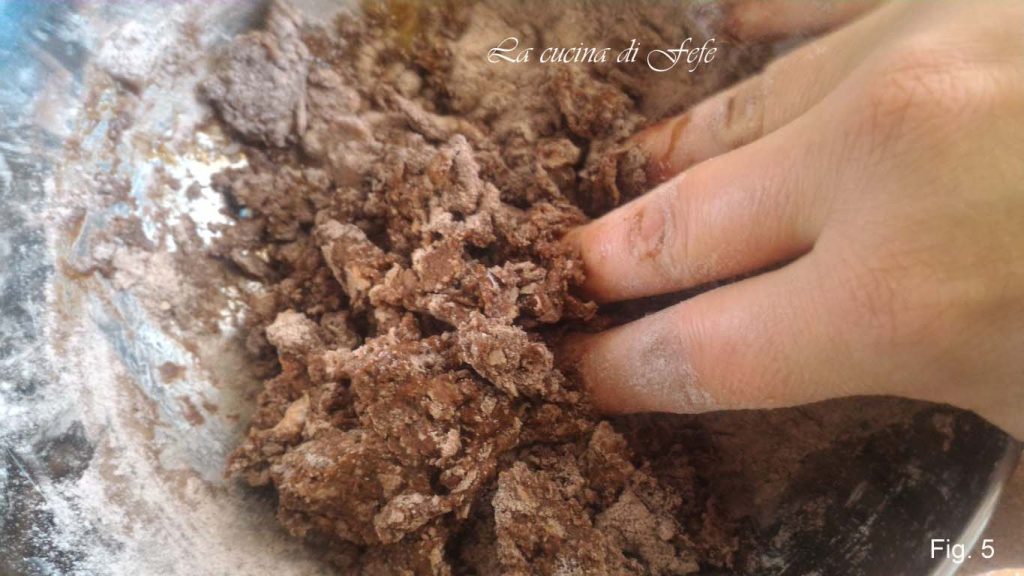
Work with your hands until you get a sandy mixture.
Then add the egg beaten with sugar and a pinch of salt. Transfer to a lightly floured work surface until you get a smooth ball that you will cover with cling film and refrigerate for 30′.
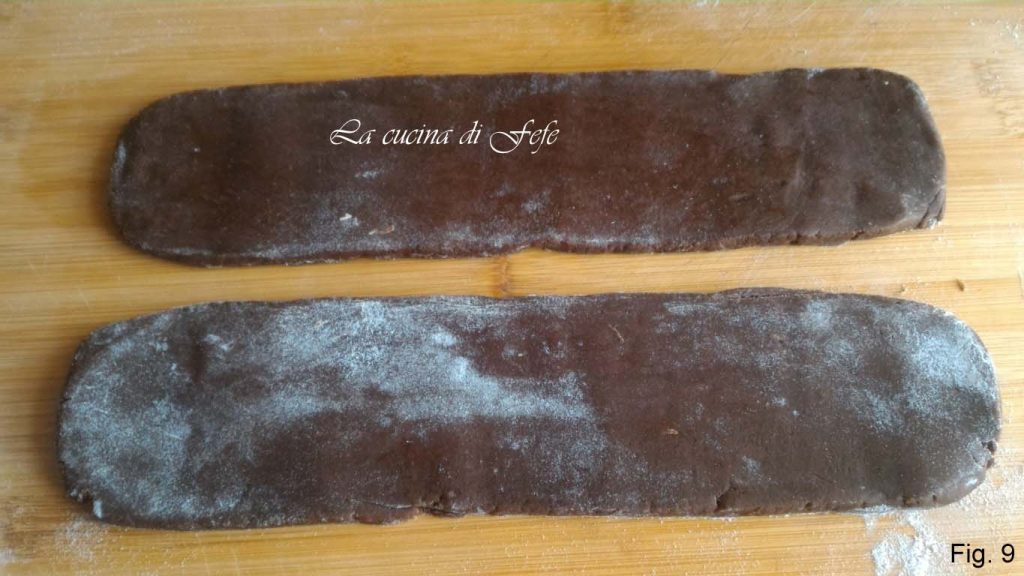
After the resting time, divide the vanilla dough into two equal parts.

Roll out with a rolling pin to obtain two rectangles of the same size, approximately 2 1/2 inches wide and 12 inches long and with a thickness of just under 3/8 inch.
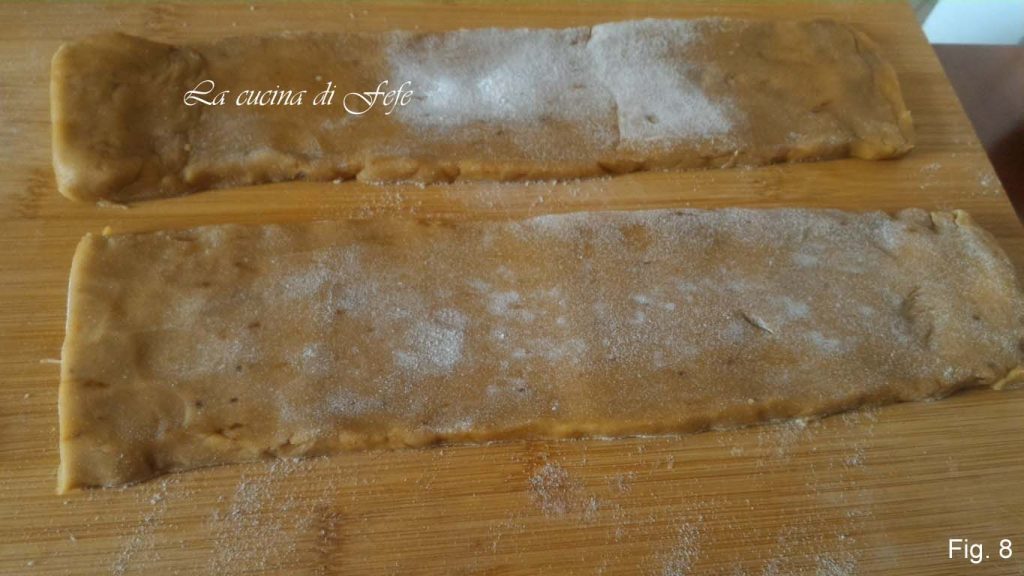
Do the same with the cocoa dough.
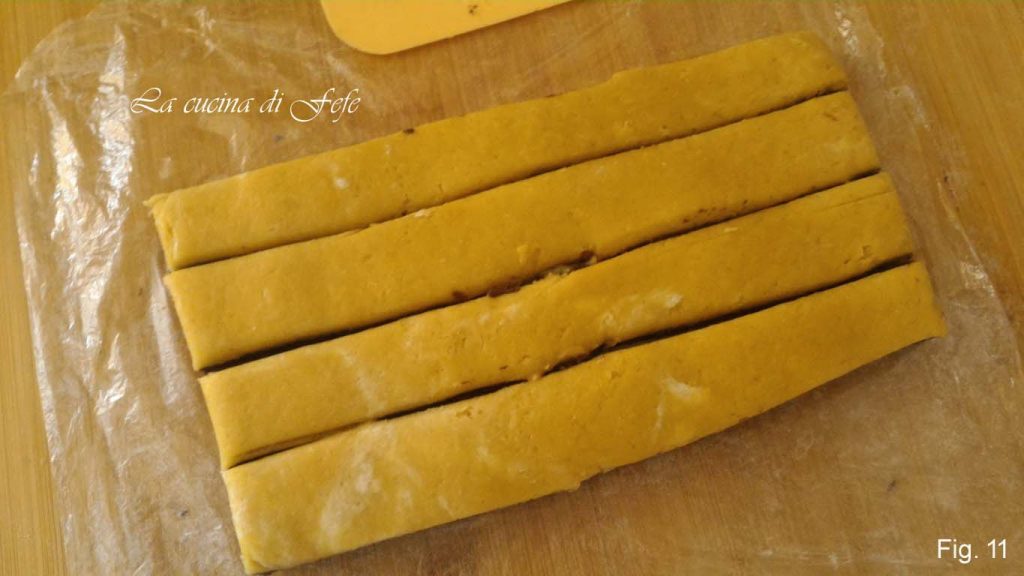
Overlay the four doughs, alternating them. Then, with a knife, trim all 4 sides of the rectangle. You can use the leftover dough to make more cookies.
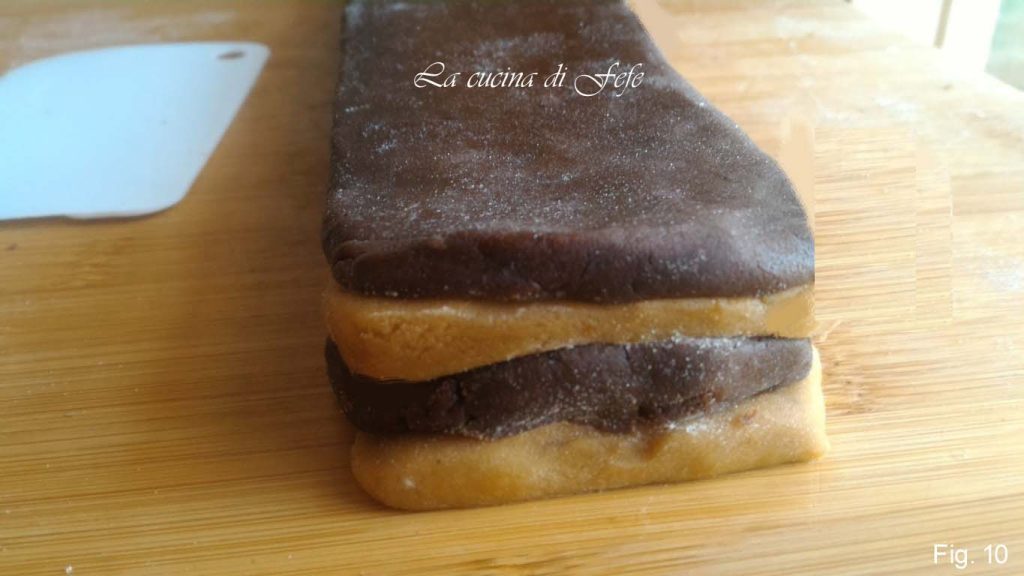
Place in the fridge for 15′ covered with cling film, then cut the dough into 4 strips from the longer side.
Flip the first and third strip so that the colors alternate.
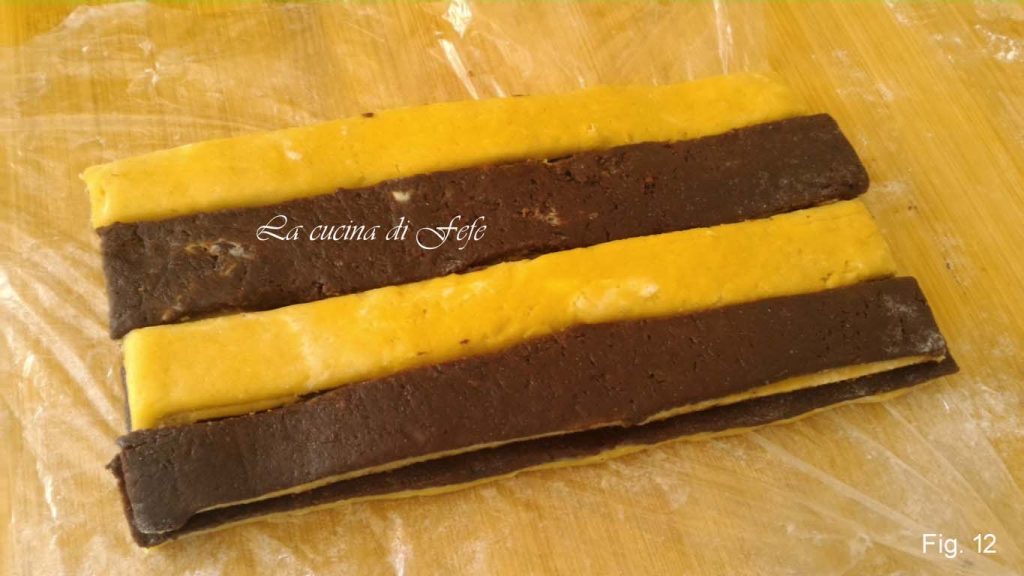
Compact it so that all the strips are well attached, brushing them with a little milk if necessary. Place in the fridge for 30′ (or 15 minutes in the freezer) to get clean cuts that do not smear the colors, then cut the cookies into checkerboards with a thickness of about 1/4 inch.

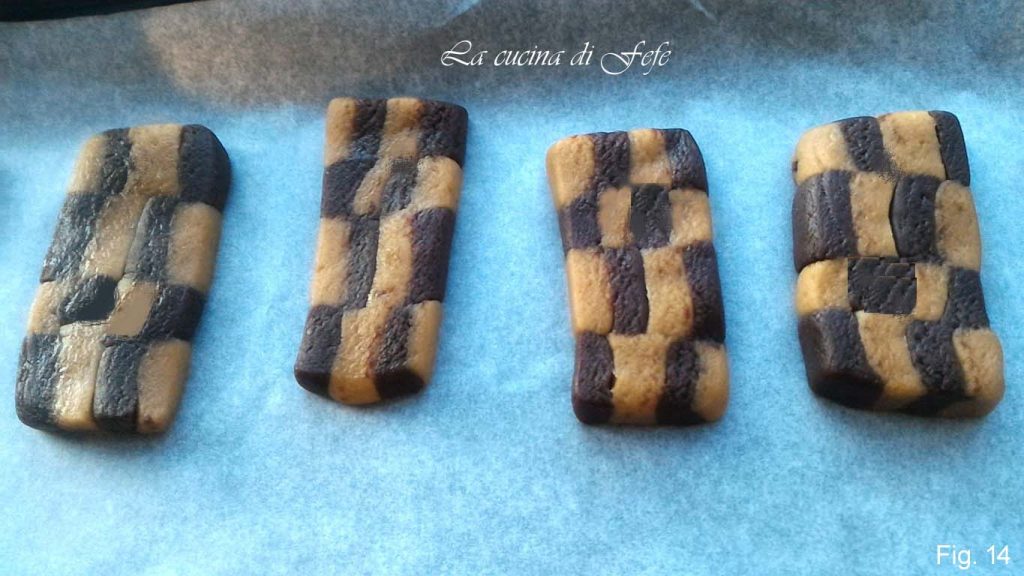
Place the cookies on a baking sheet lined with parchment paper well spaced apart.
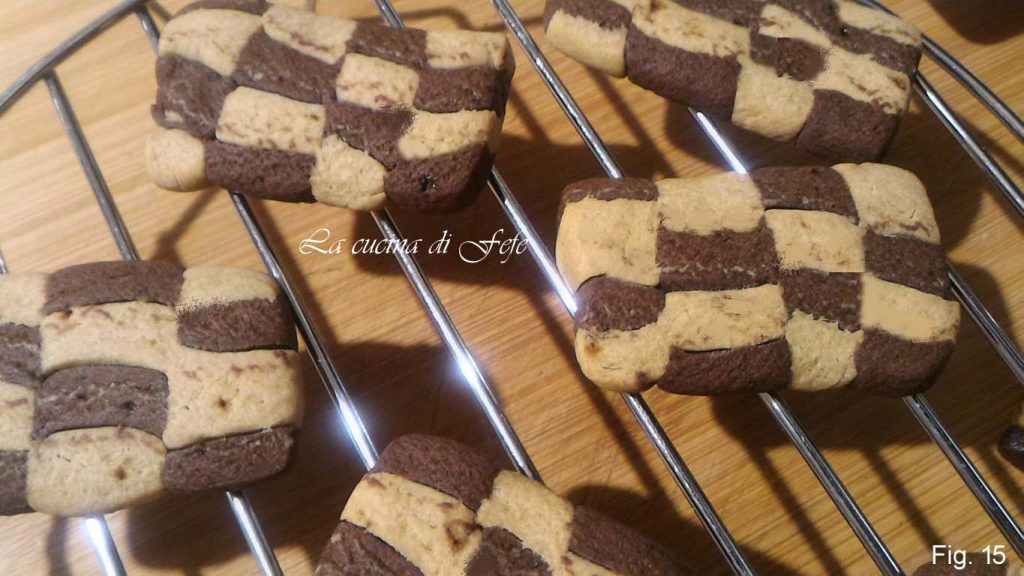
Bake in a preheated static ventilated oven at 356°F for 12′-13′. Let them cool on a wire rack before serving.
If you like, you can dust them with powdered sugar, but it’s optional.
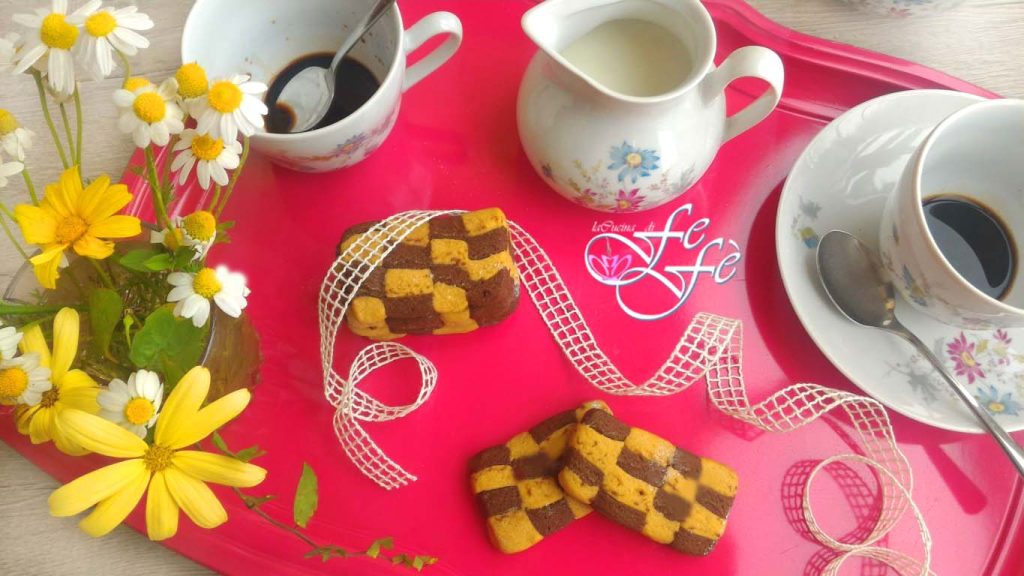
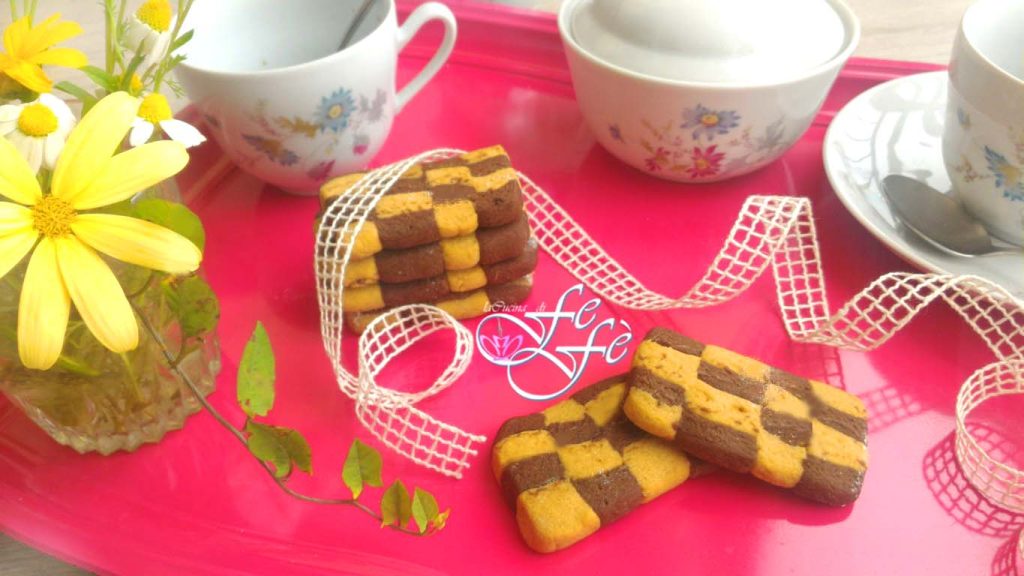
And voilà…the two-tone checkerboard cookies are ready to be enjoyed!
Version with a denser texture, rolling out the dough about 4 inches wide and 10 5/8 inches long, cutting 6 alternating strips, following the same procedure as in the recipe.
Enjoy your meal from La Cucina di FeFè!
Storage
You can store the two-tone checkerboard cookies at room temperature tightly closed inside tin or airtight containers for 1-2 weeks.
Tips, Notes, Variations, and Suggestions
🟣If you love creative challenges, try using an extra-dark cocoa for an even sharper color contrast or add a pinch of cinnamon to the neutral part instead of vanilla for a spicy aroma typical of modern gourmet cookies.
Can I double the doses?
Absolutely recommended! These cookies literally disappear. You can prepare a large amount of dough and freeze the formed logs, ready to slice and bake as needed.