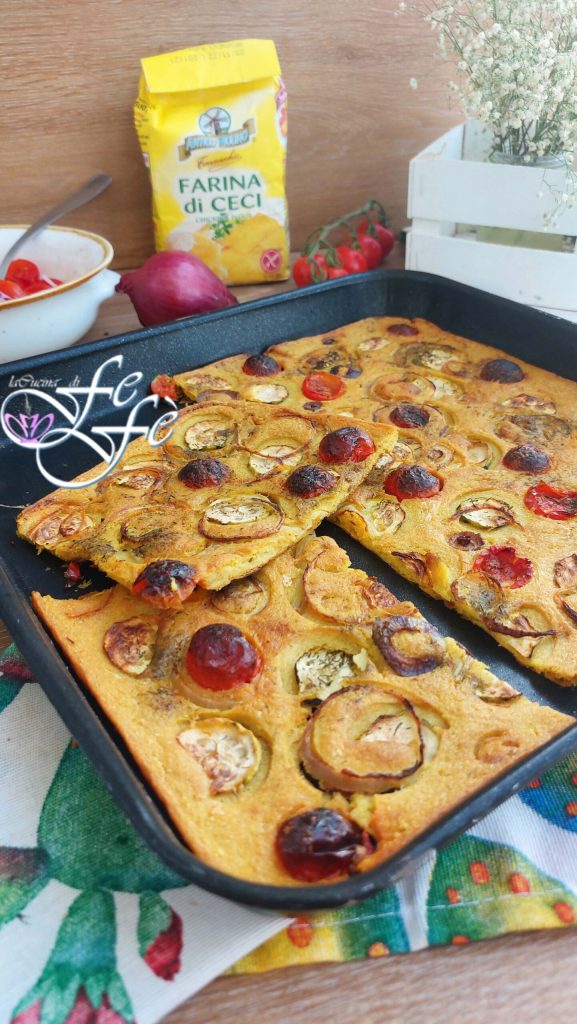
Everyone knows the farinata, the typical Italian dish from the Ligurian and Tuscan traditions, a kind of savory pie made from chickpea flour mixed with water, and then baked in the oven or pan until solid. Well, the recipe I want to reveal and share with you today is a farinata that believes itself to be crispy! An alternative I experimented with by mixing chickpea flour with oat flour, which in my opinion is really tasty and even crunchier! Drawing inspiration from the now-famous crispy treat by Diletta Secco, I combined the best of two recipes, creating one rich in fiber, vitamins, and minerals. Very easy to make, it will be a perfect dinner saver and fridge cleaner, adding inside all the vegetables you have left over or that your imagination and flair suggest to you. I made a version with zucchini, Tropea red onion, and cherry tomatoes. An incredible delight! Plus, it’s a vegan and lactose-free recipe, which doesn’t hurt, right? The secret to an excellent result is the mold, which must be non-stick, shallow, and of the right diameter! Also, the use of a fan oven minutes before taking it out is important! The rest is a piece of cake! You can propose it still hot and crispy cut into squares for an aperitif, as a snack at the start of an informal dinner, or served as a rustic unique dish in a healthy and light brunch. In short, every occasion will be right to impress your guests and enjoy a delicious and truly irresistible dish!
CURIOSITY: Did you know that chickpea flour in particular, is rich in B vitamins, vitamin A, vitamin E, Potassium, Calcium, and Phosphorus? Whereas oat flour helps to decrease LDL bad cholesterol levels? Its ability to stimulate the liver to produce lecithin and thus purify the body is also excellent. It improves intestinal regularity thanks to fiber and reduces blood sugar levels thanks to soluble fiber.
If you also love tray preparations to be divided into squares and served as finger food or informal snacks, try these recipes as well:
- Difficulty: Very easy
- Cost: Economical
- Rest time: 20 Minutes
- Preparation time: 15 Minutes
- Cooking methods: Oven
- Cuisine: Italian
- Seasonality: Spring, Summer, All seasons
Ingredients
⚠ THIS RECIPE CONTAINS ONE OR MORE AFFILIATE LINKS. The products I recommend are the same ones I use in my recipes; buying them through my blog helps to support me and my work, while it won’t cost you anything extra!
- 3/4 cup chickpea flour
- 1/2 cup oat flour
- 1 1/3 cups water (at room temperature)
- 3 oz cherry tomatoes (approx. 10)
- 1/2 zucchini
- 1/2 Tropea red onion
- 1 tbsp chives (or dried oregano)
- 1/2 tsp ground turmeric
- 1 pinch ground yellow mustard
- 1 pinch sweet paprika
- 2 tbsp extra virgin olive oil (+ 3 tbsps)
- 1 tsp salt (level)
Tools
- 1 Non-stick baking pan
- 1 Cutting board
- 1 Knife
- 1 Bowl
- 1 Mixing bowl
- 1 Hand whisk
- 1 Sieve
Steps
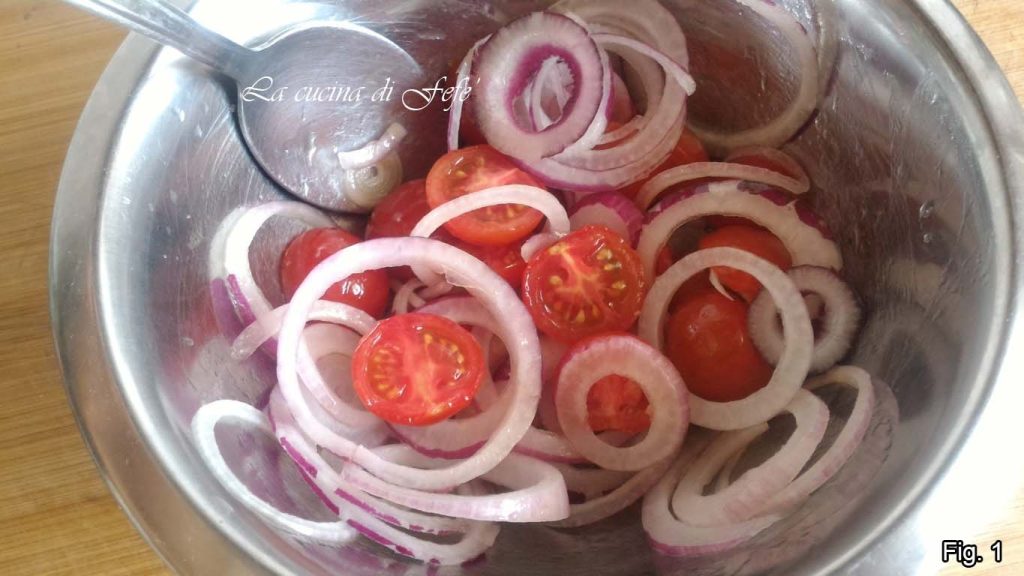
Wash and cut the cherry tomatoes in half, peel the half onion and slice it not too thick, then transfer everything to a mixing bowl, season with a pinch of salt and 2-3 tablespoons of oil and mix.
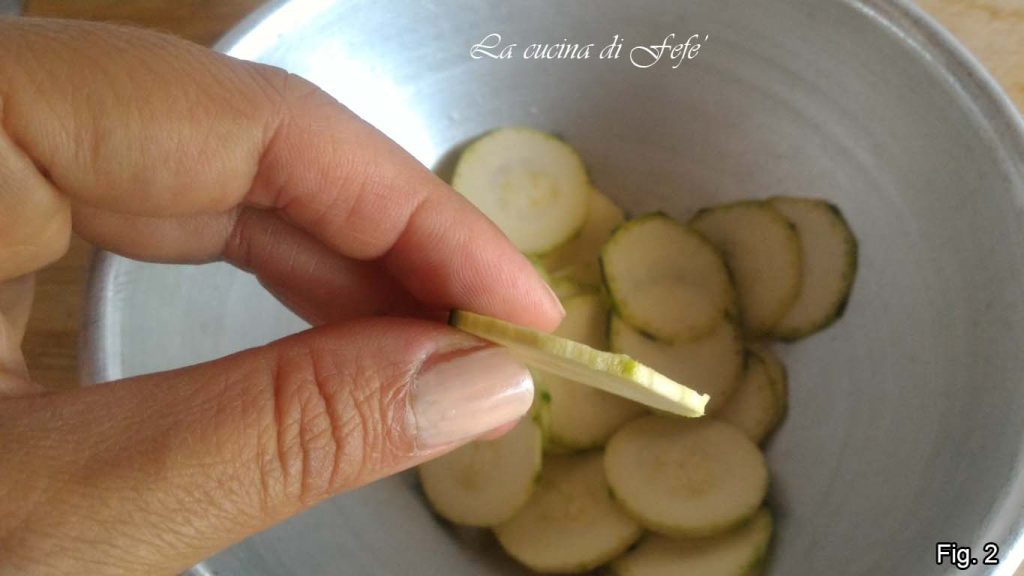
Wash and trim the zucchini, then slice them not too thick and set aside, salting them lightly.
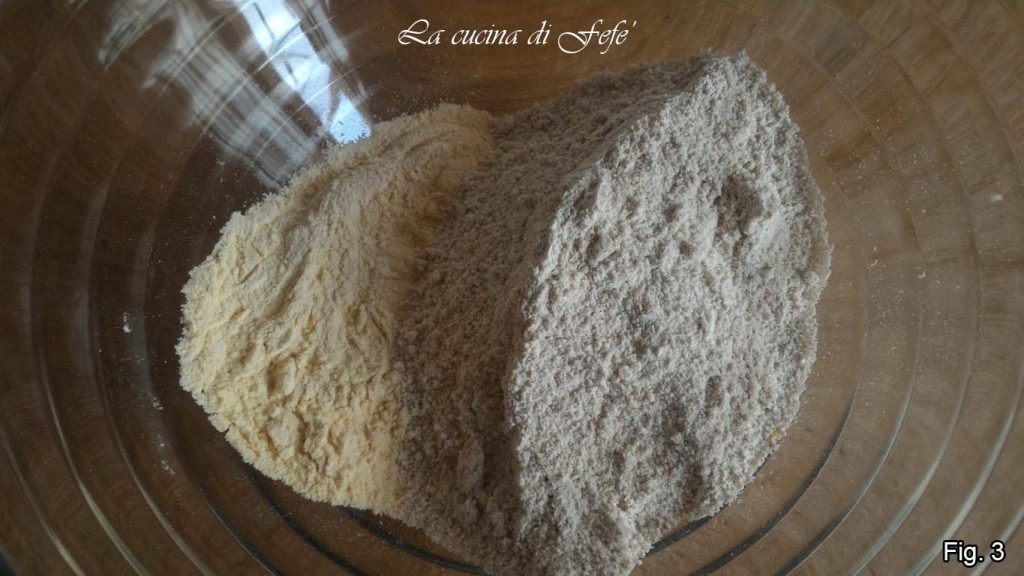
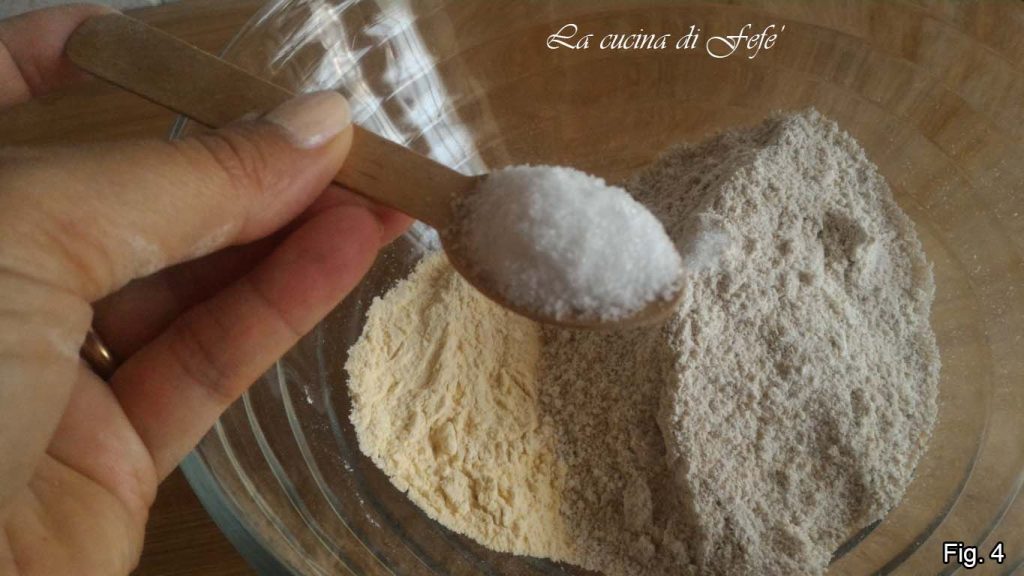
Separately, in a large mixing bowl, sift the two flours.
Add a level teaspoon of salt and mix with a hand whisk.
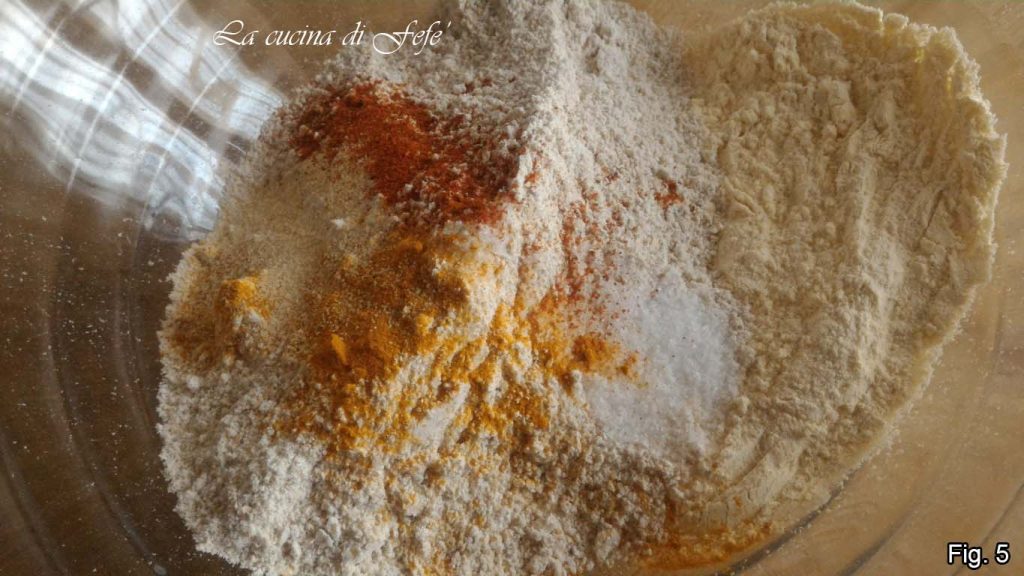
Add all the spices, namely turmeric, mustard, and sweet paprika, and mix again.
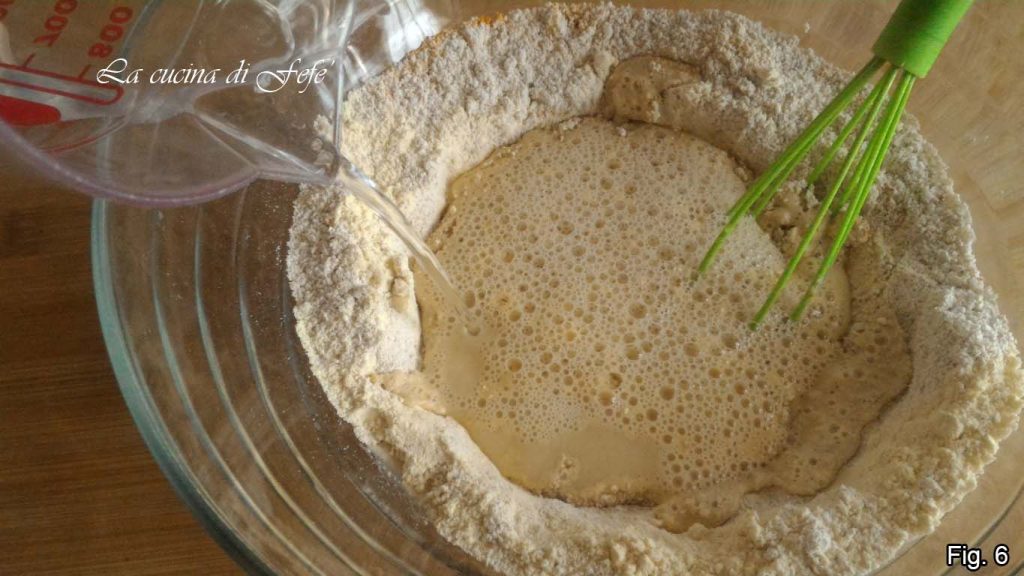
Mix in the water at room temperature gradually, while stirring continuously with a hand whisk.
Work until all lumps dissolve and you obtain a smooth and homogeneous mixture.
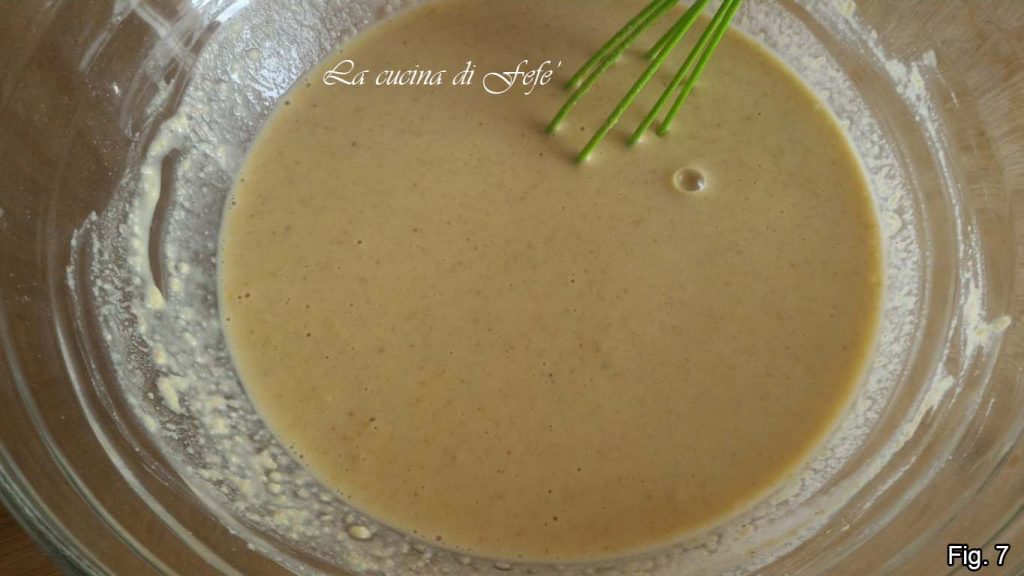
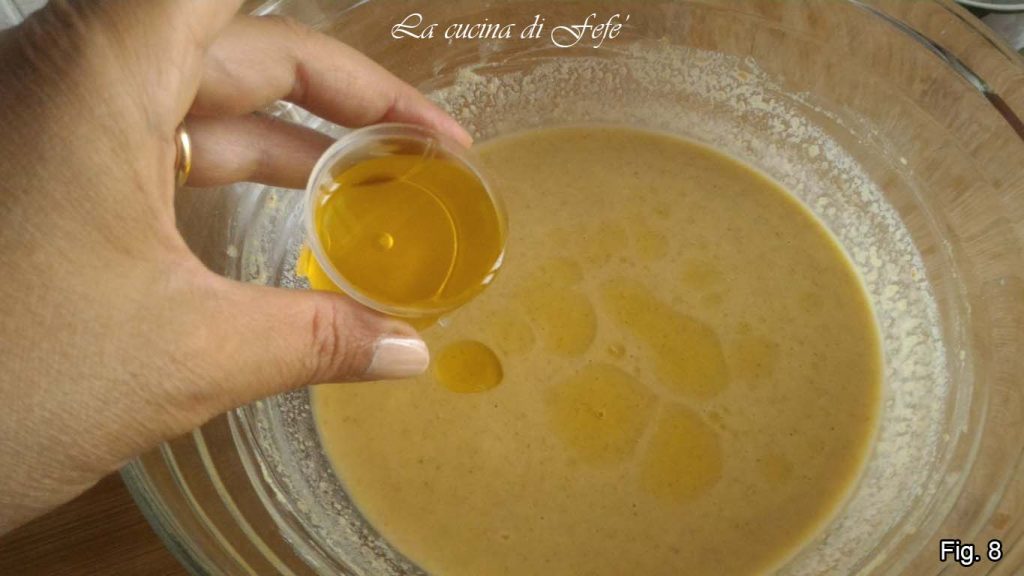
Finally, add the extra virgin olive oil and give it one last stir. Cover with a cloth and let it rest for at least 20′, but better yet for a couple of hours.
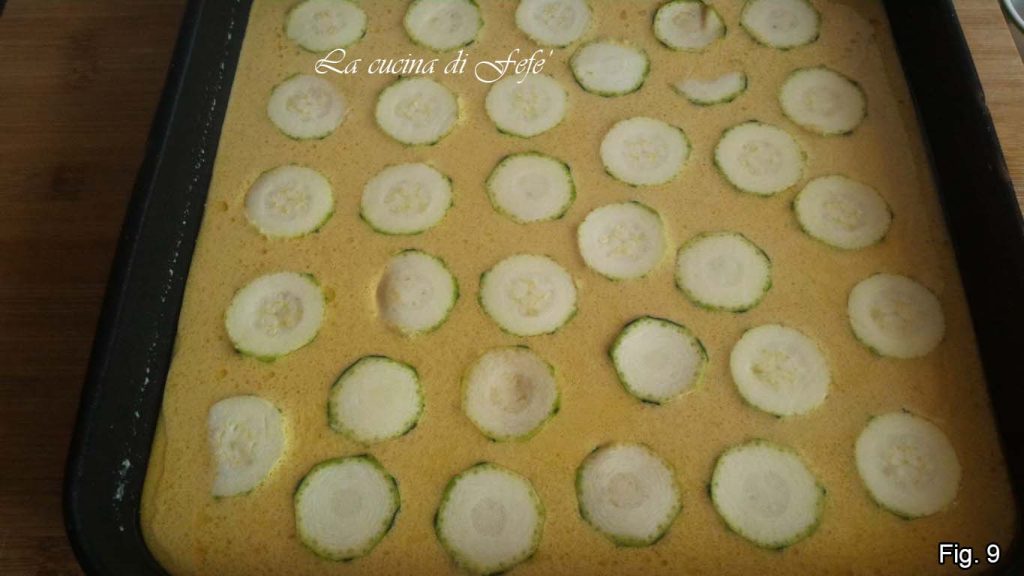
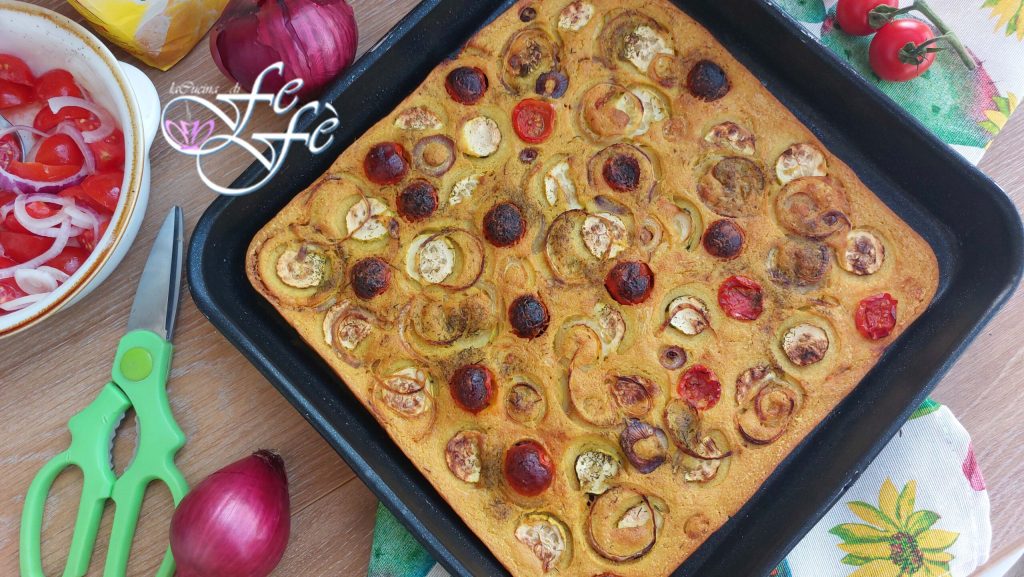
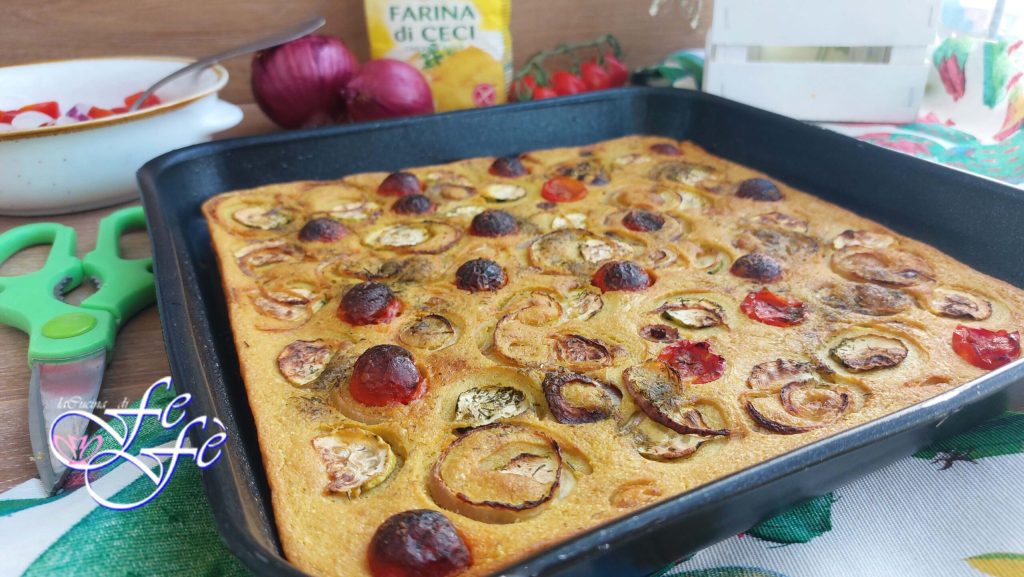
Transfer the mixture to a wide and shallow non-stick mold* and well-oiled**. Arrange the thin zucchini slices over the entire surface.
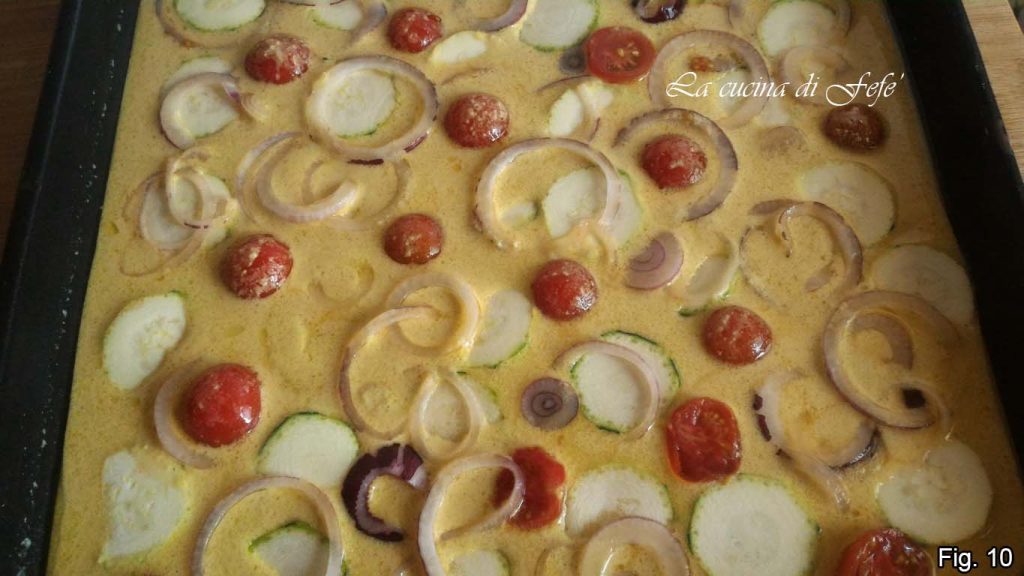
Also add the red onion rings and the cherry tomatoes.
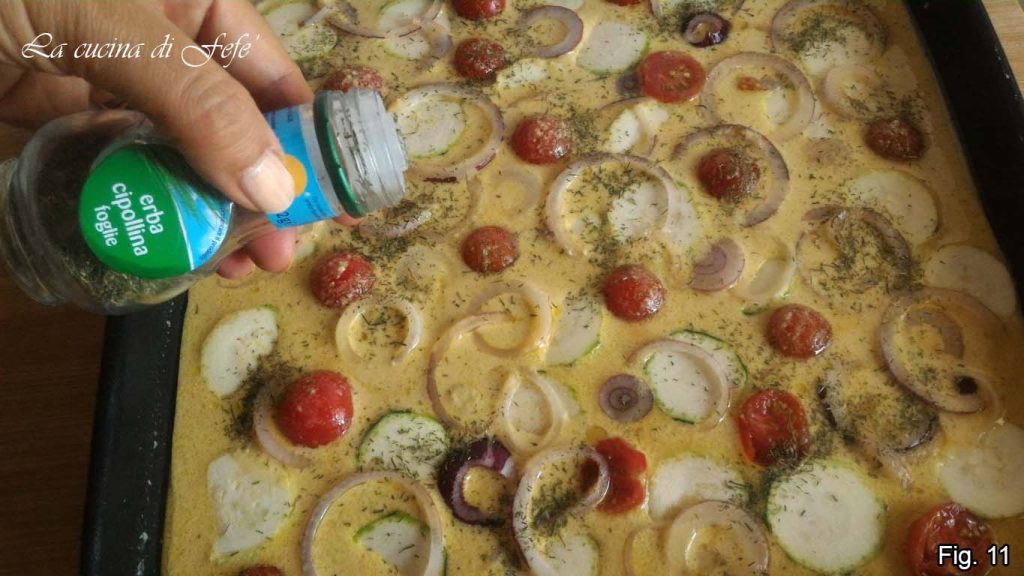
Finish with a generous sprinkling of chives and bake in a preheated oven at 375°F for about 50′, activating the fan mode for the last 5′ of cooking***.
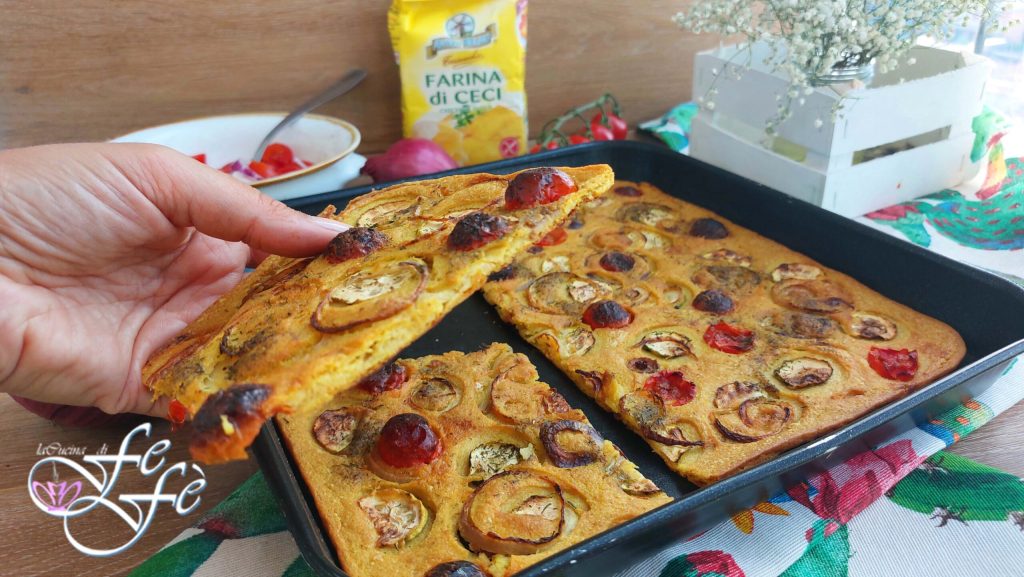
Once cooked, remove from the oven and let cool for a few minutes before serving.
And there you have it… your crispy farinata is ready to be enjoyed!
Bon Appétit from La Cucina di FeFè!
Storage
👉 The crispy farinata should be consumed while still hot and fresh out of the oven to enjoy its full fragrance and crispness, but if there are leftovers, you can store it in the fridge in an airtight container and reheat it in a preheated oven for a few minutes.
Tips
🟣 * The shallow mold is used to distribute the mixture in a thin layer, so that it solidifies quickly in the oven and becomes crispy.
🟣** If your mold is not non-stick, I recommend oiling it very well and dusting it with fine cornmeal.
🟣*** The cooking time may vary from oven to oven, which means your crispy farinata might cook before or after the time I’ve indicated, so I recommend keeping an eye on it after the first 35′ and waiting until it is well browned.