Making homemade fresh pasta with your own hands is priceless! You rediscover the value of an ancient art, which in the end, is not so time-consuming when you consider the final satisfaction! The classic proportions usually require 100 grams of flour for each egg, but consider that much also depends on the shape you decide to make. So, one piece of advice I can give to those trying this preparation for the first time is to add only as needed. Moreover, once you are familiar with the dough, you will learn to mix it with other flours, such as whole wheat and re-milled semolina, which will give your tagliatelle a more rustic taste! Another thing you will be able to do is replace part of the egg with water to lighten them, and I’m not saying you have to do like me, but it is an exercise that will give you awareness of how much you have learned! Naturally, here on the blog, I leave you the original recipe, the one typical of our culinary tradition! In my opinion, it represents one of the heritages of Italian gastronomy! We should all know how to make them because they remind us of childhood, our grandmothers, family holidays, the genuineness of things made with patience and love! Once you have learned the manual skill, considering that today the work with the rolling pin is largely facilitated and replaced by pasta machines, you can no longer buy them ready-made! So another piece of advice I feel like giving is to buy your own crank or electric machine, put on your kitchen apron, roll up your sleeves and spend some time for yourself and your family. You will be totally rewarded!
- Difficulty: Easy
- Rest time: 30 Minutes
- Preparation time: 20 Minutes
- Portions: 3
- Cooking methods: Boiling
- Cuisine: Italian
Ingredients
- 10.5 oz all-purpose flour
- 3 eggs
- to taste salt
Tools
- 1 Fork
- 1 Scraper
- 1 Pasta machine
- 1 Towel
- 1 Wooden spoon
Preparation
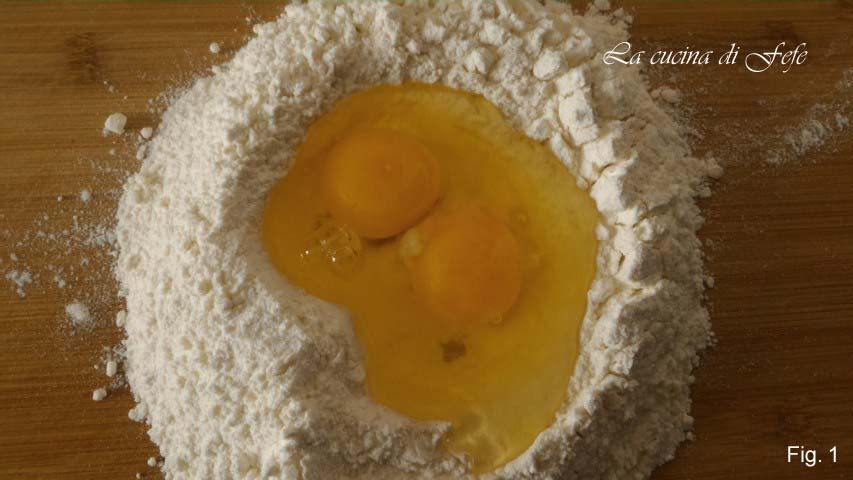
On the work surface, place the flour in a mound. Sprinkle all around with a little salt and crack the eggs in the center (fig. 1).
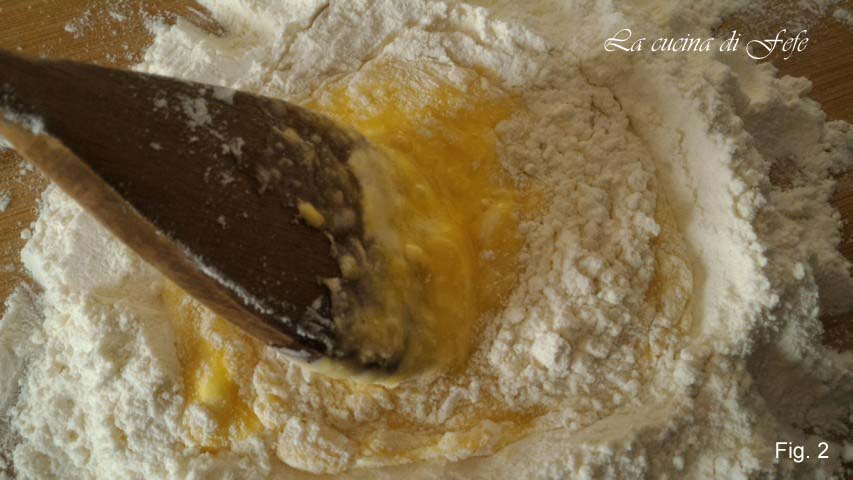
Lightly beat the eggs with a fork or a wooden spoon, then start incorporating some flour from the edges (fig. 2).
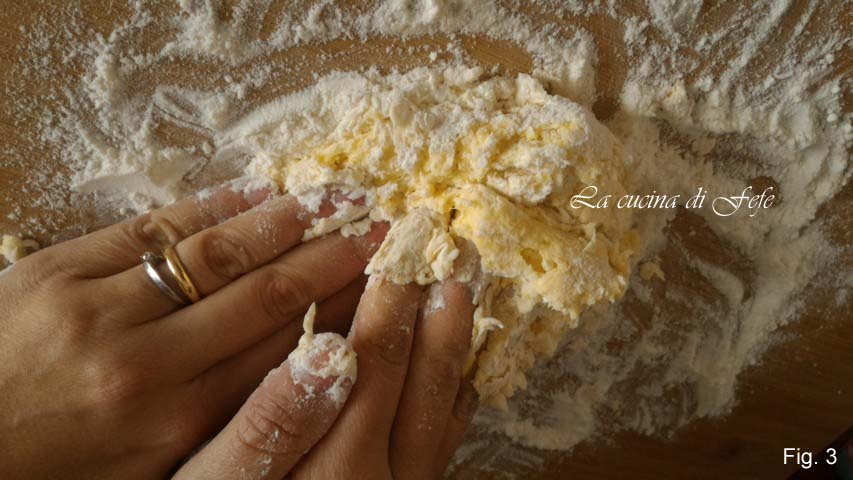
Start working the ingredients with your fingertips until the dough looks a bit grainy (fig. 3).
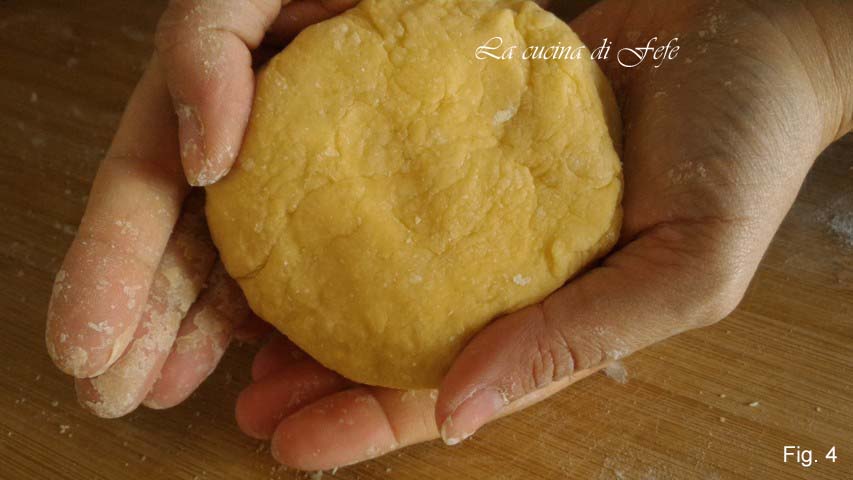
When the dough begins to gain consistency, work it with your full hands always on a well-floured board. After kneading for at least 10′ energetically, form a ball (fig. 4).
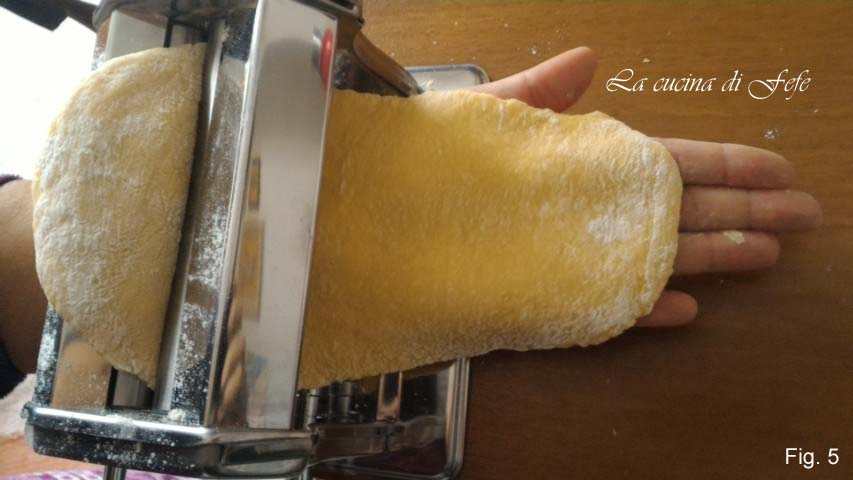
Wrap it in plastic wrap to keep it from air exposure and let it rest for 30′. Take a piece of dough, flatten it a bit with your hands and then with the rolling pin, sprinkle it with a little flour and pass it through the rollers of the pasta machine, starting with the largest thickness (fig. 5).
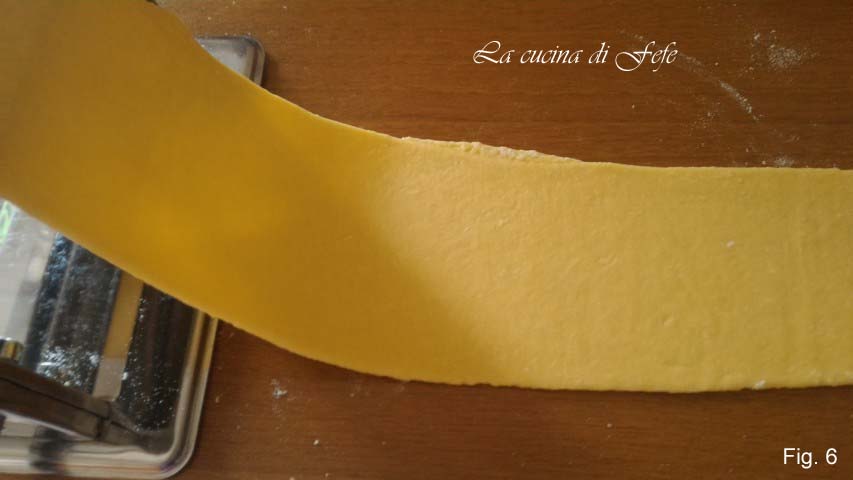
Fold the dough into 2-3 layers, flour it lightly and thin it again by passing it through the rollers once more. Repeat the operation, gradually adjusting the thickness until you get a thin sheet* (fig. 6).
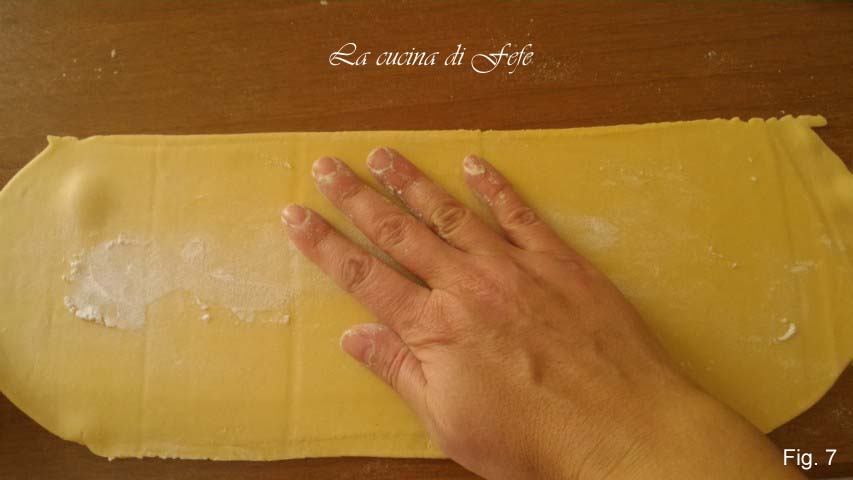
It is important to flour between each step to prevent the pasta from sticking either to the machine or the work surface once rolled out (fig. 7).
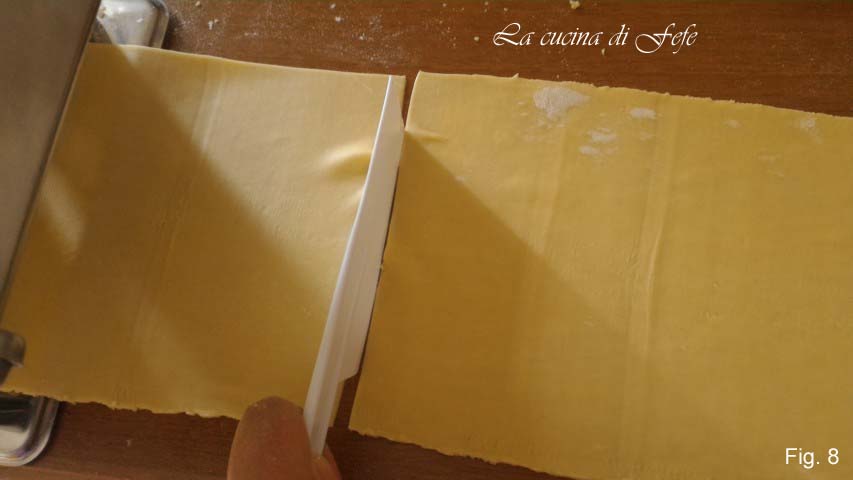
So tighten the rollers and keep passing the dough until you achieve a sheet of the desired thickness. I recommend always dividing the dough into shorter sheets to facilitate these operations (fig. 8).
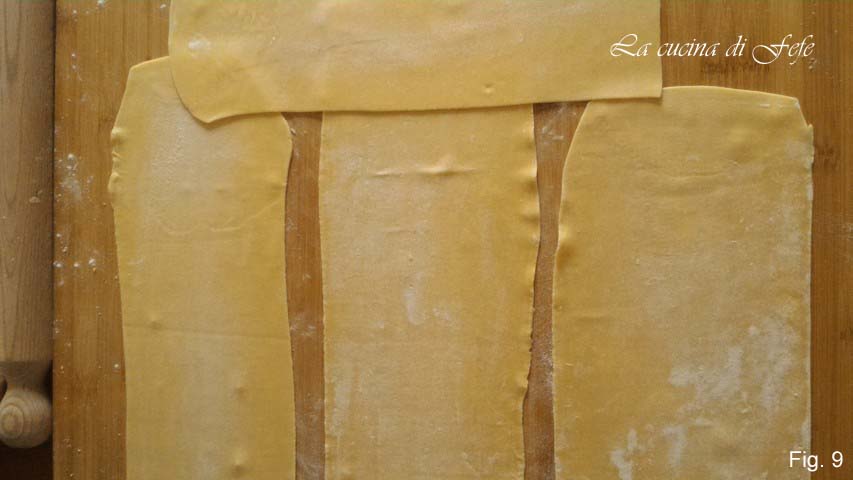
Lay the sheets to dry on a floured surface and cover with a towel (fig. 9).
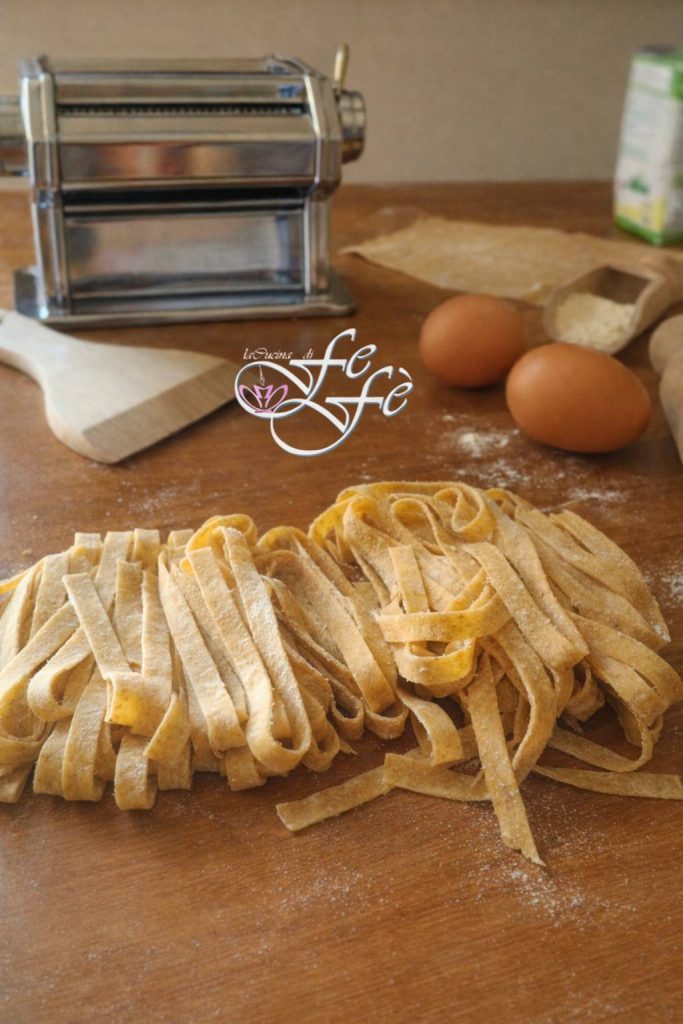
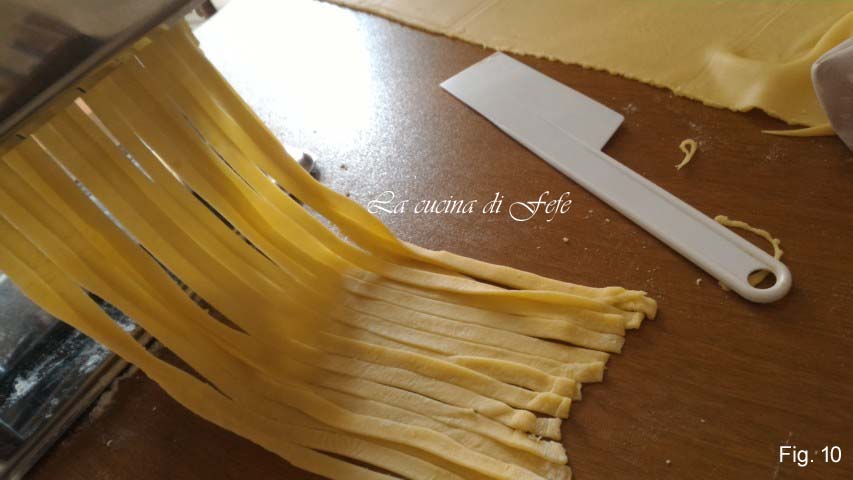
Once the sheets are dried, pass them through the roller for the tagliatelle format (fig. 10).
Gather them into small nests and sprinkle them with a little flour.
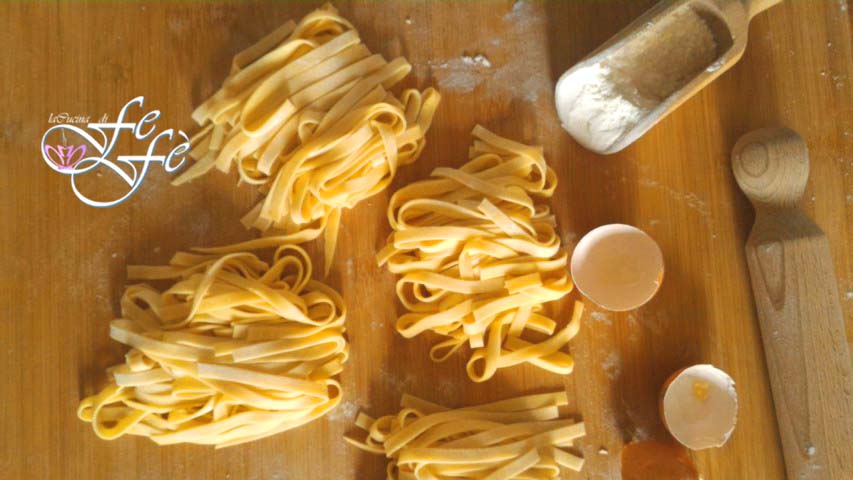
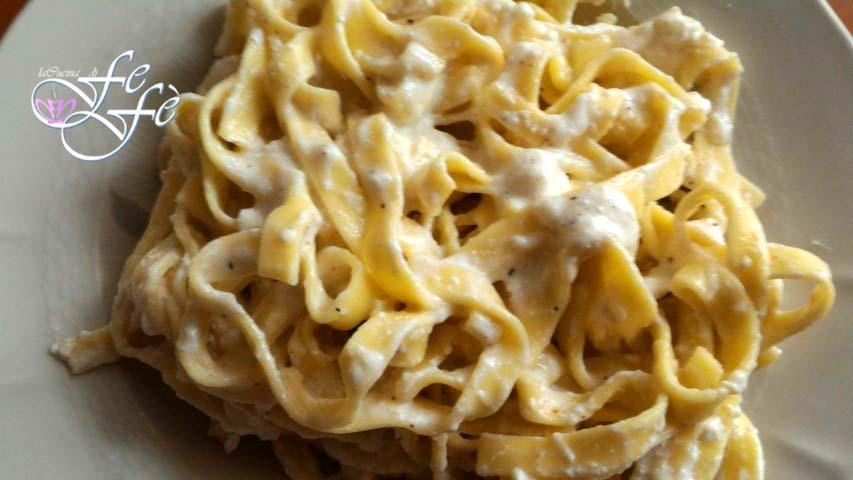
And voilà… the homemade egg tagliatelle are ready to be cooked!

Bon Appetit from La Cucina di FeFè!
Advice, notes, variations, and tips
🟣* Every pasta machine has its own characteristics and settings. Settings may vary from model to model. In general, thickness settings are indicated by numbers (e.g., 1-9) or by millimeters. Always start with the widest settings and gradually reduce the thickness, carefully checking the pasta at each pass. Laminating is a crucial process. Pass the pasta through the rollers multiple times, folding it at each pass, until you achieve the desired consistency. This helps develop gluten and makes the pasta more elastic and less likely to break. Remember to let the pasta rest between passes to avoid over-stressing the dough.
🟣It is advisable to drain the tagliatelle using a slotted spoon instead of a colander, to ensure the final result.
Storage
The tagliatelle can be stored in the fridge arranged in “nests” on a tray dusted with semolina, covered with a towel, for a maximum of 24 hours. Or you can freeze the nests on a tray and, once hard, transfer them to freezer bags. They can be kept this way for 2-3 months. You can cook them directly from frozen in boiling water.
1. What is the correct proportion between eggs and flour?
The golden rule of tradition remains 1 medium egg for every 100g of flour. However, for a rougher and more resilient sheet (ideal for ragù), many chefs today use a mix of all-purpose flour and re-milled semolina (in a 70:30 ratio) and add an extra yolk for every 300g of flour to intensify the yellow color.
2. Why does the pasta retract while I’m rolling it out?
This happens when the gluten is too “nervous”. It is crucial to let the dough rest wrapped in plastic wrap for at least 30 minutes at room temperature. The rest allows the gluten network to relax, making the sheet elastic and easy to roll out without springing back.
3. How to get tagliatelle that hold the sauce well?
The secret is the porous surface. If you use a rolling pin on a wooden board, porosity is guaranteed. If you use the pasta sheet machine, avoid over-flouring the pasta with all-purpose flour; instead, use semolina, which creates a perfect micro-granularity to “grip” the sauce.
4. How long should fresh tagliatelle cook?
Cooking is very quick: usually 2-4 minutes in boiling salted water. The 2026 tip is to drain them al dente directly into the sauce, keeping a ladle of cooking water to create a creamy emulsion with the sauce.
5. What to do if the dough is too dry or too wet?
Dry: Do not add water immediately; wet your hands and continue kneading. The moisture from your hands is often enough to rebalance the mass.
Wet: Add one tablespoon of flour at a time until the dough perfectly cleans your hands and the board.