Mattonella Cake: The Original Family Recipe (No-Bake)
The Mattonella Cake is not only a dessert, it is the flavor of my childhood. While rummaging through the archives of my first blog, I rediscovered this tried-and-true family recipe, a treasure I had forgotten to transcribe and that today I want to share with you in a refreshed version, with up-to-date photos and all the love of back then.
A no-bake dessert that tastes like celebration
The origins of the mattonella cake are uncertain, but for me it recalls family birthdays from my childhood. It was the “most wanted prize” my mother used to prepare for special occasions. The best memory? The challenge between my sisters to see who could lick the baking dish! That explains the endless deliciousness!
The big advantage? It is a no-bake cake and stress-free: there is no need to unmold it, you serve it directly from the pan. It’s the perfect compromise for anyone looking for a fresh dessert, similar to tiramisu but with an extra touch thanks to the final chocolate layer.
How to prepare the perfect Mattonella Cake: useful tips
To achieve impeccable results, follow these small tips: choose an attractive baking dish deep enough to hold at least three layers of pure indulgence.
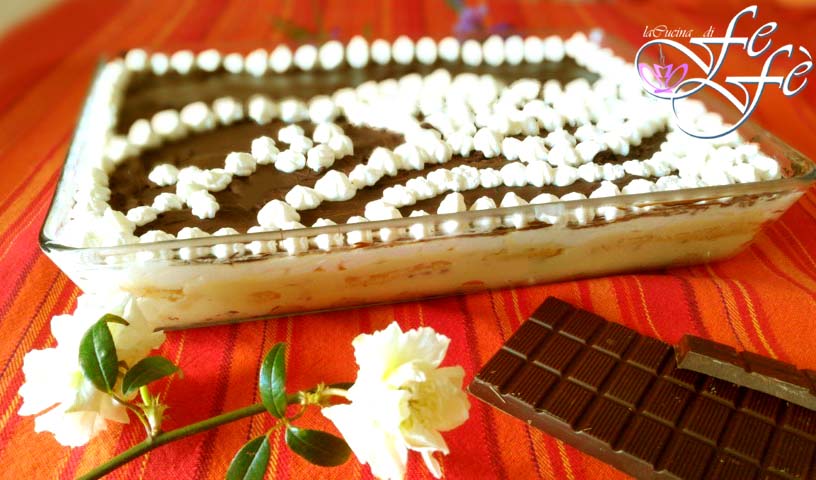
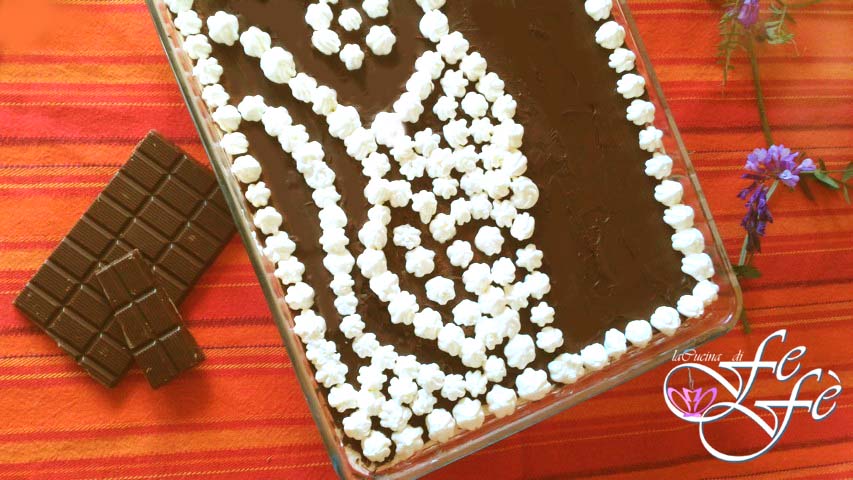
Unlike classic tiramisu, the last layer of this mattonella includes a touch of dark chocolate, which gives an unmatched texture and flavor.
Being a no-bake dessert, chilling in the fridge is essential. Prepare it the day before to allow the flavors to meld perfectly.
If you’re looking for other inspirations for your dessert buffet, try these spoon desserts that are all delicious and easy to make:
- Difficulty: Very easy
- Cost: Medium
- Rest time: 3 Hours
- Preparation time: 30 Minutes
- Portions: baking dish 12 x 7 in
- Cooking methods: No-bake
- Cuisine: Italian
- Seasonality: All seasons
Ingredients
⚠ IN THIS RECIPE THERE ARE ONE OR MORE AFFILIATE LINKS. The products I recommend are the same ones I use in my recipes; purchasing them through my blog helps support me and my work at no extra cost to you!
- 14 oz ladyfingers (savoiardi)
- 2 cups heavy cream for whipping
- pastry cream (crema pasticcera)
- 3 tbsp powdered sugar
- as needed milk
- 7 oz 70% dark chocolate
- 2 tbsp milk
Tools
- 1 Hand whisk
- 1 Sieve
- 2 Mixing bowls
- 1 Plastic wrap
- 1 Saucepan
- Electric whisks
- 1 Baking dish
- 1 Small bowl
- 1 Spatula
- 1 Piping bag
- 1 Dough scraper
- 1 Small saucepan
Preparation
Start by preparing the pastry cream following the steps in my recipe. Beat the eggs with the sugar using a hand whisk until the mixture is frothy, then add the sifted starch.
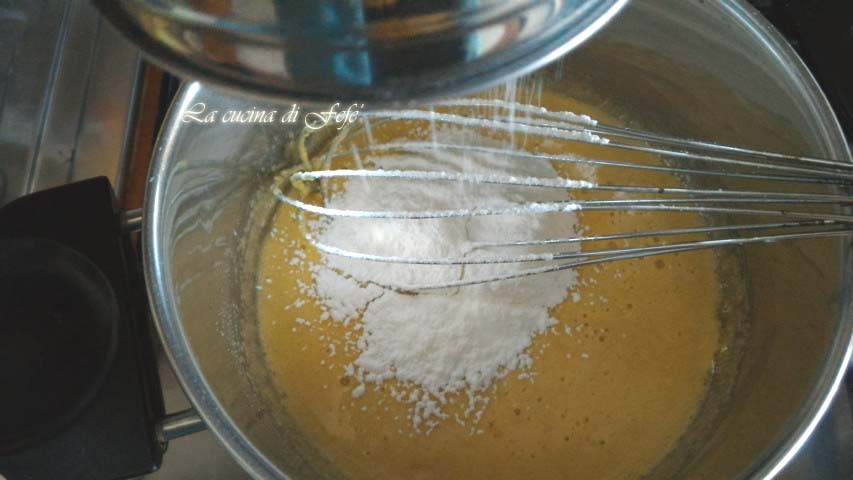
Mix carefully and pour in the warm milk in a thin stream which you previously heated with the lemon zest, stirring continuously. Put over the heat, stirring until it thickens.
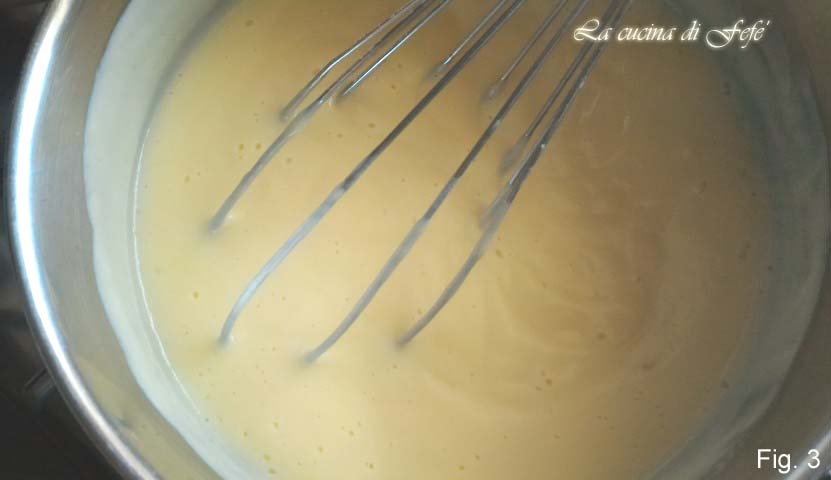
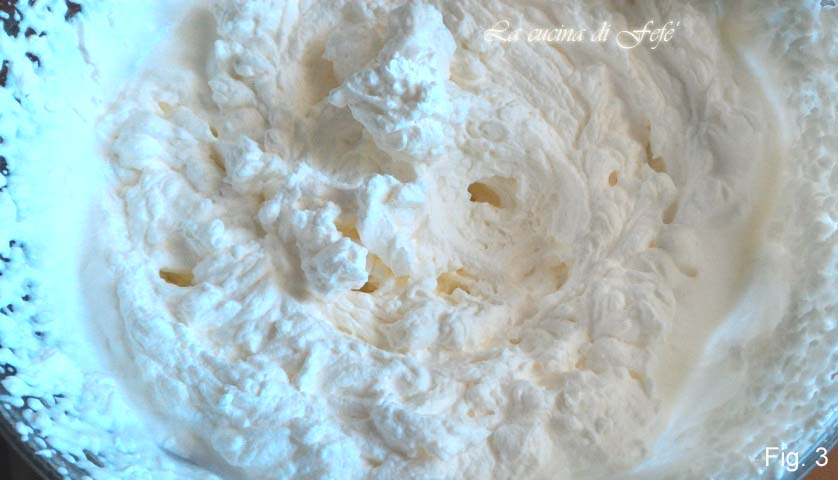
Turn off the heat, pour into a wide, shallow bowl, and cover with plastic wrap directly on the surface until completely cooled. Meanwhile, with electric beaters, whip the cream in a well-chilled glass bowl that has been in the freezer for about 30 minutes together with the powdered sugar, until it is firm and holds shape.
In a large baking dish, arrange the first layer of ladyfingers standing vertically, dipping them briefly in milk.
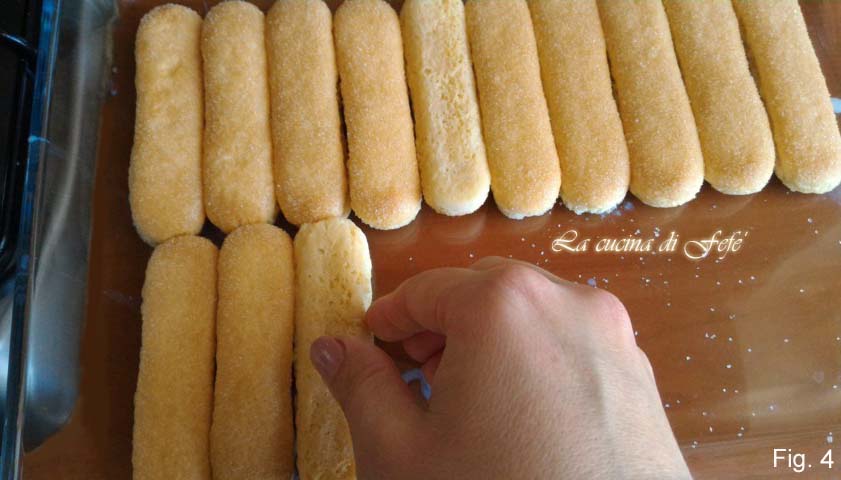
It is important to be careful with this step because the biscuit should not become too soggy, risking a mushy texture, but it should not be too dry either, otherwise the dessert will lack softness. Completely cover the biscuits with a not-too-generous layer of pastry cream, using a spatula to spread it.
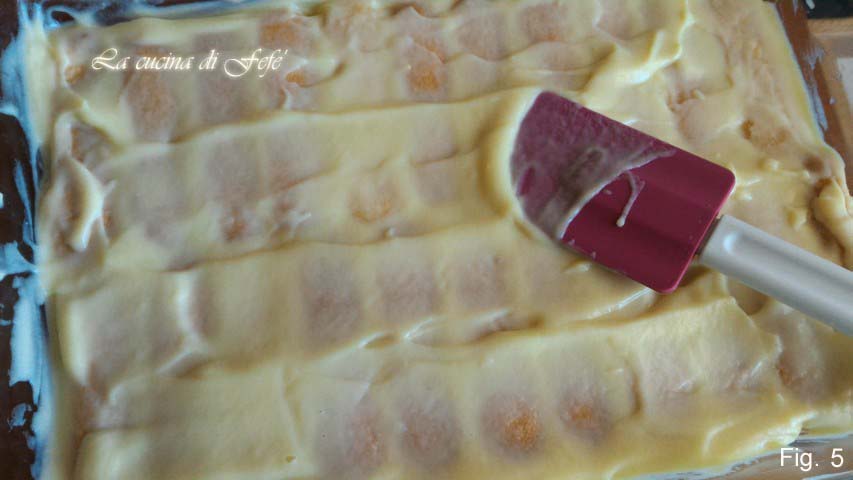
Grate some chocolate over or dust with unsweetened cocoa powder, then create a second layer, this time placing the ladyfingers horizontally.
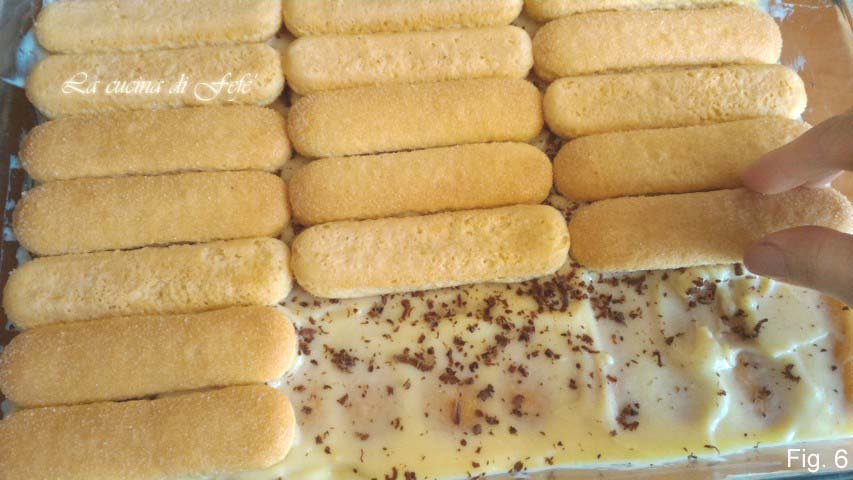
Cover and proceed to make a third layer identical to the others or continue until you run out of ingredients. For the top layer, spread the whipped cream, reserving a few tablespoons for decoration, using a piping bag or simply a spoon.
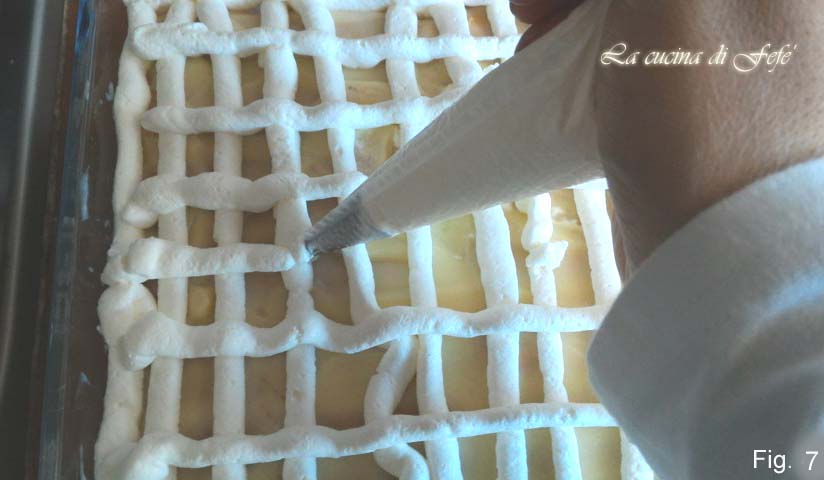
Then smooth it with a dough scraper or spatula until the entire surface is covered.
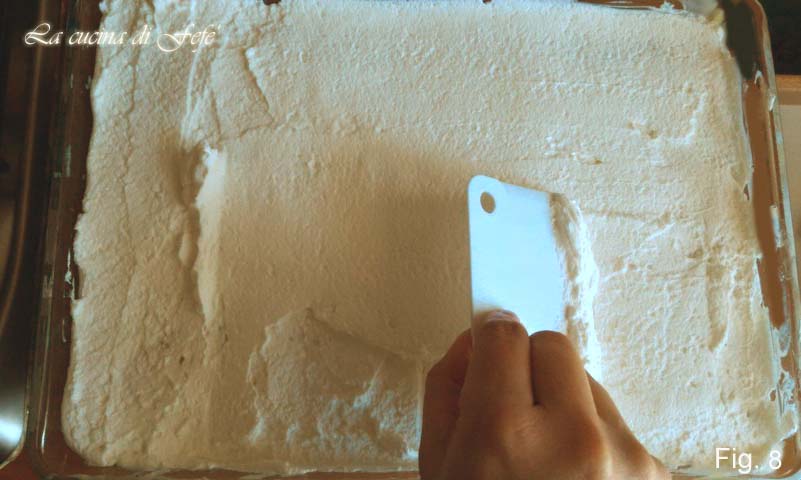
Level the surface so there are no uncovered spots.
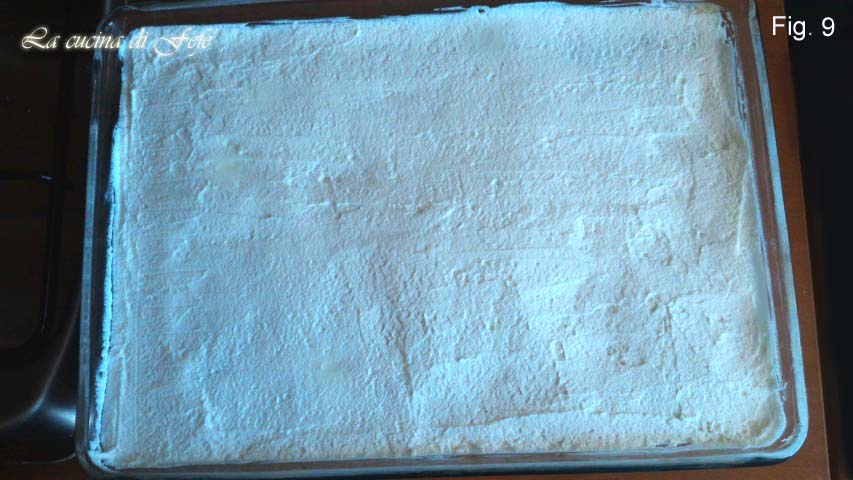
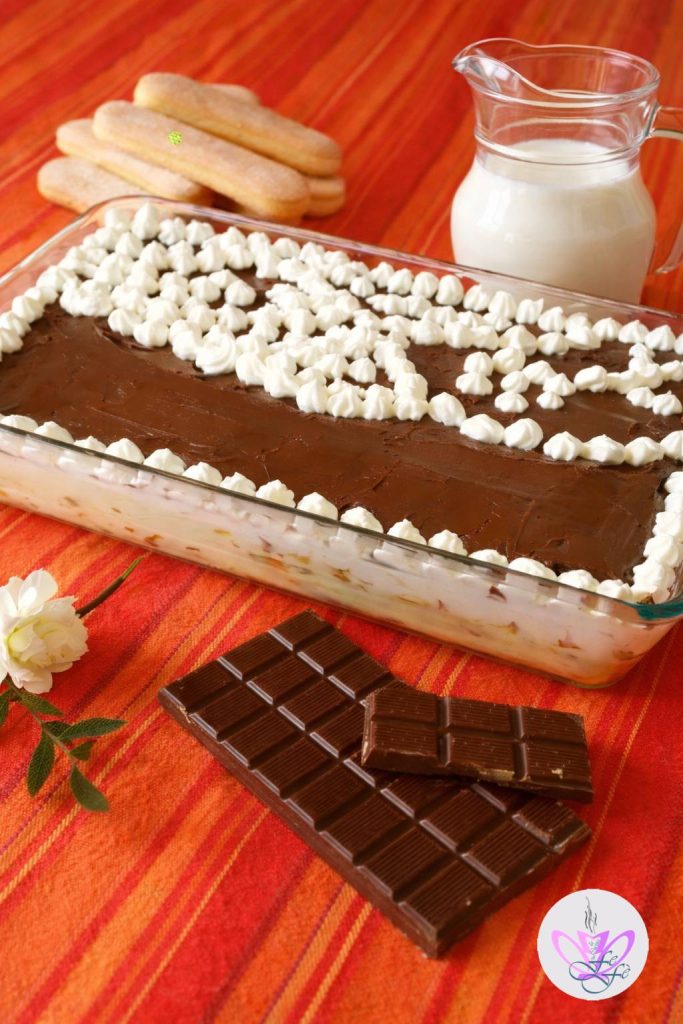
Finally, cover with a layer of dark chocolate previously melted in a double boiler with a little milk and brought to room temperature. Chill in the fridge to set for at least 4 hours. Ideally prepare it the day before: overnight rest allows the biscuits to soften uniformly and the flavors to blend better.
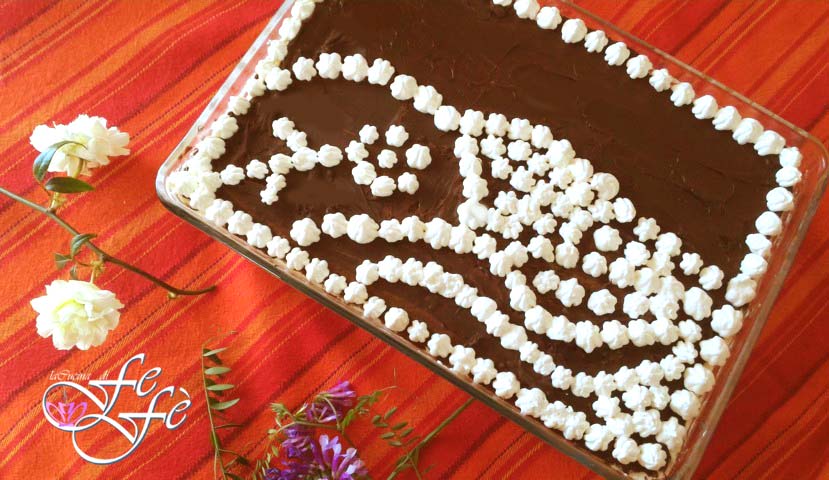
And voila… the mattonella cake is ready to be enjoyed!
Enjoy from La Cucina di FeFè!
Storage
👉 Store the cake in the central part of the fridge (about 39°F), preferably covered with plastic wrap or an airtight lid to prevent it from absorbing other food odors for 2-3 days. Remember that this dessert is best after at least 12 hours of resting; the biscuits need time to absorb the moisture from the cream and become one with it.
If you want to keep it longer or serve it as an ice cream cake, you can freeze it in the freezer for up to 2-3 weeks. The recommendation is to cut it into tiles before freezing, separating pieces with parchment paper.
1. Which cookies can I use for Mattonella Cake if I don’t like ladyfingers?
Tradition calls for ladyfingers, ideal because they absorb the cream’s moisture without falling apart. Alternatively, for a heartier version, you can use plain tea biscuits (like Oro Saiwa) or Pavesini, which give a more delicate result but you’ll need more of them.
2. Can I make Mattonella Cake gluten-free or lactose-free?
Absolutely! Since it’s a layered dessert, simply replace the ladyfingers with a gluten-free version and use a cream made with plant-based milk or lactose-free butter/milk.