The Sautéed Swiss chard with garlic is a simple, wholesome, and flavorful side dish, perfect for accompanying meat or fish main courses, or enjoying with a slice of bread and cheese. Thanks to its quick preparation, it’s an excellent solution for those looking for a healthy and tasty alternative to spinach or other cooked greens. The chard is first blanched to make it softer and then sautéed in a pan with extra virgin olive oil and garlic, which enhance its flavor without overpowering its delicacy. Discover how to prepare it best with my tips and variations!
- Difficulty: Very Easy
- Cost: Inexpensive
- Preparation time: 10 Minutes
- Portions: 4 People
- Cooking methods: Boiling, Stovetop
- Cuisine: Italian
- Seasonality: Fall, Winter, and Spring
Ingredients
- 2.2 lbs Swiss Chard
- 2 cloves Garlic
- to taste Extra Virgin Olive Oil
- to taste Salt
- to taste Pepper
Tools
- 1 Knife
- 1 Cutting board
- 1 Pot
- 1 Colander
- 1 Pan
- 1 Slotted spoon
Procedure
Clean the Swiss chard, removing overly long stalks and damaged leaves.
Rinse the leaves one by one under running water.
Bring a pot with plenty of salted water to a boil and cook the Swiss chard for about 7 minutes.
Note: If you prefer, separate the stalks from the leaves and place the stalks in the boiling water first, adding the leaves after 3 minutes for more even cooking.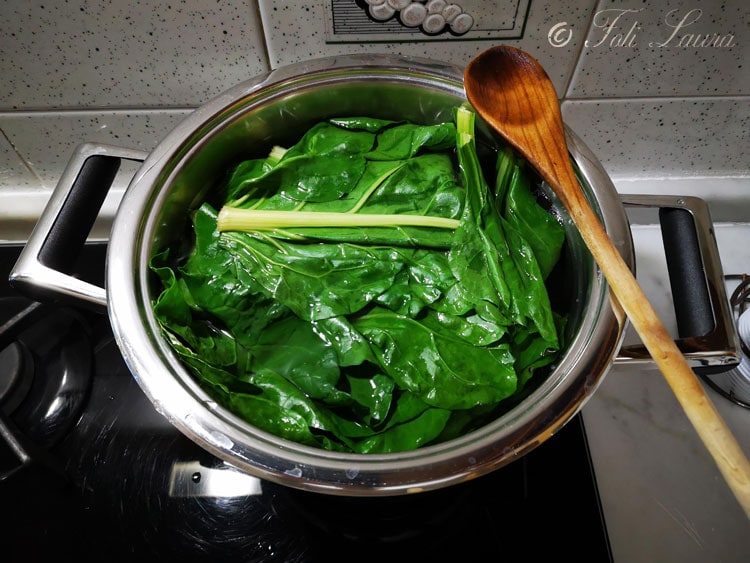
Once cooked, take the Swiss chard with a slotted spoon and drain it well using a colander.
Tip: To maintain a bright green color, after draining the Swiss chard, immerse it for a few seconds in ice water.
In a large pan, heat 3 tablespoons of extra virgin olive oil over medium heat.
Add the whole garlic cloves (you can leave them with the skin on for a milder flavor or crush them for a more intense taste).
Once golden, remove the garlic if you prefer a lighter taste.
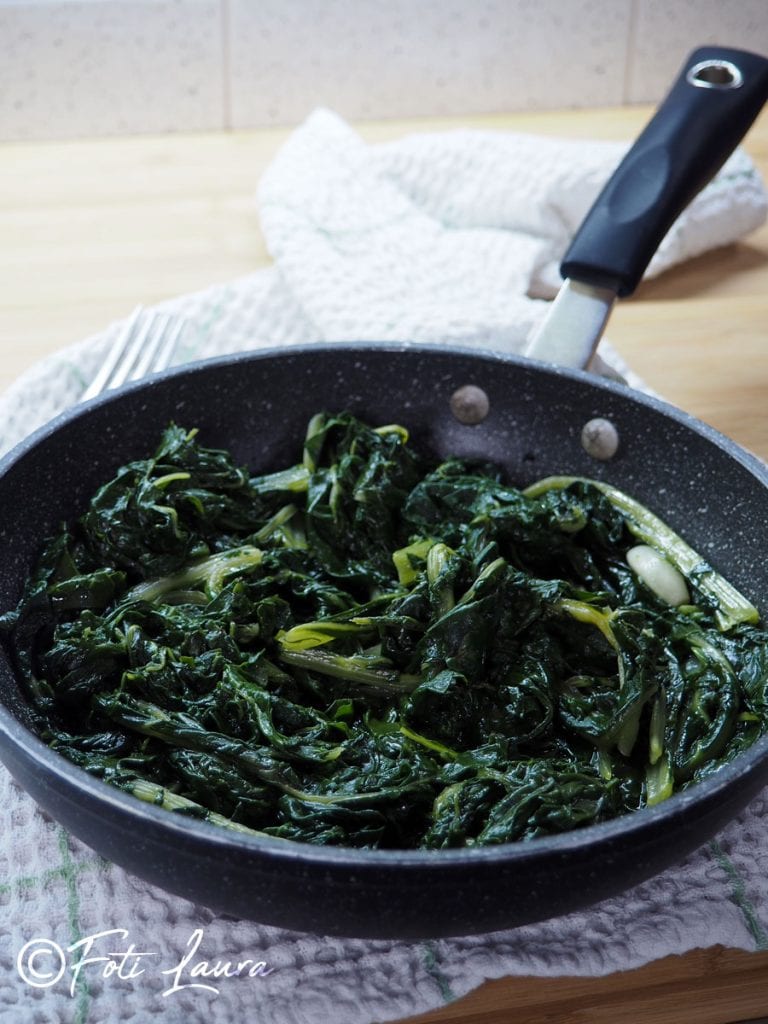
Add the well-drained Swiss chard and sauté over high heat for 5 minutes, stirring occasionally.
Season with salt and pepper and serve immediately.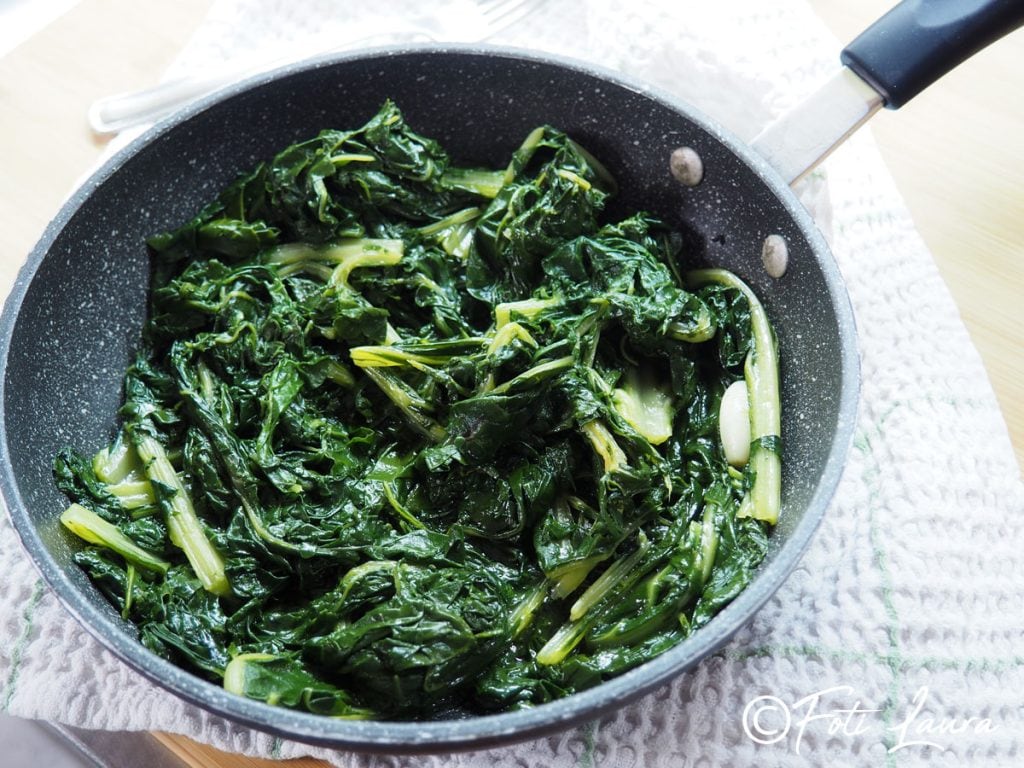
Tips
Once the garlic has been browned in the oil, you can also decide to remove it to avoid a strong flavor.
You can also add a bit of chili pepper for an extra touch of flavor.
Once the chard is blanched, it can be used for other preparations instead of spinach, such as cannelloni with ricotta and chard or crepes with ricotta and spinach.
Tasty Variations
Swiss Chard with Parmesan: At the end of cooking, sprinkle with grated parmesan for an extra touch of flavor. Mediterranean Swiss Chard: Add sun-dried tomatoes and black olives for a more flavorful version.
Swiss Chard and Potatoes: Combine boiled potato cubes for a more substantial side dish.
FAQ – Sautéed Swiss Chard with Garlic
Can I use frozen Swiss chard?
Yes, you can use frozen Swiss chard. In this case, there is no need to blanch it first, just sauté it directly in the pan with the garlic. However, it may take a bit longer to cook.
Can I add other ingredients to the sautéed Swiss chard?
Yes, you can customize the dish by adding ingredients like chili pepper, anchovies, pine nuts, or sun-dried tomatoes for an extra touch of flavor.
How can I store leftover Swiss chard?
You can store the Swiss chard in an airtight container in the refrigerator for 1-2 days. It can also be reheated in a pan or microwave.
Can I prepare this dish without garlic?
Absolutely yes! If you don’t like garlic, you can omit it and use only olive oil, perhaps adding some herbs like rosemary or thyme to give more flavor.
What is the difference between Swiss chard and spinach?
Swiss chard has larger leaves and a more fibrous texture compared to spinach, but both can be used in similar recipes. Swiss chard has a more earthy flavor, while spinach is more delicate.
How can I prevent the Swiss chard from becoming too watery in the pan?
Make sure to drain it well after cooking. If necessary, you can also pat it dry with a kitchen towel before sautéing in the pan.
The Sautéed Swiss chard with garlic is a simple but flavorful recipe, perfect for those who love the genuine flavors of Italian cuisine. Try it as a side dish to meat or fish, or with a slice of bread and cheese for a light yet tasty meal. If you liked this recipe, share it and discover more delicious ideas on our blog!