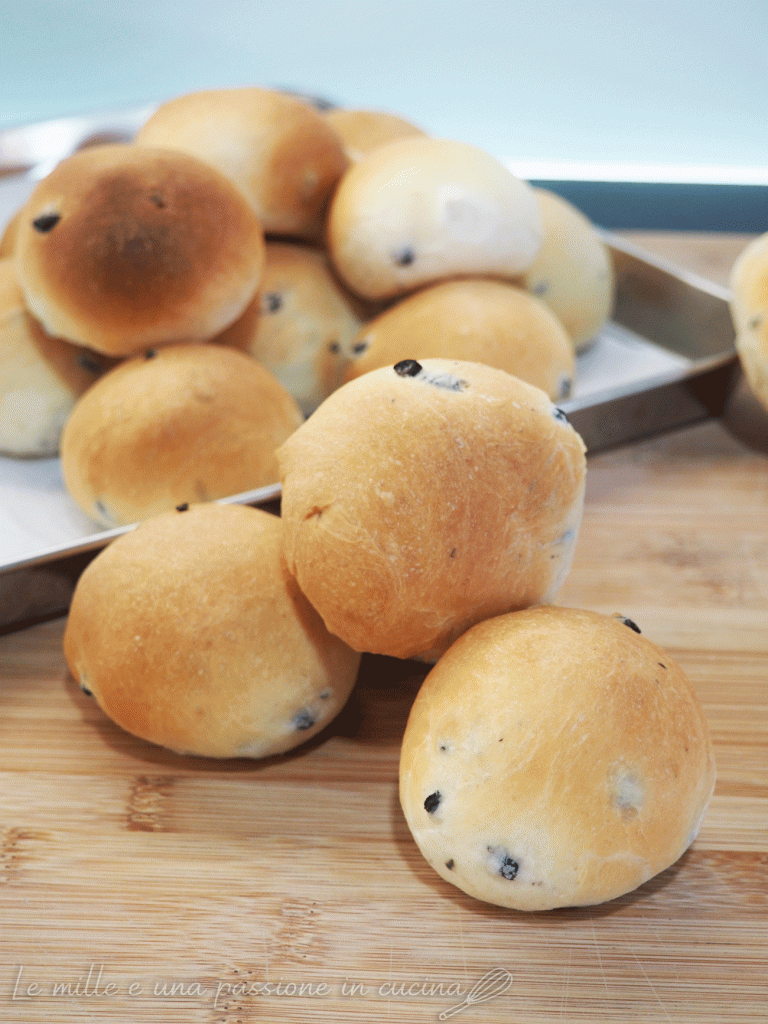
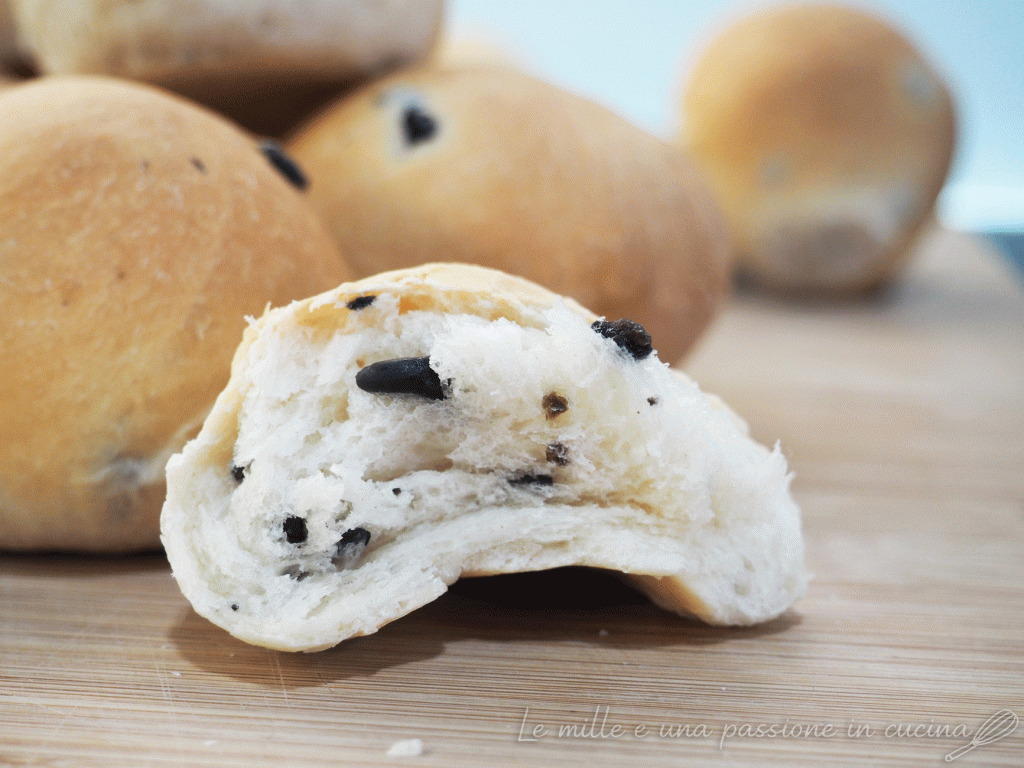
These savory butter rolls are soft, light and fragrant. I often prepare them for my child’s snack to bring to kindergarten: filled with a fresh cheese they’re practical, wholesome and really perfect even for the little ones. I chose a longer rise with fresh baker’s yeast and an intelligent use of the bread machine only for the dough: the result is soft, well‑aerated rolls without overusing the butter.
- Difficulty: Easy
- Cost: Very inexpensive
- Rest time: 4 Hours
- Preparation time: 20 Minutes
- Cooking time: 20 Minutes
- Portions: 17 pieces
- Cooking methods: Electric oven
- Cuisine: Italian
- Seasonality: All seasons
Ingredients
For 17 rolls of about 1.4 oz each.
- 1 2/3 cups Manitoba (strong) flour
- 1 2/3 cups type 0 flour
- 7.5 fl oz milk
- 3 tbsp butter (cold, cut into cubes)
- 2 1/2 tsp fresh baker's yeast
- 2 1/2 tsp sugar
- 1 3/4 tsp salt
- to taste aromatic herbs
- to taste olives
- to taste seeds (your choice)
Tools
- 1 Bread machine
- 1 Spoon
- 1 Knife
- 1 Baking sheet
- 1 Parchment paper
Steps
Pour into the bread machine pan in this order: the milk, the butter cubes, the flour, the crumbled fresh baker’s yeast, the sugar and the salt.
Start the dough only program and let it run until you obtain a soft, smooth dough that’s well‑developed and elastic.During the program, at a certain point the machine will emit a beep: this is the right moment to add optional ingredients. In my case I used black olives, which I first rinsed to remove the preserving liquid, then chopped and squeezed well.
Close the lid and let the machine incorporate them evenly into the dough, without further intervention.During the final phase of the program, the machine will beep again: usually this corresponds to the opportunity to remove the kneading hooks.
At this point I open the machine, remove the hooks, gently gather all the dough into a single ball and place it back into the pan.
Close the lid and let the dough rise directly inside the machine, using the residual heat, until the program completes.Turn the dough out onto the work surface and divide it into portions of about 1.4 oz each.
For each piece proceed as follows:
– gently press it with your hands to deflate it slightly;
– bring the top and bottom edges toward the center, creating the first tension;
– then roll the side edges, sealing well;
– finally perform a shaping, rotating the roll on the work surface to obtain a smooth, regular shape.
This step helps the rolls rise better and keep a uniform shape while baking.
Place them as you go on a baking sheet lined with parchment paper.Cover the rolls and let them rise for 1.5–2 hours, until they are soft and well developed.
Bake in a preheated oven at 356°F (conventional or fan) for 15–20 minutes, until golden. Let cool slightly on a rack before serving.
Useful tips
For children’s snacks, these rolls are ideal filled with fresh cheeses such as crescenza, stracchino or robiola.
Do not increase the butter: the long rise already guarantees softness.
If you add ingredients like olives or sun‑dried tomatoes, do not exceed about 1.8–2.5 oz total.
For a more golden surface, you can brush the rolls with a little milk before baking.
Variations
Herb rolls: add chopped rosemary or thyme directly into the dough.
Rustic version: replace 100 g of type 0 flour with whole wheat flour.
Buffet rolls: make 30 g pieces for a smaller size.
Storage
The rolls stay soft for 1–2 days in a food bag. They can also be frozen once cold and refreshed in the oven for a few minutes.
FAQ (Questions & Answers)
Can I use dry yeast?
Yes, you can substitute fresh baker’s yeast with 1 tsp of dry yeast, slightly reducing the rising times.
Can I knead by hand?
Of course, knead for about 10–12 minutes until you obtain a smooth and soft dough.
Can I use the fan (convection) oven?
Yes, you can use the fan setting at 338–347°F (170–175°C), checking the browning.
These savory butter rolls have become a staple in my home, especially for the snack to bring to kindergarten. Soft, practical and customizable, they’re suitable for many fillings and are made without stress. A simple recipe designed for everyday life.
Let me know how they turned out and what your favorite filling is!