Every year I prepare a small placeholder for the Christmas table, usually edible, but over the years I have also made small objects. This year the choice fell on the Christmas placeholder houses, and I was inspired by some small creations I saw on Pinterest.
Last year, Tescoma came out with a cookie cutter specifically for making the house, and I took advantage of it immediately. I had already prepared the gingerbread house by creating cardboard templates for all the parts, but I must say that with this cutter life is much simpler. The long part is only the assembly, which requires a bit of precision and patience, but even if the houses are not perfect, our guests will be impressed and enthusiastic.
A final tip, since the houses are completely edible, you can use the ready-made icing mix available on the market, which only requires adding water. This way, you can ensure the safety of raw eggs, especially if you have vulnerable people and children in the family.
To conclude, I leave you some perfect recipes for making handmade Christmas gifts, all edible.
- Difficulty: Difficult
- Cost: Very Cheap
- Rest time: 1 Day 1 Hour
- Preparation time: 1 Hour
- Portions: 10 Pieces
- Cooking methods: Oven
- Cuisine: Italian
- Seasonality: Christmas
- Energy 249.00 (Kcal)
- Carbohydrates 39.85 (g) of which sugars 25.57 (g)
- Proteins 3.08 (g)
- Fat 9.35 (g) of which saturated 5.80 (g)of which unsaturated 3.44 (g)
- Fibers 0.44 (g)
- Sodium 8.36 (mg)
Indicative values for a portion of 50 g processed in an automated way starting from the nutritional information available on the CREA* and FoodData Central** databases. It is not food and / or nutritional advice.
* CREATES Food and Nutrition Research Center: https://www.crea.gov.it/alimenti-e-nutrizione https://www.alimentinutrizione.it ** U.S. Department of Agriculture, Agricultural Research Service. FoodData Central, 2019. https://fdc.nal.usda.gov
Ingredients for the Placeholder Houses
- 1 2/3 cups all-purpose flour
- 7 tbsps butter
- 1/2 cup sugar
- 1 egg yolk
- 1 1/4 cups powdered sugar
- 1 oz egg white
- lemon juice (a few drops)
Tools
- Cookie Cutter
- Decorating Pen
Preparation of the Placeholder Houses
Pour all the ingredients into a bowl and quickly mix them until you get a smooth and homogeneous dough.
Let the dough rest in the refrigerator for half an hour.
Once the shortbread has firmed up, roll it out between two sheets of parchment paper with the help of a rolling pin. The ideal thickness is about 1/4 inch.
Remove the top sheet and, using the house cutter I listed among the useful tools, cut out the sides of the placeholder houses.
As the sides are ready, gently place them on a baking sheet lined with parchment paper.
Place the baking sheet in the refrigerator for an hour so that the house pieces are well chilled.
Preheat the oven to 320°F.
Bake the houses for about 5-7 minutes, they should not darken too much. Once ready, let them cool well before starting to assemble the houses.
Prepare the royal icing; place an egg white in a bowl and add a few drops of lemon juice to facilitate beating. Use an electric mixer to beat the egg white until stiff peaks form. At this point, gradually incorporate the sifted powdered sugar, continuing to mix with the mixer until you obtain a smooth, homogeneous mixture without lumps.
Set aside a small amount that you will use as mortar to attach the walls and roof.
Transfer the icing into a piping bag and cut the tip to create a thin and precise hole. For convenience, I use the decorating pen; it is very handy and precise, like writing with a real marker.Start assembling the house. For convenience, I added a little powdered sugar to the amount of icing set aside for mortaring the walls to make it thicker.
Spread a little icing along the edges and place the sides to form the body of the house. Use small jars to hold the bases in place until the icing dries. At this point, you can place the two sides of the roof, always using the jars to hold it in place.
Proceed in this way for all the houses and let them dry thoroughly; I left them on a tray lined with parchment paper all night.
Once the houses are dry, you can decorate them with royal icing. I decided to decorate them with white icing, but you can also color the icing with your preferred food coloring and use small silver sprinkles or edible glitter.
Take the piping bag or silicone pen and decorate the sides and roof. Place them again on the tray and let the houses dry completely.
The placeholder house can be kept for a few days covered so it doesn’t get dusty. You can also package it and give it as a gift to a loved one.
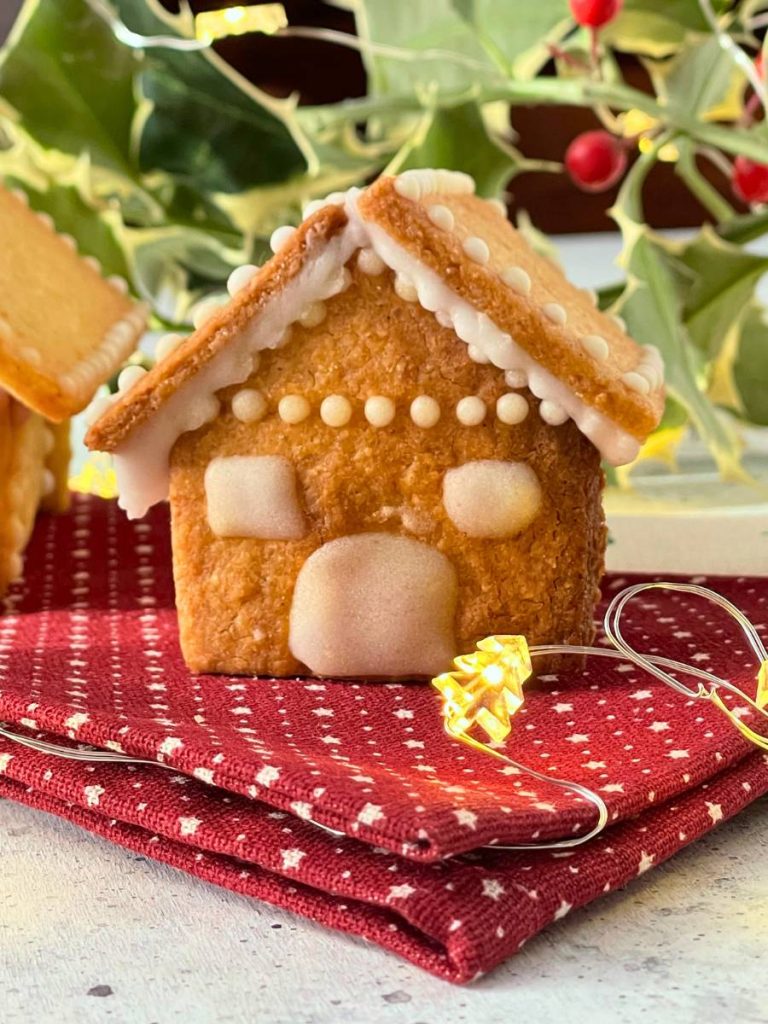
Once the table is set, place the house on the napkin in the center of the plate, it will make a great impression.
The placeholder house is delicious, even though it will be a shame to eat it, but I assure you that it is delightful when accompanied with coffee.
Follow me on social media
my Facebook page my Instagram profile my Pinterest page
FAQ
Where do you place placeholders?
Placeholders are the objects used to indicate the seat assigned to each guest. According to etiquette, they are usually placed in front of the glasses or in the center of the plate.