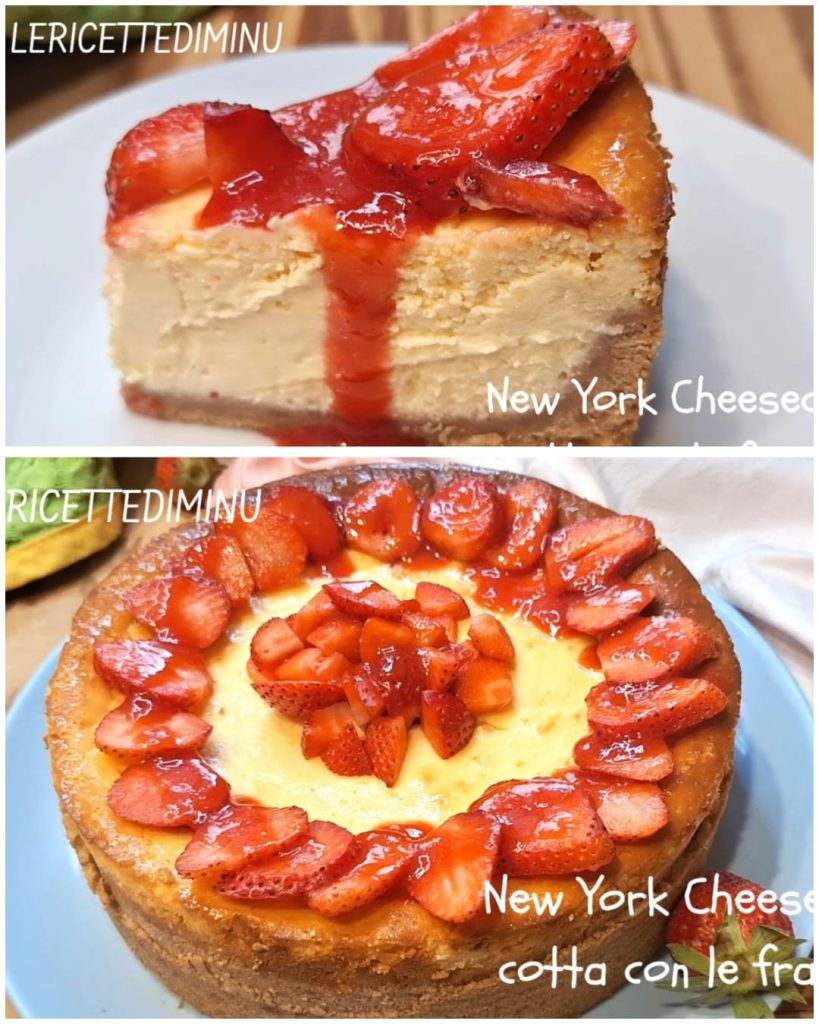
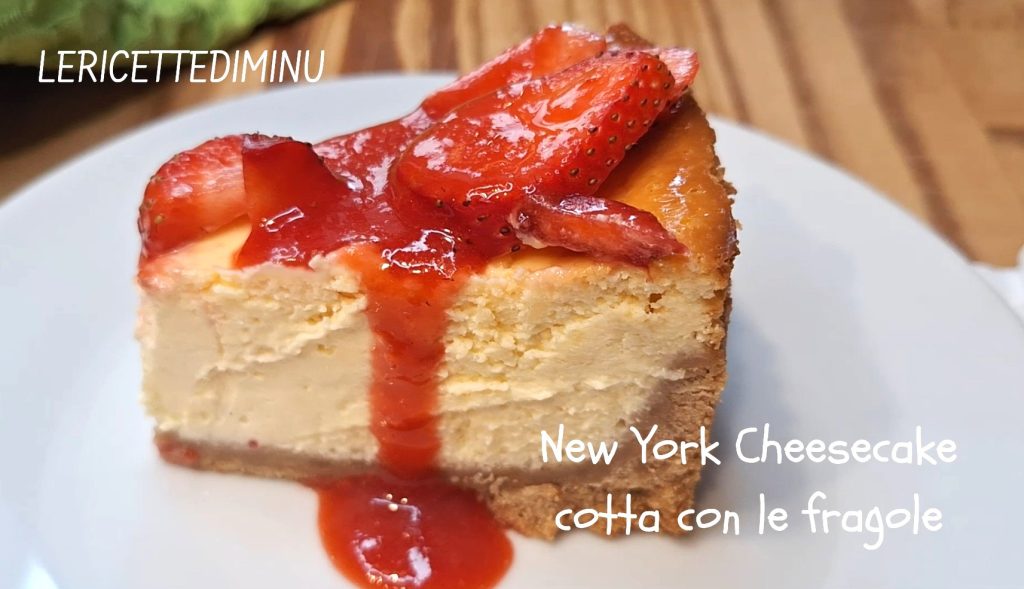
The New York cheesecake with strawberries is an American cake, with a filling based on cream cheese and cream. It is a type of baked cheesecake, first made by a German who owned several restaurants in America.
It has a cookie and butter crust, and to the cheese filling, eggs, sugar, and flavors are added, and it is baked in the oven.
It is decorated with fresh fruit and a strawberry coulis, which can be easily homemade.
Depending on the taste, it can clearly be modified, for example by using berries instead of strawberries, with the care, in this case, to cook them if they are frozen berries.
The New York cheesecake is one of those desserts that adorns all the windows of the famous American bakeries.
It is quite simple to make, even though its preparation certainly requires more steps, none of which is too demanding.
Anyone who loves this type of dessert, in my opinion, should try this baked version, as an alternative to the more common cheesecakes that do not require baking.
Compared to the latter, the baked cheesecake is more consistent, but when bitten, it reveals all its creaminess and enveloping taste.
A true delight, whose goodness increases as the flavors blend well together, and I therefore highly recommend tasting it.
If you like my recipes, you can follow me on my FACEBOOK page and on INSTAGRAM
Thank you ❤️😘❤️
- Difficulty: Easy
- Cost: Medium
- Rest time: 2 Hours
- Preparation time: 40 Minutes
- Portions: 8
- Cooking methods: Oven
- Cuisine: American
- Seasonality: Spring, Summer
Ingredients
- 8.82 oz digestive biscuits (oro saiwa)
- 7 tbsps butter (plus some for greasing the pan)
- 10.58 oz cream cheese (philadelphia)
- 8.82 oz ricotta
- 3 eggs
- 1 tbsp all-purpose flour
- 2.12 oz plain yogurt
- lemon zest (unwaxed)
- 1 tsp vanilla extract
- 4.23 oz sugar
- 0.42 cup fresh whipping cream
- 6 strawberries (for decoration)
- to taste strawberry coulis
- 8.82 oz strawberries
- 2.12 oz sugar
- 1 tsp lemon juice
Tools
- 1 Blender or mixer
- Electric Beaters
- 1 Pan non-stick
- 1 Strainer
- 1 Spatula silicone
- 1 Baking Pan non-stick, 7-inch diameter (springform)
Steps
To prepare the New York cheesecake with strawberries and thus a baked cheesecake, start by melting the butter over very low heat, always stirring and without letting it fry.
Let it cool slightly.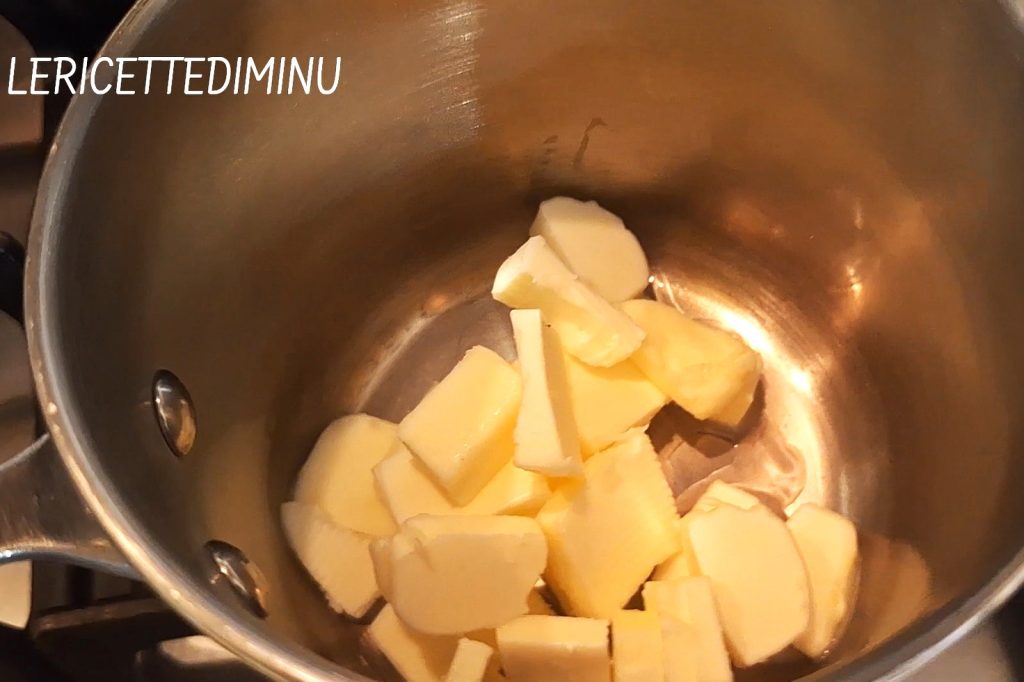
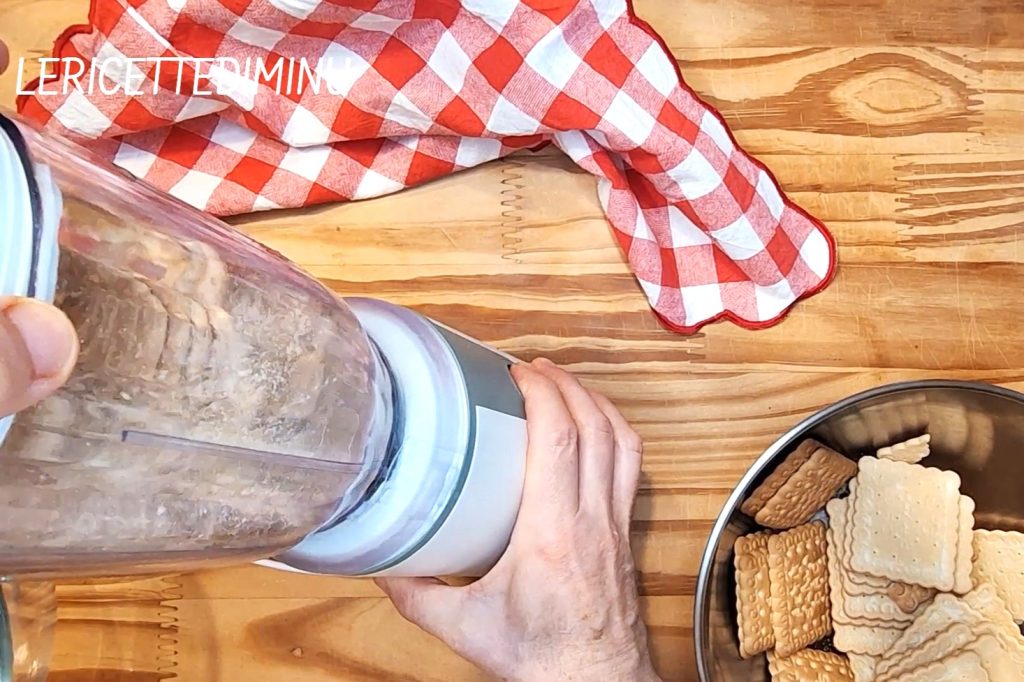
In a blender (or mixer), finely chop the digestive biscuits.
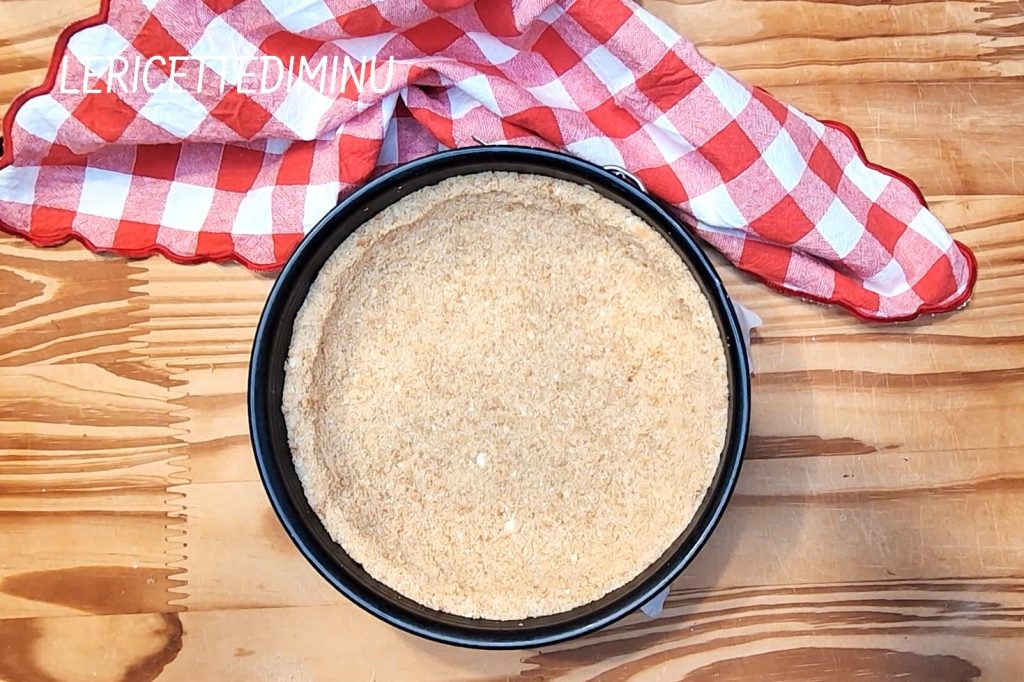
Cover the bottom of a springform pan with parchment paper.
Grease the sides well.
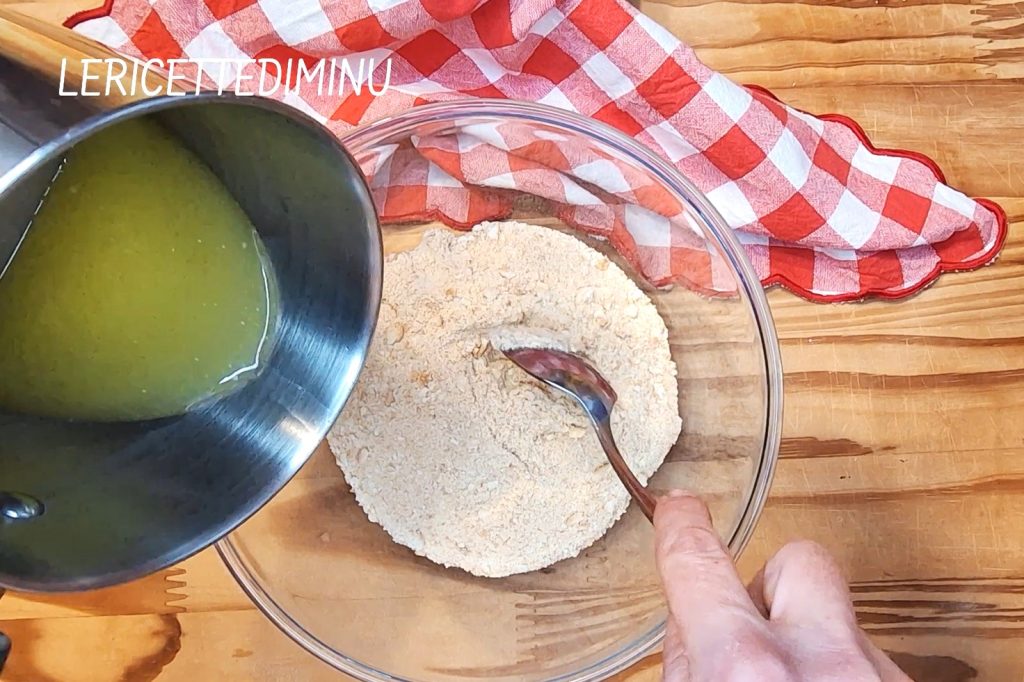
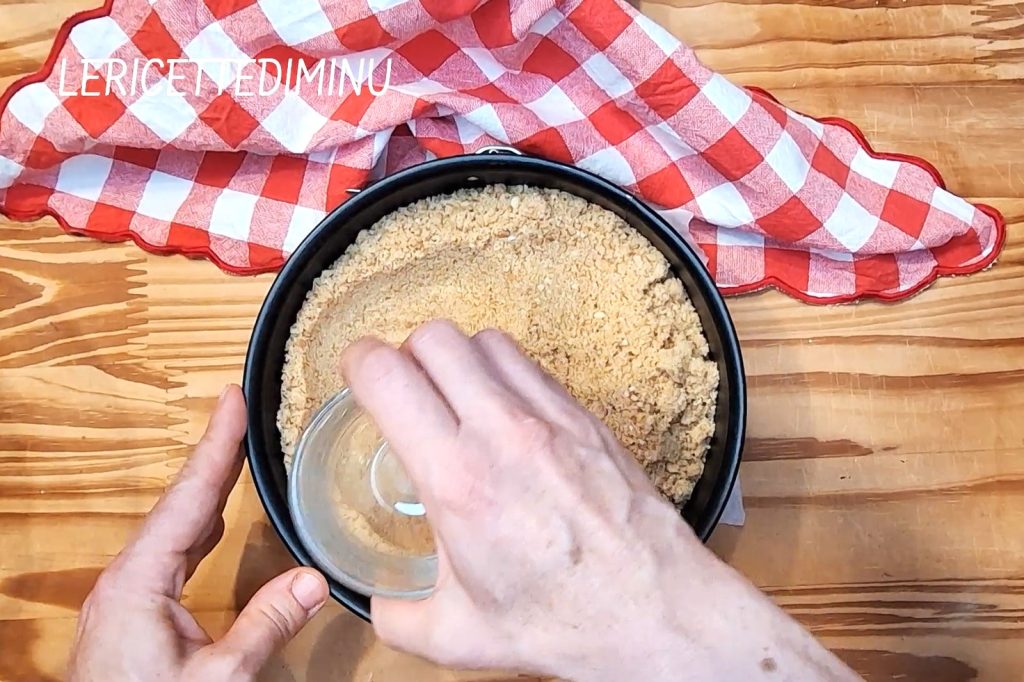
In a bowl, combine the biscuits with the butter and mix so that the cookie crumbs are evenly soaked with butter.
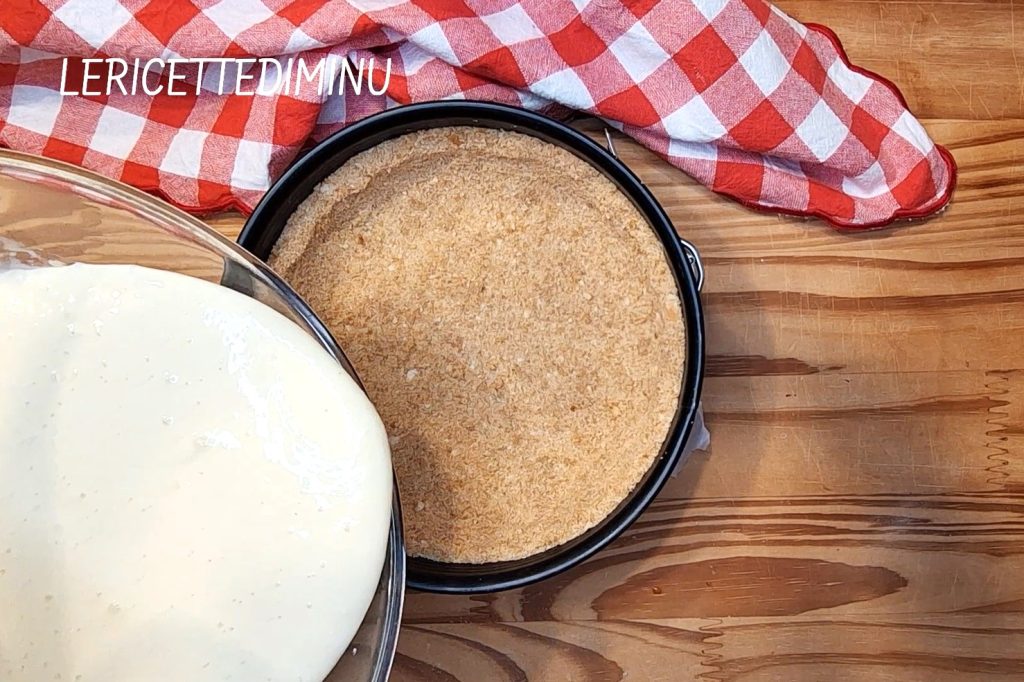
Transfer the obtained mixture into the springform pan and create a high-edged shell by compacting it very well.
Use the base of a glass or simply press with your hands.
Set aside for now.
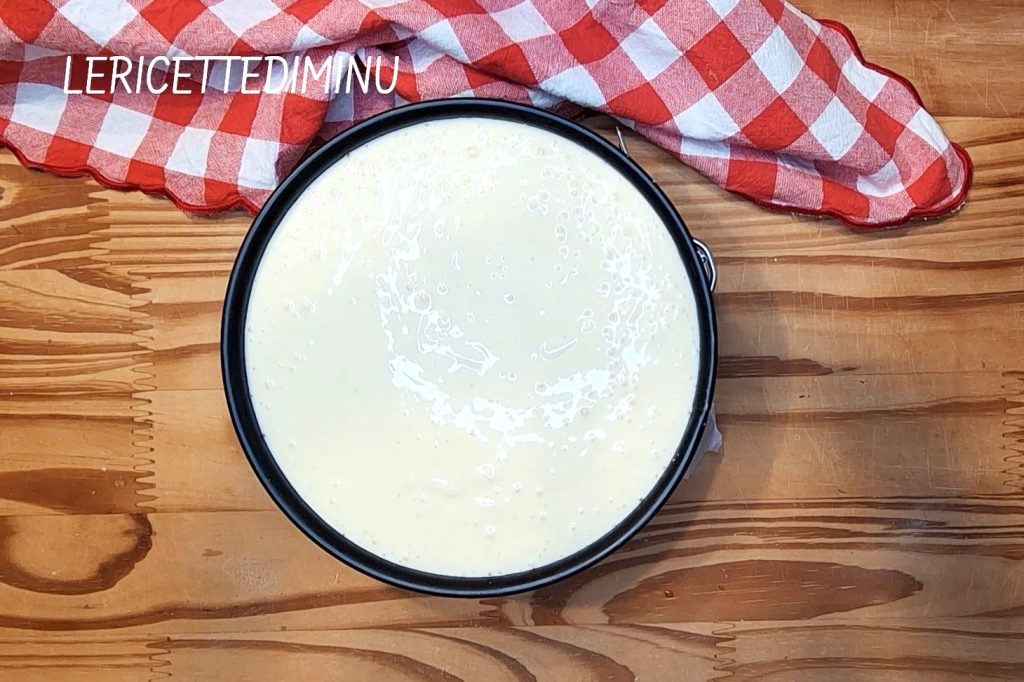
In a bowl, combine cream cheese, ricotta, plain yogurt, grated zest of an unwaxed lemon, vanilla extract, and sugar.
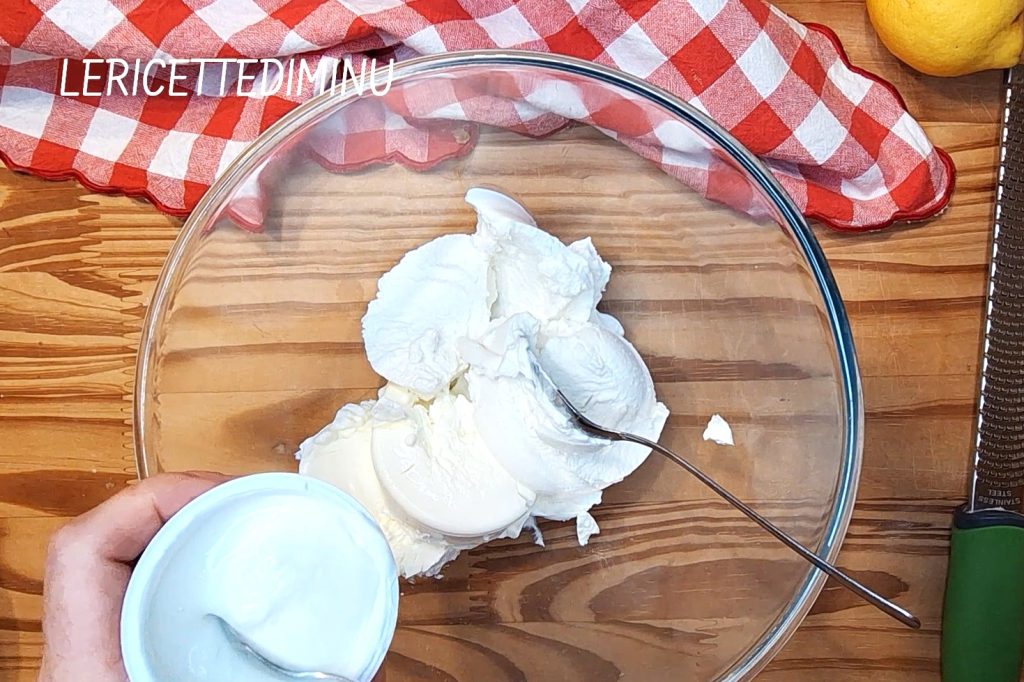
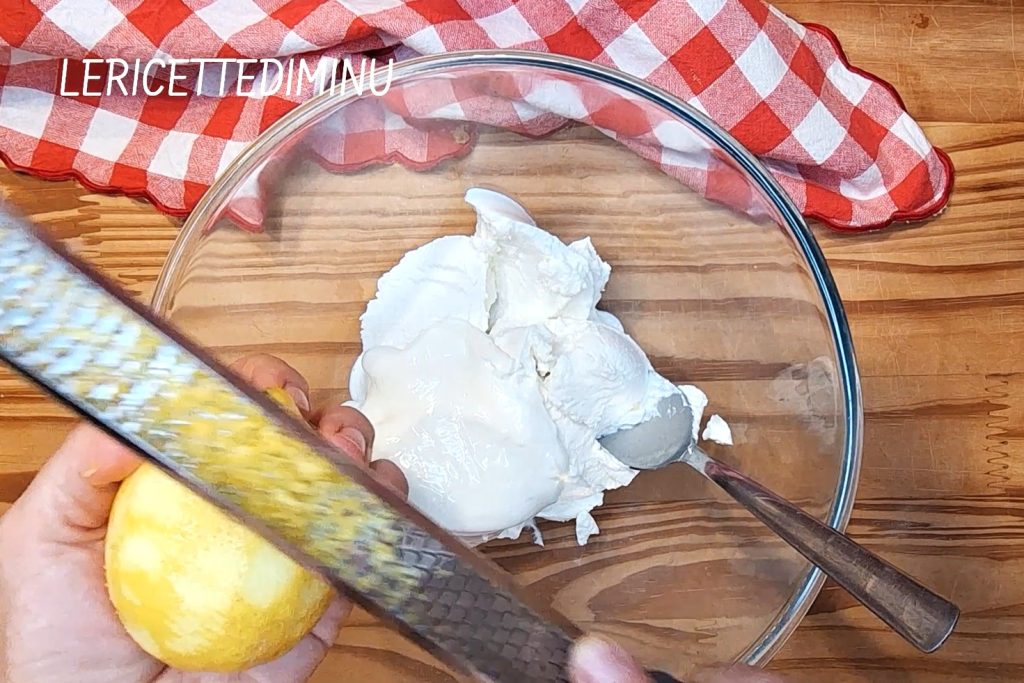
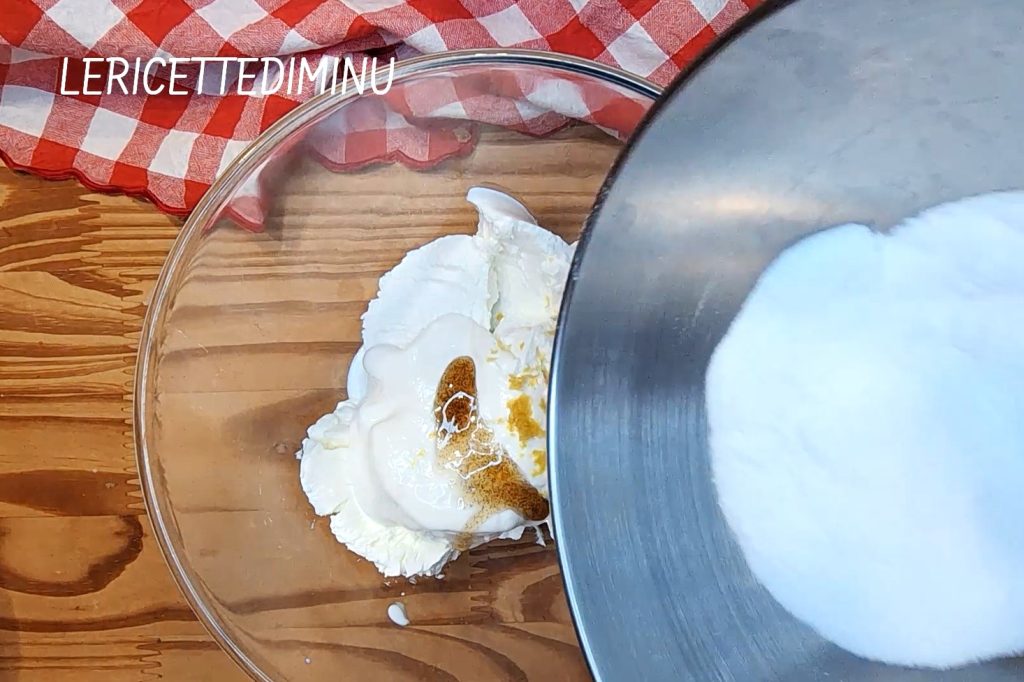
Start working with the electric beaters.
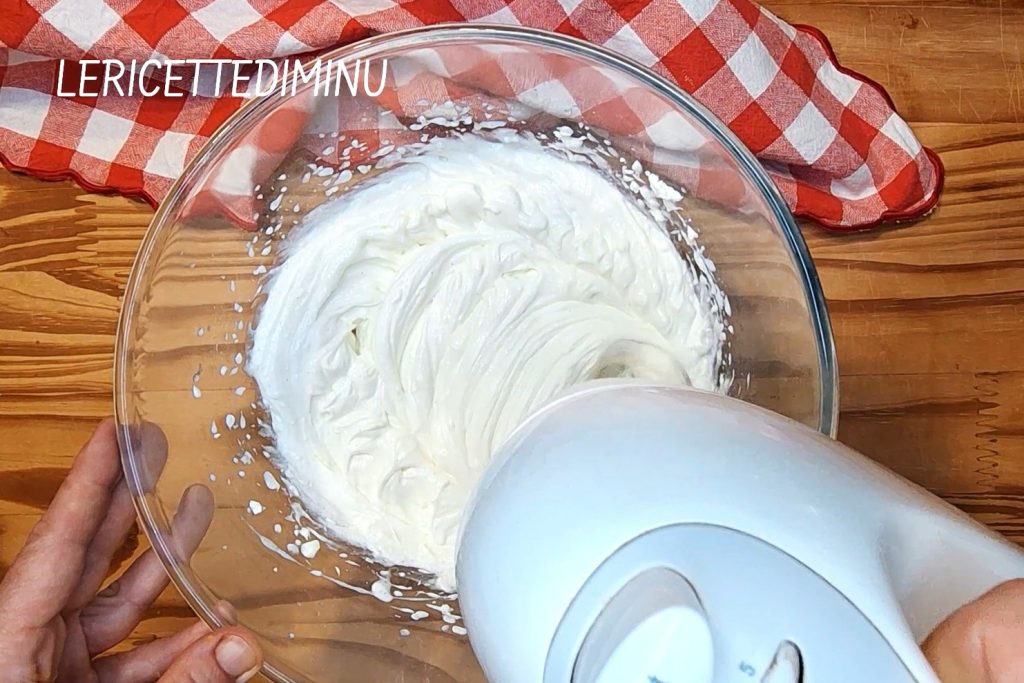
Then add the eggs and cream and continue beating for a very short time with the electric beaters.
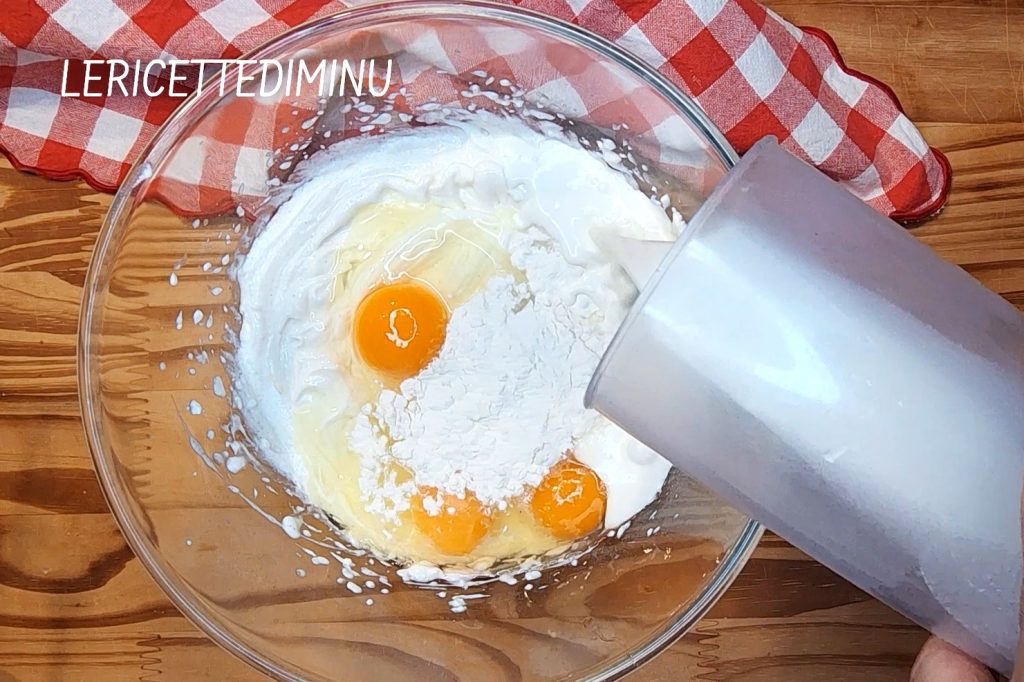
As soon as a homogeneous mixture is obtained, pour it into the cookie shell. Even if it slightly exceeds the cookie edge, it will not be a problem.
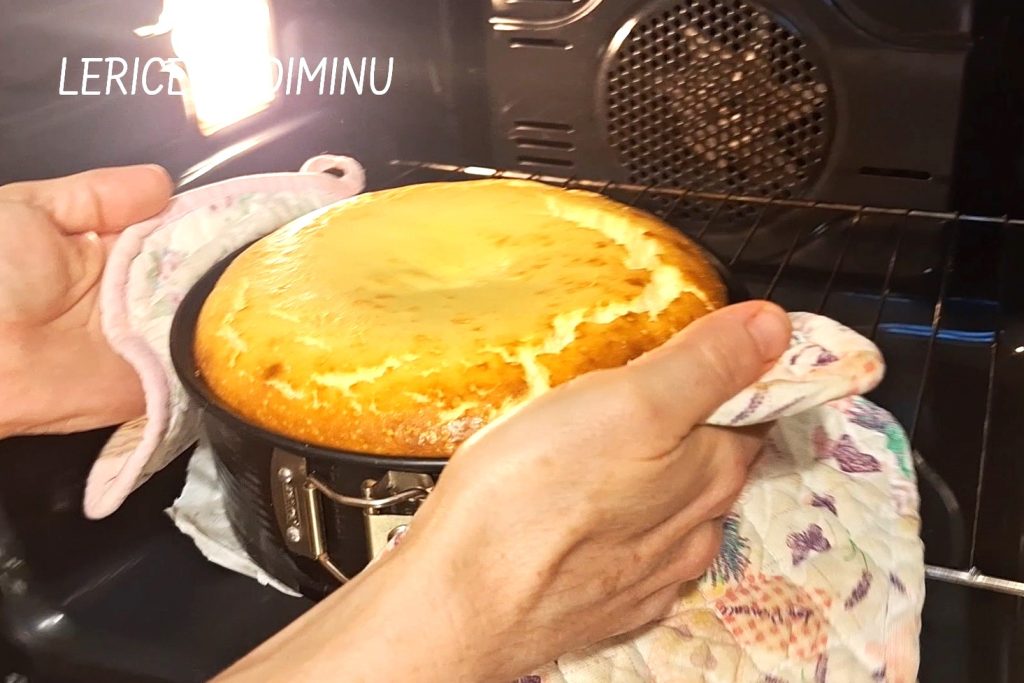
Bake in a static oven, preheated to 338°F, for about 1 hour, on the lower-middle rack of the oven.
At the end of the baking, the central part of the filling should be wobbly; its own heat will completely firm it up out of the oven.
Remove from the oven and let cool in the pan.Then refrigerate for at least two or three hours, or better yet, overnight.
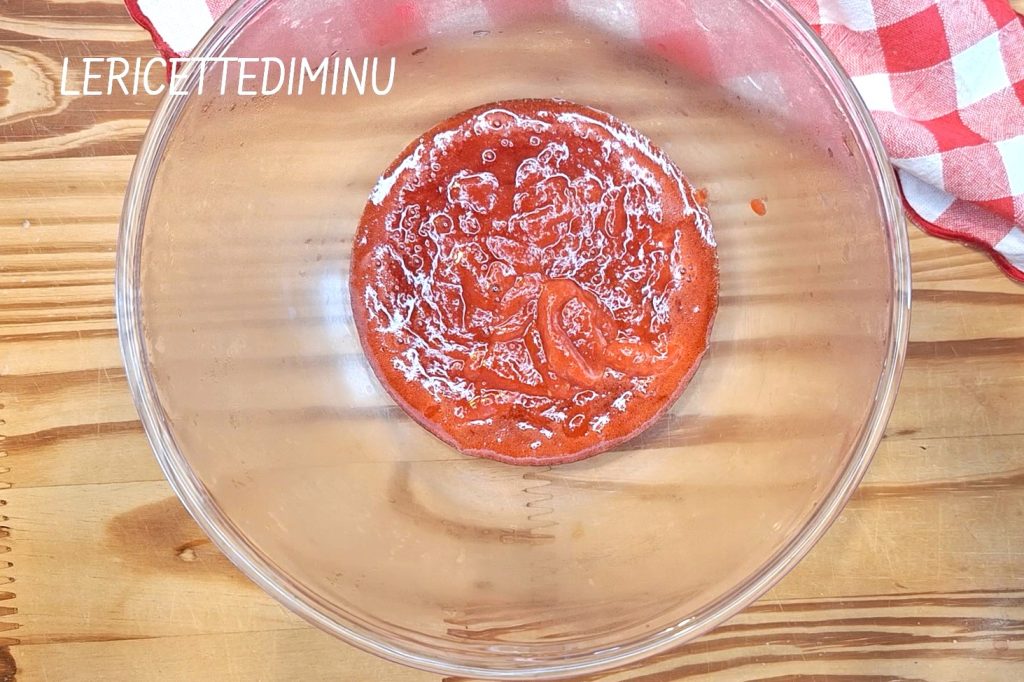
In the meantime, prepare the strawberry coulis.
Wash the strawberries, cut them into pieces, and place them in a non-stick saucepan with the sugar and a teaspoon of lemon juice.
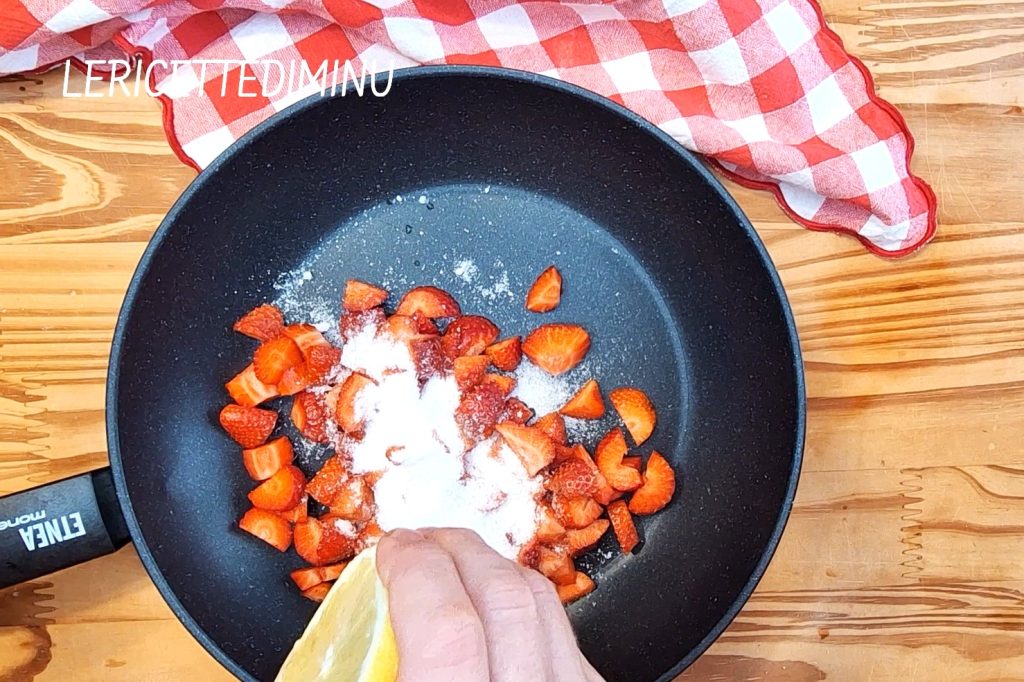
Cook over low heat until the strawberries are very soft, stirring a few times.

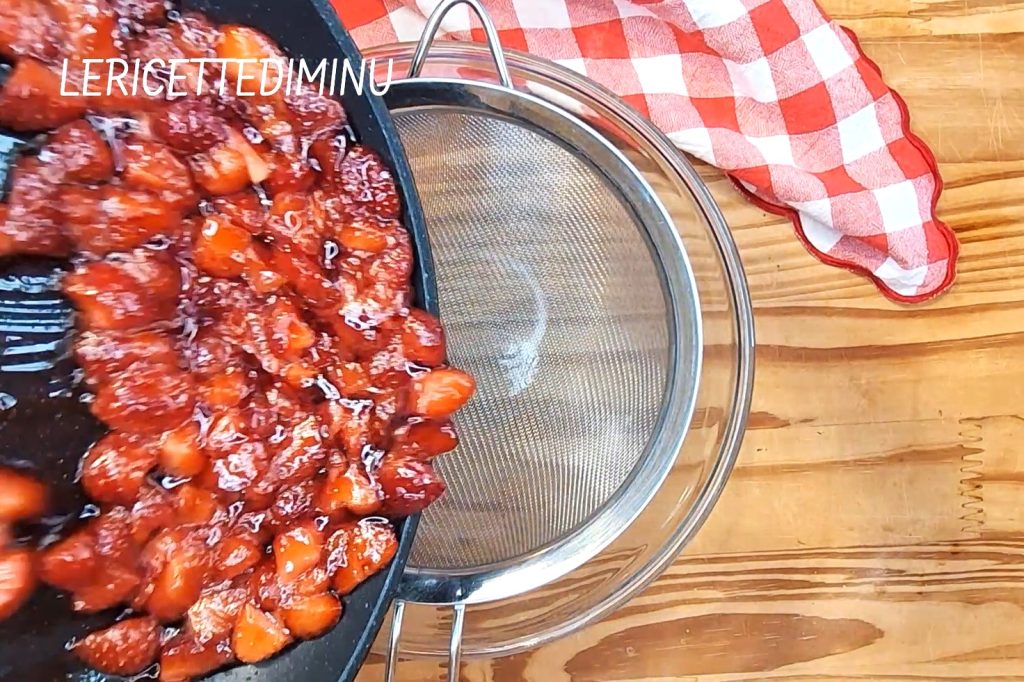
Then strain it through a sieve, pressing with a silicone spatula to remove the seeds and turn the strawberries into a puree.
Let it cool.
At this point, carefully remove the cake from the mold and decorate with fresh strawberries.
Drizzle with the coulis when serving.
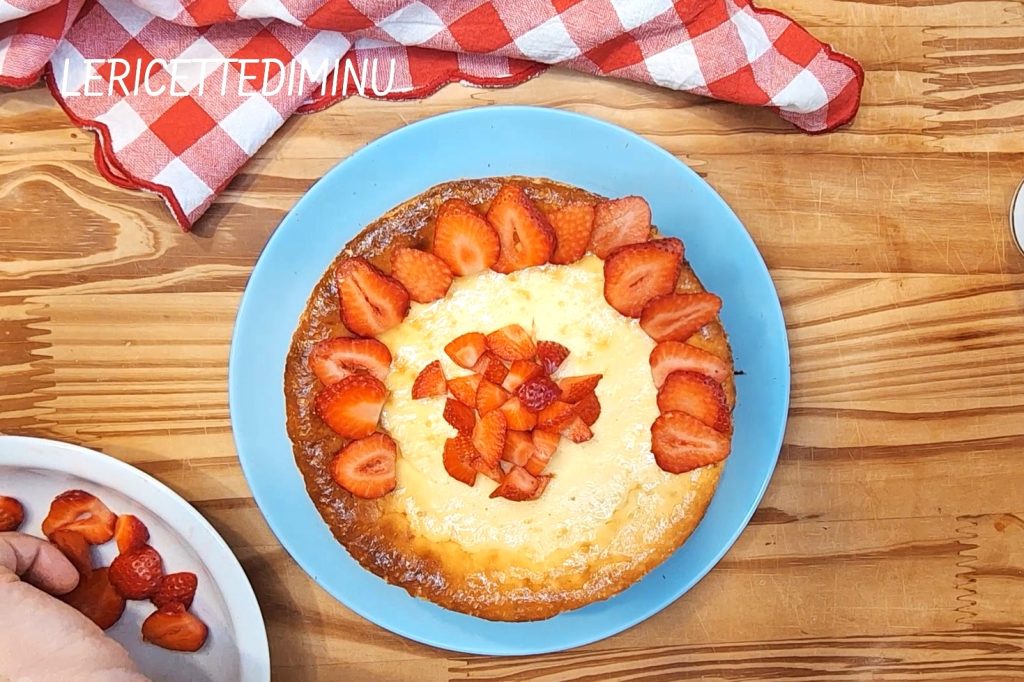
The New York cheesecake with strawberries is thus ready.

In the fridge, well sealed in an airtight cake container, for about 3 days.
In the fridge, well sealed in an airtight cake container, for about 3 days.
Here is a selection of products that are really useful for making desserts. Many of these have been bought and tested by myself. To view the recommended products click here.
Here is a selection of products that are really useful for making desserts. Many of these have been bought and tested by myself. To view the recommended products click here.
