Mimosa Cake, My Version of this classic Italian cake made with sponge cake and custard cream named after the sponge cake squares that resemble mimosa flowers. Normally in Italy, we enjoy this cake for Women’s Day, but it’s actually part of the family desserts that remind us of special occasions from the past, it’s one of our grandparents’ favorite cakes and appreciated by the whole family, including children, thanks to the whipped cream topping.
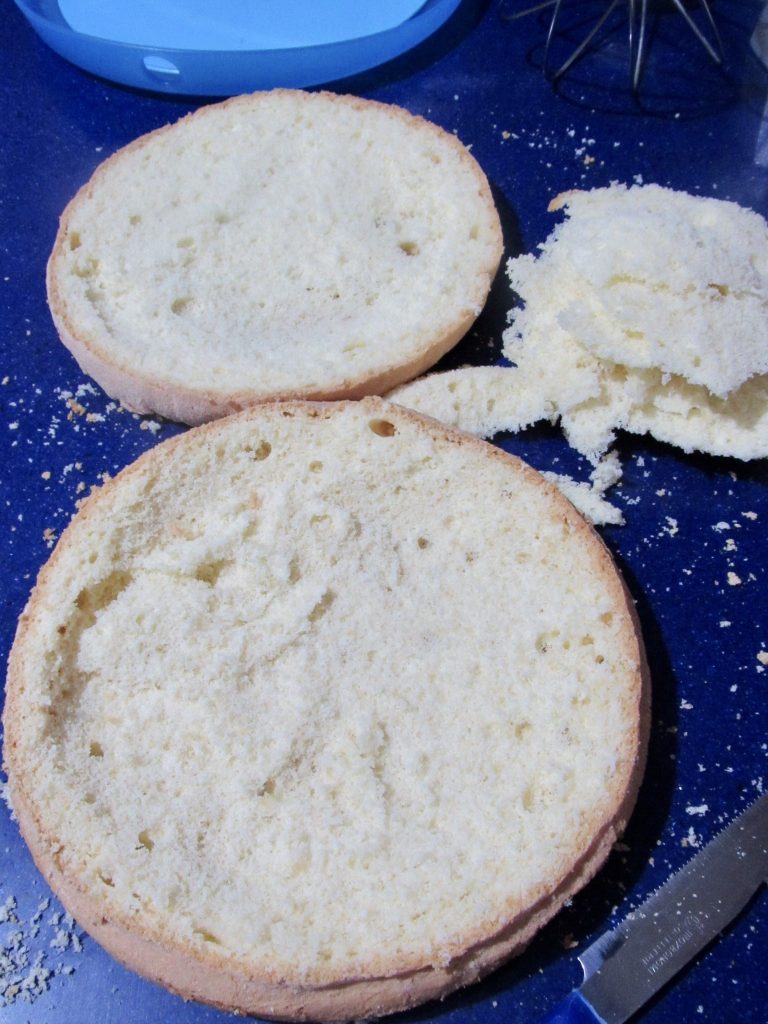
Personally, when preparing this cake, I prefer to use custard cream without adding cream because it is already generously present in the topping, and it’s good to appreciate each flavor by creating different layers of cake to enjoy. I also simply cut the sponge cake in half for this cake because I will scoop out the inside to have sponge cake to cut and chop for the topping.
For lovers of filled cakes, here are some links for other ideas
- Difficulty: Medium
- Cost: Average
- Preparation time: 2 Hours
- Cooking time: 40 Minutes
- Portions: 10
- Cuisine: Italian
- Energy 463.64 (Kcal)
- Carbohydrates 58.55 (g) of which sugars 45.69 (g)
- Proteins 6.29 (g)
- Fat 23.57 (g) of which saturated 2.62 (g)of which unsaturated 2.53 (g)
- Fibers 0.11 (g)
- Sodium 26.77 (mg)
Indicative values for a portion of 190 g processed in an automated way starting from the nutritional information available on the CREA* and FoodData Central** databases. It is not food and / or nutritional advice.
* CREATES Food and Nutrition Research Center: https://www.crea.gov.it/alimenti-e-nutrizione https://www.alimentinutrizione.it ** U.S. Department of Agriculture, Agricultural Research Service. FoodData Central, 2019. https://fdc.nal.usda.gov
Ingredients
- 3 eggs
- 3/8 cup sugar
- 1/3 cup all-purpose flour
- 1/3 cup potato starch
- 1/4 teaspoon baking powder
- 2 cups milk
- 3/4 cup sugar
- 4 egg yolks
- 1/2 cup cornstarch
- as needed vanilla flavoring
- 1/2 cup water
- 3/4 cup sugar
- 1/2 shot glass alchermes
- 2 cups heavy whipping cream
Tools
- 1 Stand Mixer Howork
- 1 Springform Pan Tescoma
Preparation
For the preparation of the sponge cake and to properly whip the cream, I suggest using a stand mixer or a good electric whisk.
Place the whole eggs with the sugar in the mixer bowl and start the mixer at maximum speed for at least 10 minutes; the eggs must be well whipped for the successful preparation of the sponge cake. Mix the flours with the pinch of baking powder in a bowl and add them manually to the whipped eggs. Please do not use electric whisks or the mixer for this operation but simply add them manually using a hand whisk with circular movements from bottom to top. You only need to combine the flours with the eggs to obtain a homogeneous mixture, without mixing too long and trying to deflate the eggs as little as possible,
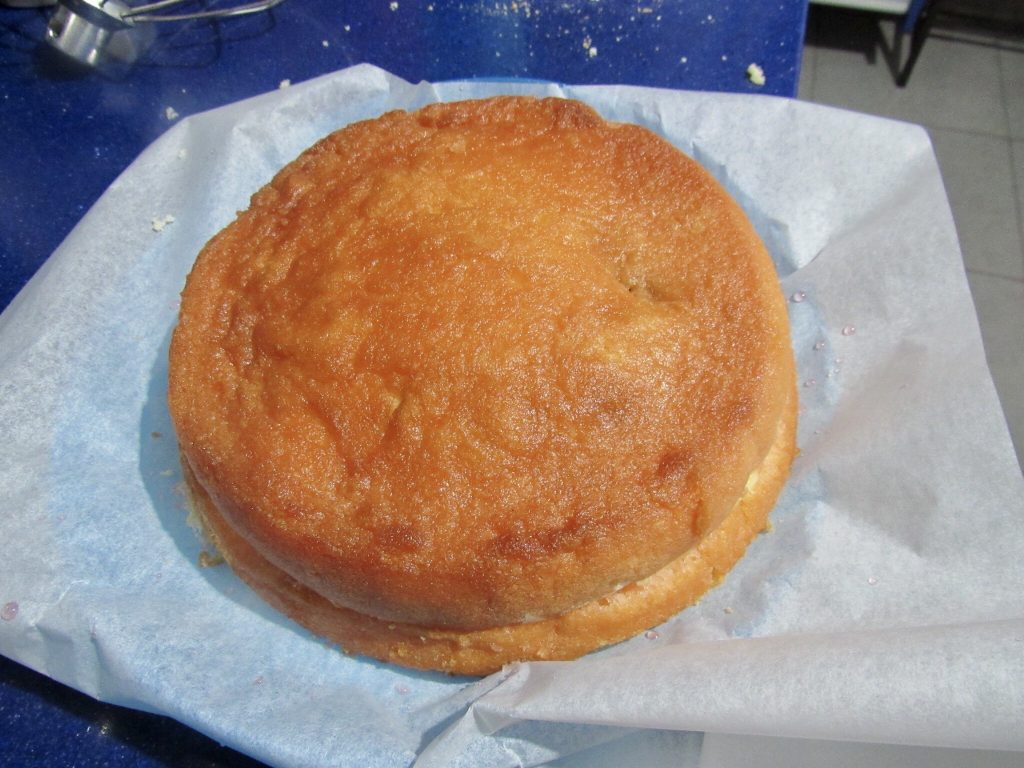
Transfer the obtained mixture into a springform pan with a diameter of 8-9 inches, previously buttered and floured, and bake the sponge cake in a preheated oven at 350°F for about 30 minutes. If the sponge cake is well baked, you will see the edges slightly pull away from the pan during baking, but always perform the toothpick test and never open the oven before 20 minutes from the start of baking, otherwise, it will collapse on itself. Remove the sponge cake from the oven, remove the outer rim of the pan, and let it cool. When the sponge cake is cold, divide it in two and scoop out some of the inside using a knife and set it aside. This way, you will have created the cavity to fill the cake and have the necessary sponge cake for topping and decoration.
Put the milk in a saucepan with half of the sugar needed to prepare the cream and heat it on the stove. While the milk is heating, pour the egg yolks into a measuring jug, add the remaining sugar, and roughly mix with a spoon. When the sugar is mixed with the yolks, add the cornstarch and continue mixing roughly by hand. Add the warm milk to the eggs and mix well, put everything back on the stove and, stirring with a wooden spoon, let the cream thicken. It will take a few minutes, and when you see that stirring the spoon in the cream starts to thicken, turn off the heat and let it thicken while stirring off the heat. Add the vanilla and let it cool slightly.
Bring the water and sugar to a boil on the stove, then turn off the heat and add the alchermes and the soaking syrup will be ready.
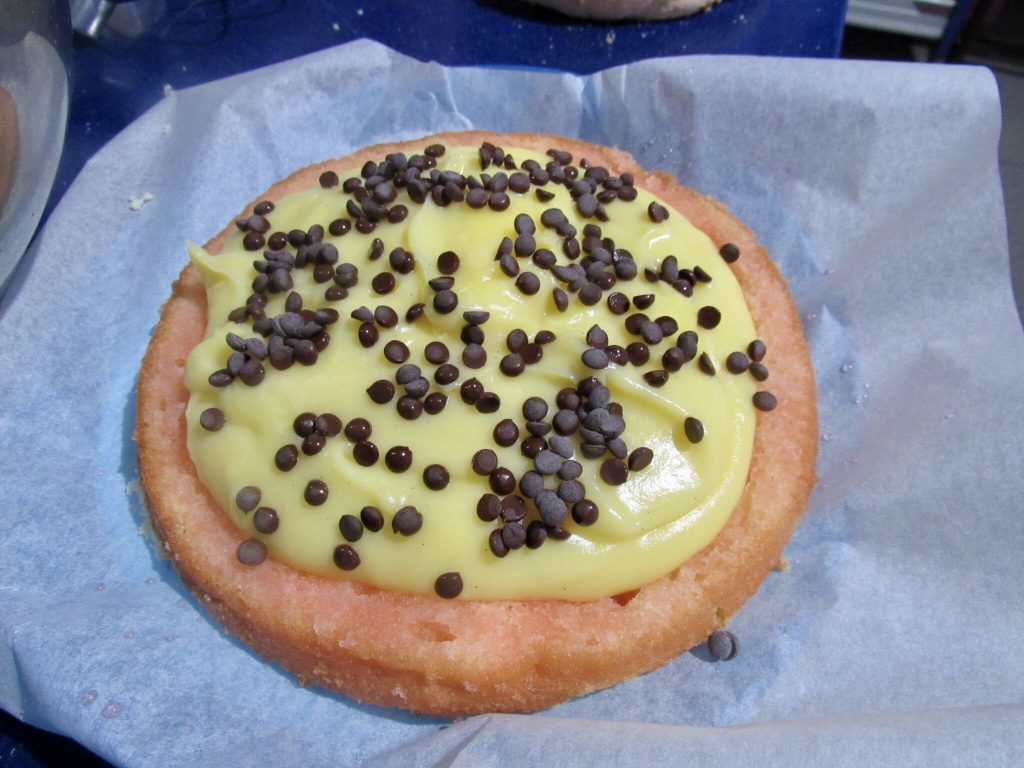
After cutting the sponge cake as described above, soak it with the syrup and fill it with custard and chocolate chips.
Cover with the sponge cake dome and soak it well with the syrup as well. To make this operation easier, use a kitchen brush.
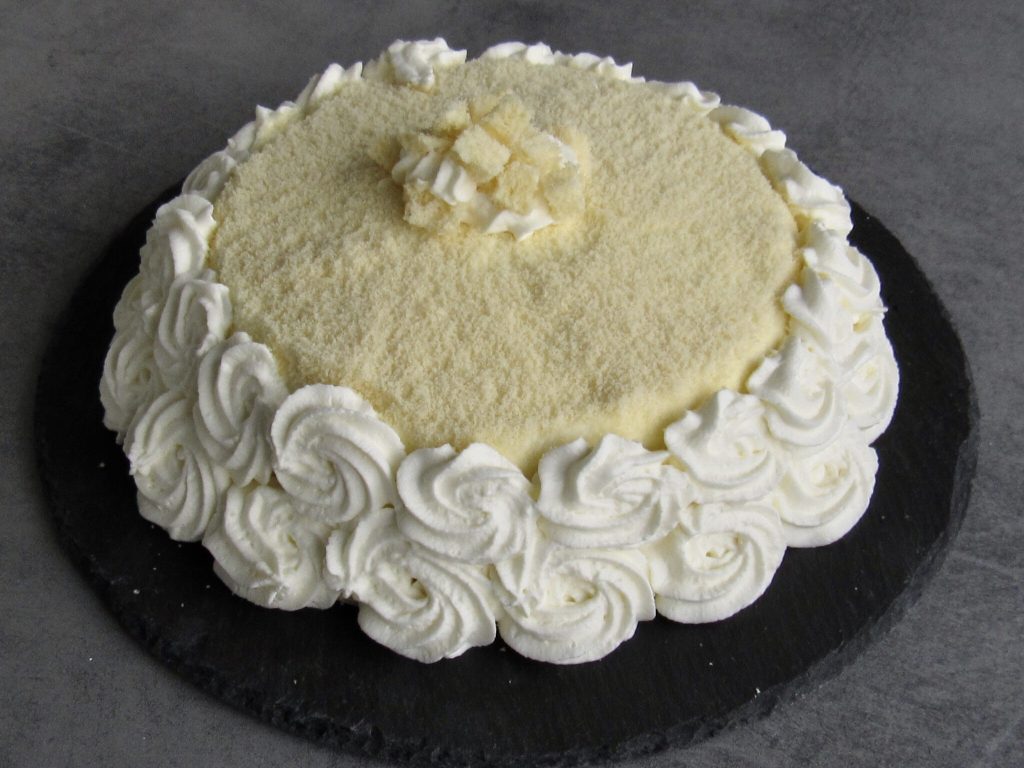
Cover the cake with whipped cream and chop the sponge cake that you set aside. Part of it can be cut into cubes as seen in the photo to decorate the central part of the cake and truly resemble the mimosa cake. Cover the surface of the cake you covered with whipped cream with the chopped sponge cake.

With the remaining whipped cream after covering the cake, decorate the edges as you prefer; I put the cream in a bag and with the star nozzle I created two rows of small roses and three central roses on the surface where I placed the sponge cake cubes.

NOTES
To have a nice compact whipped cream to decorate with the piping bag, whip the cream well and sweeten it with two teaspoons of powdered sugar, which contains cornstarch that will help keep the cream whipped.
The mimosa cake should obviously be stored in the refrigerator until consumed, and it keeps well for a couple of days in the fridge.
This recipe contains one or more affiliate links.
If you liked the recipe or have any questions, feel free to comment here or on social media Facebook, Pinterest, Instagram, and Twitter.