White Pizza I like to call it that even though most of the time it’s defined as Roman pizza, focaccia, pan pizza, etc. White pizza has always been my snack or snack par excellence and in this recipe, I had fun preparing it with sourdough for a unique taste and digestibility. In the recipe, you will also find the ingredients to make it with brewer’s yeast as the procedure remains the same, the only difference is the rising times.
For those who love homemade pizza, I also remind you of the high hydration pizza where I always use sourdough.
The important moments of rising are the doubling of the dough and the rest in the pan; the latter must be short, from 30 minutes to a maximum of one hour.
To double the dough, you can choose to leave it at room temperature or to double the rising time, place it in the refrigerator. Leaving the dough at room temperature to double takes about 4/5 hours with sourdough and about 2 hours with brewer’s yeast.
I’ll leave you some more recipes for your snacks or appetizers
- Difficulty: Easy
- Cost: Cheap
- Rest time: 4 Hours
- Preparation time: 15 Minutes
- Portions: 12
- Cooking methods: Oven
- Cuisine: Italian
- Energy 451.99 (Kcal)
- Carbohydrates 79.47 (g) of which sugars 2.42 (g)
- Proteins 12.88 (g)
- Fat 10.42 (g) of which saturated 1.54 (g)of which unsaturated 0.73 (g)
- Fibers 3.31 (g)
- Sodium 579.93 (mg)
Indicative values for a portion of 88 g processed in an automated way starting from the nutritional information available on the CREA* and FoodData Central** databases. It is not food and / or nutritional advice.
* CREATES Food and Nutrition Research Center: https://www.crea.gov.it/alimenti-e-nutrizione https://www.alimentinutrizione.it ** U.S. Department of Agriculture, Agricultural Research Service. FoodData Central, 2019. https://fdc.nal.usda.gov
Ingredients
The ingredients are very simple; I will only divide them to highlight the doses with sourdough and those with brewer’s yeast
- 3 1/2 oz semolina flour
- 4 cups all-purpose flour
- 1 1/4 cups water
- 1 tbsp extra virgin olive oil
- 1 tsp sugar
- 1 1/2 tsp salt
- 4 1/2 oz sourdough starter
- 3 1/2 oz semolina flour
- 5 cups all-purpose flour
- 1/2 oz fresh brewer's yeast
- 1 1/2 cups water
- 1 tbsp extra virgin olive oil
- 1 tsp sugar
- 1 1/2 tsp salt
- 1/2 cup extra virgin olive oil
- 1/3 cup water
- as needed salt (to season the surface)
Tools
To knead well, I recommend using a stand mixer, but you can still knead by hand 🤚
- 1 Stand Mixer Howork
- 1 Container
Preparation
The preparation of white pizza is very simple. For convenience, I used sourdough and kneaded in the evening around 10 PM, leaving the dough at room temperature until around 2 AM, then I put it covered in the refrigerator and left it until around 9 AM; when I took it out of the refrigerator, I let it rest a bit at room temperature before rolling it out. If you have time and leave it at room temperature, the dough will be ready to roll out after about 4/5 hours.
Place the flours in the stand mixer bowl with the sugar and sourdough starter, and start at minimum speed, gradually adding water, salt, and finally the oil. The dough should be soft but not sticky; if needed, don’t add all the water or add a little more to get the right consistency.
Place the dough on a work surface and make circular movements with your hands to round the dough onto itself.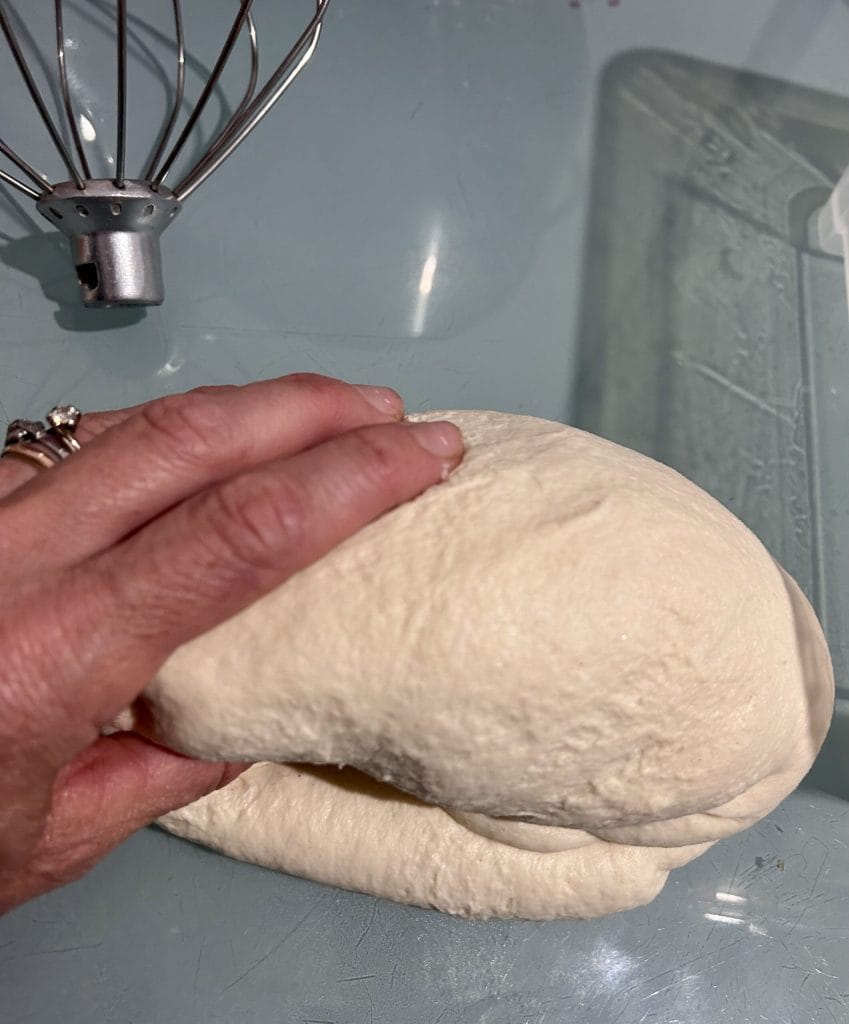
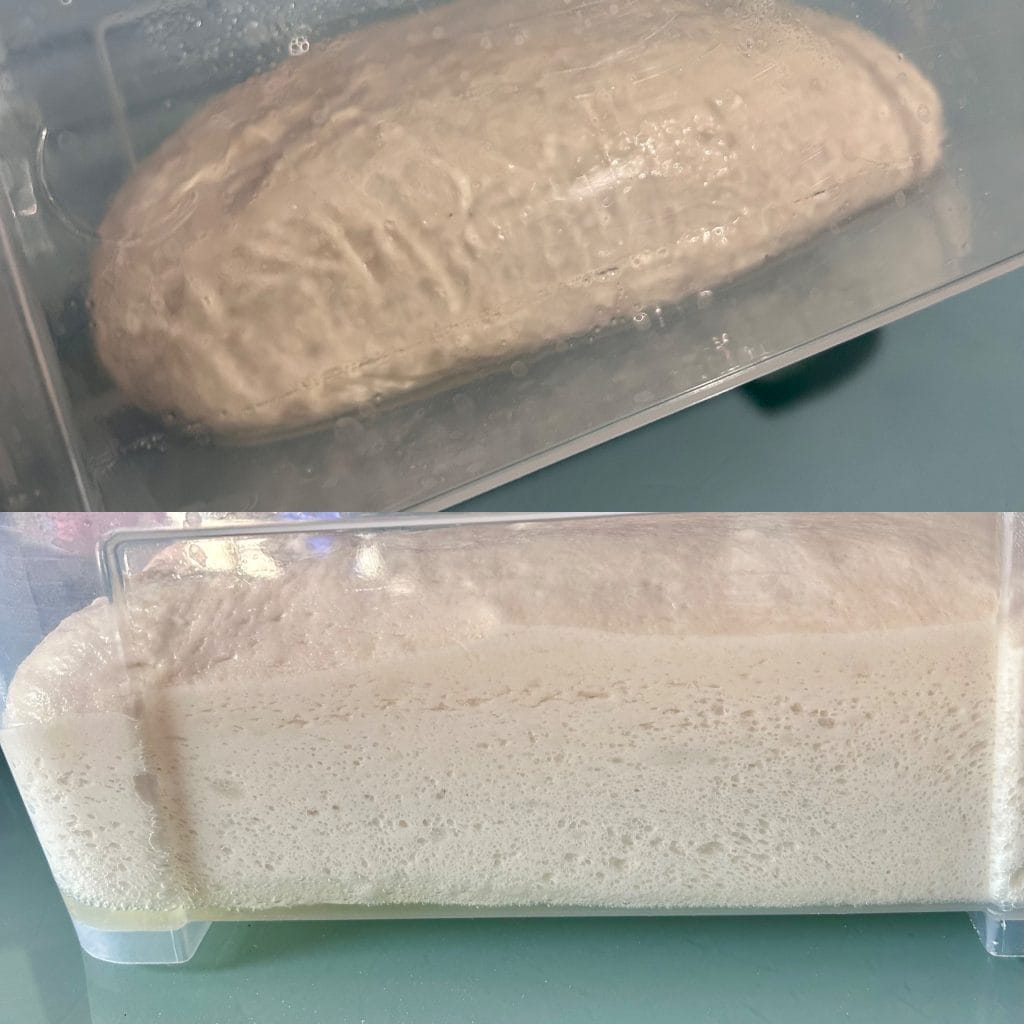
Place the dough in a slightly oiled fermentation container and cover with the lid; let it rise at least until it doubles or more, as you can see in the photo, it should be well aerated.
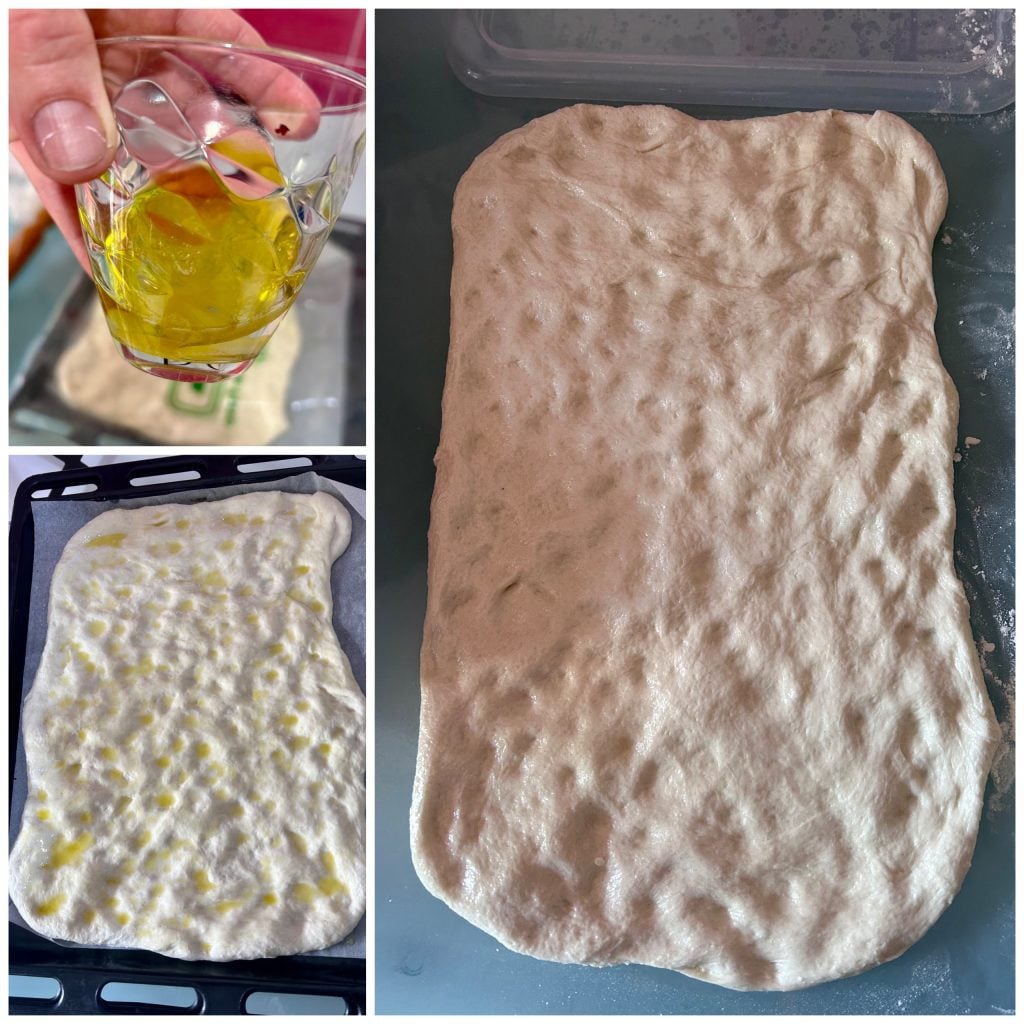
When the dough has risen, place it on a work surface and divide it into two parts. Roll out each part with a little flour, pressing with your fingertips to lengthen the dough. Now place the pizzas on a baking sheet, let them rest for 10 minutes covered with a cloth, and roll them out again with your fingers; when you’ve reached the desired shape, cover them with the emulsion prepared simply by mixing water, oil, and salt; for this operation, it may be useful to use a kitchen brush. Let the pizzas rest for at least 30 minutes with this topping.
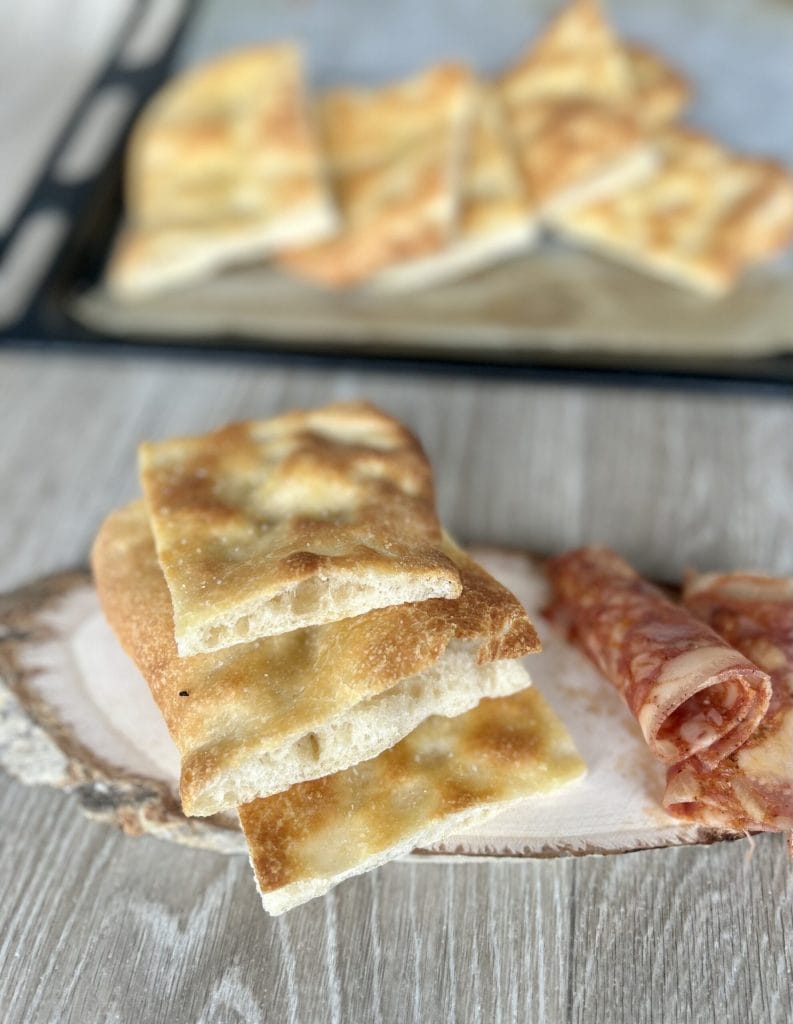
Bake in a preheated oven at the maximum temperature for about 15 minutes, until the base and the surface are golden. I recommend baking in the lowest part of your oven; I made two separate bakes for the two pizzas. If you have a baking stone, you can place the baking sheet directly on the stone for even more even cooking.

NOTES
We consumed the white pizza as it came out of the oven, but if you want, you can brush it again with a little extra virgin olive oil right after baking.
You can eat the white pizza plain, filled with cold cuts, or for a delicious dessert, fill it with hazelnut cream or jam.
This recipe contains one or more affiliate links.
If you liked the recipe or have questions, don’t hesitate to comment here or on social media Facebook, Pinterest, Instagram and Twitter.
Frequently Asked Questions
I try to answer some of your questions, but don’t hesitate to contact me here or on social media for more questions.
Can I freeze white pizza?
Yes, you can easily freeze white pizza after baking to have it ready when needed, or you could also freeze it after the first rolling out and then let it come back to room temperature for a couple of hours before proceeding to the baking sheet and subsequent baking.
Can I use type 2 flour for kneading?
Of course, you can use less refined flour instead of all-purpose flour, but be careful about the amount of water needed to achieve a hydrated dough; it may require a little more water for kneading.