Today, let’s make bread together! I discovered this recipe thanks to a friend and fellow blogger, Annamaria, who always amazes me with her wonderful bread recipes.
I’m not an expert in bread-making but thanks to her no-knead bread recipe, I managed to serve a fantastic product on the table without any effort.
Being naturally curious, I researched a bit about the origin of no-knead bread, also known as “Pane Cafone,” or Camaldoli bread, a very ancient traditional recipe.
Many mistakenly attribute the origins of this bread to the American baker Jim Lahey, but in reality, the no-knead bread was born in Italy, more precisely in Naples.
Jim Lahey supposedly discovered this fantastic bread during a visit to Italy and then spread it upon his return to America, making it his own.
The no-knead bread, or Pane Cafone, can be prepared without having special baking skills.
However, a few precautions must be followed to get a fantastic product that will make us feel very satisfied and happy, and we’ll see them together in this article!
I obviously invite you to visit my friend Annamaria’s blog where you can find both this recipe and many others to try out Annamaria tra forno e fornelli
And if you like getting your hands dirty in the dough, take a look at these recipes too:
Walnut Bread
Soft Savory Pie Dough
Homemade Whole Wheat Bread
Focaccia with Cherry Tomatoes
Rustic Pizza with Peppers, Mozzarella, and Ham
Homemade Oil Buns
- Difficulty: Easy
- Cost: Very economical
- Rest time: 13 Hours
- Preparation time: 20 Minutes
- Portions: 1 loaf or more baguettes or rolls
- Cooking methods: Electric oven
- Cuisine: Italian
- Seasonality: All seasons
Ingredients
- 2.2 lbs Manitoba flour
- 2.83 cups Water (approximately)
- 0.25 oz Fresh brewer's yeast (or 0.07 oz of dry brewer's yeast)
- 0.63 oz Salt
- as needed re-milled durum wheat semolina (for working on the pastry board)
Preparation
To prepare the no-knead bread, start by taking a very large bowl because the dough will rise a lot and you’ll need enough space.
Place the Manitoba flour in the bowl. Annamaria’s original recipe calls for using Manitoba flour, but I’ve already made the no-knead bread three times using different flours, including Manitoba, type 0, and semi-whole wheat flour, and in all three cases, the result was excellent.
However, one thing must be specified, each type of flour absorbs water differently, so the above-indicated amount may vary depending on the flour you choose.
The secret is to pour it little by little so if necessary you can add more water, if it’s too much, avoid using the excess.
From the water you weighed, take about 3.5 oz, put it in a glass, and dissolve the fresh brewer’s yeast (you can replace it with dry yeast equal to 0.07 oz), add half a teaspoon of sugar, stir, and let activate for about 5 minutes.
An important tip, the water where you dissolve the brewer’s yeast (whether fresh or dry) should never be hot, but lukewarm, otherwise the yeast won’t do its job.
After 5 minutes when the yeast is dissolved, pour it into the flour along with half of the water you already weighed and set aside.
Start mixing the ingredients with a spoon and continue to pour the water slowly until the flour has completely absorbed it. Only at this point should you add the salt and not before, to avoid negatively affecting the yeast.
Stir with the spoon to even out the dough and let the salt be absorbed. You will get a mixture that is very, very soft, cover it with food wrap and let it rise for 12 hours.
Yes, you got it right, 12 hours! The main characteristic of this no-knead bread is its long rising time. Regarding the time, let’s say that if your home has a temperature between 70°F and 72°F, it will need 12 hours of rising.
If it’s below 70°F, it will take about 1 hour more, if around 75°F about 1 hour less. Of course, in summer, when the temperature rises a lot, the dough will need less time to rise.
After the time has passed, you will find your dough tripled in volume, beautiful and full of bubbles. At this point, take a pastry board, flour it generously with re-milled durum wheat semolina and pour all the dough on top.
Now comes another crucial moment to have an exceptional no-knead bread. We need to make folds! “Oh dear, what are folds?” Don’t worry, it seems difficult but it’s not!
So this operation allows the bread to rise in height and release the gases already produced during rising. This operation has a precise name, I researched this too! It’s called Folding, meaning “to fold“.
To make the folds, with well-floured hands, take the dough and with your fingers, gently, try to spread it on the pastry board, giving it a roughly rectangular shape.
Then fold the right side to the left and the left side to the right, then fold it from the bottom up and from the top down.
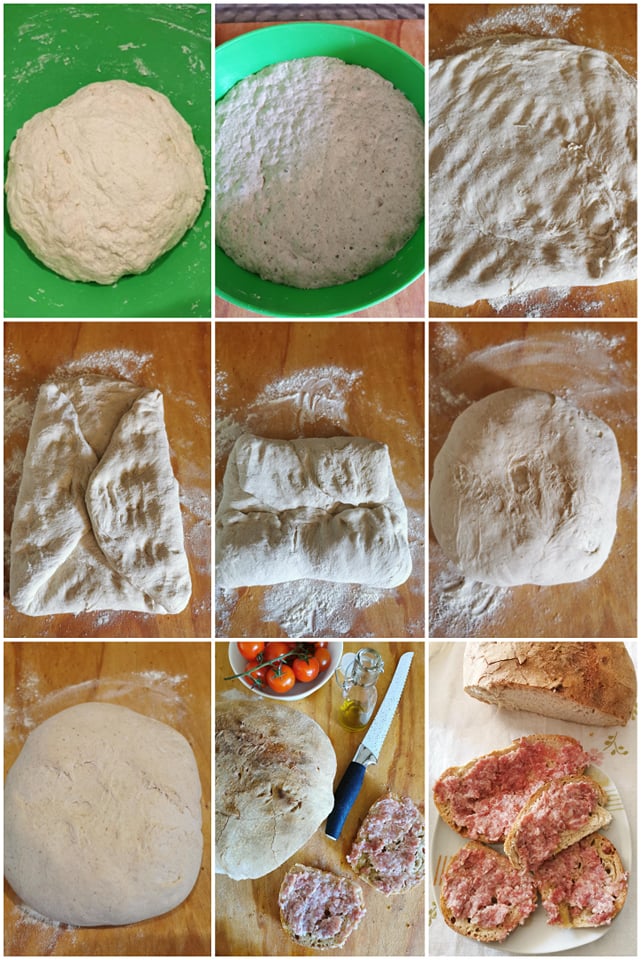
Flip it over on the pastry board and repeat the folds 3-4 times, each time you will need to spread the dough again, giving it a roughly rectangular shape, and then make the folds.
In the tutorial photo you can see both the folds and the bread (with half flour type 0 and half type 2 wheat flour), I didn’t divide the dough into two loaves in this case but preferred to leave it whole for a larger bread. You can choose based on your preferences.
After making the folds, cover the bread with a cloth and let it rise again for at least 30 minutes.
Then you can place the dough as is, making sure not to deflate it, directly on a baking sheet lined with parchment paper, thus obtaining a single large loaf.
If, on the other hand, like I did in today’s recipe, you prefer to make two baguettes or more rolls, divide the dough, shape it as you wish (always taking care to handle the dough gently) and then place it on the sheet.
Dust the surface of the bread with a good handful of semolina and let it rise again for at least 30 minutes.
In the meantime, remember that the oven should be turned on at least 30 minutes before to have a better temperature management inside. After the time has passed, bake your bread. Static oven at 428°F for about 30 minutes.
This step is not mandatory but I usually prefer to do it: to create the right humidity in the oven, I place a small pot with water inside.
If you have a cast iron pot with a lid or a baking stone, you should heat them at least 30 minutes before baking the bread.
Always remember that the baking time may vary from oven to oven, in my case, I baked it in 45 minutes, so check before removing from the oven (just use a toothpick as for cakes).
Another very important tip:
“After baking, what do you do?! Where do you put the bread? Do you cover it with a cloth or a food bag?”
The answer is no, the bread should not be covered or closed immediately in a bag, leave it on a rack so it can lose all the moisture and dry better.
Only when it is completely cold can you slice your beautiful and tasty no-knead bread. You can choose to consume it within two to three days (it keeps perfectly) or slice all the bread, or as much as you prefer, place it in food bags and freeze it.
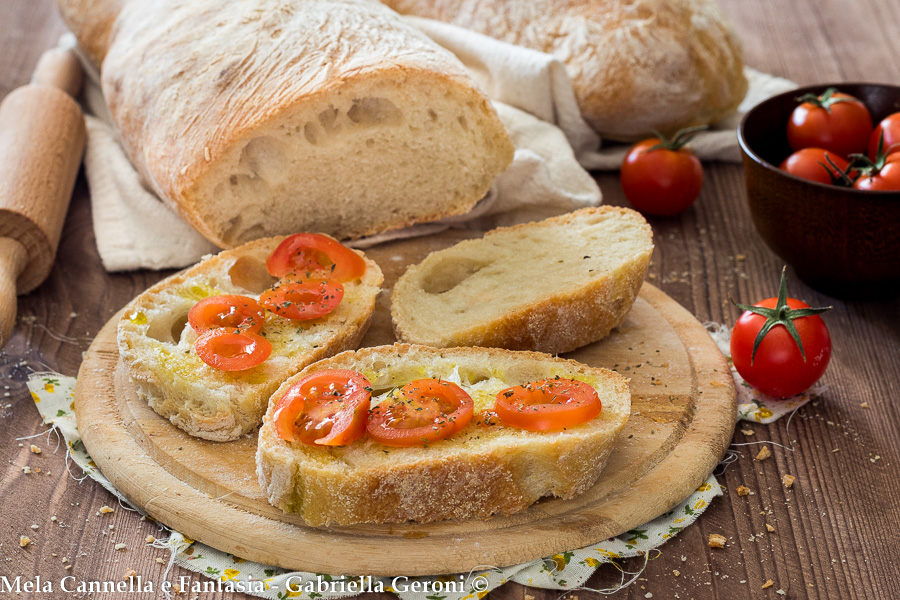
And voilà, your fragrant no-knead bread is ready, it will be hard to resist cutting it just out of the oven!!
Thanks to Annamaria for her beautiful recipe – all rights recognized
Photo Gabry – all rights reserved