Today, let’s prepare the witch fingers, Halloween cookies that look scary but are so tasty! Halloween is a celebration of Celtic origin and is celebrated on the night of October 31st. This year, I decided to make some truly scenic Halloween cookies! They are made with a simple butter shortcrust pastry. You will need the classic ingredients such as flour, egg, sugar, butter, and baking powder. I flavored the dough with lots of lemon zest to make it super fragrant! Once the dough is ready to use, form the fingers! The peeled almonds are used to simulate the witch’s nails! Once baked, you can get creative! We can give the witch fingers a truly scary look, like I did! Just a bit of bright red jam, and the effect will be truly incredible!
The witch fingers cookies are made without molds. They are easy to make, and we can prepare them with the little ones for a moment of pure fun and creativity! At the bottom of the article, you will find the recipe to prepare witch fingers cookies without butter.
But now, enough talking! Let’s see together, with the step-by-step photos, how to prepare the witch fingers!
Other spooky Halloween recipes I recommend you try!
- Cost: Cheap
- Preparation time: 30 Minutes
- Portions: about 16 cookies
- Cooking methods: Electric oven
- Cuisine: American
- Seasonality: Halloween
Ingredients
- 2 cups all-purpose flour
- 7 tbsps butter
- 1/2 cup sugar
- 1 egg (medium whole)
- to taste lemon zest
- 1 tsp baking powder
- 1 packet vanillin
- 16 peeled almonds (one for each cookie)
- to taste red fruit jam (or sour cherries, strawberries, raspberries, the important thing is it has a bright red color)
- to taste unsweetened cocoa powder (not necessary)
Tools
- Bowl
- Small Bowl
- Spoon
- Work Surface
- Brush
- Baking Tray
Steps
First, prepare the shortcrust pastry. In a bowl, add flour, baking powder, vanillin, and lemon zest.
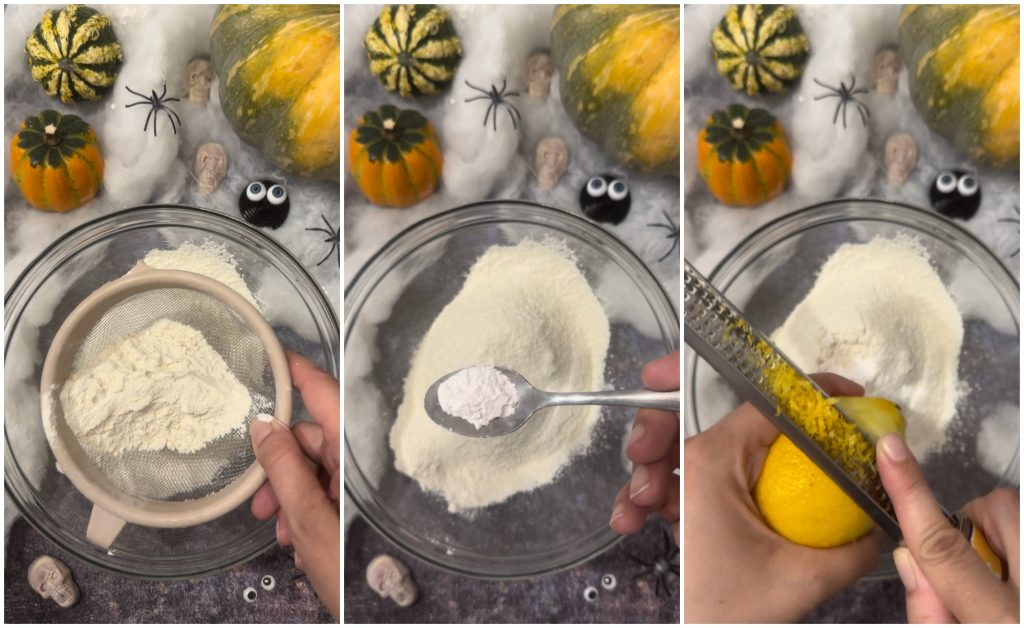
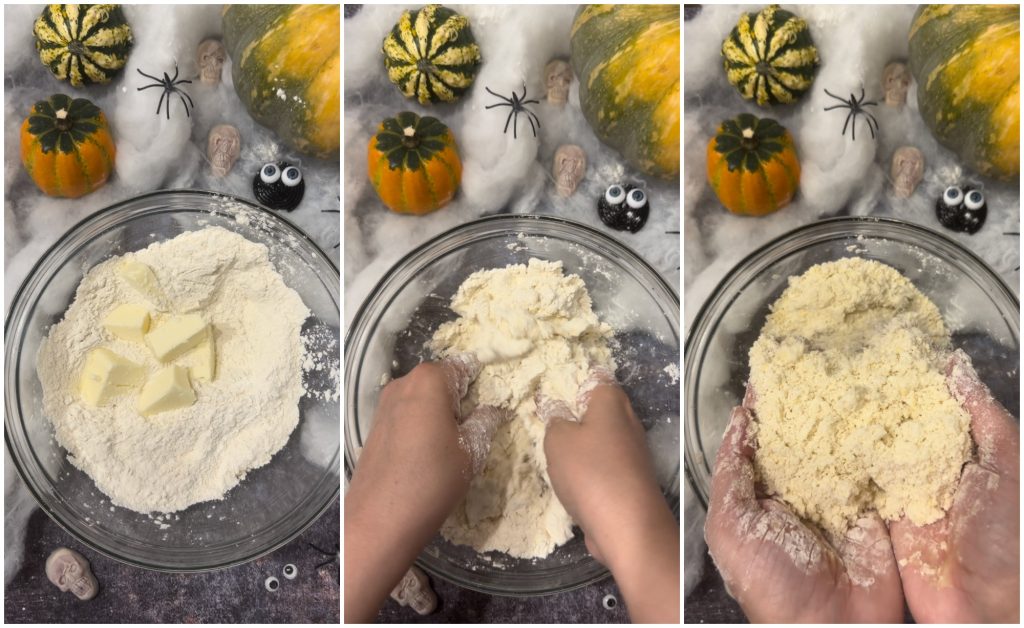
Incorporate the cold butter from the fridge, cut into pieces, and work quickly with your hands until you get a sandy mixture.
Make a well in the center and add the whole egg and sugar. Mix inside the bowl first with a spoon.
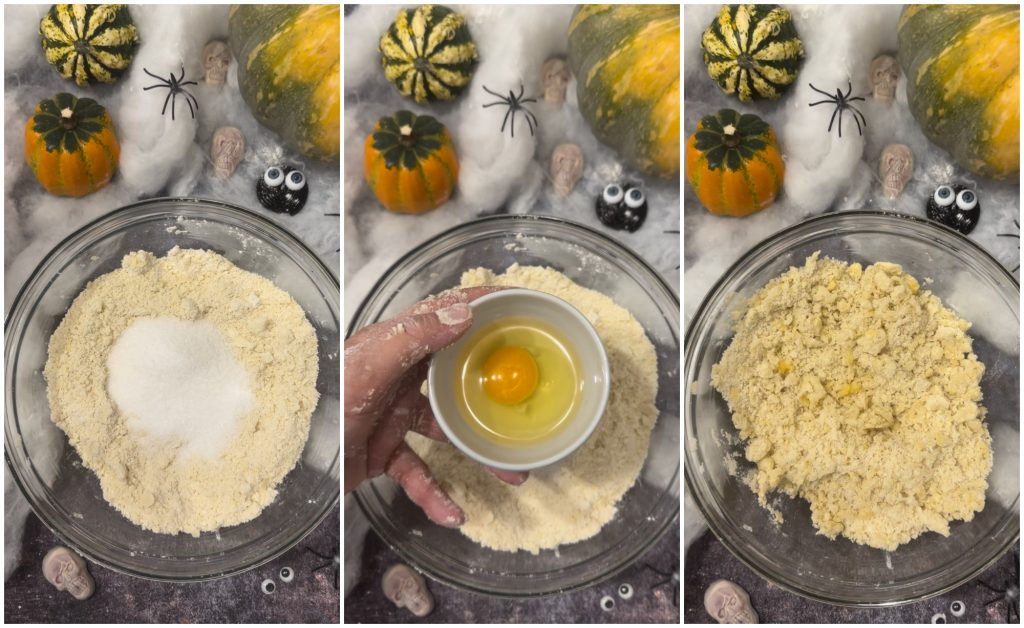
When the dry ingredients have absorbed the egg, turn everything out onto a work surface and work quickly with your hands.
If you want, you can do this in the bowl.
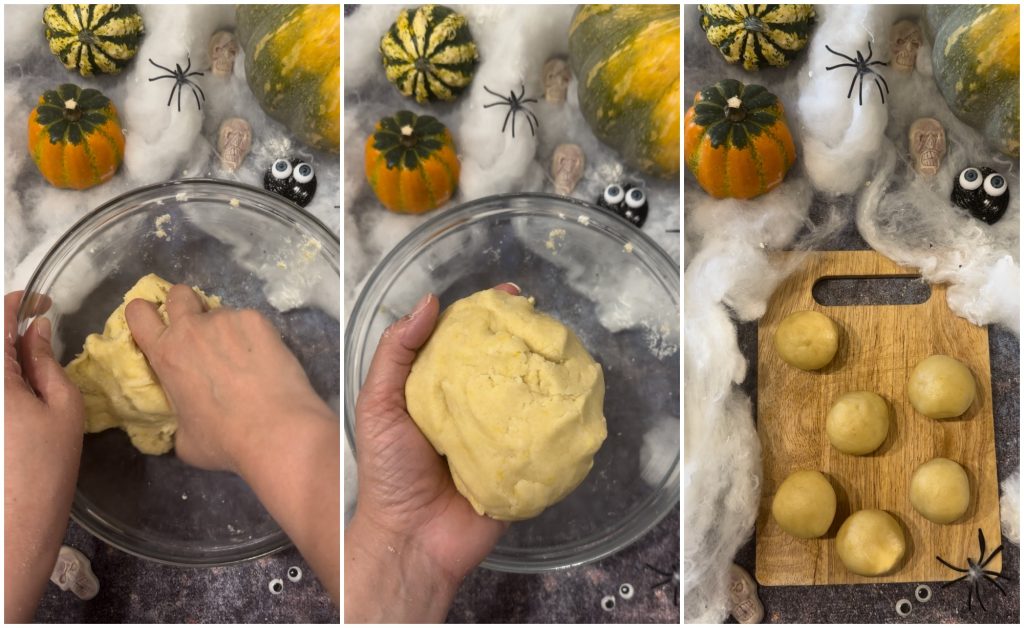
Once you have a smooth and non-sticky dough, cover it with plastic wrap and let it rest in the fridge for 30 minutes.
After the resting time, take the dough to form the witch fingers!
Work the dough for a few moments. Then, separate small portions of dough and form many balls of the same size.
You can use a scale to help you. Mine weighed around 1 oz, and with these quantities, I got 16 witch fingers.
Once the dough is finished, take each ball and roll it into a log at least 2 inches long.
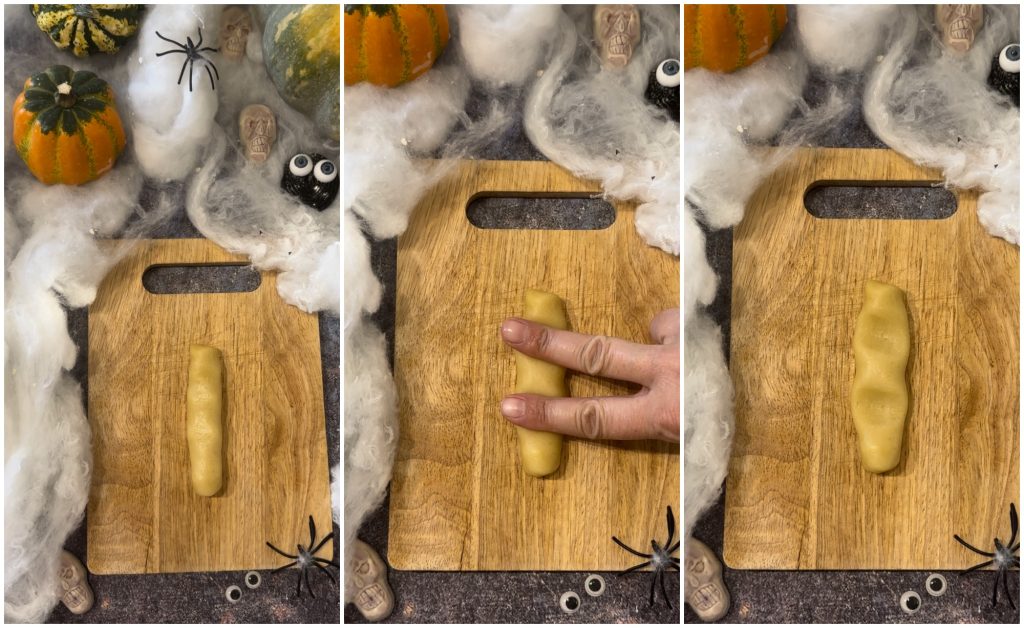
Place two slightly spaced fingers at the center of the log and press to form two grooves.
This way, you will have formed the knuckles of the finger! 👻
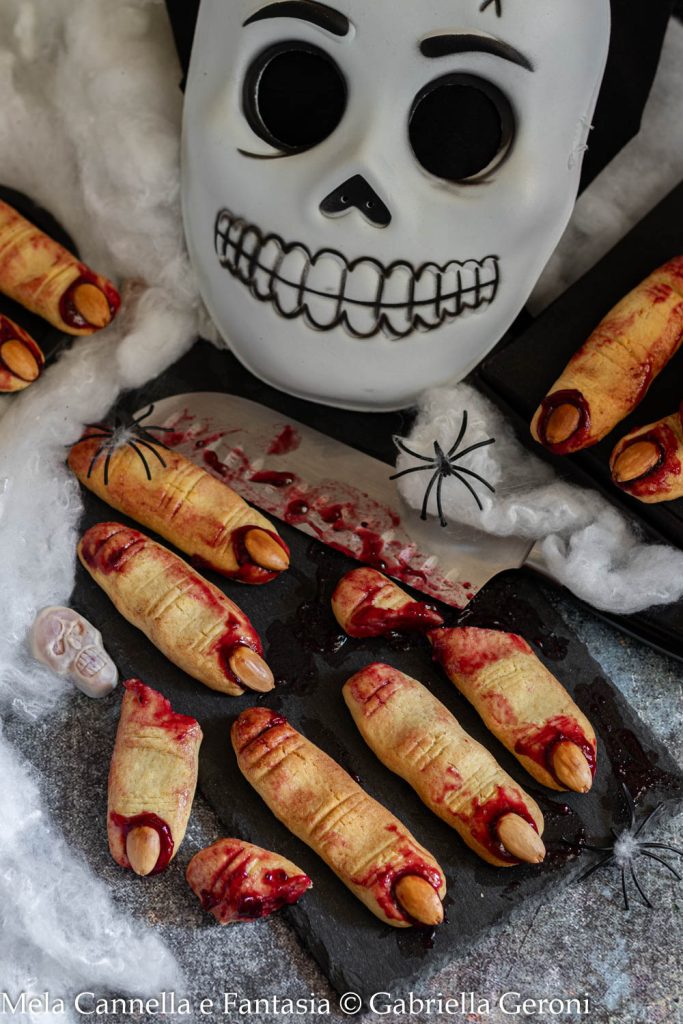
Take a peeled almond and create the nail by placing it at the end of each cookie.
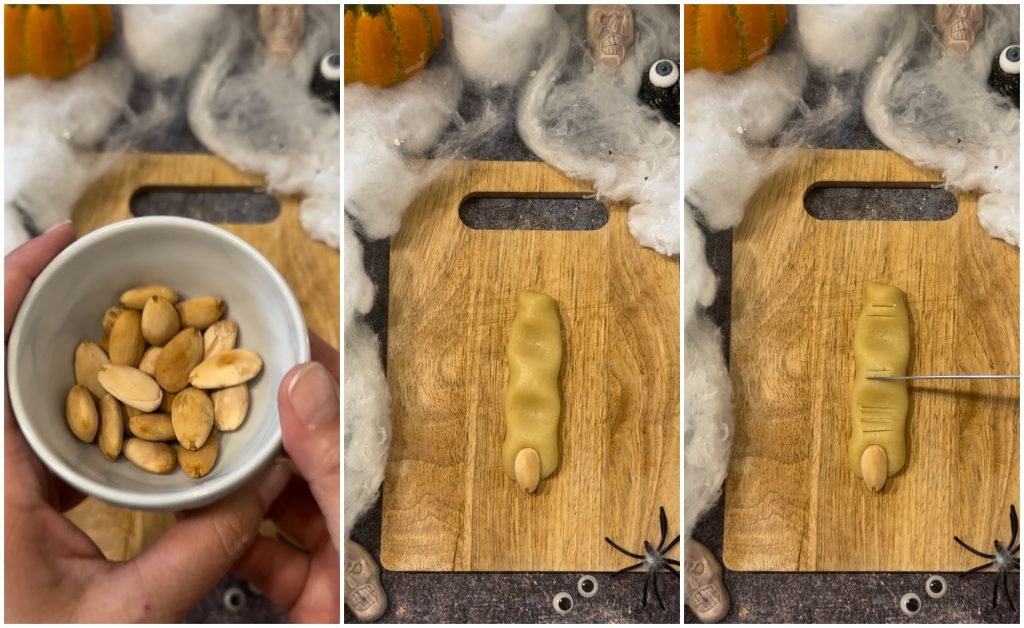
Apply a light pressure so that the almond adheres well to the dough.
If you only have almonds with skin at home, you can peel them or use them as they are.
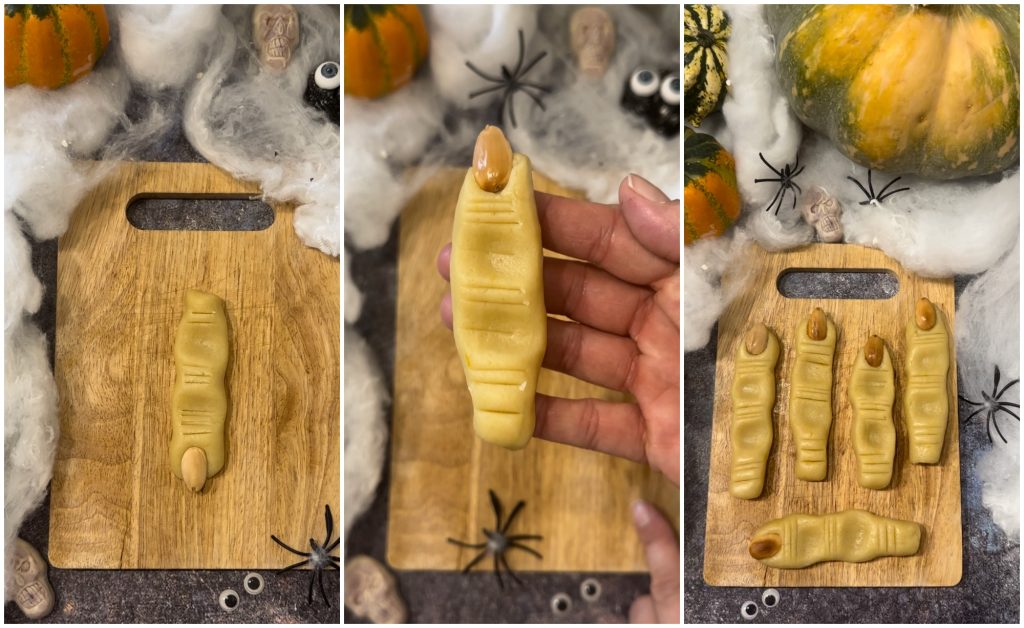
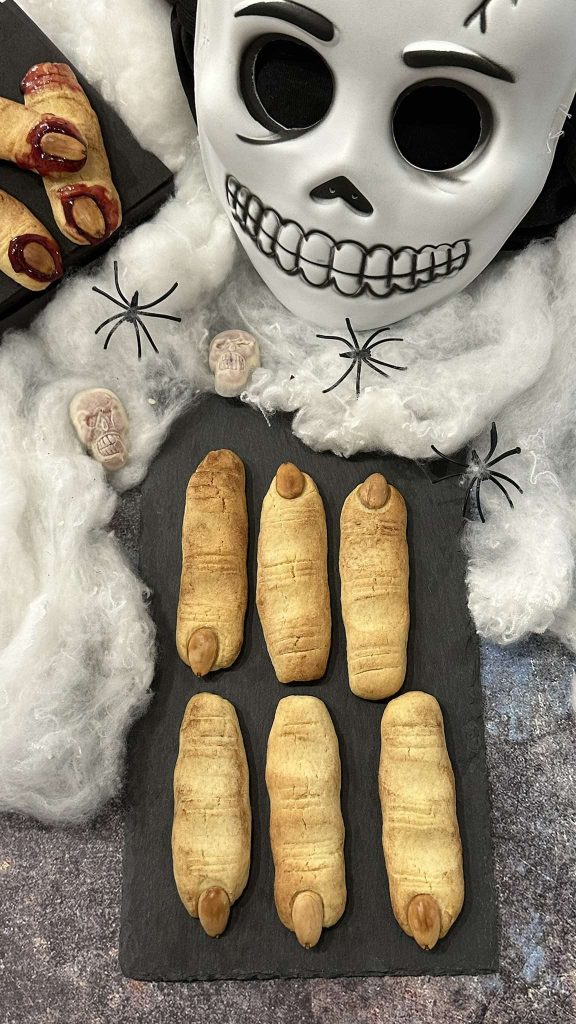
With a sharp knife, make lines over the knuckles to make the witch fingers look more realistic!
Repeat the operation with all the other logs until you get many witch fingers for Halloween!
To make the fingers more scenic, create shadows with unsweetened cocoa powder.
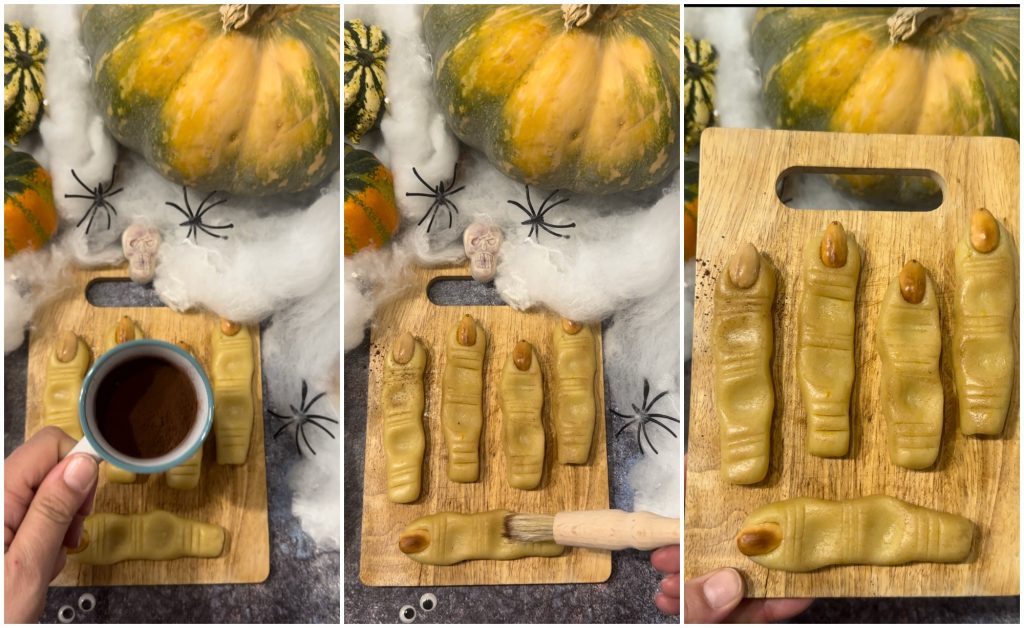
Take a little cocoa with a kitchen brush and lightly dust it along the made fingers.
Place the cookies on a baking tray lined with parchment paper.
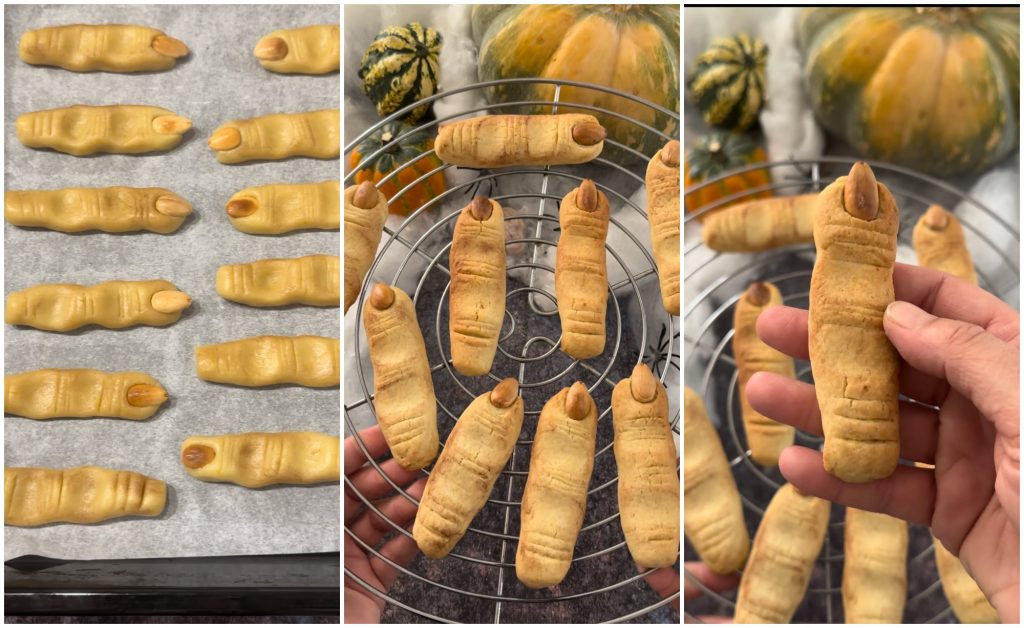
Since the cookies spread slightly while baking, try to create some distance between them.
Bake the witch fingers cookies in a static oven preheated to 350°F for about 20 minutes.
As soon as they start to color, take them out and let them cool completely.
Now comes the fun or, for some, the scary part!
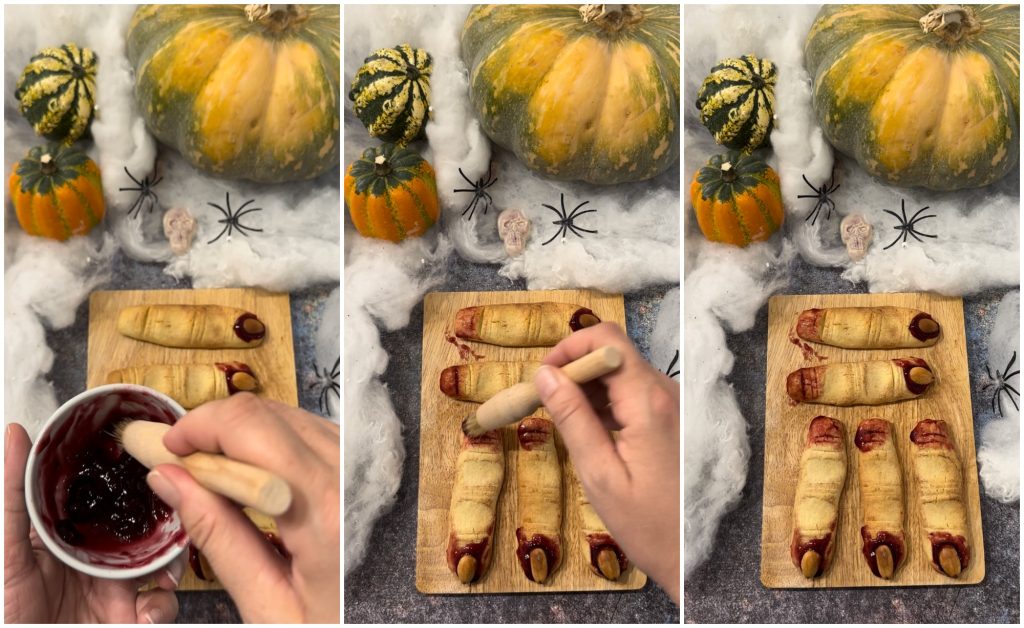
Carefully remove the almonds from each finger without breaking them. Place a little jam in the indentation formed.
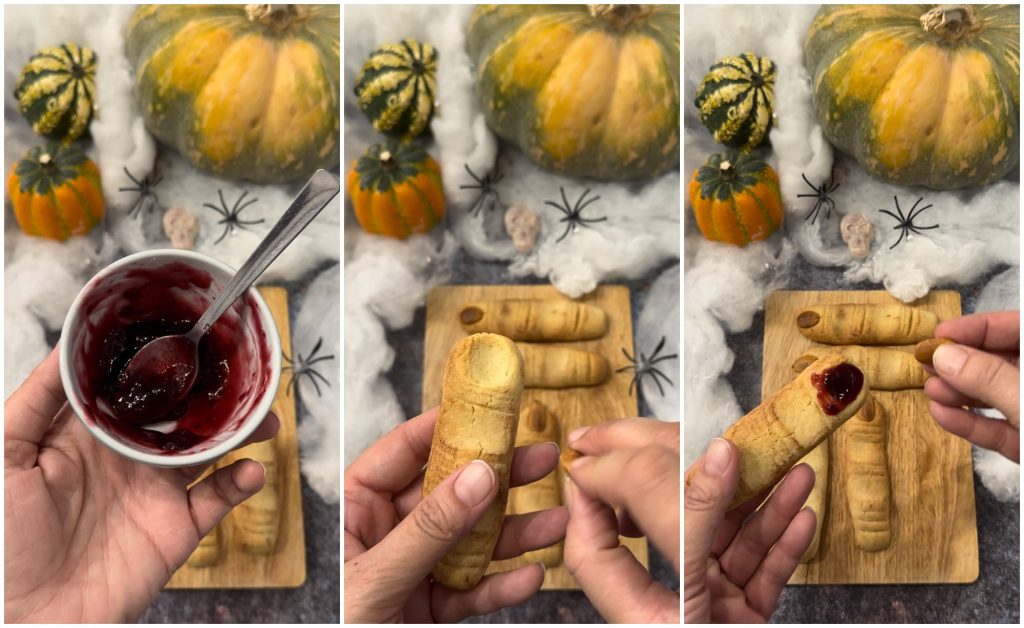
You should use a jam with a bright red color, such as plum, currant, raspberry, or strawberry.
Using a teaspoon, fill all the grooves with a little jam and place the almond/nail on top.
This way, you will have created a “bloody” witch finger!
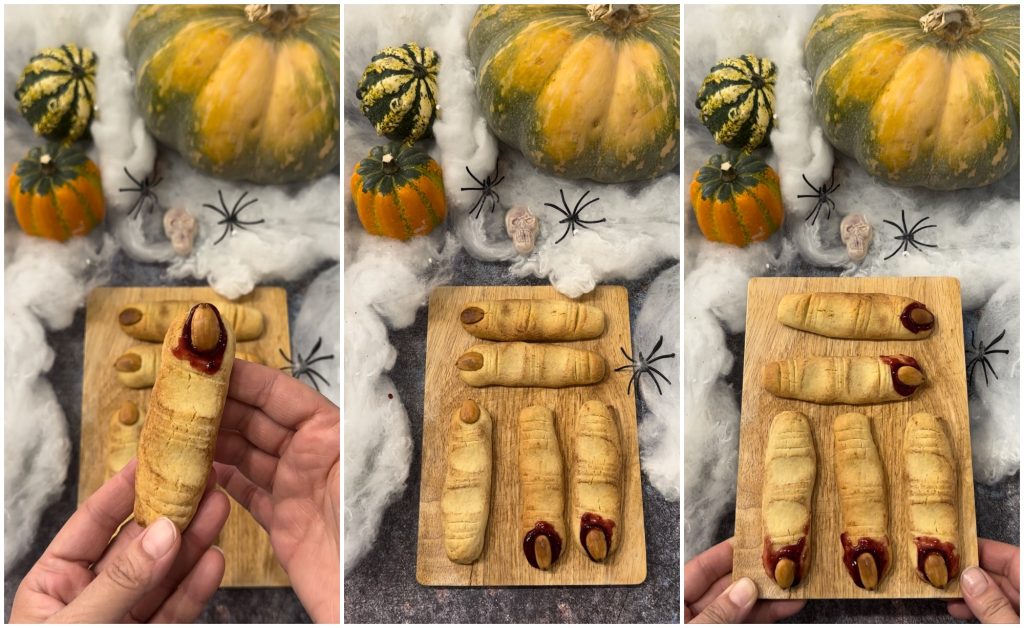
For the more sensitive, this decoration might be enough! I wasn’t satisfied! I wanted an even scarier effect!
So I brushed the jam onto the end of each finger and a bit on the surface.
After all, the party in question is Halloween, you have to leave a mark!
Once you’ve decorated all the witch fingers, you can place the cookies on a tray and serve them!
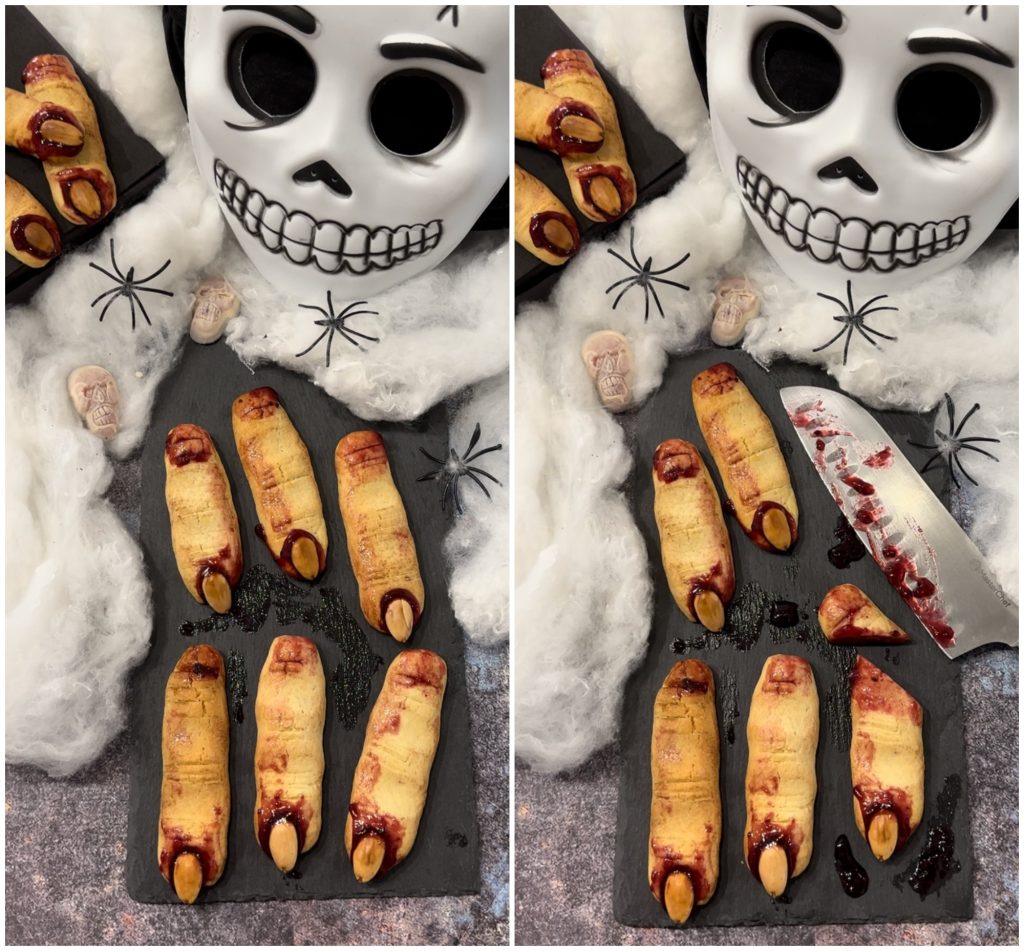
An idea on how to serve them? Cut one or more cookies in half and brush the cut part with jam.
Brush the tray with some jam, then place a sharp knife near the cut cookies.
Brush the knife blade with jam, and you’ll leave everyone speechless!! 😱
I didn’t think I would get so carried away with decorating these cookies! I got carried away and left a finger!!! 😱
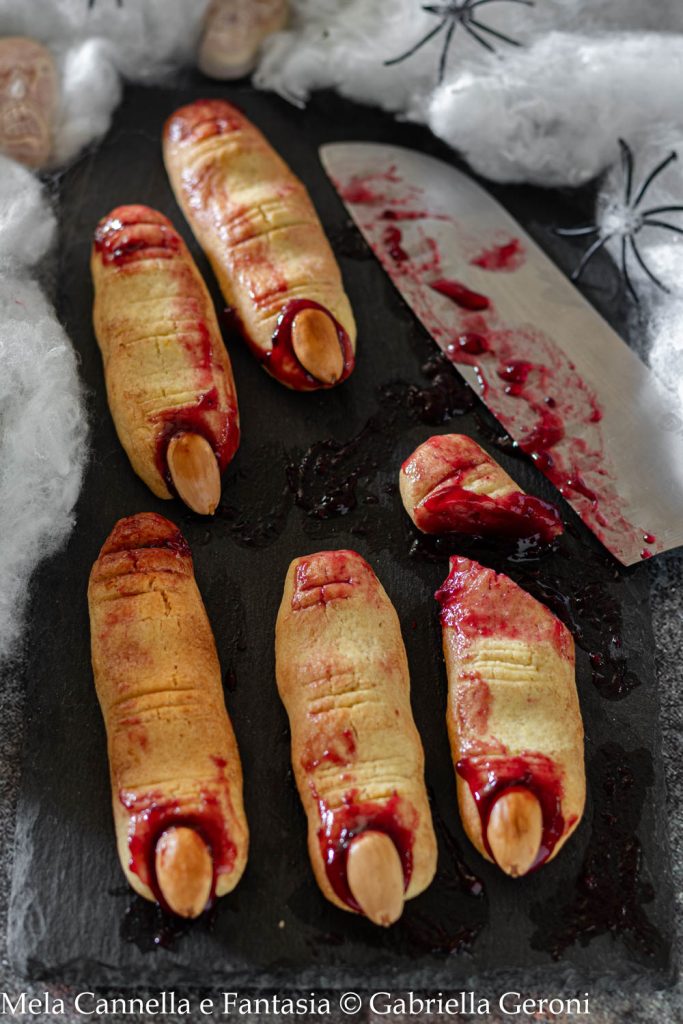
The witch fingers cookies are incredibly scenic, monstrously scary, and also very delicious!!
I hope you enjoyed this recipe! Happy Halloween and come back soon!
On Facebook, you can also find the complete video recipe to make these spooky cookies! Of course, if you prefer, you can avoid decorating them with jam, leaving them in a less Horror version 😉
Article protected by copyright © – Gabriella Geroni © All Rights Reserved
FAQ
Can I make these cookies without using butter?
Of course! If you want, you can make a shortcrust pastry without butter and create the witch fingers as described above. Find the oil-based pastry recipe here, you can also halve the doses.
How long do these Halloween cookies last?
The cookies keep for several days; just put them under a cake dome. You can also make them the day before and decorate them with jam the following day.
Is it necessary to decorate the cookies with jam?
Absolutely not! The witch fingers can also be enjoyed plain. I felt particularly inspired and wanted a more “strong” decoration, but if you don’t like it, you can skip it.
Is it essential to use unsweetened cocoa powder to create shadows?
If you want that effect, yes, but you can also leave it out, and your cookies will still be wonderfully spooky and delicious 😉