Being lactose intolerant, I make homemade soy milk at least once a week. I’ve been making it for many years and in this recipe number 2, I want to bring some updates that will simplify your periodic self-production.
Homemade soy milk is definitely better than store-bought, even though it requires some time to make it, but consider that it is doable and in the end very easy to manage. Get yourself some organic dehydrated yellow soybeans, a large pot, a skimmer, a muslin cloth or a nut milk bag, a bowl, and a strainer.
Considering the concept explained in the previous soy milk post from a few years ago, the ratio soybean to water was: 100 g of dehydrated soybeans = 900 ml of water (which is fine), but in this recipe, we will reduce the water, so to make 1 liter (about 4 cups) of soy milk, you will need 200 g of dehydrated soybeans and 1600 ml (about 6 3/4 cups) of natural water, not tap water. This soybean/water ratio I also apply to make silken tofu in the douhua recipe with ginger syrup.
The rehydration times for soybeans to make drinkable milk vary from 8 to a maximum of 12 hours, unlike when you need to self-produce tofu or silken tofu, which are halved from 4 to a maximum of 6 hours, and this will make the difference in the excellent success of the two cheeses.
Finally, the soy milk for drinking use can be consumed plain or made tastier by flavoring it with the addition of 15 g of brown sugar per liter (about 3 3/4 cups) or half a vanilla bean, or even a pinch of salt; this is your choice.
- Difficulty: Easy
- Cost: Economical
- Rest time: 8 Hours
- Preparation time: 1 Hour
- Portions: 1 liter
- Cooking methods: Stovetop
- Cuisine: Asian
Ingredients
- 200 g dry soybeans (yellow, organic)
- 1600 ml water (natural, not tap)
Steps
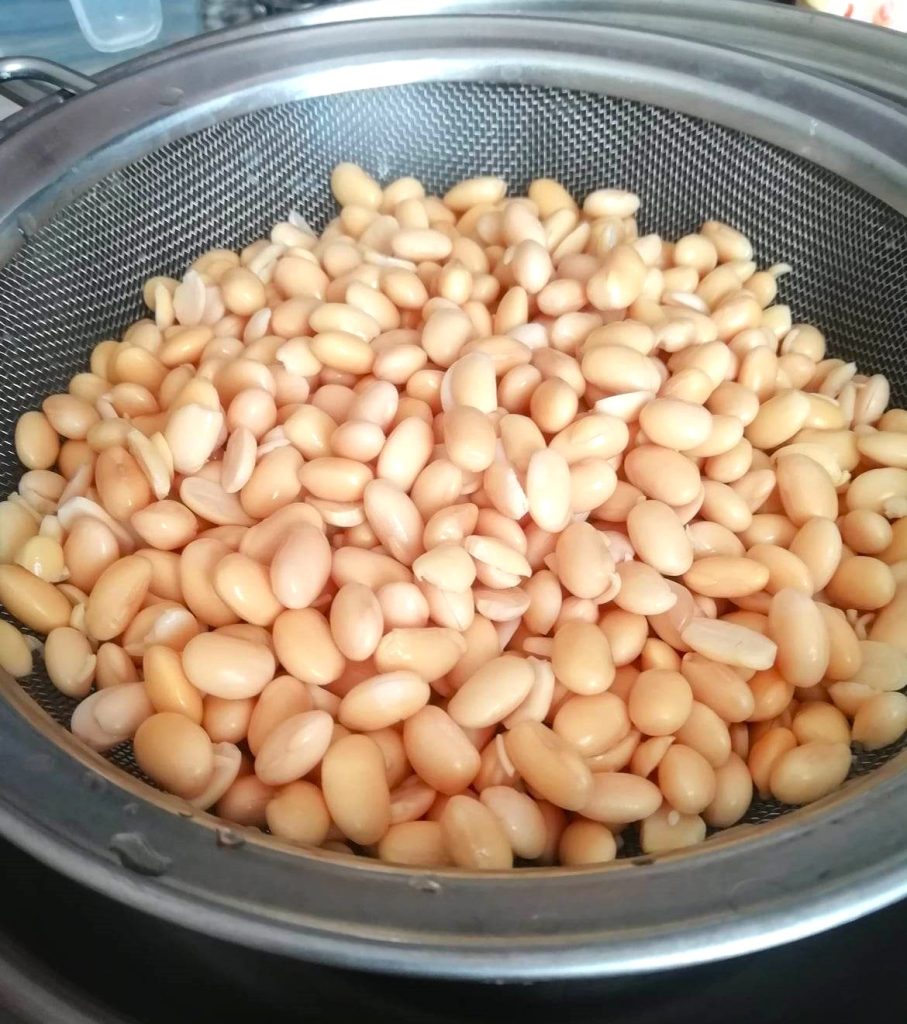
Weigh the organic dehydrated yellow soybeans and rinse them several times under running water. Then soak them in a container with 700 ml (about 3 cups) of natural water, not tap water. Leave them to rehydrate for 8 to a maximum of 12 hours.
By this point, they will have absorbed most of the soaking water. I used to discard it after rehydration, but now I drain the soybeans and use this water as part of the amount needed to make the milk.
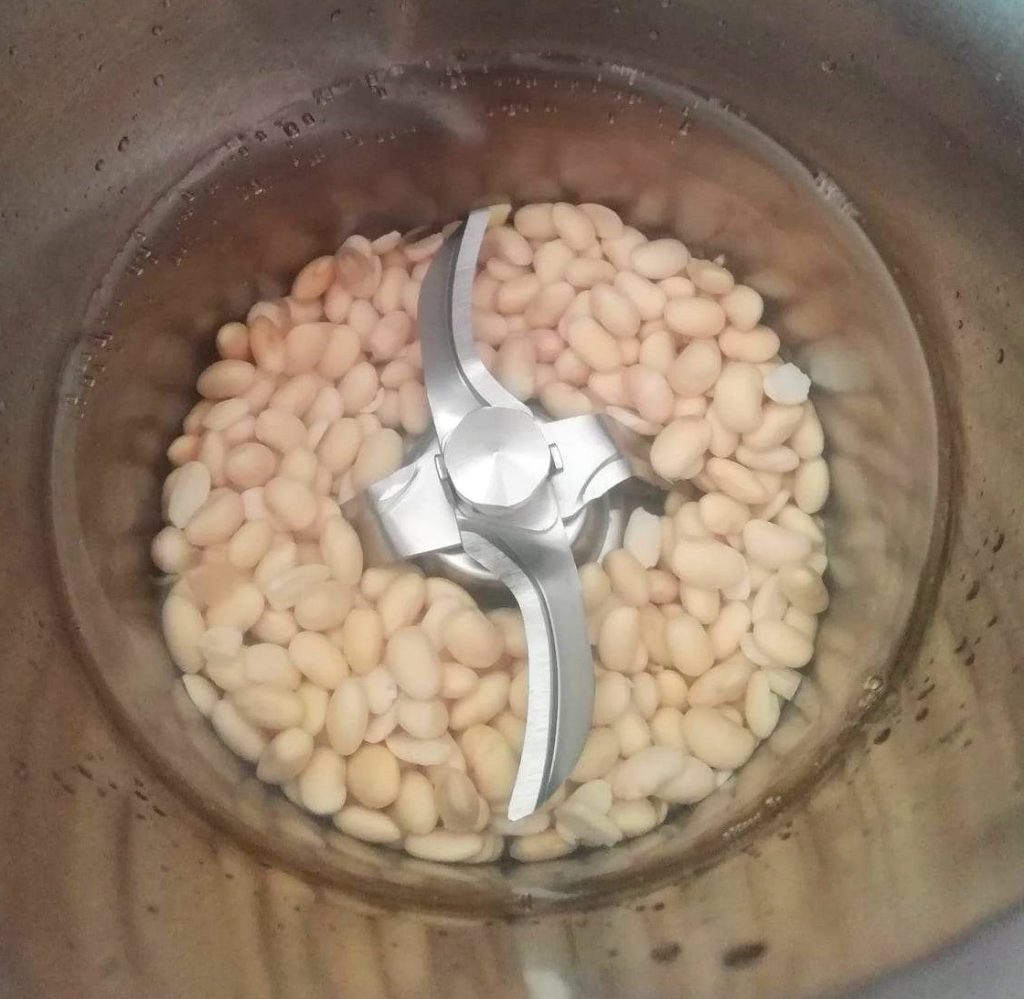
Place half of the rehydrated soybeans in the blender with 800 ml (about 3 1/3 cups) of natural water (including the soaking water) and blend everything finely for 2 minutes until it becomes a homogeneous pulp.
Pour the blended soybeans into the cooking pot and set aside.
Place the other half of the rehydrated soybeans in the blender with another 800 ml (about 3 1/3 cups) of natural water and blend as before. Do this operation in two times, then also pour this batch into the cooking pot.
The cooking pot should be large enough to contain the soybean pulp without reaching the rim, leaving at least 4 cm (about 1 1/2 inches) of space.
After blending the soybeans with water, you will have a lot of foam on the surface. Carefully remove it with a skimmer.
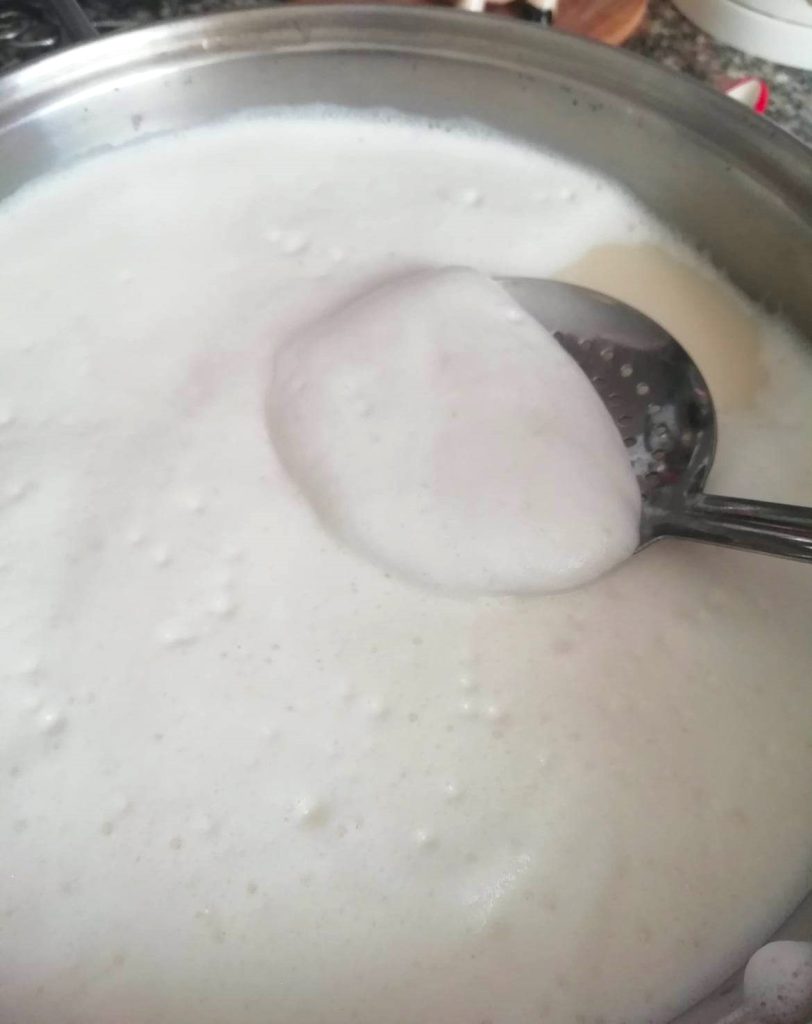
After removing all the foam, light the stove and cook the milk over medium/low heat. Occasionally stir with a ladle to avoid soy sticking to the bottom, as burning will release a bad taste into the milk.
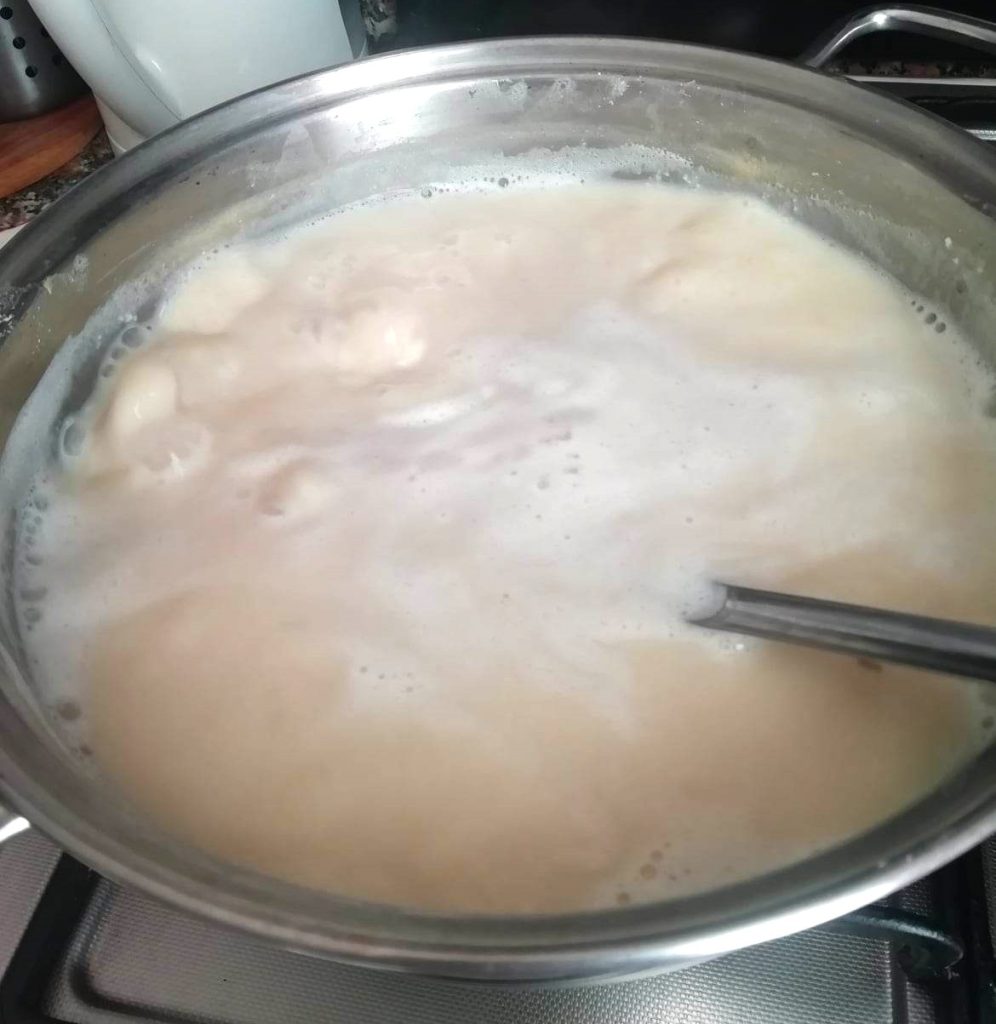
Stir until it reaches a boil, which will take about 20-25 minutes. At this point, boil for 10 minutes, and while stirring, remove any more foam that forms on the milk.
It’s ready when the taste is sweet. Turn off the heat and let it cool before filtering; otherwise, you’ll burn your hands during milk pressing.
The most convenient solution is to prepare a tall container in the kitchen sink with a mesh strainer or colander on top.
Place a damp muslin cotton cloth over the strainer, or use the appropriate filtering bag, and pour the soybean pulp.
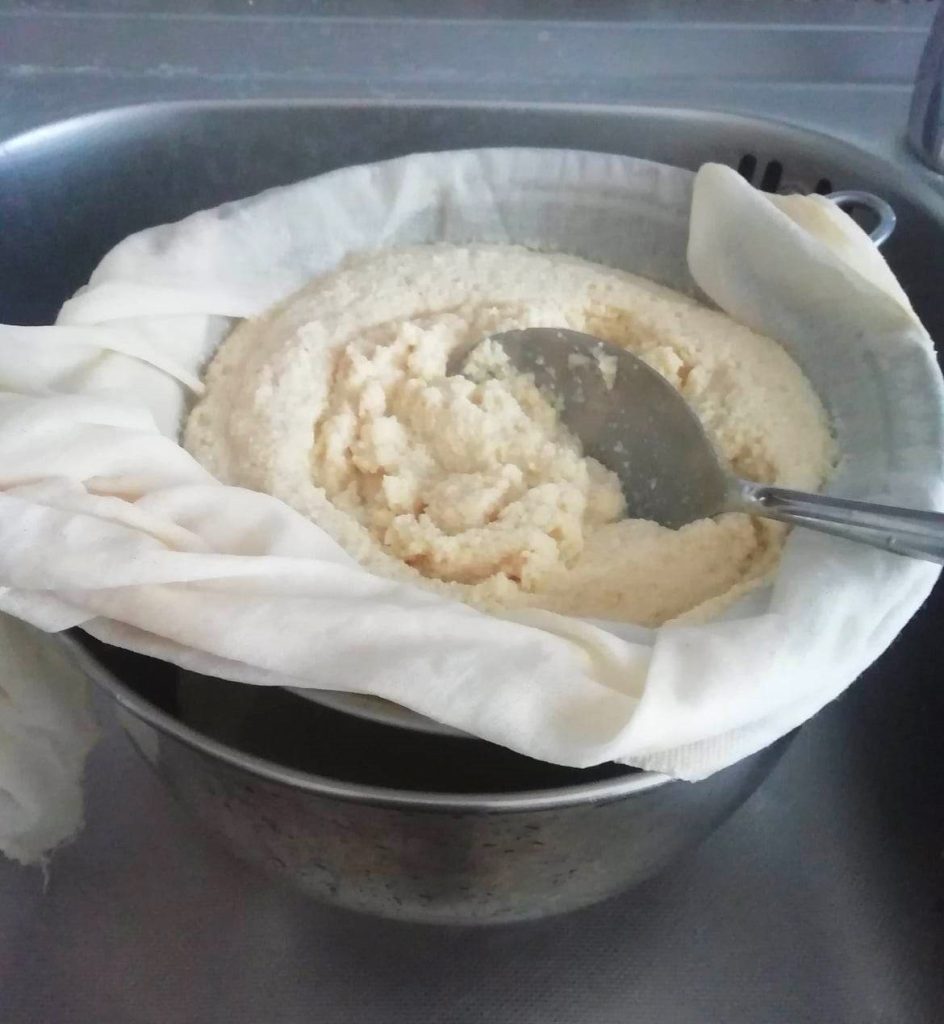
And here comes the fun part of the recipe, milking the soy milk. Gather the edges of the muslin cotton cloth into a bundle, and squeeze the soy to collect the last drop of milk into the container.
In the special bag for this operation (which I bought after the photo), the operation is simpler, but especially practical, as you don’t have to worry about the bundle opening during milk pressing. But both methods are valid.

What remains in the muslin cloth or bag is not waste, but a delicious okara, reusable for many fantastic recipes. Store it in the fridge for 3 days or freeze it.
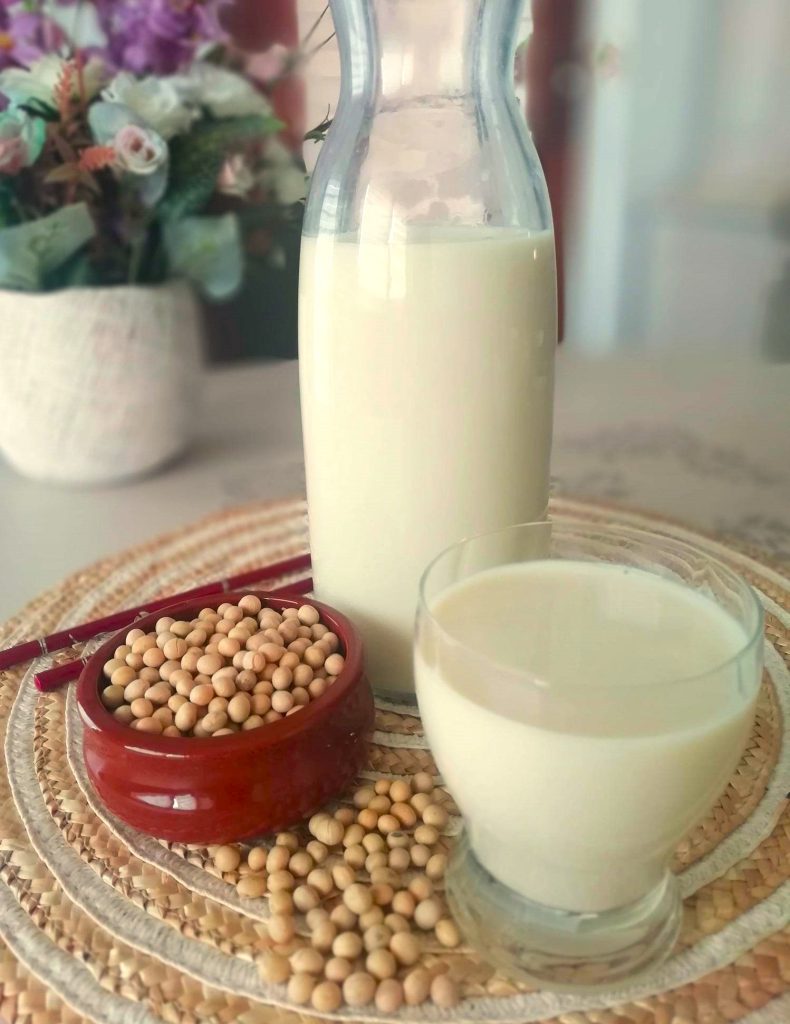
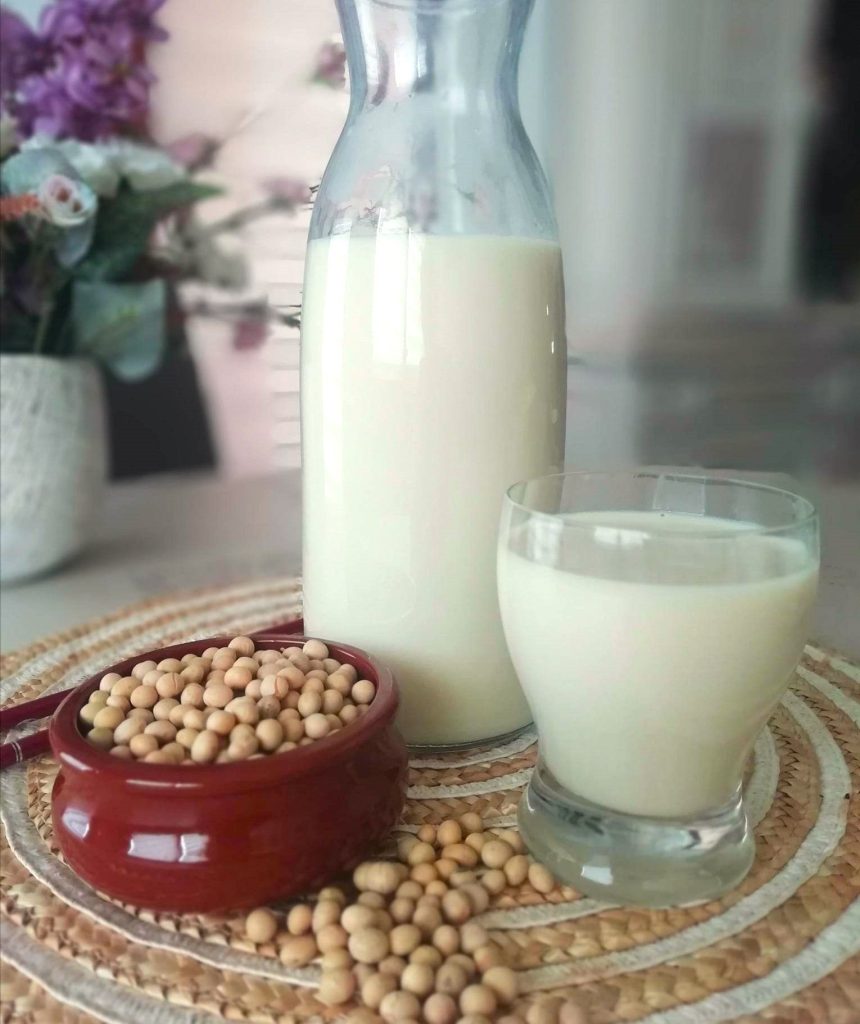
The soy milk is ready to be bottled and stored in the refrigerator.
If you want to make it more pleasant, you can add 15 g (1 tbsp) of brown sugar per liter (about 4 cups) of milk, or a pinch of salt or half a vanilla bean.