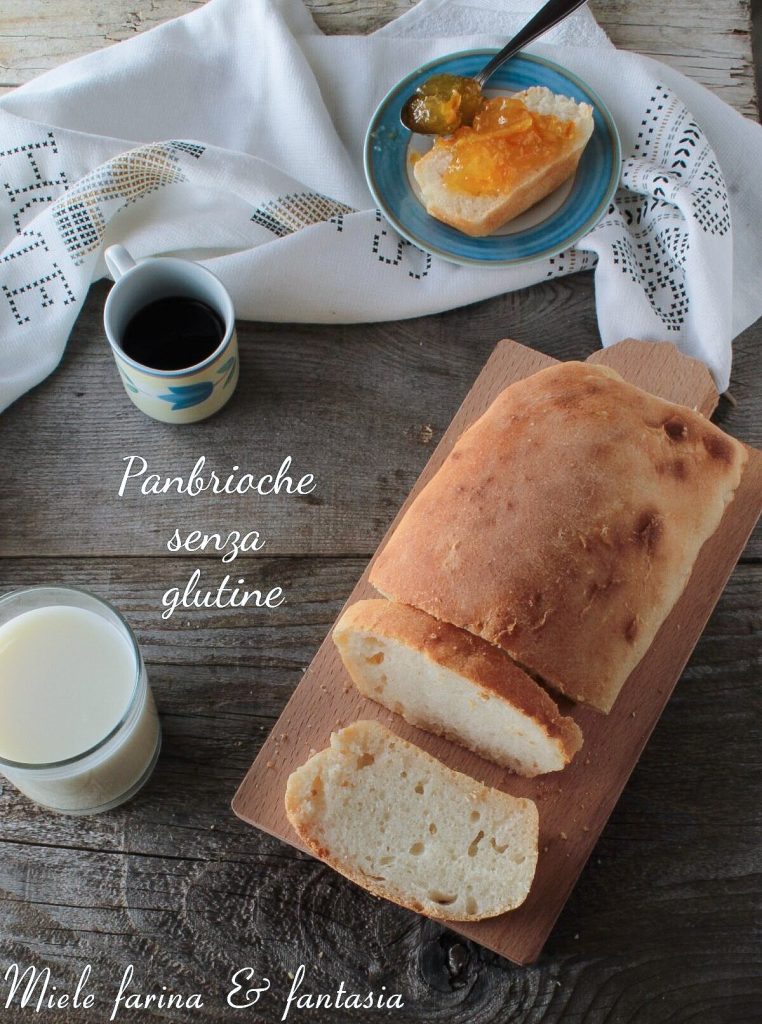
The brioche bread I would like to propose today is made with a ready-made blend of gluten-free flours specific for bread and pizza. It is a soft leavened bread, slightly sweet, so it can be paired with savory fillings and does not become cloying when paired with creams or jams. It’s delicious even eaten on its own or dipped in milk and coffee for breakfast or a snack. Besides being gluten-free, this brioche bread contains neither lactose nor eggs. It’s easy to make; within the procedure, you will find step-by-step explanations to make it without any problems. Thanks to the three leavenings and the very small amount of yeast, it will be much more digestible and will maintain its softness longer than a product made with a single leavening and a larger amount of yeast.
- Difficulty: Very Easy
- Cost: Cheap
- Rest time: 18 Hours
- Preparation time: 30 Minutes
- Portions: 10
- Cooking methods: Oven
- Cuisine: Italian
- Seasonality: All seasons
Ingredients
- 2 oz warm lactose-free milk
- 1 g fresh gluten-free yeast
- 50 g gluten-free blend for bread and pizza
- fermented starter
- 250 g gluten-free blend for bread and pizza
- 7 oz warm lactose-free milk
- 3 oz granulated sugar (or a heaping tablespoon of wildflower honey)
- 5 g fine salt
- as needed grated orange zest
- 1/4 teaspoon ground cinnamon (or other ground spice of choice)
- 1 teaspoon Strega liqueur (optional)
- 1 oz light seed oil
Tools
- 1 Loaf Pan
Steps
To make our gluten-free, lactose-free, and egg-free brioche bread, we start by preparing the pre-ferment or starter.
In the bowl of a stand mixer (you can also work it with electric beaters, but not by hand, as the dough will be very soft) place the yeast and, using a fork, dissolve it with the milk which should be either at room temperature or just slightly warm. Immediately add the specific blend for gluten-free bread and pizza, mix and let it rise at room temperature, away from drafts or excessive heat sources, well covered with plastic wrap.
The amount of milk may vary slightly depending on both the type of gluten-free flours used and the ambient temperature and humidity. This means that it may be necessary to add a little more milk or, on the contrary, less.
I have not indicated precise rising times, because they are also subject to ambient temperatures and humidity.
When we notice that the starter has increased its starting volume, we can move on to the actual dough.
Warm 5 oz of milk (it should not be boiling, just slightly warm) and pour it little by little over the starter while mixing with the paddle attachment at low speed (or electric beaters) until it is completely dissolved, without leaving lumps.
Add the already sifted flour blend, mix again for a few seconds and stop. The dough should be coarse, lumpy (as in the picture below); seal with plastic wrap and let it rest for 30 minutes.
After the time has passed, slowly add the remaining 2 oz of milk (also slightly warmed), fine salt, granulated sugar, spices, liqueur, and finally, the oil.
Mix everything at a low speed to avoid overheating the dough, which will be creamy (like cake batter). Occasionally stop the beater, gather the dough spread on the sides of the bowl with a spatula, bring it back to the bottom, and continue until the dough is smooth, lump-free, and all the ingredients are perfectly absorbed (5-6 minutes at most).
Cover the bowl again with plastic wrap and let it rest for 90 minutes at room temperature (photo 4).
After an hour and a half, uncover the bowl and, using a spatula or a “rubber scraper,” turn the dough (which will continue to be creamy) from bottom to top, making a full turn of the bowl. Repeat this operation three times; this way, we will incorporate air into the mixture and give it a kind of structure that will help it develop well even in height and keep it very soft over time.
After this operation, we can decide whether to leave it in the same bowl (to dirty as little as possible) or transfer it to another one (photo 5). Cover perfectly with plastic wrap and store in the fridge in the least cold part. Let it rest and mature for 12 hours.
After twelve hours (obviously it is not necessary to be strict; it could be 10 hours or 14 depending on your needs) take out the bowl and leave it at room temperature for one or two hours (depending on the ambient temperature and the season).
After the time has elapsed, line a small loaf pan (or sandwich bread pan) of 8 inches with parchment paper and very, very gently pour the dough inside. It is important that the dough at the bottom of the rising bowl then ends up on top in the pan.
Let it rise one last time, covered with a cloth, until it has almost reached the edges of the pan.
When the brioche bread has almost reached the edges of the pan (about a finger’s width from the edge of the pan), turn on the oven to 356°F and bring it up to temperature.
Bake the brioche bread at mid-height, in the hot oven, for about 20-25 minutes, depending on whether you use a static or fan oven.
As soon as the brioche bread is cooked, turn off the oven and take it out immediately to prevent it from drying out too much with the residual heat. Let it cool completely before slicing it.
Store it in a tightly closed food bag.
Bon appetit