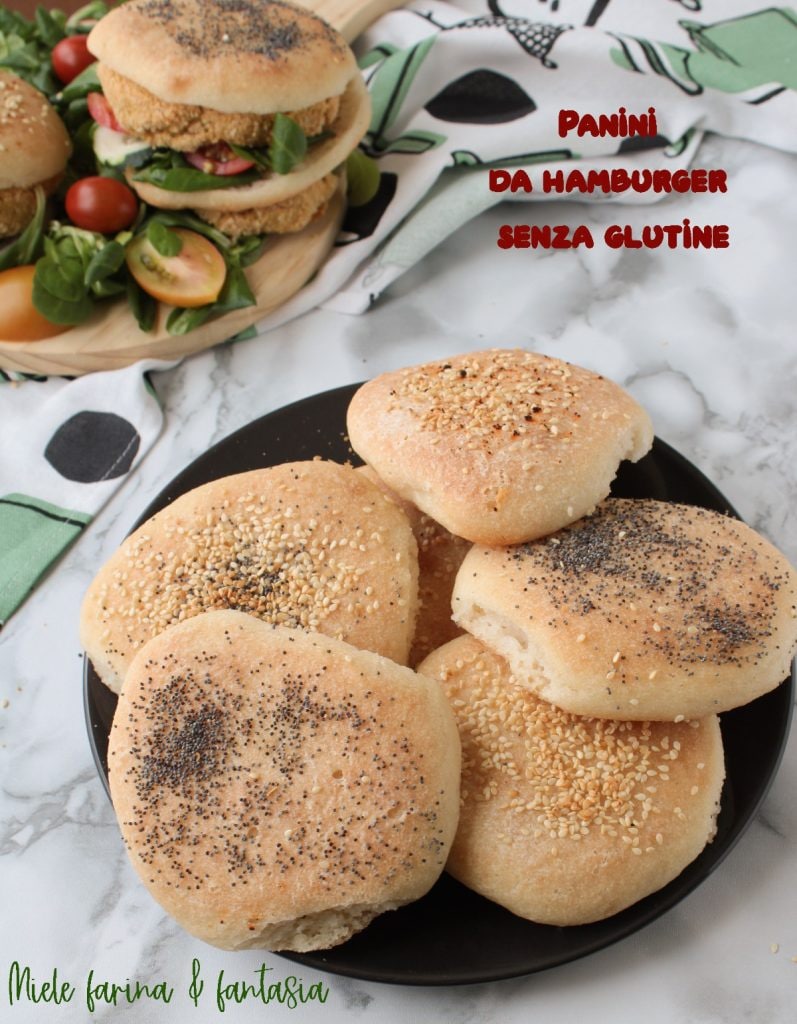
Today I offer you these soft and tasty gluten-free and lactose-free hamburger buns (and not only). This is an egg-free leavened dough that is very, very easy to prepare, with a 12-hour maturation in the fridge to make it as digestible and soft as possible. We can make the buns any size we like, depending on the occasion and need; they are perfect for a quick lunch, a buffet, or Saturday night dinner.
- Difficulty: Very Easy
- Cost: Affordable
- Rest time: 15 Hours
- Preparation time: 10 Minutes
- Portions: 7
- Cooking methods: Oven
- Cuisine: Italian
- Seasonality: All Seasons
Ingredients
- 2 1/2 cups gluten-free bread and pizza mix
- 3/4 cup white corn flour
- 1 3/4 cups water (lukewarm)
- 1/2 tsp fresh yeast
- 3/4 tsp fine salt
- 1 tbsp vegetable oil
- as needed sesame and poppy seeds (for decoration)
Steps
Place a sieve over a large bowl. Pour in both flours, i.e., the bread and pizza mix and the white corn flour (the kind for making tortillas works perfectly), and sift them thoroughly.
Dissolve the fine salt in a tablespoon of lukewarm water (not boiling, please) taken from the 1 3/4 cups and set it aside.
Pour 1 1/4 cups of lukewarm water into the flour mixture, in which you will have already dissolved the fresh yeast, and mix well with a fork (not all flours or flour mixes absorb the same amount of water or liquids, so I recommend adding it little by little).
Now add the dissolved salt in the water and the oil; finally, pour the remaining water with one hand and mix the dough with the other. The mixture will initially appear almost liquid and very sticky (if you have a stand mixer, I recommend using it for personal convenience), but it will gradually gain consistency.
According to leavened dough rules, it’s good to always add fats (whether animal or vegetable) at the end, after having added all other ingredients. I have noticed that, in this recipe, the softness and final result do not change if I add the oil at the end or not, but feel free to proceed as you see fit.
Mix the dough with a motion that goes from bottom to top, i.e., take the dough from underneath, from the bottom of the bowl, and bring it upwards, turning the bowl gradually for a uniform motion. Continue this way for about a minute; we’ll incorporate as much air as possible into our dough (with a stand mixer, this will not be necessary).
Now seal the bowl with the dough very well and place it in the coldest part of the fridge for 12 hours.
After 12 hours, take out the bowl and let it sit at room temperature for an hour (in winter, an extra hour might be needed).
Shape the buns: line a 11-inch diameter baking pan (or smaller if you prefer your buns to rise more in height than in width, like mine) with parchment paper and lightly grease it with vegetable oil.
Grease your hands with a tiny bit of oil or water (keep a small cup with a tablespoon of oil or water nearby) and take a portion of the dough, roll it, slightly flatten it to give it the desired shape, and place it on the baking sheet.
Continue until the dough is finished, placing the buns next to each other. In my case, the dough weighed exactly 805 grams, and I made 7 buns of 100 grams each and one of 105.
Let them rise for a couple of hours before baking them (I put them in the turned-off oven, away from drafts and temperature changes).
Before baking, sprinkle them with sesame, poppy seeds, and anything else you like as long as it’s not too heavy (the seeds will stick immediately, thanks to the presence of oil on their surface, which will also prevent the buns’ surface from drying out during the last rise).
Turn the oven up to maximum temperature.
When it reaches temperature, bake the gluten-free hamburger buns in the middle of the oven for about 10-12 minutes or until they are golden on the bottom and surface. Turn off the oven and remove them immediately to prevent the residual heat from drying them out.
Initially, the buns will feel harder than they will be after about 30 minutes when they cool down and regain their softness.
The buns are ready; it’s up to you to choose the fillings. On the blog, you’ll find many preparations in the sauces and condiments category to accompany and fill them.