The no-knead bread uses a technique for making bread that I really like and that gives exceptional results even with a home oven. The bread is fragrant, and the crust is crunchy just the way we like it. What is it about? It is an extremely easy technique created and developed by an American baker, Jim Lahey. It is based on the idea of letting the flour, water, and yeast do the work for us. In just a few moves, about 10 minutes, we too can have enviable bread. The bread is baked in a terracotta pot, but I bake it in a steel one, without plastic parts or flammable materials. The quantities listed here are for bread made with 2 parts all-purpose flour and 8 parts semolina flour, but we can use any flour we want. When I use other types of flour, the amount of water varies significantly.
- Difficulty: Easy
- Cost: Economical
- Rest time: 12 Hours
- Preparation time: 10 Minutes
- Portions: About 4 lbs
- Cooking methods: Oven
- Cuisine: Italian
- Seasonality: All seasons, Fall, Winter, and Spring
Ingredients
- 5.3 oz Sourdough starter
- 7 oz All-purpose flour
- 1 lb 12 oz semolina flour
- 1 tsp Wildflower honey (optional)
- 0.5 oz Fine salt
- 3 cups Water
- as needed Semolina flour
Preparation
Don’t be fooled by the process that seems long; actually, it will only take you about 10 minutes to make the dough. It seems long because I have been very detailed, especially for those who are new to baking or this technique for the first time.
1) Refresh the sourdough starter according to our habits, and when it is well risen, take the amount needed to make the bread.
2) Place the starter in a large bowl with honey and water. Dissolve the starter (with your hands like grandma did or with electric whisks), until you get a semi-liquid mixture.
Add the sifted flours, salt, and roughly mix all the ingredients by hand, for about 30 seconds, just long enough for the water to be absorbed by the flours (we don’t need to knead, indeed). The dough will be very soft because it has high hydration and is sticky. Cover the bowl with plastic wrap and let it mature in the fridge for 12/18 hours at most.
3) After the maturation time has elapsed, take the bowl with the dough out and leave it at room temperature for about 2 hours or less if it is very hot. Then generously flour a work table with semolina (it helps to dry the doughs) and gently turn our dough over onto it, giving it an approximate square shape.
4) Let’s start folding.
-With a dough scraper or spatula, lift the left side of the dough and bring it to the center (photo 1).
-Now lift the right side of the dough and also bring it to the center (photo 2)
-Lift the top side of the hypothetical “square” and bring it to the center (photo 3)
-Finally, lift the bottom side (the one closest to us) and bring it to the center (photo 4).
We will obtain a dough as shown in photo 5.
-Now we just need to roll it on itself from top to bottom (photo 6) to get an oblong loaf to place in a loaf pan; or make a ball (photo 7) to place in a basket for a round loaf.
Divide the dough into two or more pieces, depending on our needs, shape them as we desire, and place them in the chosen molds already lined with a kitchen towel, generously sprinkled with semolina flour. Also sprinkle the surface of the dough before closing the flaps of the towel, and let our loaf rise at room temperature for 2-3 hours at most.
5) After this additional resting period, turn on the oven to the maximum temperature. Also introduce the container that will bake the bread in the oven.
Be sure there are no wooden or plastic parts and use gloves and pot holders because the pot will be red-hot.
6) When the oven reaches temperature, with due precautions, take out the pot, flip the bread inside (the side of the bread that was underneath should end up on top), make a vertical cut with a sharp knife to allow the bread to expand better during baking, close the lid and bake on the lowest shelf for 35 minutes.
7) After 35 minutes, take the pot out of the oven and remove the bread, being careful not to burn yourself. Lower the temperature to 392°F and immediately put the bread back (simply placed on a baking tray) in the oven at mid-height for another 15 minutes. During the last 5 minutes of baking, the oven door should be opened in a “crack” to let out excess moisture and thus make the crust crispier. At the end of baking, immediately take the bread out and let it cool.
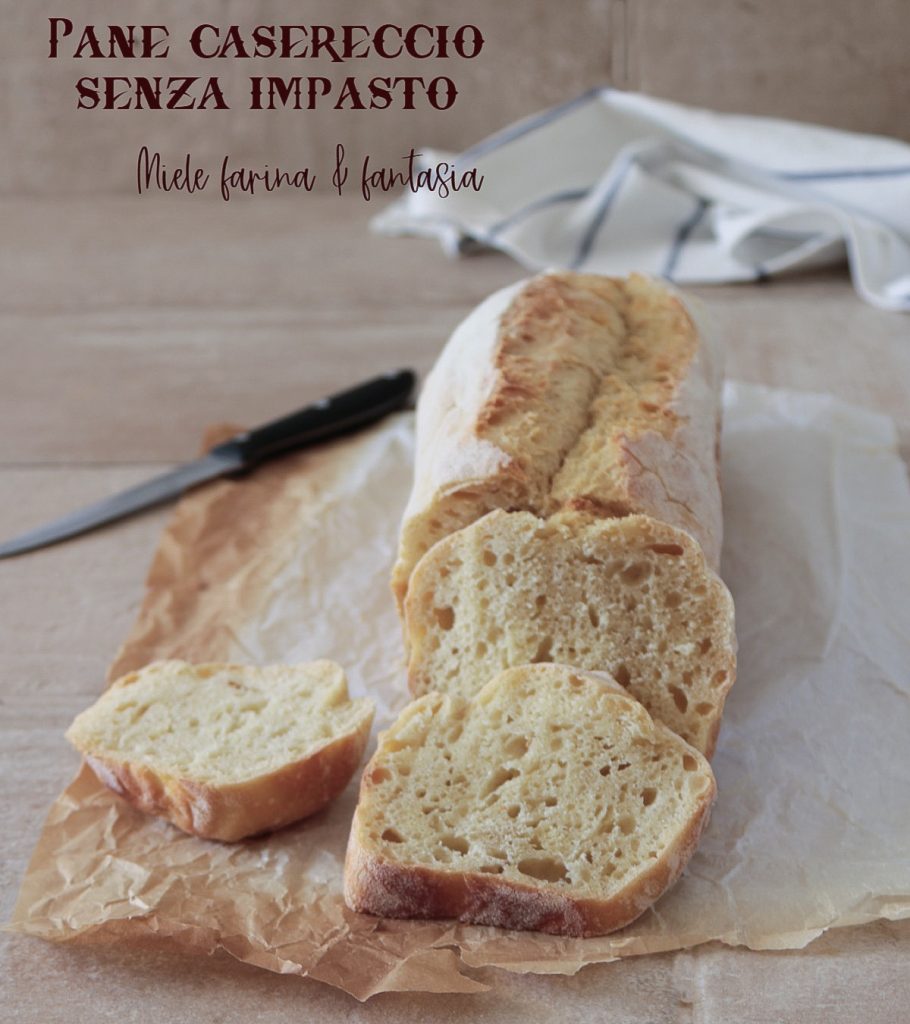
Depending on the container in which we bake the bread, we can have a slightly taller and narrower bread, like the one in the main photo, or wider and flatter like the one below. What matters is the taste…..
Bon appetit