Homemade sandwich bread allows us to enjoy a natural and safe product. Here I present the recipe by the Simili sisters, taken from their book ‘Pane e roba dolce’, which I made both with sourdough and with yeast, so that everyone can make it. The method I followed for this wonderful sandwich bread is the same as indicated in the book, but I have varied the quantities specifically for my loaf pan, which is 12 inches. This sandwich bread is ideal for stuffed sandwiches, canapés; or we can enjoy it at breakfast and snack time.
- Difficulty: Easy
- Cost: Cheap
- Preparation time: 14 Hours
- Portions: 12/15 slices
- Cooking methods: Oven
- Cuisine: Italian
- Seasonality: All seasons
Ingredients
- 20 oz Manitoba flour
- 1 tbsp Butter (soft)
- 5 oz Sourdough
- 1 1/4 cups Water
- 2 tsp Fine salt
- 1 tsp Sugar
- 1 tsp Wildflower honey
- 3.5 oz All-purpose flour
- 0.2 oz Fresh yeast
- 1/4 cup Water
Preparation
Let’s start with the sourdough process. Refresh your sourdough according to your habits; when it has more than doubled in volume, take 150 grams.
I would like to add a few words about this.
Depending on the strength of your natural yeast, you can decide the amount to use in this sandwich bread. If it’s a strong and very active yeast, 50-60 grams of sourdough is sufficient (especially in summer or in very warm environments).
Blend the sourdough with half the water, adding the sugar and honey. Then, gradually, add the sifted flour, salt, and butter, and finally the remaining water (a little at a time, as it may not be necessary to add it all, or conversely, add a few more tablespoons).
Knead by hand for about ten minutes (you can also do it with a mixer, using the “leaf” attachment).
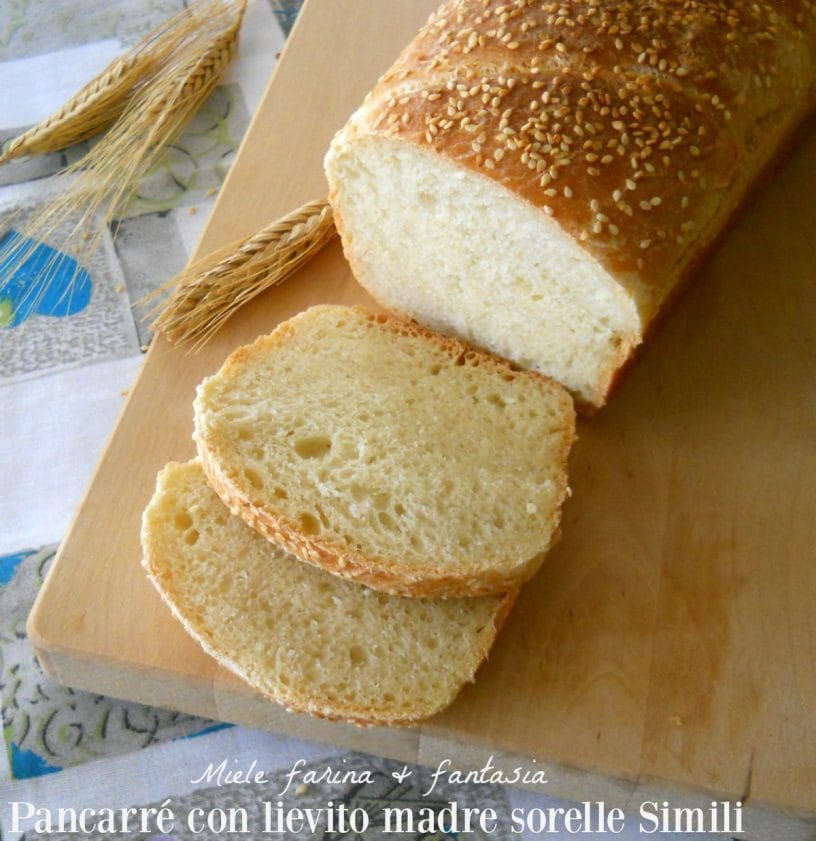
Work the dough into a cylinder, fold it into a horseshoe shape, and braid it. Place the braid in the buttered and floured mold (or lined with parchment paper, so we avoid adding more fats) and let it rise for about 12 hours (about 6/8 hours in summer), covered, leaving a 1 cm gap as described by the Simili. As soon as the dough reaches the edge of the mold, bake it at 356°F in a preheated oven for about 40/45 minutes.
Once baked, the sandwich bread should be allowed to cool “standing up” (as in photo 6), that is, resting on one of the short sides, and should not be cut until it is completely cooled, as it would tend to crumble. The crumb is soft, with a tight, dry texture and well-cooked.
Procedure for those intending to use yeast.
Make a pre-dough or big starter, completely dissolving the yeast in the water and adding it to the 100 grams of flour.
Mix well, cover tightly and let it double in volume. Once it has doubled, we’ll combine the big starter with all the other ingredients, and from this step forward, the process will be the same as described for the sourdough.
I did not specify the exact rising times, because they depend on various factors: such as the strength of the yeast, the strength of the flour used, the temperature and humidity of the environment, and the use or absence of ingredients that could slow down growth (such as animal fats, for example). In winter, using natural yeast, within 18/22 hours you can enjoy the finished product (I also included the rising times of the refreshment).
With the big starter of yeast (made with 5 grams), the rising times are a bit faster, meaning that within 12 hours the finished product is obtained. My advice is to check them often during the various stages and resist the temptation to speed up rising by placing them too close to direct heat sources.