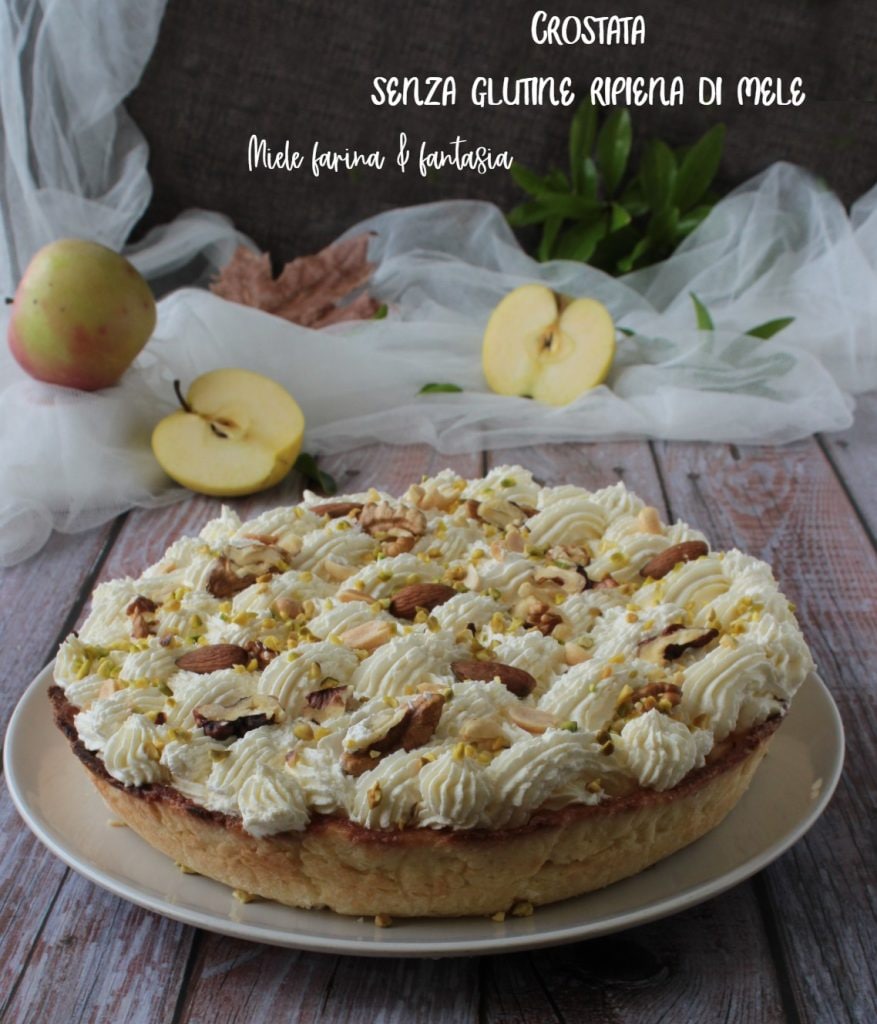
The apple and nut tart is a shortcrust shell, prepared with gluten-free flours, filled with natural apples and a mix of dried fruits. It is a simple recipe to replicate and, thanks to some precautions necessary due to the lack of gluten, it will give you an extraordinary result for taste, aroma, and texture. This type of tart can be made for festive occasions or to use up excess fruit, marmalades, jams, and so on.
- Difficulty: Very Easy
- Cost: Medium
- Rest time: 12 Minutes
- Preparation time: 10 Minutes
- Portions: 12
- Cooking methods: Oven
- Cuisine: Italian
- Seasonality: Fall, Winter, and Spring
Ingredients
- 1 1/3 cups gluten-free rice flour
- 1/3 cup cornstarch
- 1/2 cup granulated sugar
- 1/2 cup butter (also lactose-free)
- 1/3 tsp fine salt
- 2 egg yolks
- 1 egg white
- to taste finely grated lemon peel
- 3 apples
- 1/2 cup mixed nuts chopped (coarsely)
- 1 1/4 cups fresh heavy cream (also lactose-free)
- 9 oz spreadable cheese (also lactose-free)
- to taste chopped lemon peel
- to taste vanilla
- 1 tbsp gluten-free powdered sugar (heaped)
- 1 oz dark chocolate (to waterproof the tart)
Tools
- 1 Baking Pan
Steps
The pan I used for making the tart with these quantities is 9.5 inches, flared.
We will need two sheets of parchment paper
Dried legumes to use as weights on the shortcrust pastry for “blind baking,” i.e., without filling.
Plastic wrap
Food brush
Open star nozzle or another
1 piping bag
Let’s prepare the shortcrust pastry
Take the butter from the fridge, cut it into cubes, put it on a plate or bowl, cover it, and put it back in the fridge for 30 minutes.
In the meantime, prepare all the other ingredients. Measure the rice flour and cornstarch and sift them together.
Let’s prepare the gluten-free shortcrust pastry
Take the butter cubes out of the fridge 5 minutes before starting to knead.
After 5 minutes, place the butter in a large, shallow bowl. Add the sifted flours, fine salt, very finely grated peel of a lemon or orange, and the sugar.
Using your fingertips, quickly work these dry ingredients with the butter to obtain a kind of crumbly and coarse mixture, a sort of very crumbly dough (photo 1), to be precise. It doesn’t matter if the butter is not perfectly blended, it shouldn’t be, otherwise, it overheats.
Now we can add the yolks and the egg white (photo 2). On this note, I suggest adding the egg white little by little and only if you struggle to combine all the ingredients, that is, if you can’t incorporate all the flour (not all starches absorb liquids in the same way).
Knead quickly just to let the eggs absorb into the flour; the dough should still be firm. Again, it’s not important and not a mistake if the butter pieces are still visible, coarse.
Place a sheet of parchment paper on the worktable, turn the dough onto it, place another sheet of parchment paper on top, and roll out the dough with a rolling pin (photo 3) more or less to the size necessary to fit into the chosen pan, without being too precise and with a thickness of at most 1/5 inch. Wrap the dough well in plastic wrap and place it in the coldest part of the fridge for at least 12 hours.
The cold step for at least 12 hours is important because it stabilizes the dough, making it much more “elastic” and workable, if you can say so.
After this time, preheat the oven to 392°F.
Remove the dough from the fridge and place it inside the chosen mold, using the parchment paper around the pastry.
Even out the bottom, the side edges (photo 4), and remove the excess that overflows from the mold (we’ll use it to make some cookies to bake simultaneously with the pastry or we can put it back in the fridge). Again, it’s important to touch the pastry as little as possible and be quick to prevent the butter from softening too much.
On the surface of the pastry, covered with parchment paper, place dried beans or chickpeas to prevent the dough from swelling during baking and then bake immediately, at mid-height in the already hot oven for about 30/35 minutes, static oven.
After about 25 minutes, remove the pan from the oven (make sure to use oven mitts and appropriate pot holders), remove the parchment paper with the legumes, and continue baking so that the surface can brown.
At the end of baking, the pastry should be evenly golden both at the bottom and on the surface.
Take it out of the oven and let it cool for at least 15 minutes before removing it from the mold to avoid breaking it (it is necessary to remove it from the mold to prevent condensation at the base that could moisten the pastry). Let it cool on a wire rack.
When the pastry is completely cool, we can fill it
Chop the dried fruit coarsely together (photo 5); you can use any you like.
Then let’s deal with the apples. Wash them, peel them, cut them into chunks (photo 6), put them in a large bowl, and mix them with the dried fruit mix. Spread the filling evenly inside the tart.
If the type of apples is too watery or if the tart is not to be consumed immediately but, for example, the next day, I strongly recommend waterproofing it with chocolate (whether dark or white) just melted (photo 7), brushing the inside with a thin layer. As soon as the chocolate has dried, we can fill the tart, which will not fear moisture. This operation should be done on the already baked and cold tart.
Let’s focus on the decoration
Pour the fresh liquid cream into a mixer and start whipping it (one minute).
Then, add the spreadable cheese (dry, free of whey), the powdered sugar, and the flavors (vanilla and finely grated lemon peel) and continue whipping until you have a firm and fluffy cream (about another minute).
Put the obtained cream in a piping bag and let your creativity run wild. I decorated the tart with a 10 mm open star nozzle, creating a “basket” pattern and I add here the link to the tutorial. The tip used in the tutorial is different from the one I used, but the result was perfect, from an aesthetic point of view.
We can complete the decoration with dried fruit.
Enjoy your tart