Look at these cute chocolate pine cones! They are spectacular and really delicious, and they look perfect on the holiday table. However, don’t just make them for Christmas because it would be a shame. They are easy to make, although they do require a good dose of patience because inserting all those petals is truly a meticulous task. But the final result will reward you for the time spent. At my house, they were a hit, and I’ve already been asked to make them again. However, I have a tip for you: prepare and consume them on the same day or, at most, the day after because, unfortunately, the cereals gradually lose their crunchiness. The mixture remains delicious, but the crunchy touch fades away. Sigh!
Other Christmas treats that might interest you:

- Difficulty: Easy
- Cost: Economical
- Preparation time: 50 Minutes
- Portions: 9 Pieces
- Cooking methods: No Cooking
- Cuisine: Italian
- Seasonality: Christmas
Ingredients for 9 chocolate pine cones
- 7 oz Digestive biscuits
- 1/3 oz grated coconut
- 2/3 cup sugar
- 1/2 cup unsweetened cocoa powder
- 2 tbsps hazelnut cream
- 2.8 oz butter
- 2 tbsps milk
- chocolate petal-shaped cereals
- powdered sugar (for dusting)
Tools
- 1 Food Processor (I use Bimby)
- 1 Bowl
- 1 Whisk
Preparation of chocolate pine cones
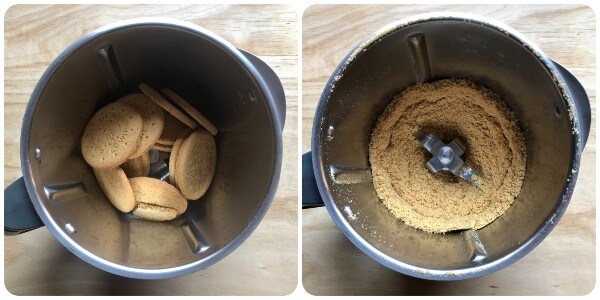
Place the digestive biscuits in a food processor and finely crush them. I used the Bimby, crushing for 10 seconds at speed 6.
Transfer the resulting powder into a bowl, then add the grated coconut, sugar, and unsweetened cocoa.
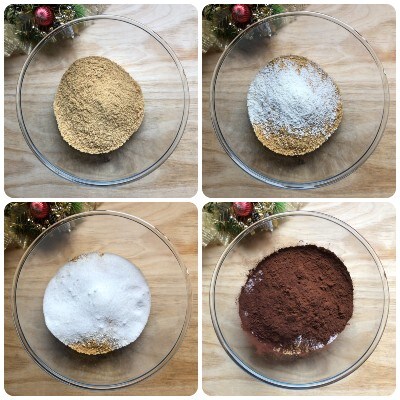
Mix well with a small whisk. Obviously, those with a Bimby can mix everything in the cup. This time, I chose to do it by hand to show the steps to those who don’t have this appliance.

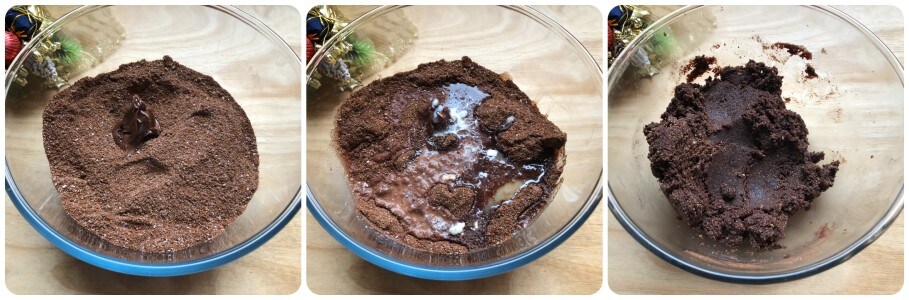
Then add the hazelnut cream, melted butter, and milk, and mix everything with your hands or a spatula. If the mixture is too crumbly and difficult to compact, add a little more milk.
Take 1.8 oz of dough and mold a small pyramid shape with your hands. You can make larger pine cones if you wish. I preferred a size more suitable for a single serving. If the pine cone is too large, one person cannot eat it all and has to cut it in half. However, it’s up to you to decide. You could even consider making pine cones of different sizes.

Now comes the part that requires the most patience: insert the petal-shaped cereals into the pyramid dough from the bottom to the top. Place them in a staggered manner.
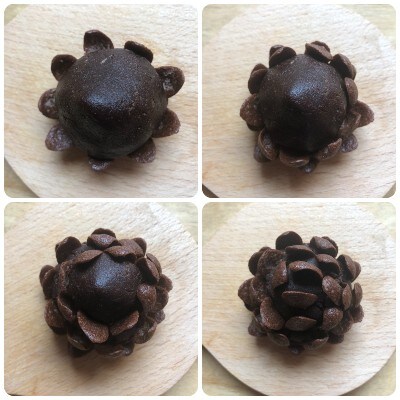
Once the pine cone is finished, gently press the petals to close them slightly. Don’t worry if a petal or two falls out and needs to be reinserted; it’s completely normal. In fact, I’d say it’s impossible not to happen.
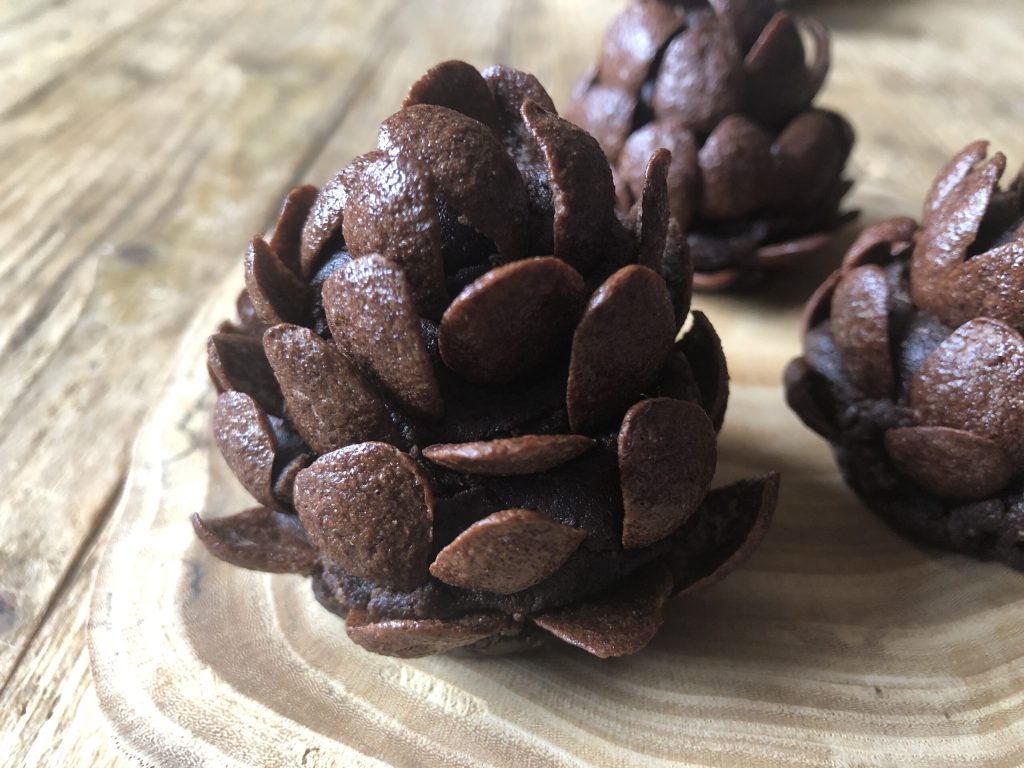

Arrange the chocolate pine cones on a serving plate and, just before serving, dust them with powdered sugar to mimic snow. Enjoy! Paola
I take this opportunity to remind you that you can follow me on various social networks to stay updated on the new recipes I publish. You can find me on Facebook (HERE), on Twitter (HERE), on Pinterest (HERE), on Instagram (HERE), and also on Tik Tok (@zenzero_limone). Thank you♥!
