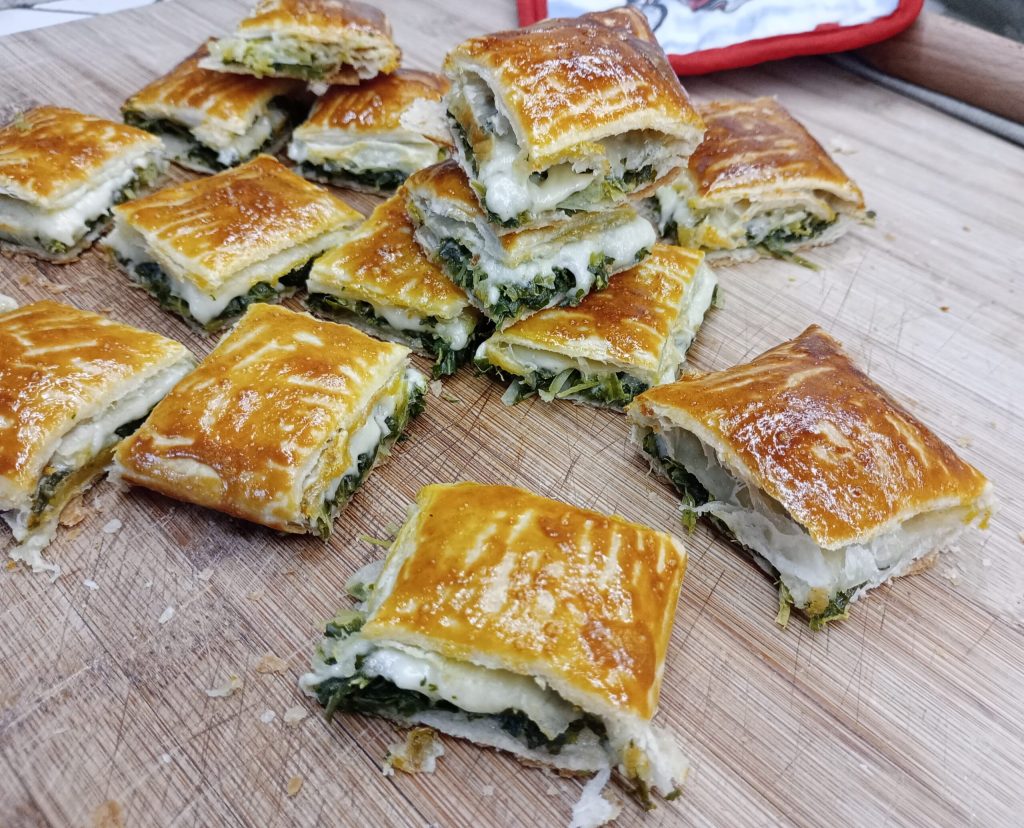
Filled Puff Pastry Squares with turnip greens and cheese. A quick appetizer perfect for festive days and beyond.
Today I’m making with you a little snack that will solve your starter or aperitif with surprising speed, the filled puff pastry squares.
They’re ideal to bring to the table when you have little time but don’t want to give up on flavor or making a good impression with guests.
These little bites are incredibly easy and quick, but above all customizable. For my version I chose a rustic and delicious filling… a tasty mix of sautéed turnip greens and creamy sliced cheese. A perfect combination for a homey, comforting flavor.
Enjoy the recipe, Giusi.
You might also like:
- Difficulty: Easy
- Cost: Economical
- Preparation time: 35 Minutes
- Cooking time: 25 Minutes
- Portions: 4 servings
- Cooking methods: Oven
- Cuisine: Italian
Ingredients for the puff pastry squares
- 1 sheet puff pastry
- 5 oz (about 1 cup) turnip greens, cooked, boiled
- 5 slices Emmental
- 1 egg yolk
Steps for the filled puff pastry squares
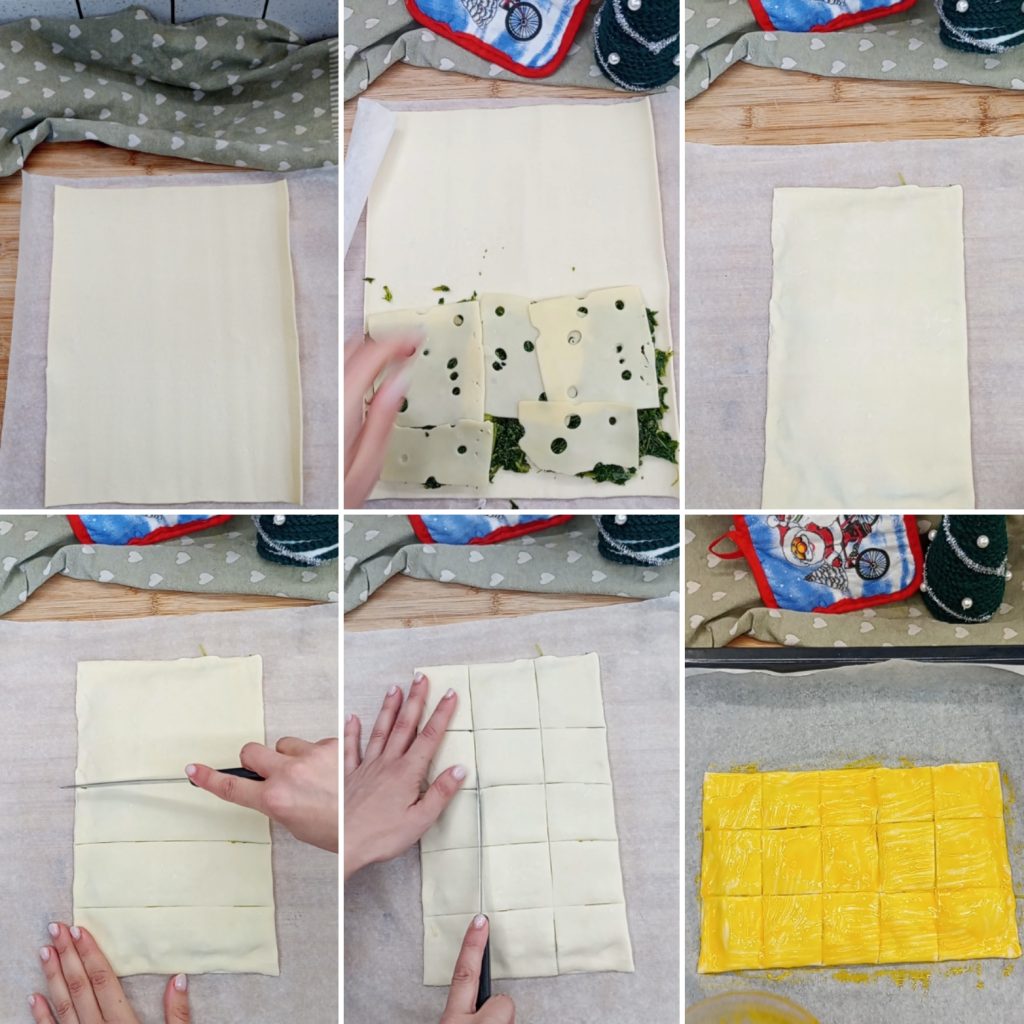
Unroll the rectangular puff pastry, keeping its parchment paper.
Cover only half of the pastry rectangle with the turnip greens and the cheese slices. Leave a free border of about 3/8 inch for sealing.Fold the empty half of the pastry over the filling like a book to cover it.
Seal the edges well with your fingertips, pressing carefully. You can also use the tines of a fork for a cleaner and more decorative seal.
Make shallow cuts with a knife to pre-form the squares. Then, brush the entire surface with a beaten egg yolk (this will ensure perfect browning).
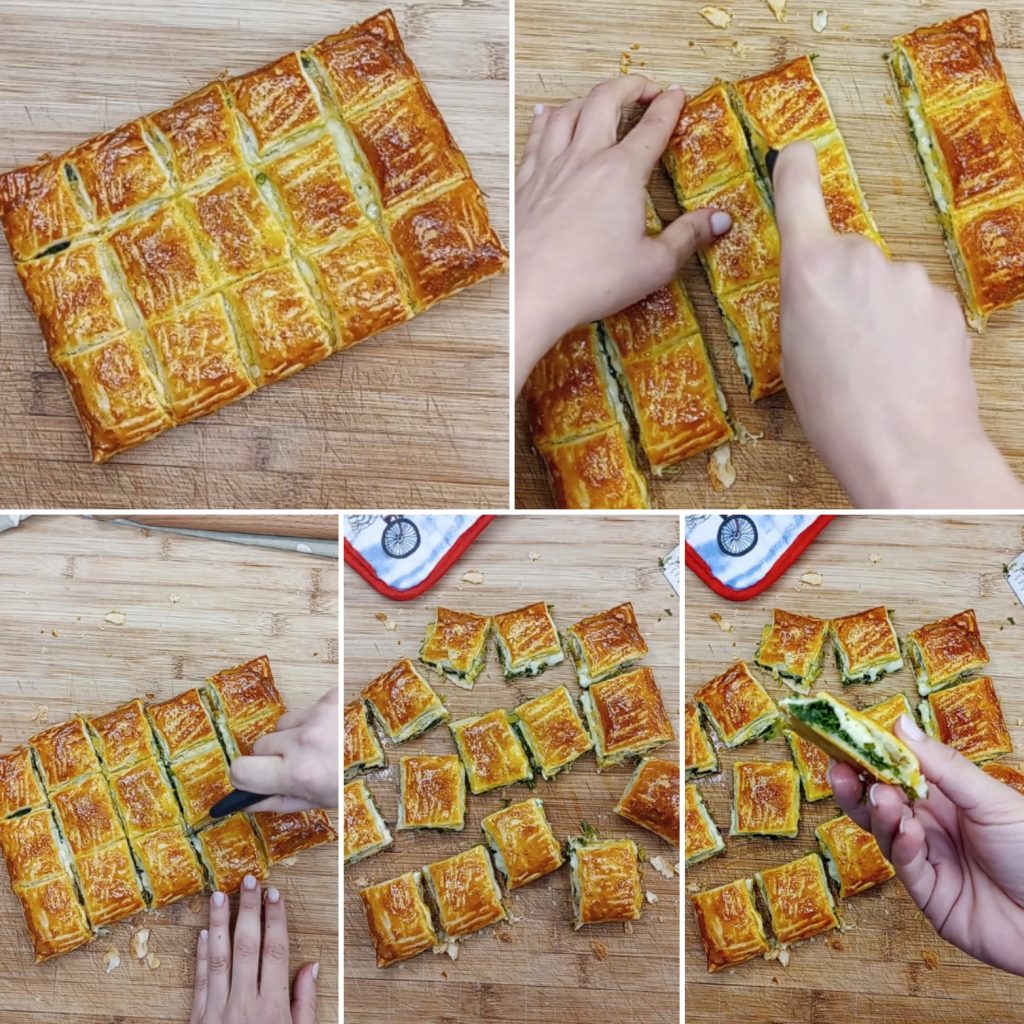
Transfer the pastry to a baking sheet and bake at 356°F in a preheated conventional oven for about 25 minutes, or until the pastry is well puffed and golden.
Once out of the oven, let them cool slightly, then cut along the pre-made incisions to separate the squares.
After baking, let your puff pastry squares cool slightly. At this point, carefully cut along the incisions to separate the bites. Serve hot or cold — they’ll be a guaranteed success on your table.
Don’t miss my recipes on Instagram Pasticcidigiu ⬅️
If you want to see all my other recipes click here to start browsing
