The Focaccia/Flatbread You Can’t Go Wrong With: The WOW Effect Dough!
Focaccia lovers (or our beloved Tuscan Flatbread) come to me, I don’t know about you, but I could eat it all the time.
Its magic lies in its versatility: high and fluffy or thin and crispy? You decide!
It’s all in the final rolling on the baking sheet: spreading the dough differently, you can get exactly the texture you want, and I’ll explain everything during preparation.
And don’t fear complications! As you know, I love simple and quick things to keep up with busy days. Just a few simple tricks in the initial proofing phase and the result is guaranteed. Let’s prepare to knead the perfect focaccia! But now come with me and let’s start baking.
Happy cooking, Giusi.
You might also be interested in:

- Difficulty: Very easy
- Cost: Very cheap
- Rest time: 4 Hours
- Portions: 4
- Cooking methods: Oven
- Cuisine: Italian
Ingredients for the focaccia-flatbread
These quantities are for a baking sheet the size of the oven.
- 2 cups all-purpose flour
- 2 cups bread flour (or all-purpose flour)
- 1.6 cups water
- 0.14 oz fresh yeast (or 0.07 oz dry yeast)
- 0.28 oz fine salt
- 2 tbsp extra virgin olive oil
Steps for the focaccia/flatbread
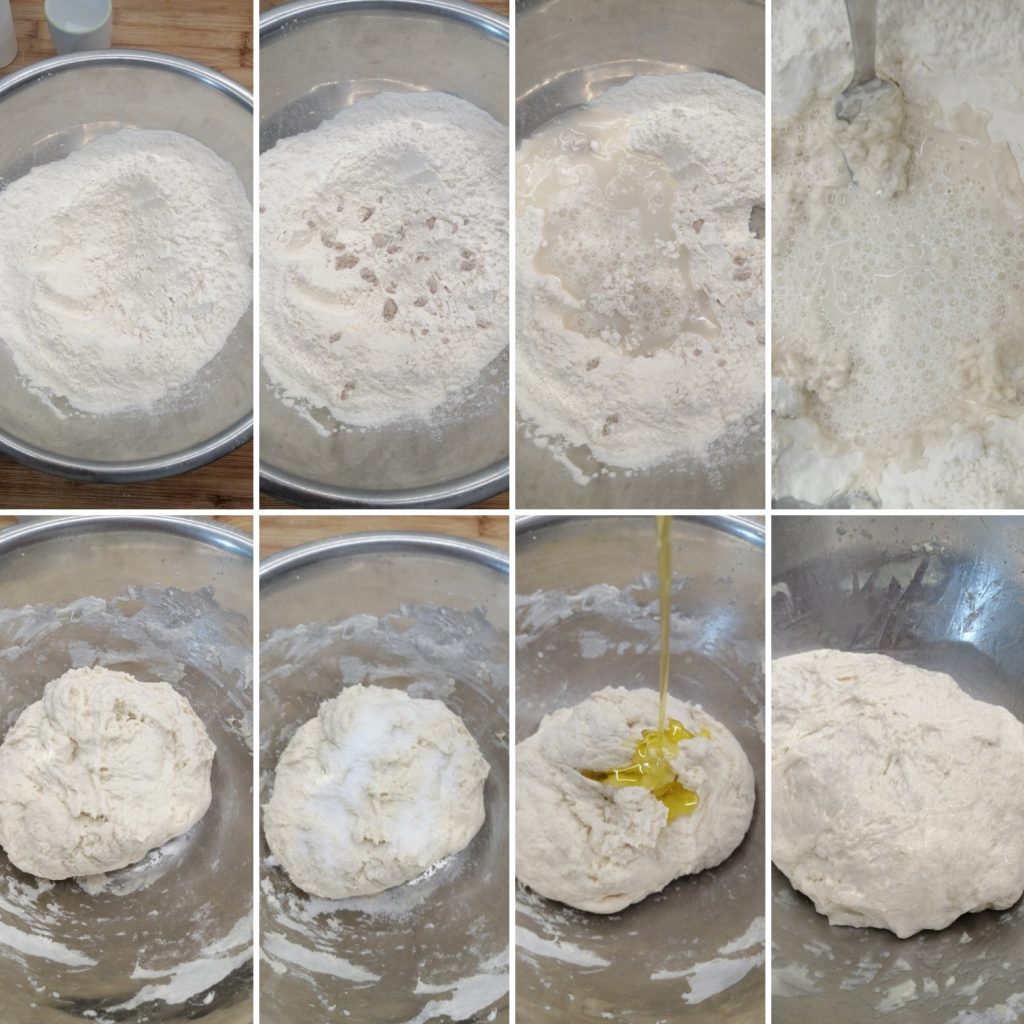
In a large bowl, pour in the flours and yeast.
If using fresh yeast (cube): crumble it directly into the flours.
If using dry yeast (packet): dissolve it first in a small amount of lukewarm water (about 3 tbsp) taken from the total of the recipe.At this point, add the water gradually, a little at a time, and start incorporating it while working with a fork. Continue until the water is almost completely absorbed.
When the dough is rough and no longer has obvious lumps, add and incorporate the salt.Finally, pour in the oil. Still using the fork or, even better, with your hands, mix and knead until the oil is completely incorporated. Don’t be alarmed: at first, it will seem like the dough is drowning in oil, but it is normal!
Continue mixing for a few minutes; once absorbed, the dough will appear smooth and exceptional.
Once the kneading is complete, cover the bowl with a lid (or plastic wrap) and let the dough rest for 10 minutes. This short pause helps relax the gluten mesh and makes it more workable.
After the resting time, start with the first round of folds.
Lift a section of dough from the edge of the bowl on the left side and gently bring it toward the center, pressing lightly.Repeat the operation lifting the next section from the right side and bringing it to the center.
Perform a total of 4 folds (one for each ideal “side” of the dough). [See photo]
After the first round of folds, cover the bowl again with the towel and let it rest for another 10 minutes.Repeat this entire operation (Folds + 10 minutes of Rest) two more times.
In summary, you will need to perform 3 rounds of folds in total, each followed by a 10-minute rest.
The (see photo) indication is crucial here, as the folds are much easier to understand with an image than with an explanation.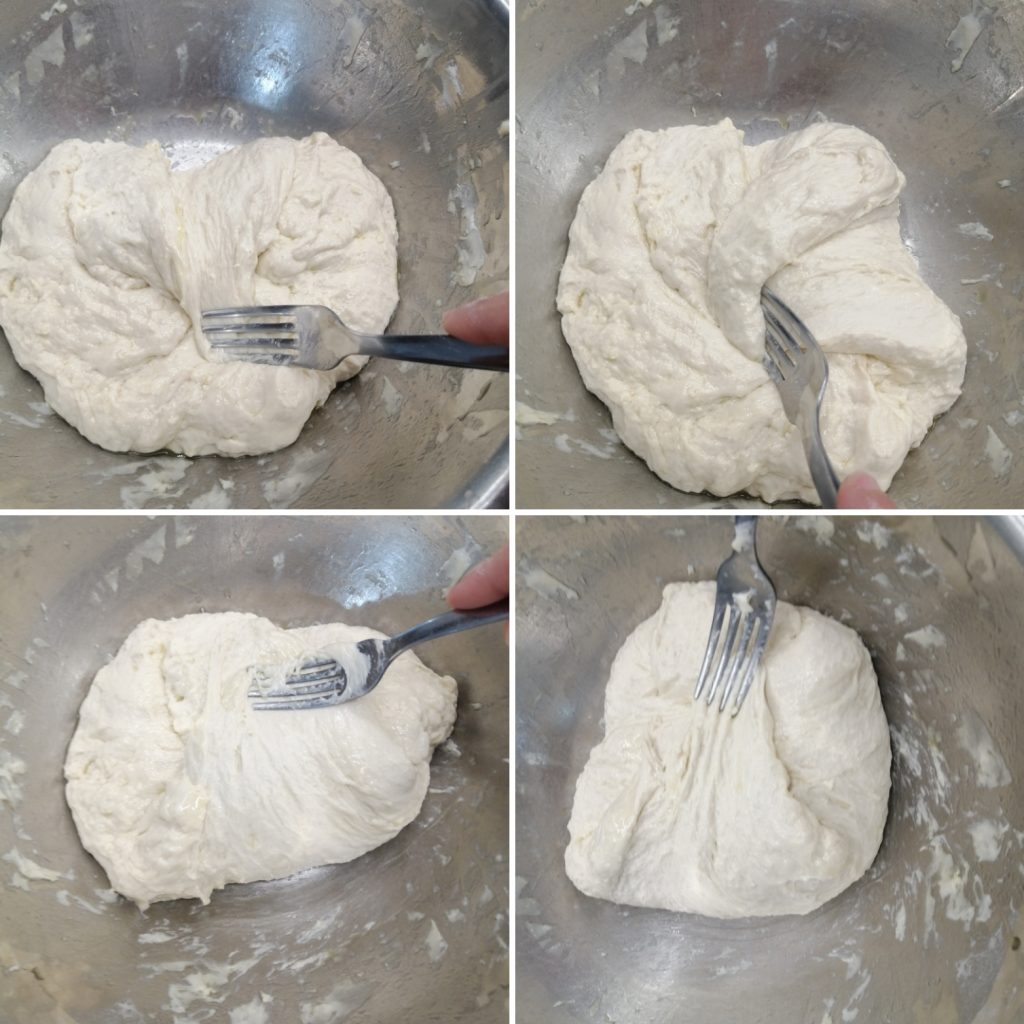
After the last round of folds and rest, the dough will look visibly better: as you can see from the photo, it should appear well kneaded, elastic, and slightly sticky (this is the sign that it’s working perfectly!).
At this point, cover the bowl hermetically with plastic wrap to prevent it from drying out on the surface.
Let the dough rise at room temperature (away from drafts) for about 3 hours, or until it has doubled in volume.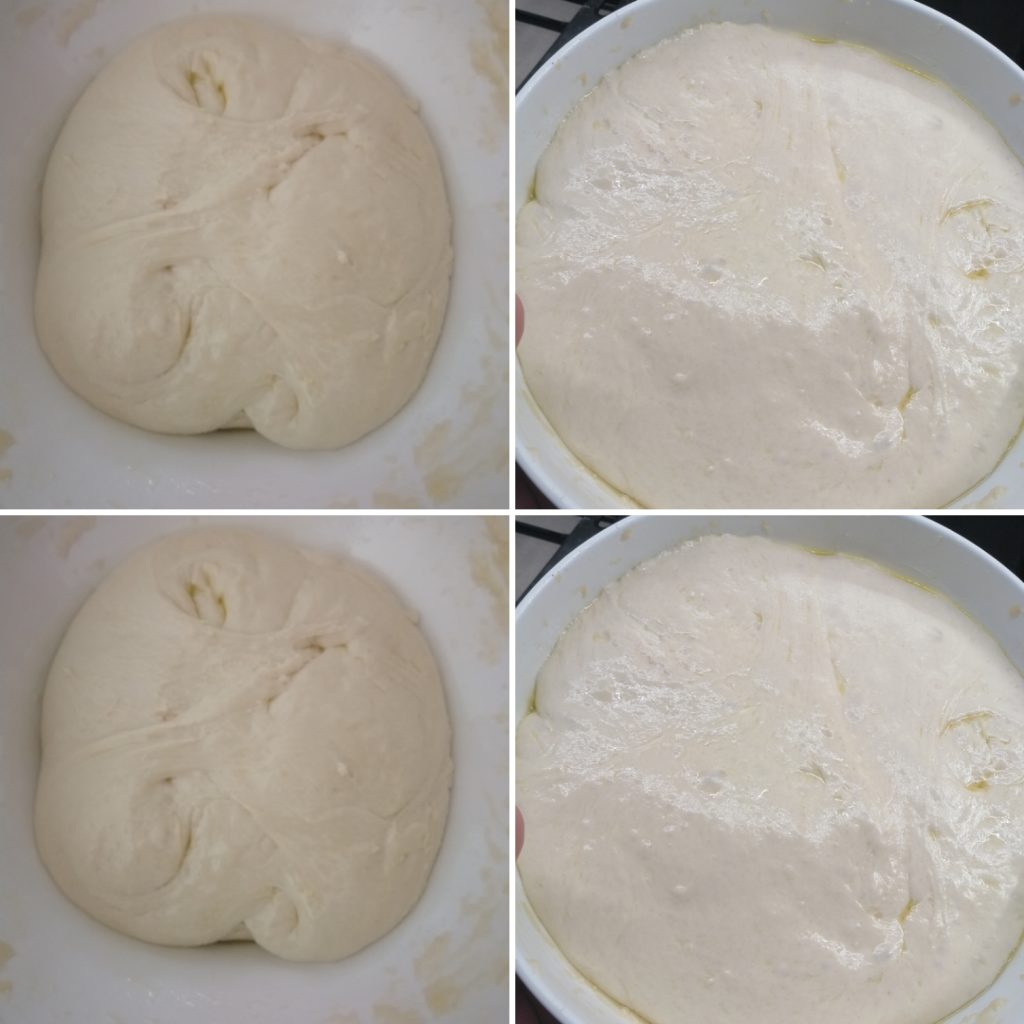
Take the oven tray you will use for baking, line it with parchment paper and generously oil it with a drizzle of extra virgin olive oil.
Pour the risen dough into the pan and start spreading it gently using your fingertips, which should also be oiled.Remember, this is the crucial moment to decide the final texture of your Focaccia/Flatbread!
If the dough is spread to the edges, making it wider on the tray, you will achieve a thin and crispy result.
If you spread it less wide, leaving it thicker, you will get a high and fluffy focaccia.If the dough seems too elastic and difficult to spread immediately, let it rest for 2-3 minutes and then continue: it will relax and allow you to complete the spreading.
Once spread to your liking, cover the tray with plastic wrap and let it rise for another hour at room temperature.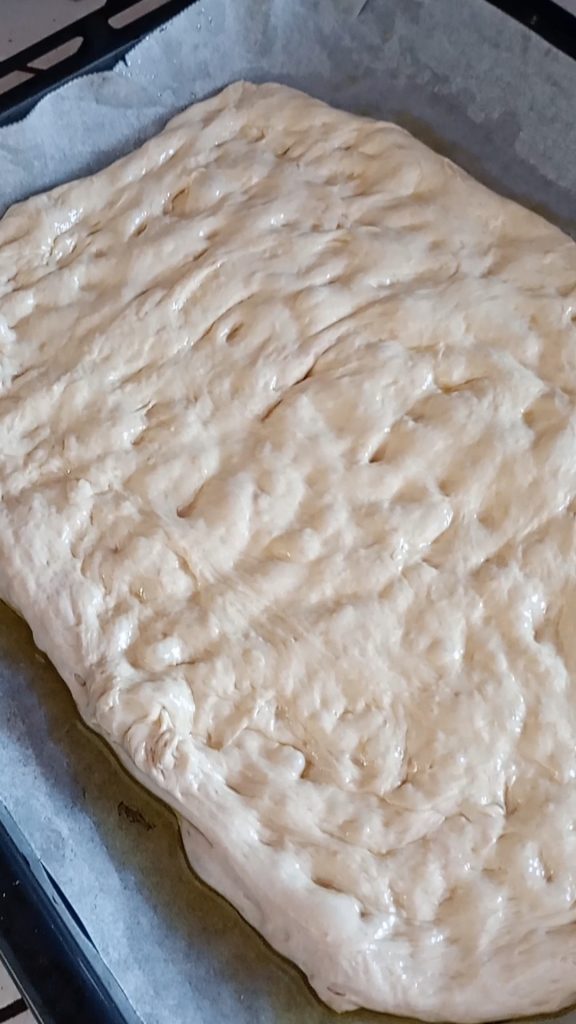
Preheat the oven to 392°F (static or fan-assisted, depending on your preference).
First phase (15 minutes): Place the tray in the lower part of the oven. Bake for about 15 minutes. This helps give a good rise and cook the bottom well.
Second phase (10-15 minutes): Move the tray to the middle part of the oven and continue baking for another 10-15 minutes, or until the surface reaches perfect golden color.
Remove the Focaccia/Flatbread from the oven and let it cool on a rack to keep the base crunchy.
Once warm or cooled, just slice it and layer or fill it as you like!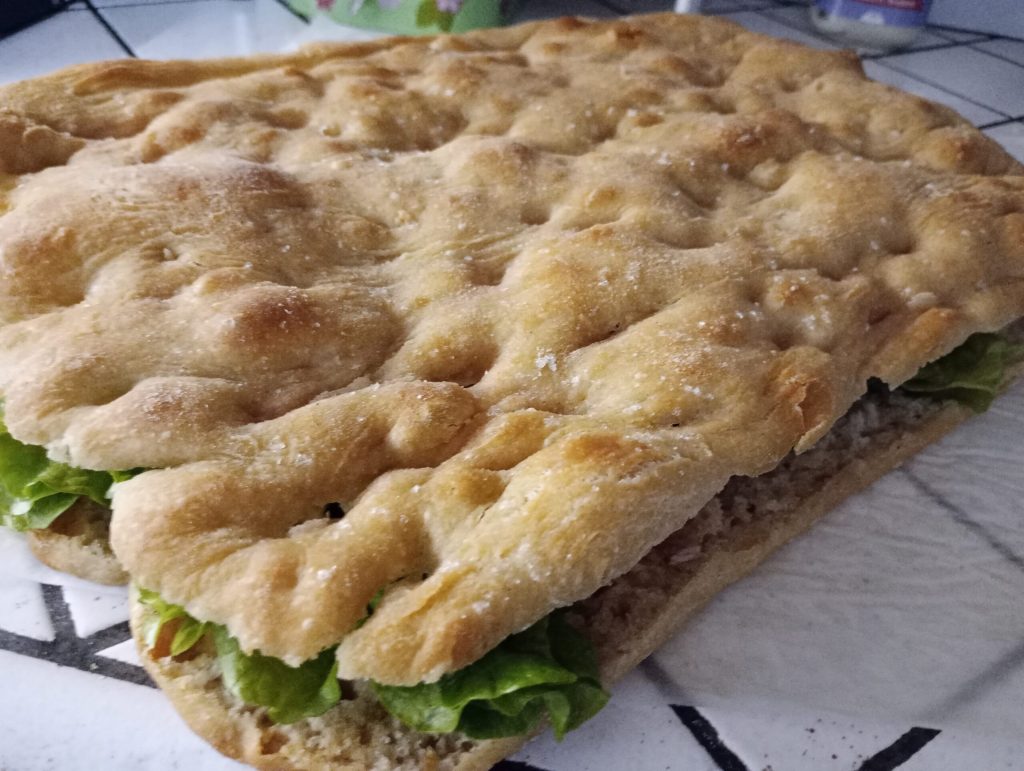
Don’t miss my recipes on my Instagram page.
