Super easy filled Paradise Cake, who doesn’t remember the famous snack. Today I bring home the taste of the most beloved snack. I must confess it’s been my favorite snack since I was a child, and making it at home is a real joy.
This is not just a cake, it’s a cloud: the base is soft and buttery (like the original), while the filling is my No-Cook Cream. The result is a delicate, melting cake with an intense milk and vanilla flavor.
It’s a easy recipe that requires very little effort, but guarantees huge success with adults and kids. Perfect for a birthday, in fact, I always make it for my brother because it’s one of his favorite cakes.
Let’s get started!
Enjoy the recipe, Giusi.
You may also be interested in:

- Difficulty: Very Easy
- Preparation time: 1 Hour
- Portions: 8 People
- Cooking methods: Oven
- Cuisine: Italian
Ingredients for the Super Easy Filled Paradise Cake.
If you don’t have condensed milk or prefer not to use it, you can replace it with about 1/2 cup of powdered sugar to add to the whipped cream. However, be aware: the cream will be more like Chantilly and won’t have the same firmness and milky taste and unmistakable flavor of the real Paradise Cream!
- 2/3 cup all-purpose flour
- 2/3 cup potato starch
- 3 eggs
- 7 tbsps butter (Melted)
- 1/2 cup granulated sugar
- 2 tsps baking powder
- Half vanilla flavoring (Half a vial)
- 1 1/4 cups heavy cream
- 100 condensed milk (or powdered sugar)
Tools for the Super Easy Filled Paradise Cake
- 1 Baking Dish 12×8
Steps
In a large bowl, beat the eggs with the sugar until you get a light and frothy mixture.
Add the melted butter, making sure it is well lukewarm before pouring it in. Mix gently with a whisk or spatula at low speed.
Add the flour and potato starch sifted with the baking powder and the half vial of vanilla flavoring.
Continue mixing with the whisk until all ingredients are well combined and the batter is smooth and lump-free.Pour the mixture into a greased and floured mold of 12 x 8 inches.
Bake at 350 degrees (in a static oven) for 25 minutes. After this time, always do the toothpick test: it should come out clean.
Remove from the oven and allow the cake base to cool completely.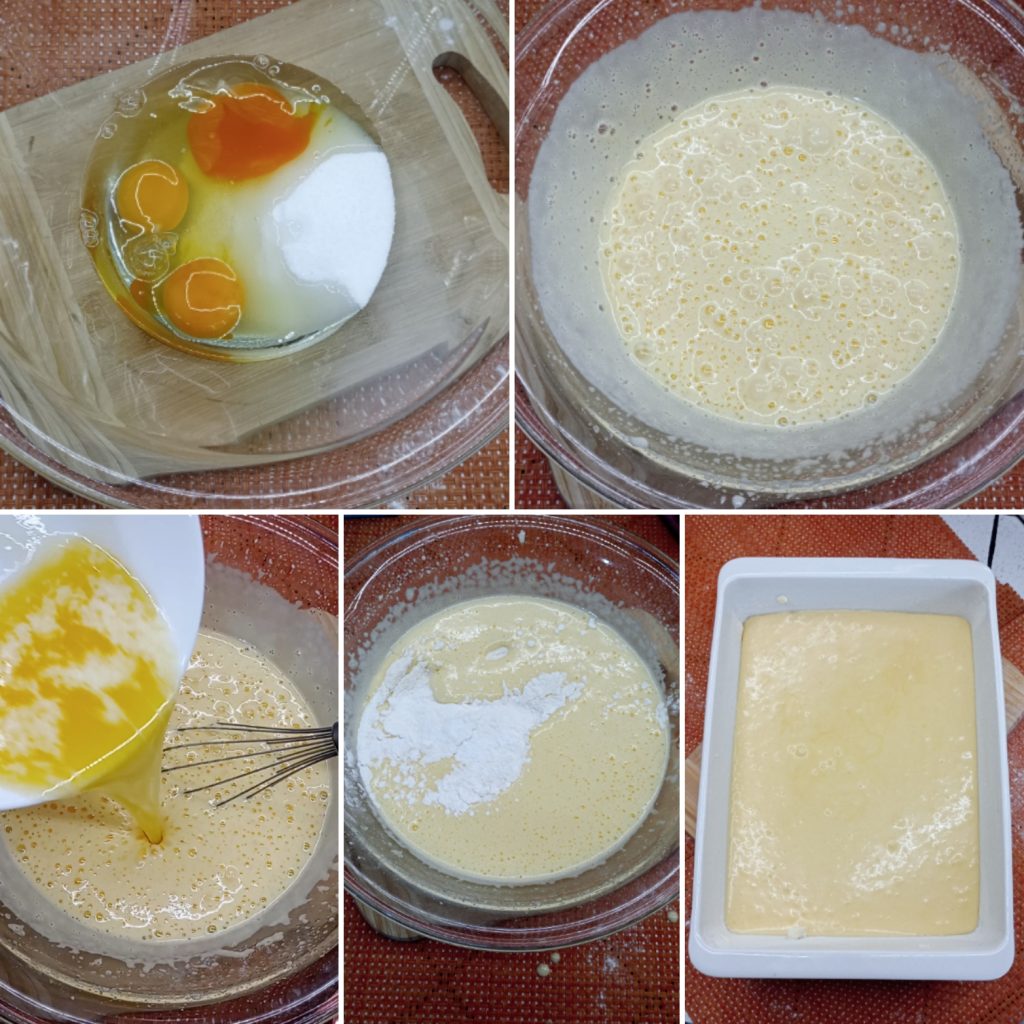
Once the cake is cold, cut it into two equal layers horizontally.
Preparation of the No-Cook Paradise Cream: In a bowl, whip the fresh cream (very cold) until it is semi-whipped. Add the condensed milk in a thin stream and continue to whip until you get a thick and fluffy cream.
Trick for the Perfect Filling: Take the bottom layer of the cake. Place a cutting board or straight ruler along the long edge of the base. This acts as a containment for the cream.
Spread the Paradise Cream abundantly and evenly on the bottom layer of the cake, letting the cutting board help keep the edge clean and straight.
Remove the cutting board and close with the top layer of the cake. Press very gently.
Sprinkle the surface with plenty of powdered sugar.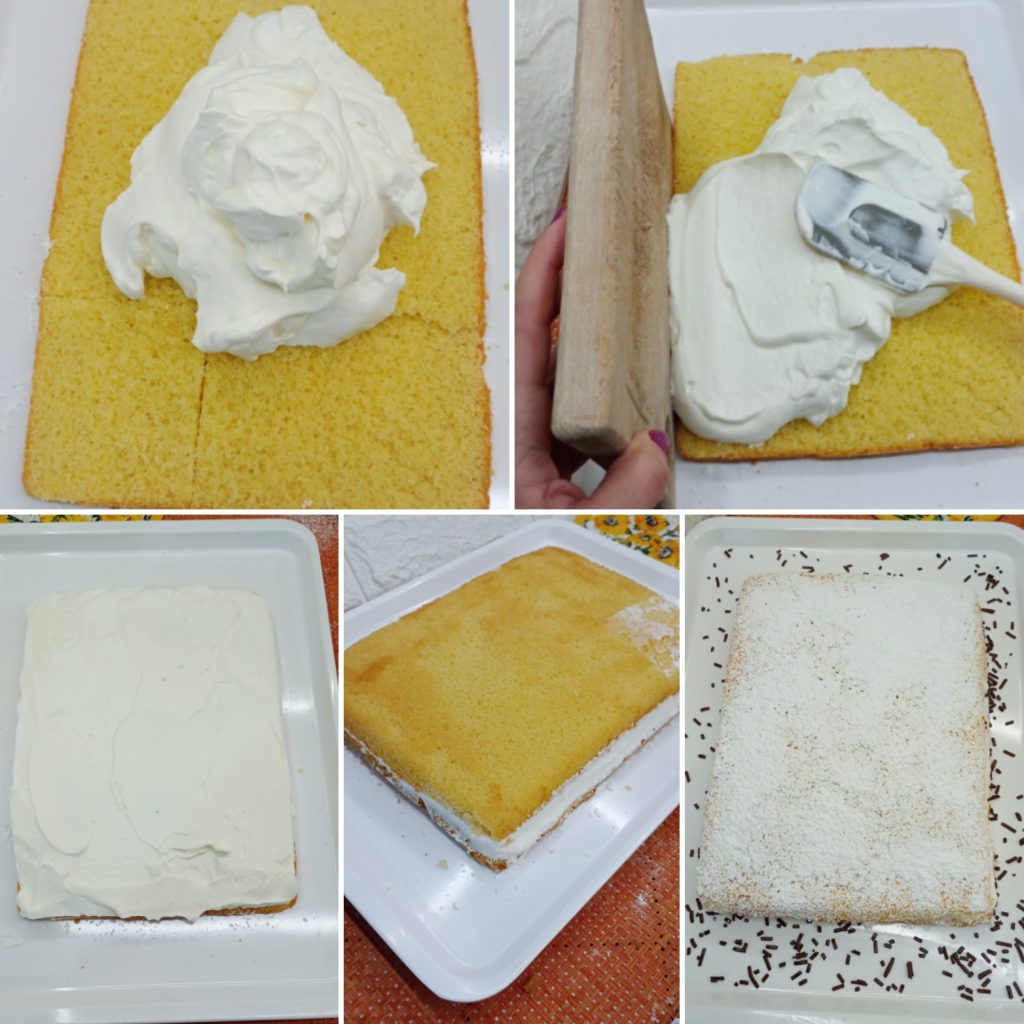
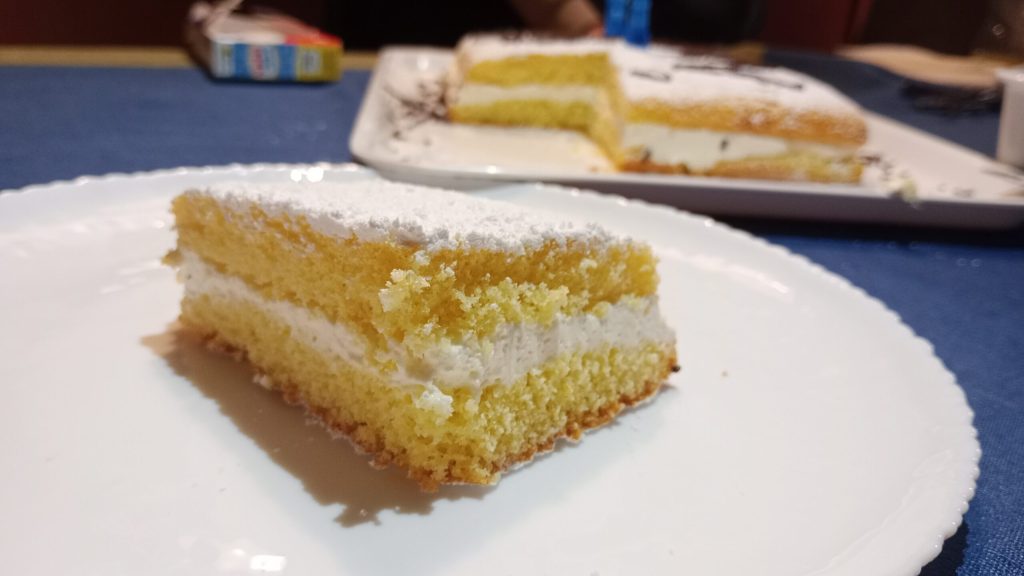
And here is your Soft Paradise Cake ready!
Every bite is a dive into the past, with that cloud-like softness and unmistakable milk cream flavor that takes us back to childhood. It’s an emotion to prepare it for my brother, and I hope it will become your favorite cake for festive days too!
It shows that the best sweets are made with love and simple ingredients.
A hug and see you at the next recipe!
Here you can see all its deliciousness and the inviting layer of Paradise Cream.
Don’t miss my recipes on my Instagram page Pasticcidigiu ⬅️
If you want to see all my other recipes click here to start browsing
Storage
The Paradise Cake, filled with the Paradise Cream based on cream, must be stored in the refrigerator.
Place it in a cake container or cover it well to prevent it from absorbing odors. It keeps in the refrigerator for about 3-4 days.
For the best taste, take it out of the fridge about 15-20 minutes before serving, so that the base becomes more soft.
