Stuffed Eggs Shaped Like Chicks: the perfect Easter recipe for kids! Discover how to prepare this creative, easy and quick appetizer to make your Easter menu special with a cheerful touch.
Today I suggest a Creative appetizer: Stuffed Eggs Shaped Like Chicks: the perfect Easter recipe for kids! Follow our simple steps to decorate your table and amaze the whole family with a cheerful and tasty dish.
Welcome to the kitchen! 🐣
Easter is around the corner and, let’s be honest, there’s nothing better than bringing a bit of cheer to the table that makes both kids and adults smile.
If this year you want to go beyond the usual hard-boiled eggs, you’re in the right place!
Super quick: The Creative Appetizer In just a few minutes and with very simple ingredients you probably already have in the fridge, we’ll transform classic eggs into small, adorable chicks that look like they’ve just hatched.
They’re so cute you may almost feel bad eating them (but they’re so tasty they’ll disappear in a second!).
Let’s get to work and find out how to make your Easter appetizer unforgettable.
Made for you:
- Cost: Very economical
- Rest time: 10 Minutes
- Preparation time: 10 Minutes
- Cooking time: 9 Minutes
- Portions: 6 Pieces
- Cooking methods: Boiling
- Cuisine: Italian
- Seasonality: Easter, Easter Monday
- Energy 85.58 (Kcal)
- Carbohydrates 3.79 (g) of which sugars 1.00 (g)
- Proteins 7.04 (g)
- Fat 4.74 (g) of which saturated 1.99 (g)of which unsaturated 2.42 (g)
- Fibers 0.69 (g)
- Sodium 145.61 (mg)
Indicative values for a portion of 75 g processed in an automated way starting from the nutritional information available on the CREA* and FoodData Central** databases. It is not food and / or nutritional advice.
* CREATES Food and Nutrition Research Center: https://www.crea.gov.it/alimenti-e-nutrizione https://www.alimentinutrizione.it ** U.S. Department of Agriculture, Agricultural Research Service. FoodData Central, 2019. https://fdc.nal.usda.gov
Ingredients
Let’s shop What you need for your Easter Chicks
- as needed arugula (or mixed salad: To recreate the "grass" effect in the photo.)
- 6 eggs (large: Preferably white-shelled for greater contrast, but classic brown ones are fine too.)
- 2 tbsp mayonnaise (To make the filling creamy.)
- 1 tsp sweet mustard (To give that intense yellow color and a slightly stronger flavor.)
- 1 carrot (small: Essential to make the beaks and webbed little feet.)
- as needed black peppercorns (or small olive pieces: To create expressive little eyes.)
- 1 pinch salt
- 1 pinch pepper
- 1 pinch sweet paprika ((optional) if you want a more orange color.)
Tools
- 1 Pot
- 1 Bowl
- 1 Knife carving tool
- 1 Plate
Steps
Let’s go to the kitchen
Perfect cooking: Start with cold water and count 9 minutes from the boil. Immediately plunge the eggs into ice water: this trick prevents the unsightly green ring around the yolk and makes the shell very easy to remove without breaking the white.
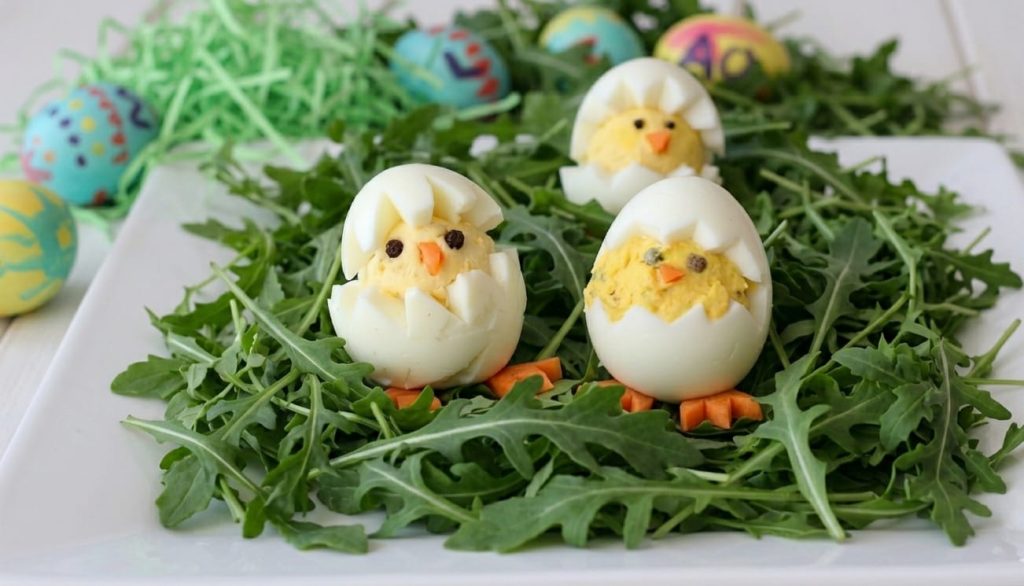
The “Zig-Zag” cut: Don’t cut the egg cleanly in half. Use a sharp pointed knife and make small triangular incisions around the circumference (about 2/3 of the way up). Gently lift the top “cap”: here’s the hatched egg effect!

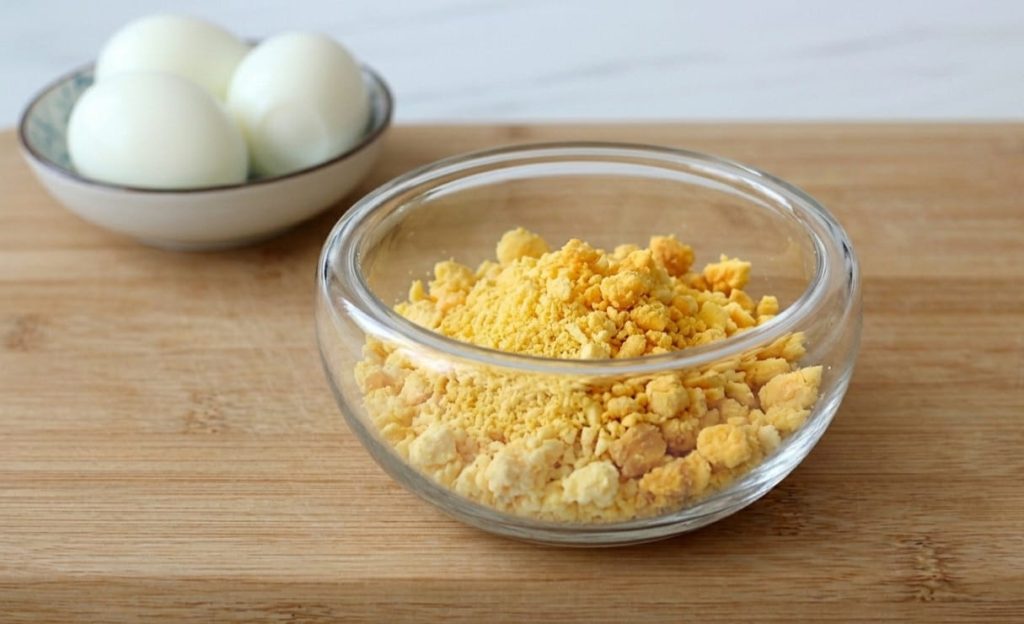
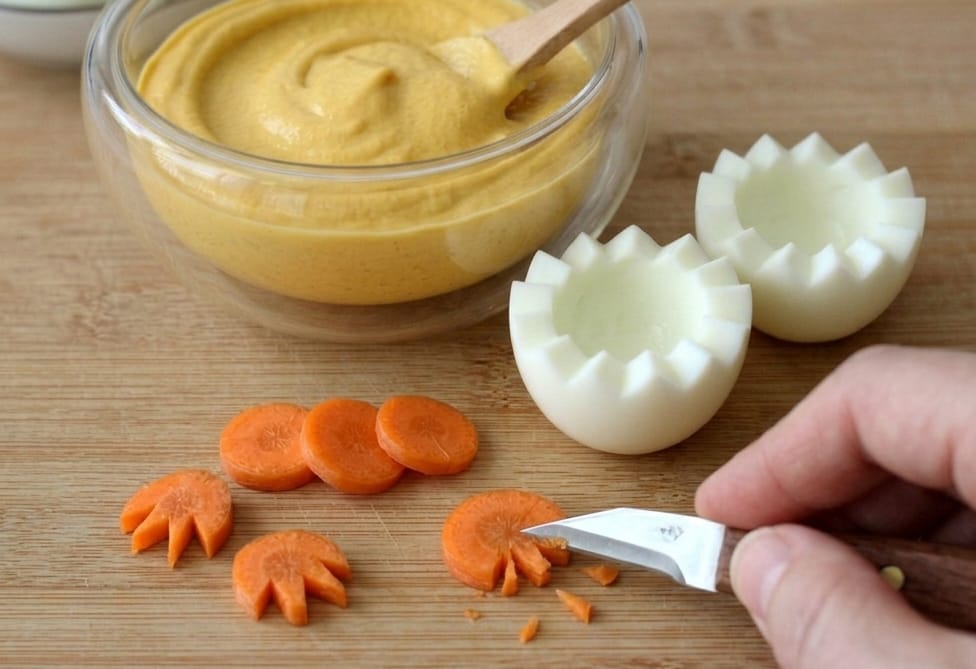
Scoop out all the yolks and collect them in a bowl, where you will add the mayonnaise, the mustard, a pinch of salt and a pinch of pepper. If you want a more yellow color you can also add some sweet paprika. Mix everything.
Once you have a smooth, homogeneous mixture, take care of the little feet.
Peel the carrot and cut it into slices as in the photo. With a small knife carve the slices to create the shape of the little feet.
Stability guaranteed: To prevent the chicks from “running away” from the plate, slice a very small piece from the base of the hard-boiled egg. By creating a flat surface, they will stand perfectly on the arugula. Now it’s your turn: bring joy to the table! 🐣
Moisten a spoon and scoop a little of the yolk mixture to fill the eggs.
Place the cap on each egg and arrange them on a bed of arugula, placing the carrot feet at the base.
Use other small carrot pieces to make the beak and peppercorns for the eyes.
As you have seen, it only takes a few minutes and a pinch of imagination to turn a simple appetizer into a magical decoration that will leave everyone speechless.
Whether you are preparing Easter lunch or a cheerful spring picnic, these chicks will be the true stars of the celebration!
And you, how will you personalize your chicks?
Will you add a touch of tuna to the filling or use olives to create different eyes?
Let us know in the comments below! If you decide to replicate this recipe, take a photo and tag us on social media: we can’t wait to see your creations hatch on the table! 📸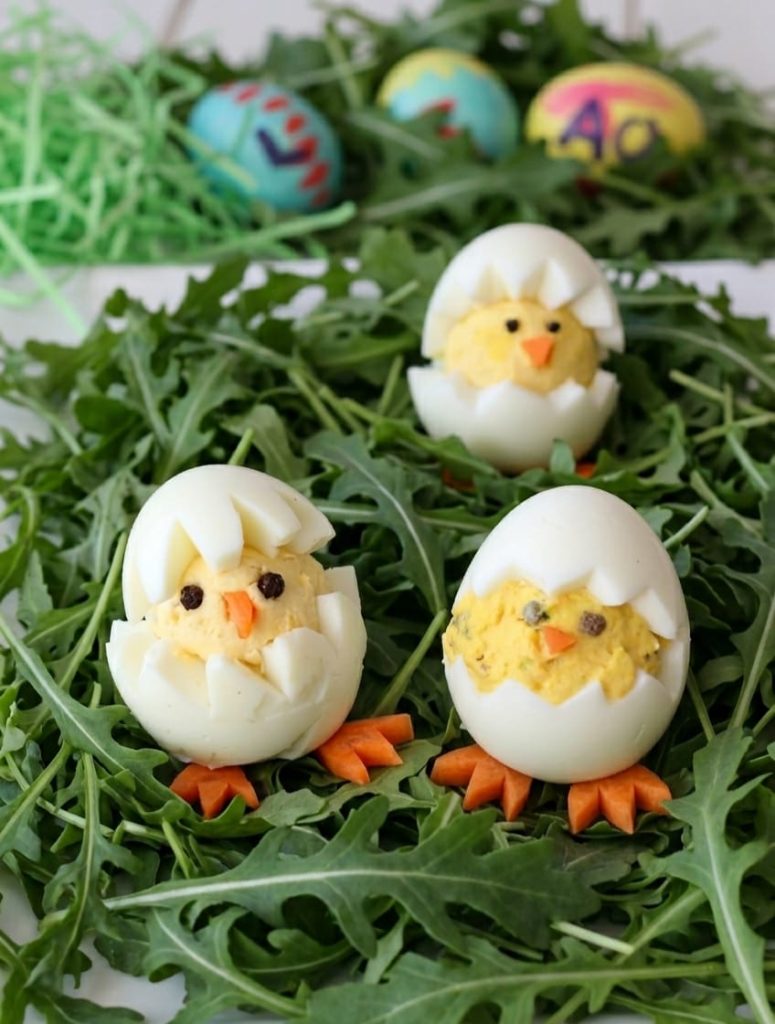
Storage
Stuffed Eggs Shaped Like Chicks can be stored for up to 2 days in a closed container in the refrigerator.
FAQ (Questions & Answers)
Stuffed Eggs Shaped Like Chicks
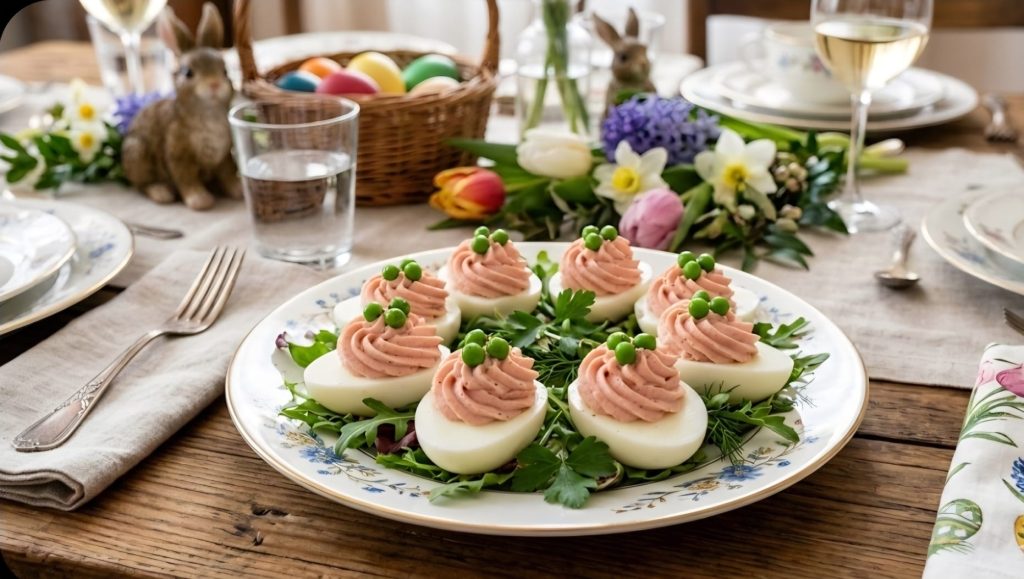
How can I make a pink filling?
With a mortadella mousse — here’s the recipe, click here
Stuffed Eggs Shaped Like Chicks