Hello friends, today I present to you these wonderful craquelin choux with whipped cream that are truly delicious and scenic to make. Below you will find the recipe..
- Difficulty: Medium
- Cost: Economical
- Cuisine: Italian
Ingredients for the Craquelin Choux with Whipped Cream
- 7 oz eggs (weighed without shell) about 4-5 eggs
- 1 1/4 cups all-purpose flour
- 1 1/4 cups water
- 1 pinch fine salt
- 1/2 cup butter
- 1 pinch granulated sugar
- 1 cup all-purpose flour
- 1 cup granulated or cane sugar
- 1/2 cup cold butter
- 3 cups liquid heavy cream (Or sweetened cream)
- 3/4 cup powdered sugar
Tools
- 2 Saucepans
- 2 Bowls
- 1 Stand Mixer
- 1 Piping Bag
- 1 Star Tip
- 1 Cookie Cutter
- 1 Parchment Paper
- 1 Rolling Pin
Steps for the Craquelin Choux with Whipped Cream
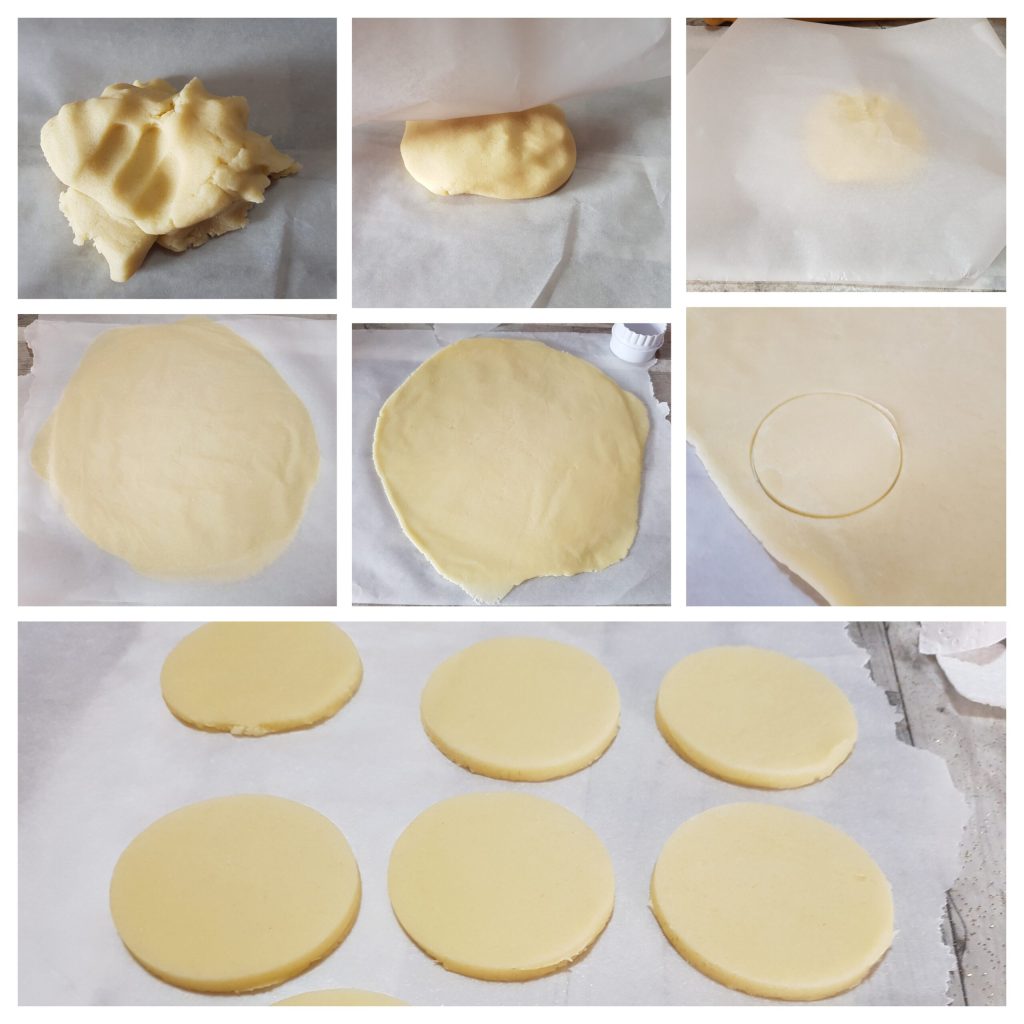
To make the craquelin choux, first prepare the craquelin in advance. Place the butter, sugar, and flour in a bowl and knead with your hands until a smooth dough is obtained. The butter will become soft with the heat of your hands. Compact well and roll out with the help of a rolling pin between two sheets of parchment paper to a thickness of 1/25 inch and place in the fridge to firm up for about 20 minutes. Retrieve the dough and cut out discs using a cookie cutter of about 2 1/3 inches. If you want to make smaller craquelin choux, you can use a 1 1/5-inch cookie cutter. Place all the discs on a tray lined with parchment paper and put them in the fridge.
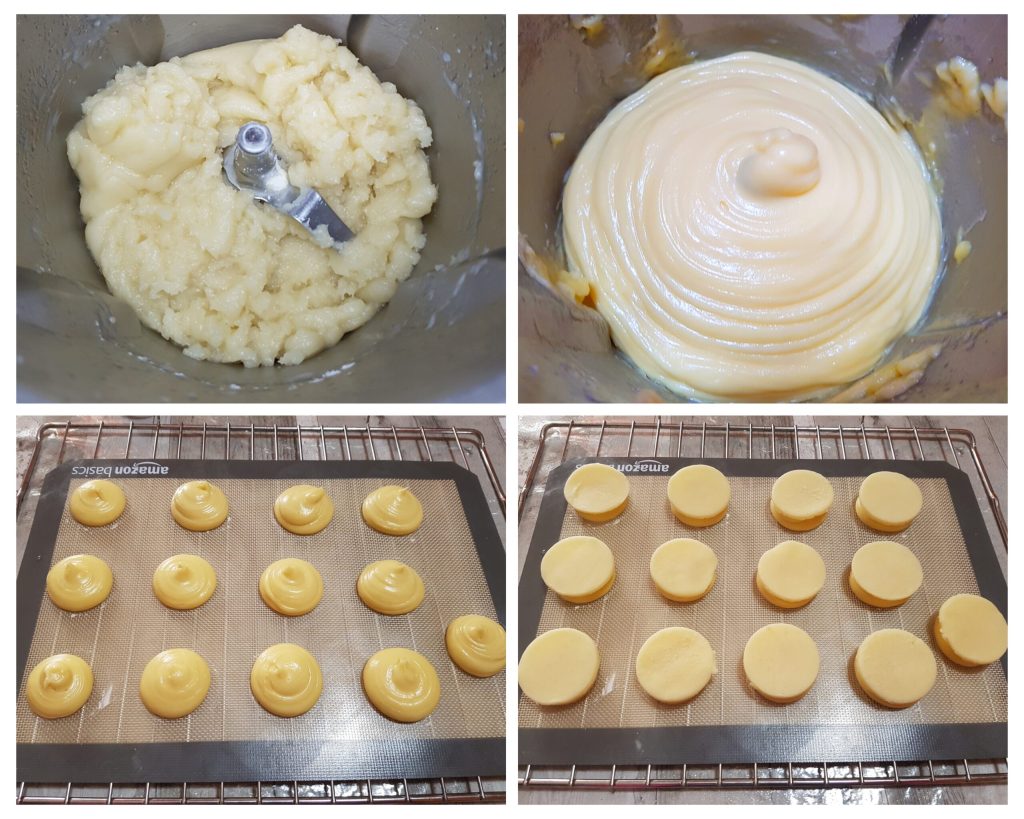
I used a food processor to make the dough, but I will also provide the classic stand mixer recipe below. In a saucepan, pour the water, butter, salt, and sugar and bring to a simmer. As soon as it boils, add the flour all at once and stir quickly, cooking the roux until a white film starts to form on the bottom of the saucepan. This will take a few minutes. Pour the dough into the stand mixer bowl, equip with a paddle attachment (K), and let the dough cool, stirring occasionally at speed 2-3. When the mixture reaches 122°F, incorporate the eggs one at a time. Do not add another egg until the previous one is fully absorbed. The choux pastry is ready when it is smooth and elastic, and inserting a spatula or wooden spoon into the dough will stand up forming a sort of triangle or ribbon. If you do not use a stand mixer, you can perform this last step of adding the eggs by hand, turning with a wooden spoon or electric whisks until the dough is thick and creamy. Now place the obtained mixture into a piping bag with a 3/4-inch plain tip. Pipe the mixture onto a perforated mat or simple baking tray lined with parchment paper, creating choux about 1 1/2-2 inches. If you prefer, you can make them smaller. Position a craquelin disc on each choux and bake in a preheated static oven at 374°F for about 35-40 minutes or until the craquelin is golden. For a convection oven, bake at 356°F for the same amount of time. I recommend baking them on the second shelf from the bottom of the oven. Obviously, each oven is different, so pay close attention to the baking process because if the choux is not perfectly dried inside, it may collapse when you remove them from the oven. If you want, you can bake the choux with the oven door slightly open using a wooden spoon, or leave them in the oven to dry further when cooked. Use any method you prefer. These choux, being much larger than traditional ones, bake for much longer, so do not worry about the baking time. When the choux are ready, let them cool completely at room temperature.
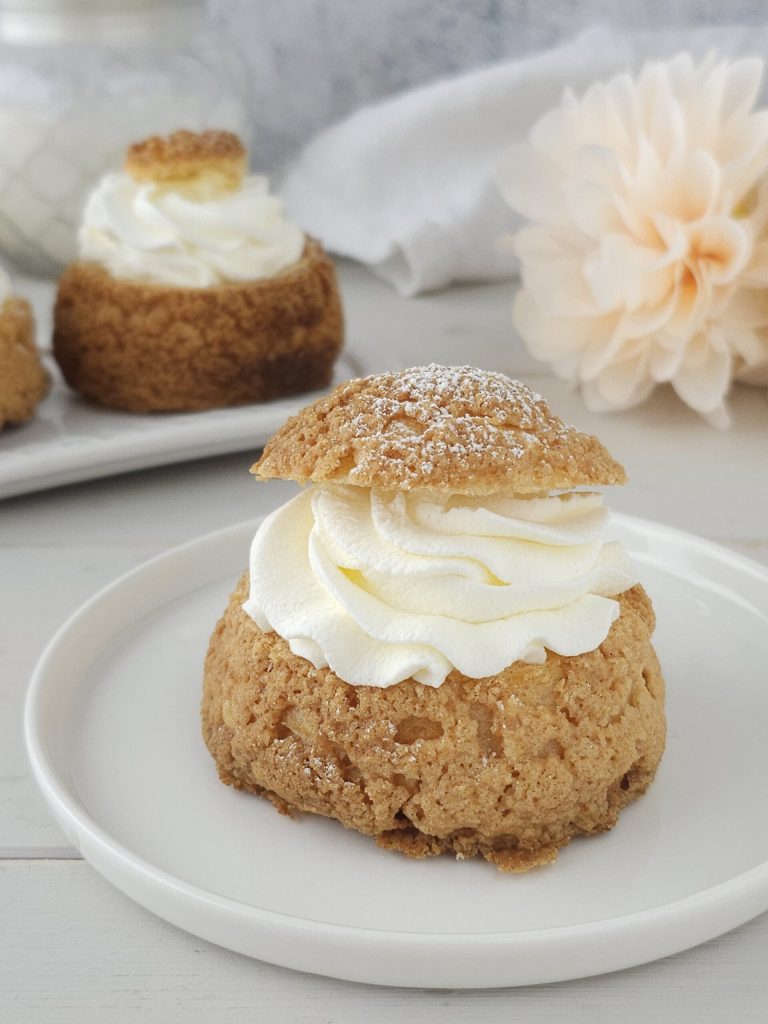
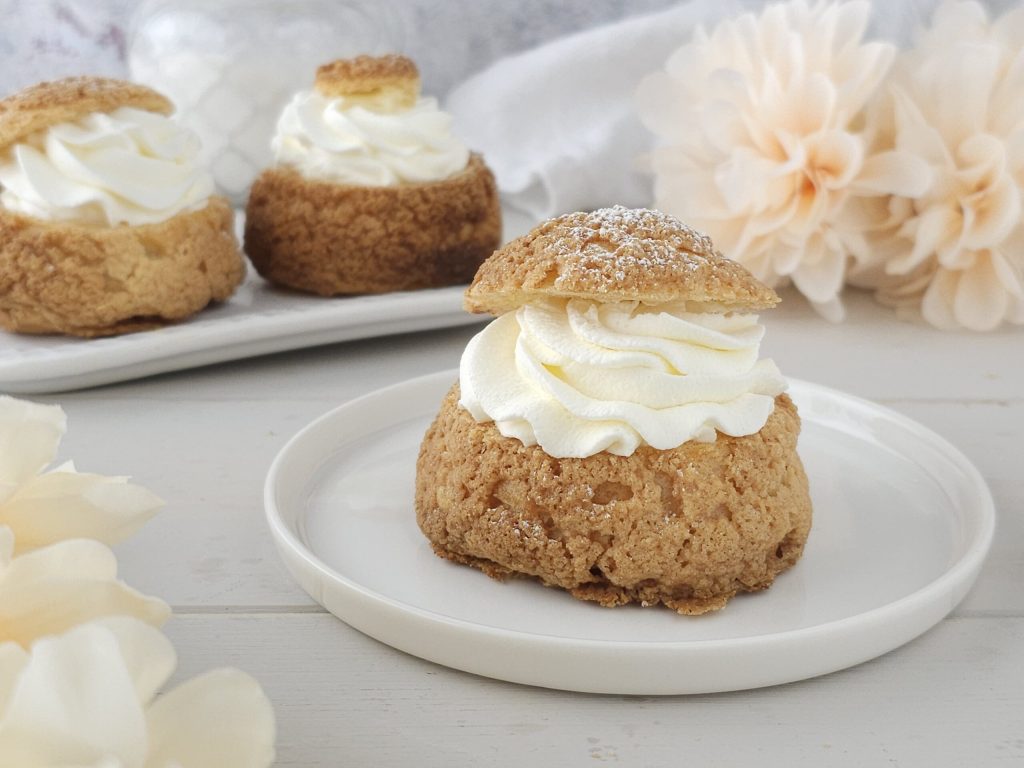
In a large bowl or stand mixer, whip the heavy cream with the powdered sugar to obtain a fluffy mixture. Place the whipped cream in a piping bag with a star tip. Take the choux, cut them in half, and fill them well with the cream.

Place the craquelin choux with whipped cream on a tray and dust the surface with some vanilla powdered sugar and serve them. I hope you like my latest recipe, see you next time friends.
STORAGE, TIPS AND NOTES
The craquelin choux can be made in advance and filled when needed. Simply store them in freezer bags or paper bags or tin containers for up to three days. Fill them, as per my advice, an hour before serving. Once filled, they keep in the fridge for up to 1 day.
If you want to visit my Facebook page https://www.facebook.com/pasticceraPerPassione
If you want to return to the homepage https://blog.giallozafferano.it/rosly/
