If you’re looking for a 100% plant-based alternative to classic ragù, vegan lentil ragù is the perfect choice!
Healthy, sustainable and incredibly tasty! It’s become one of my favorite dishes.
This cruelty-free sauce won me over with its enveloping texture and rich flavor, without using meat or other animal derivatives. Ideal for dressing pasta, lasagna or creative dishes, it’s perfect for those following a vegan diet or who simply want to reduce animal products.
In this simple and very easy recipe I’ll guide you through the preparation of a simple and flavorful vegan lentil ragù.
TRY ALSO:
- Difficulty: Easy
- Cost: Budget-friendly
- Preparation time: 5 Minutes
- Cooking time: 30 Minutes
- Portions: 2 People
- Cooking methods: Low heat, Stovetop
- Cuisine: Italian
- Seasonality: All seasons, Spring, Autumn
Ingredients for the lentil ragù
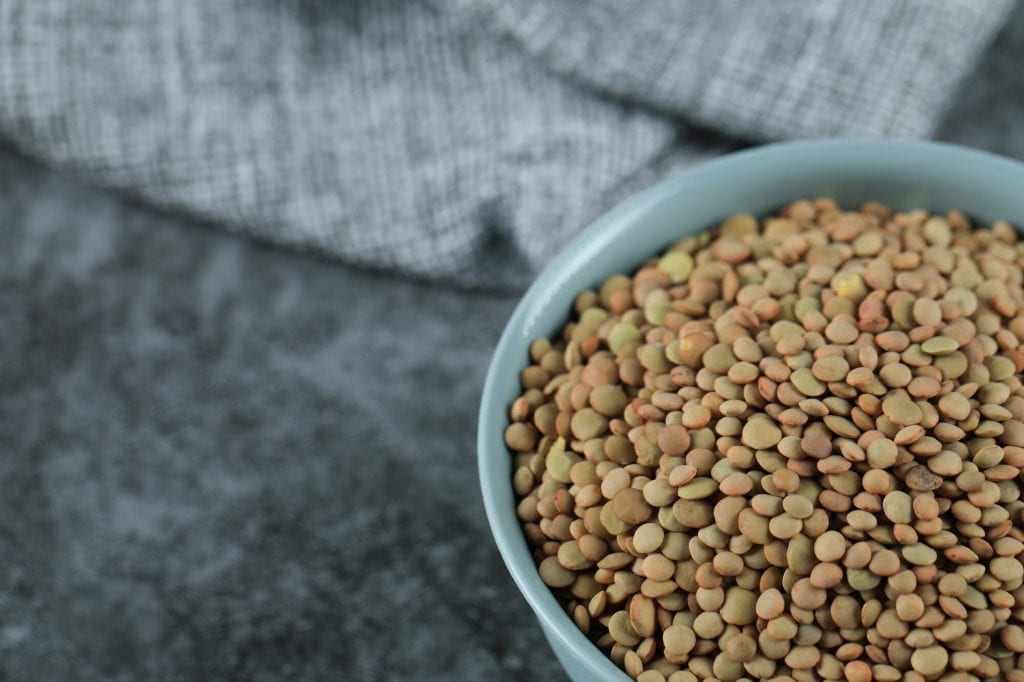
- 1/2 cup red lentils (dry, or 7 oz (about 1 cup) if using canned lentils)
- 2 tbsp extra virgin olive oil
- 1 2/3 cups tomato passata
- 1/2 carrot
- 1/2 celery (stalk)
- 1/2 onion
- to taste salt
- to taste spices (paprika or rosemary)
Tools for the lentil ragù
- 1 Saucepan saucepan
- 1 Wooden spoon wooden spoon
Steps for the lentil ragù
In a pot, heat the 2 tablespoons of extra virgin olive oil. Add a carrot, a onion and a celery stalk, all finely chopped. Let them sauté for 4– minutes over medium heat, until the vegetables are soft and fragrant.
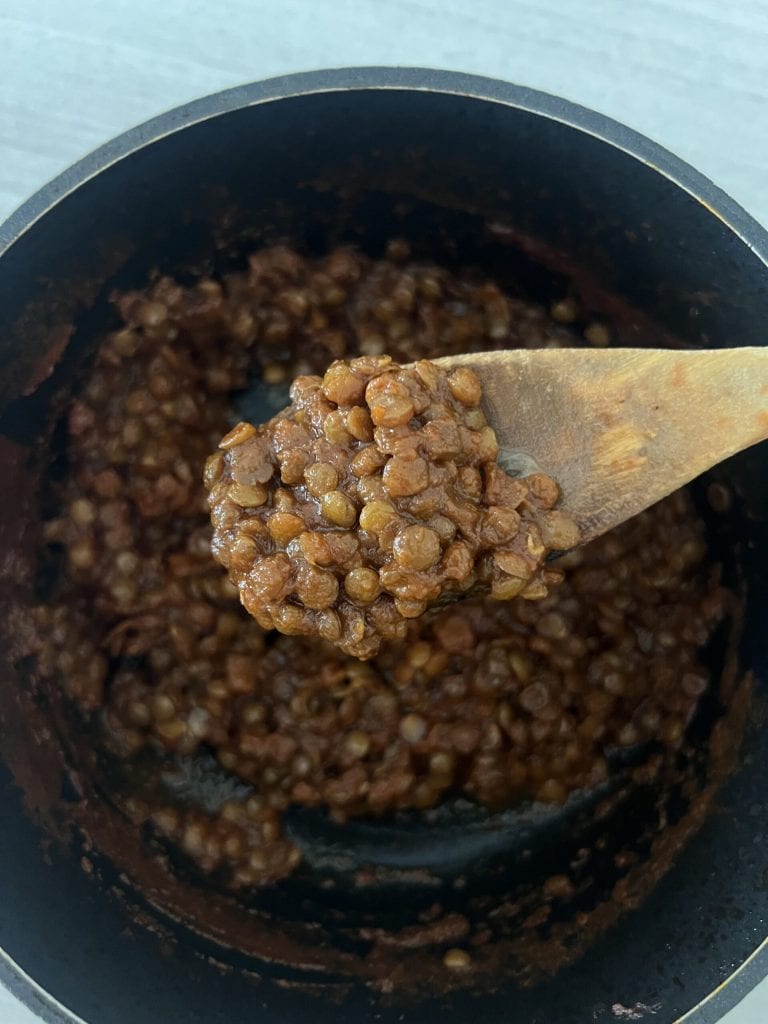
Add the dry lentils (or alternatively, the already cooked lentils) and mix well, letting them brown for a few minutes. Pour in the tomato passata, a pinch of salt and, if you like, sweet paprika or rosemary. You can omit them if you don’t prefer them.
Let cook over low heat for about 25–30 minutes, stirring occasionally and adding a little water if necessary. The result? A dense, flavorful vegan lentil ragù perfect for dressing your favorite pasta or to accompany basmati rice.
FAQ (Questions & Answers)
How should I store vegan lentil ragù and how long does it last?
Vegan lentil ragù keeps in the refrigerator, in an airtight container, for 3–4 days. It can also be frozen for up to 3 months: just let it cool completely before placing it in the freezer. When ready to eat, simply reheat it in a pan with a splash of water to recover its texture.
I’m Terry, a Food Organizer on a mission to simplify your life in the kitchen (and help you save money!). If you don’t know what I’m talking about, visit the About Me page.
Follow me on Instagram to not miss recipes and food-ninja tips! ❤
Buy my Meal Planner here to plan your meals.
The images published on this page are personal and covered by my personal copyright unless otherwise specified. If you intend to use them you can contact me.