Classic mimosa cake: the signature dessert of Women’s Day
The classic mimosa cake is much more than a simple dessert; it is an edible floral tribute that brings the cheer and scent of spring to the table.
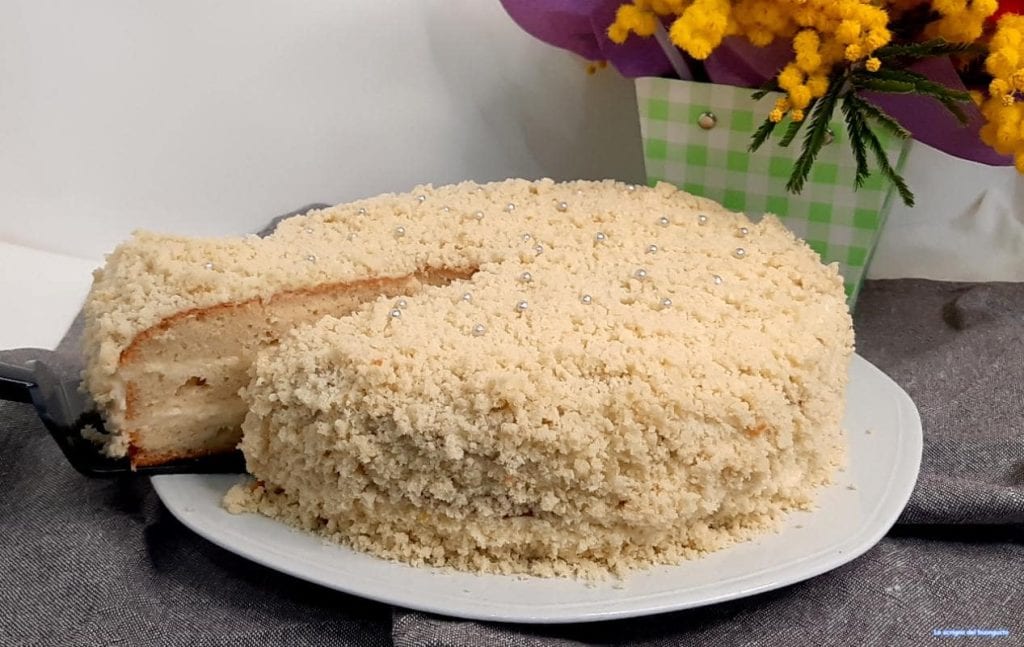
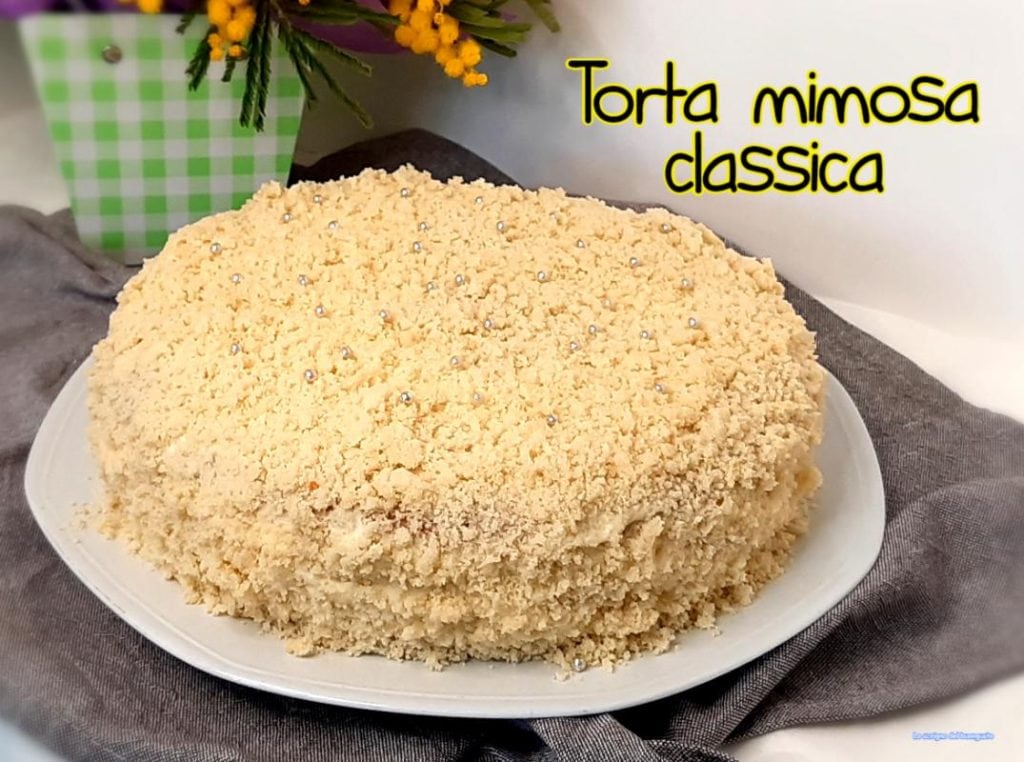
Its iconic name comes from its unmistakable look: the crumbs of soft sponge cake that cover the entire surface recall the small yellow buds of the mimosa, the flower symbolizing feminine strength and delicacy.
Thanks to this striking resemblance, this dessert has over time become the undisputed protagonist of Women’s Day, carrying with it a message of good wishes and sharing.
However, limiting the mimosa cake to a single occasion would be a shame.
Although closely associated with March 8, its deliciousness makes it perfect for many other occasions throughout the year.
The combination of a light, spongy base and a velvety filling makes it a festive, elegant dessert that is universally appreciated.
It is the ideal cake for a spring birthday, a Sunday family lunch, or any moment when you want to celebrate something special with a touch of homemade refinement.
Making the classic mimosa cake requires a bit of attention, but the final result more than repays the effort.
If you are worried about time on the day of the celebration, the secret to a stress-free preparation is organization: prepare the Pan di Spagna (sponge cake) the day before. Resting overnight, the base will acquire the perfect consistency to be sliced and crumbled without breaking too much, allowing you to obtain that dramatically “flowered” effect.
The next day you only need to focus on preparing the cream and assembling the cake, layering carefully.
Give it a try and let’s make this delight together: follow my steps and I’m sure you’ll bring to the table a mimosa cake that will win both the eyes and the palate of all your guests.
I can’t wait to hear how you decorated it!
approx. 460 kcal per person
- Difficulty: Medium
- Cost: Medium
- Rest time: 3 Hours
- Preparation time: 1 Hour
- Cooking time: 1 Hour
- Portions: 10 servings
- Cooking methods: Electric oven
- Cuisine: Italian
- Seasonality: Winter, Spring, Women's Day
Ingredients to make the Mimosa Cake
- 2 1/3 cups Type 0 flour (about all-purpose flour)
- 6 medium eggs
- 1 cup granulated sugar
- 1 packet vanillin (vanilla powder)
- 6 egg yolks
- 4 1/4 cups whole milk
- 4 tbsp granulated sugar
- 4 tbsp cornstarch (maize starch)
- 2 packets vanillin (or 1 tsp liquid vanilla)
- 3/4 cup Hoplà cream or fresh heavy whipping cream ((about 200 g/7 oz))
- 3/4 cup rum ((about 200 ml) or Creola)
- 1/3 cup water ((about 100 ml))
Tools
- 1 Ring Cake ring
Preparation of the Classic Mimosa Cake
Preparation of the sponge cake (Pan di Spagna)
Beat the eggs with the sugar in a hand mixer or stand mixer until the mixture is light and fluffy.
Then add the vanillin powder sifted in, or the liquid vanilla, mixing everything gently by hand with a spatula.
Fold in the sifted flour and work the batter gently until fully incorporated.
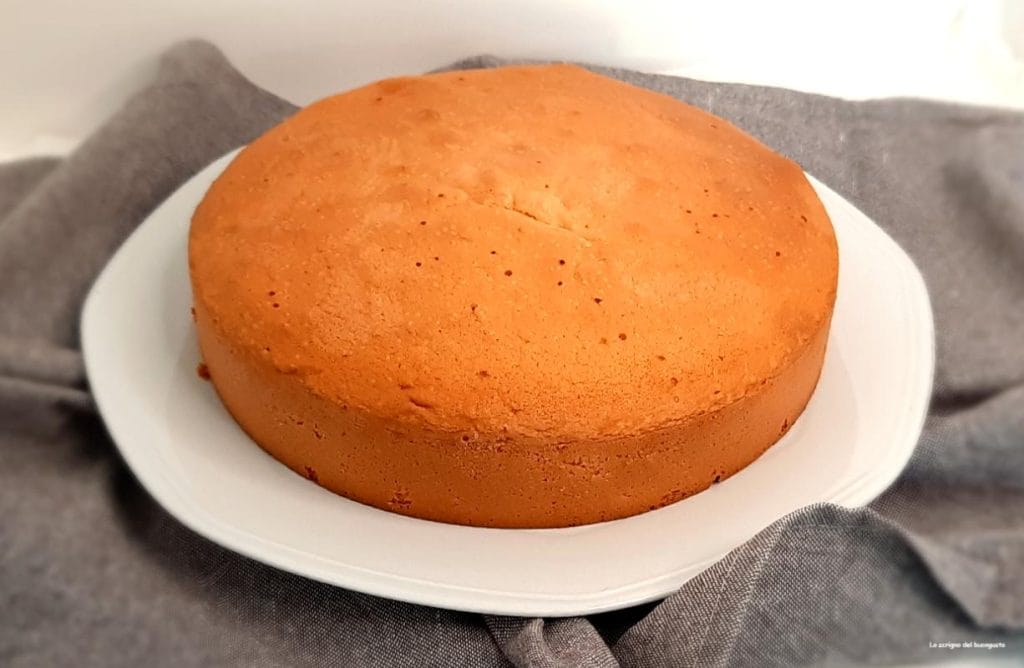
When mixed, transfer the batter into a buttered and floured pan or into a silicone mold with a diameter of 9.5 in and bake in a preheated oven at 356°F for about 40 minutes, checking for doneness.
Preparation of the Chantilly cream
Prepare the Chantilly cream by taking a saucepan and putting in the eggs, sugar, vanilla and a little milk.
Place the pan over low heat and whisk everything with an electric whisk, gradually adding more milk until you’ve added it all; add the starch or flour and whisk again.
Continue cooking while stirring with a wooden spoon, being careful not to create lumps; if necessary, help yourself with the electric whisk.
The custard will be ready when you see bubbles and it starts to pull away from the pan when stirred.
It should not be too runny.
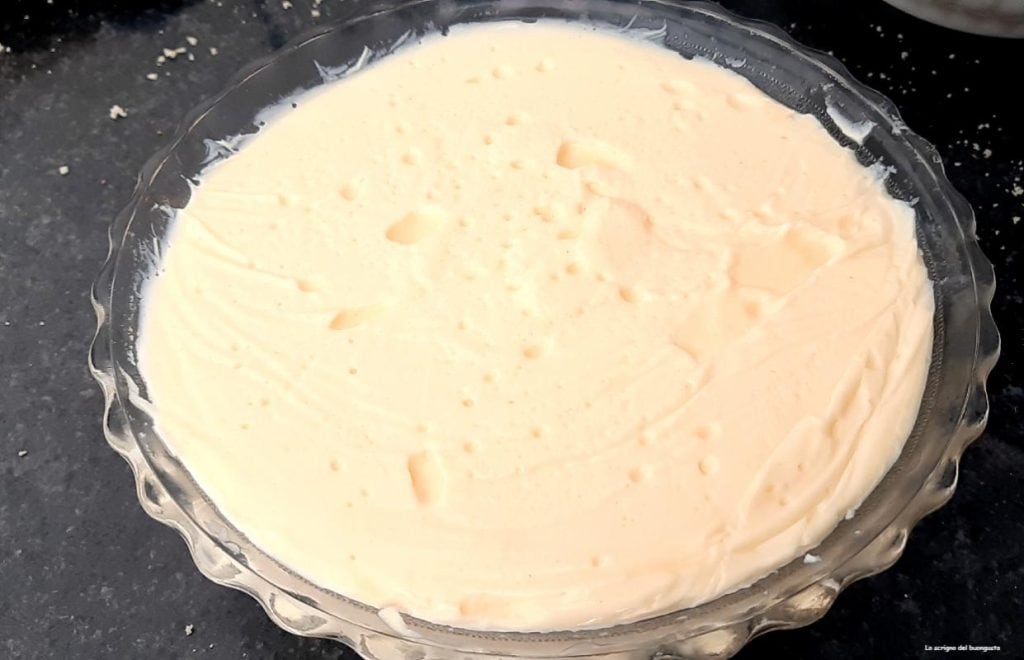
When cooked, transfer the custard to a glass container and cover it with plastic wrap, placing the wrap in contact with the cream to prevent a skin from forming.
Chill in the refrigerator for at least 1 hour before use, stirring occasionally.
Whip the cream until stiff and then fold it into the cooled custard, mixing well.
Final assembly
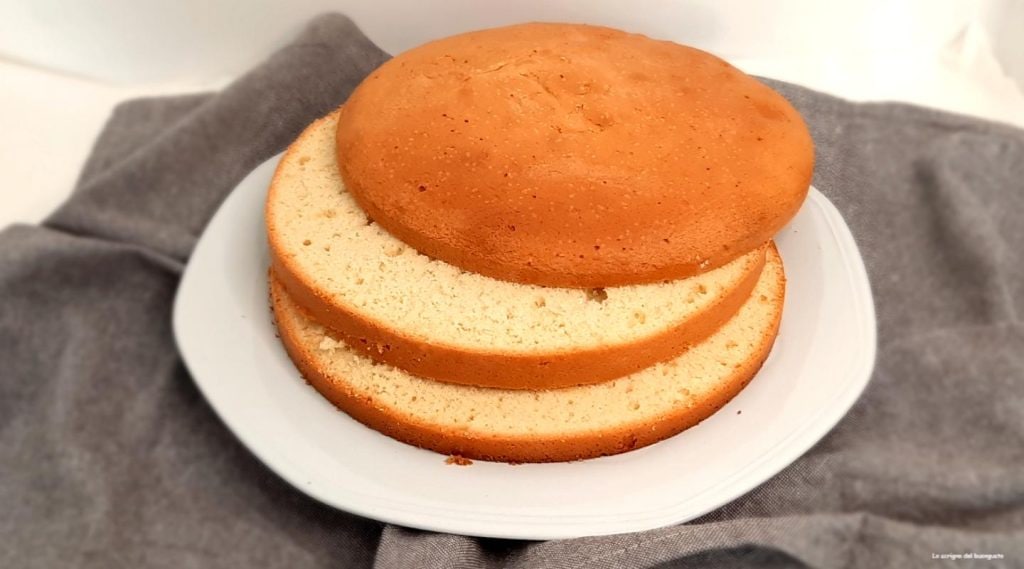
Take the sponge cake and cut it into 3 layers (discs)…
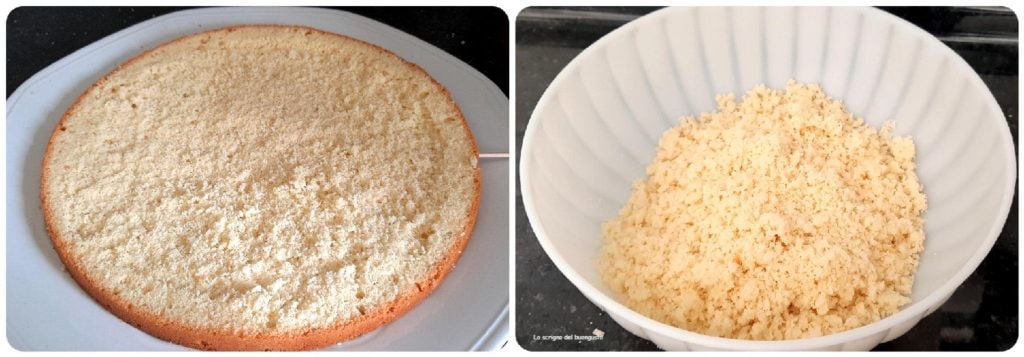
…leave the disc that will be the base on the plate and grate it with a fork to obtain crumbs, leaving the edge intact and setting the crumbs aside for the outer coating.
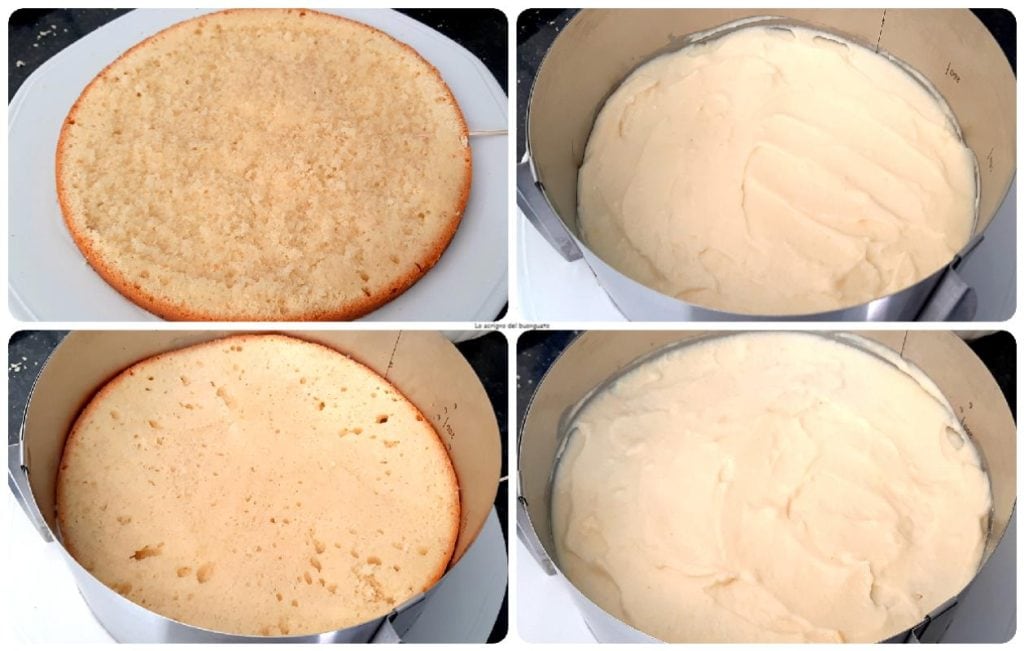
Brush the base disc with the rum diluted with water, spread a layer of cream and place the second disc; brush the second disc and add another layer of cream.
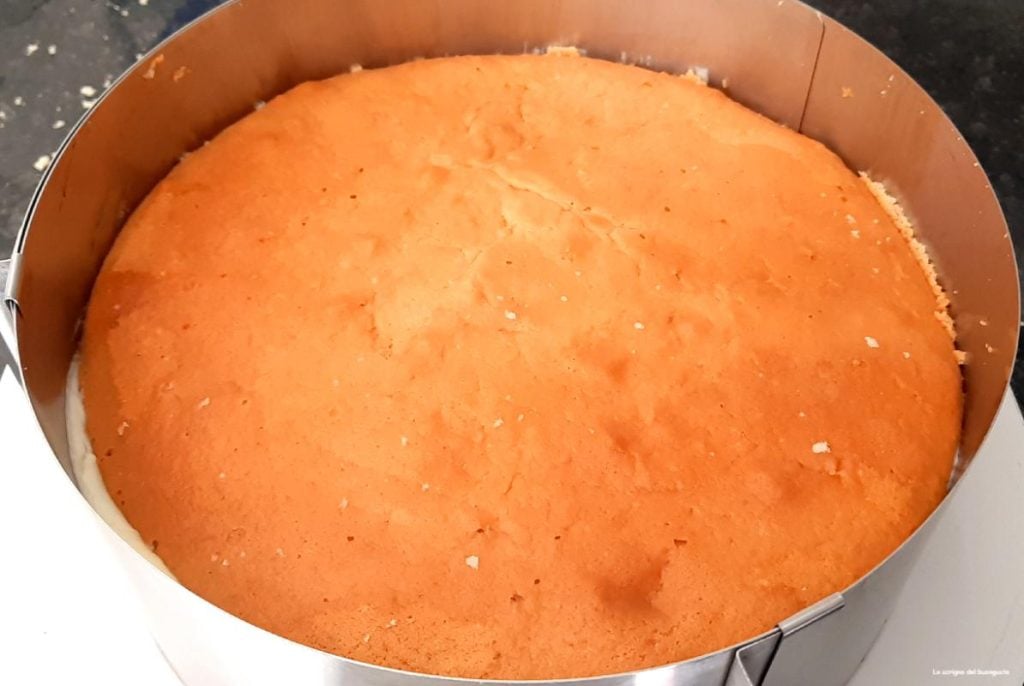
The third disc should be soaked and then carefully placed on top of the cake, making sure all the circles line up; if necessary, use a cake ring to be safe.
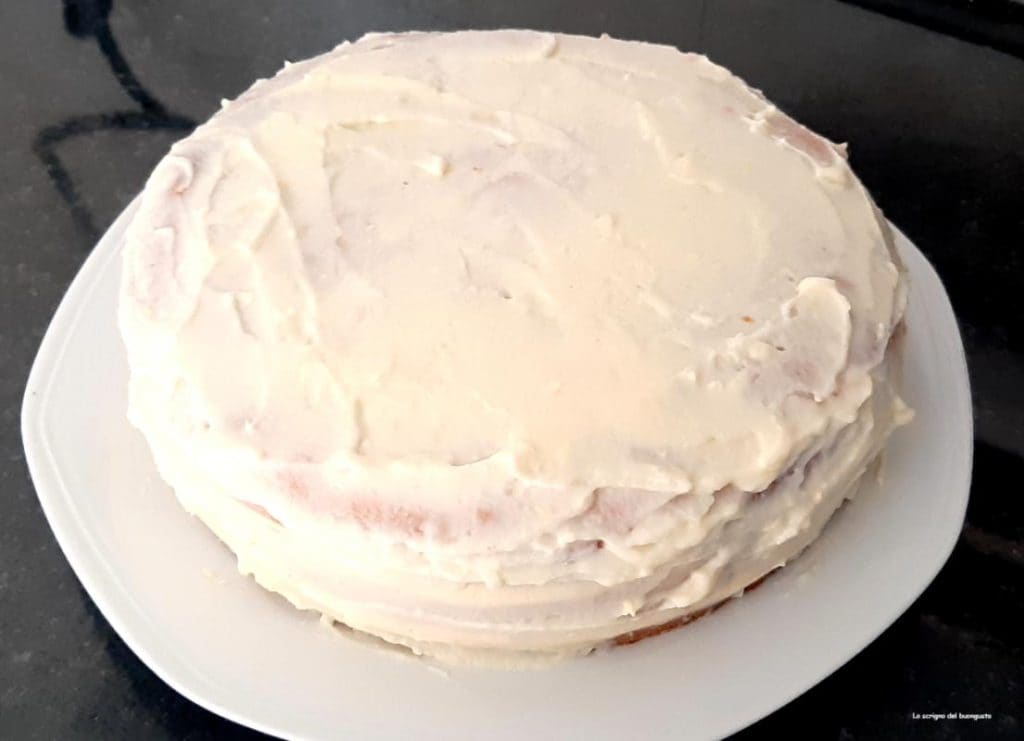
Once the cake is assembled, let it rest in the refrigerator for about one hour…
…then spread a light layer of cream over the entire cake, covering the sides as well.
“After the cake, looking for a quick idea? Try my Soft Orange Cookies that everyone loved!”