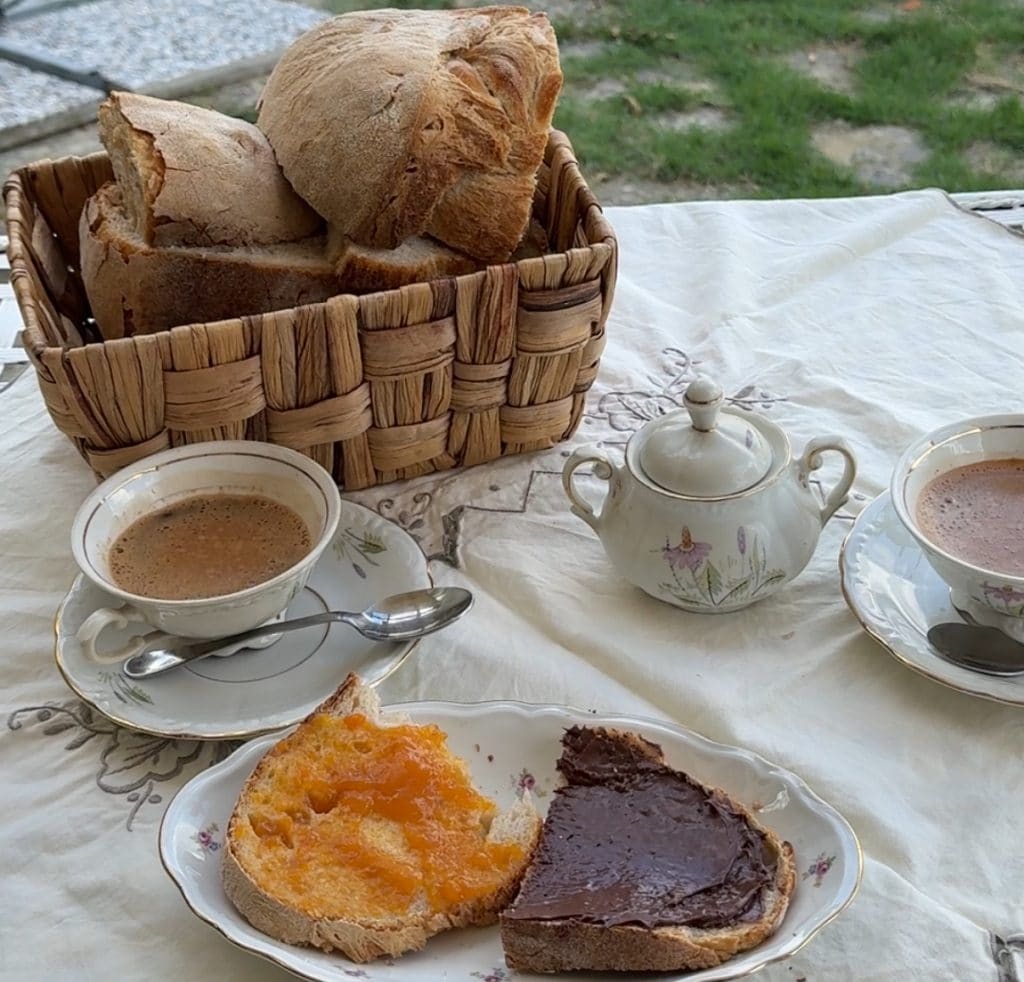
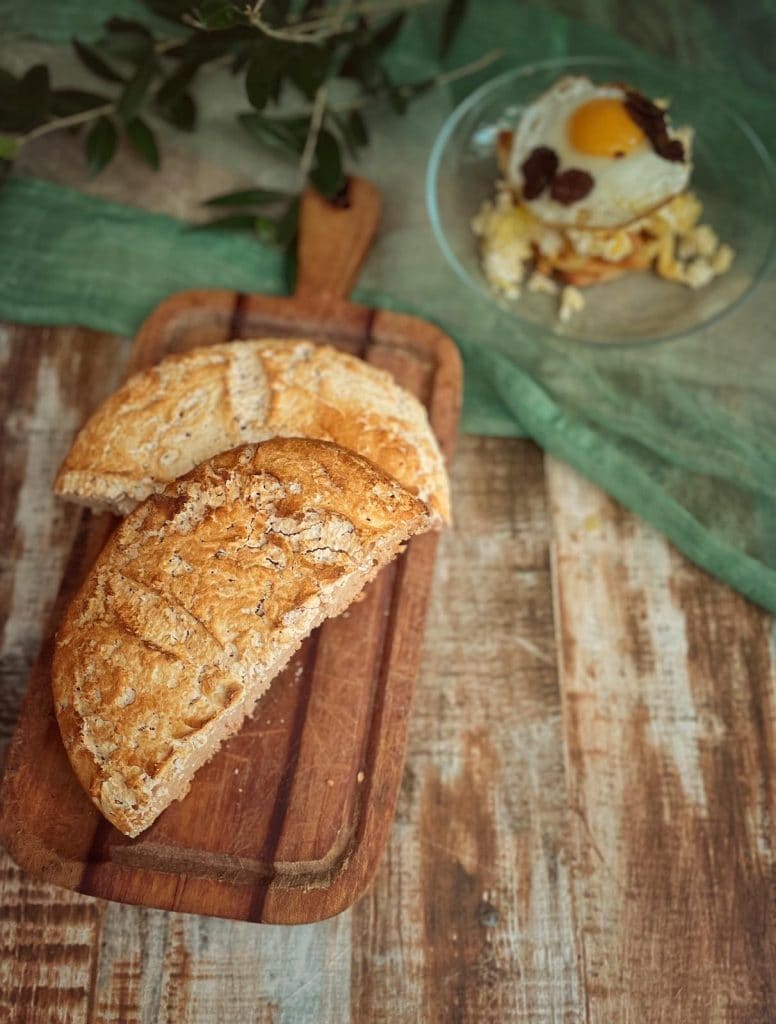
Pan de pueblo, known as the Spanish country bread, is a rustic bread with an authentic flavor and a crunchy crust, very similar to our Italian country bread. This Spanish bread recipe is simple to make at home and perfect for those who love traditional countryside flavors. By following the right steps, you can achieve a soft inside and golden outside Spanish country bread, ideal for enjoying at any time of the day. I made it with sourdough starter, but it’s very easy to convert it with other types of yeast. It is also possible to make it gluten-free: thanks to the collaboration with my colleague Selene from the blog ViaggiandoMangiando, at the end of the recipe you’ll find her version!
If you want to take a trip to Spain with me, turn on the mixer!
For more bread recipes, take a look here
- Difficulty: Easy
- Cost: Very cheap
- Rest time: 12 Hours
- Preparation time: 30 Minutes
- Portions: 15
- Cooking methods: Oven
- Cuisine: Spanish
- Seasonality: All seasons
Ingredients
The ingredients for Pan de pueblo are simple, just like those of any Italian country bread: fairly strong flour, water, salt, and yeast. In my case, I chose sourdough starter, for a deeper flavor and a soft crumb. In short, it takes little to get a rustic and authentic bread… because, after all, the whole world is a village… even for bread!
- 4 cups all-purpose flour
- 4.6 oz sourdough starter (refreshed and doubled)
- 1.25 cups water
- 1.4 tsp fine salt
- 1 tsp malt (diastatic)
Steps
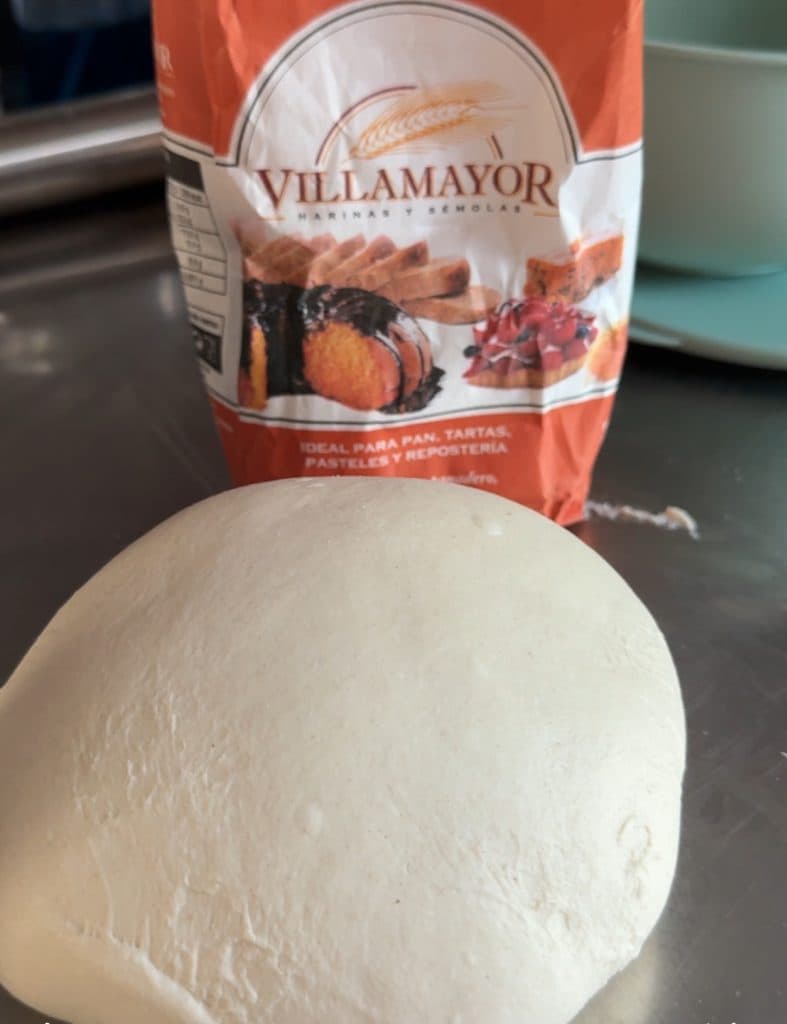
To prepare the Pan de pueblo dough, the Spanish country bread, start by breaking the refreshed and doubled sourdough starter into the mixer. Add 130 ml of water and the malt, and let it dissolve using the whisk attachment.
Once the starter is dissolved, start incorporating the sifted flour, alternating it with the remaining water. Important: add the liquids only when the previous water has been completely absorbed.
Once this phase is completed, replace the whisk with the dough hook and start kneading the dough. When the dough is kneaded – meaning it detaches from the sides of the mixer and attaches to the hook – add the salt, slightly increase the speed, and continue working until fully kneaded.
Finally, transfer the dough onto the work surface, cover it with a bowl, and let it rest.
Perform three “slap and fold” folds, letting about half an hour pass between each. Then transfer the dough to a container and let it rest in the refrigerator overnight.
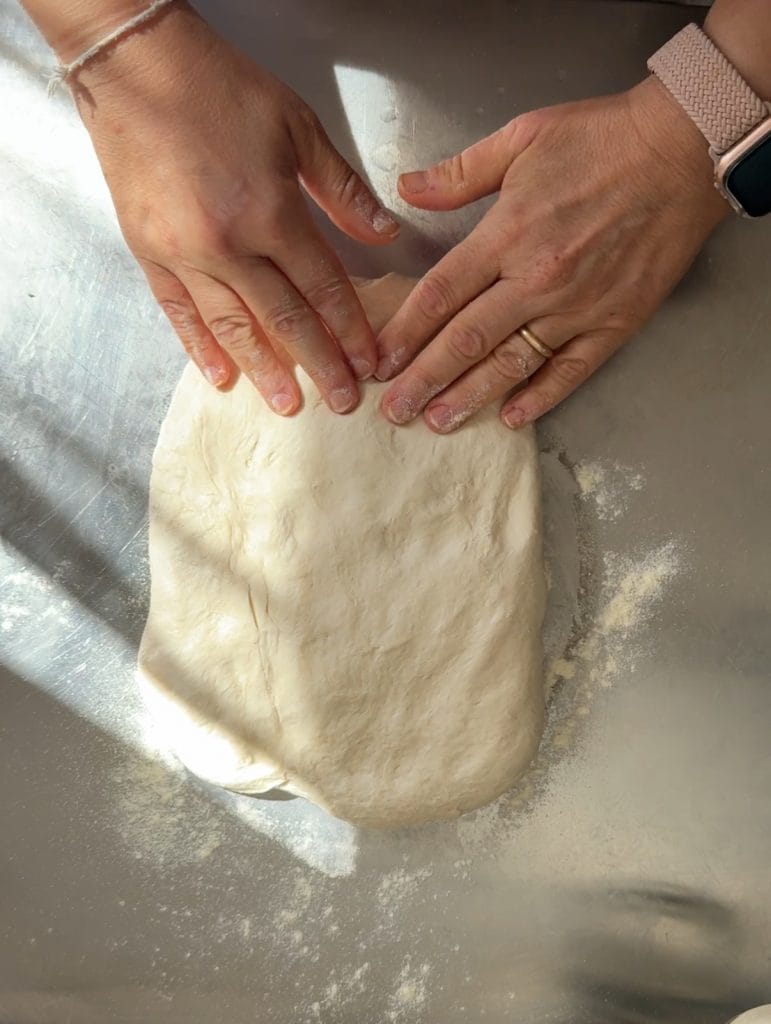
The next day, take the dough out of the fridge and let it come to room temperature. If it hasn’t risen enough (depends on the strength of the starter and the fridge temperature!), let it double. Dust the work surface with some semolina and turn the dough onto it.
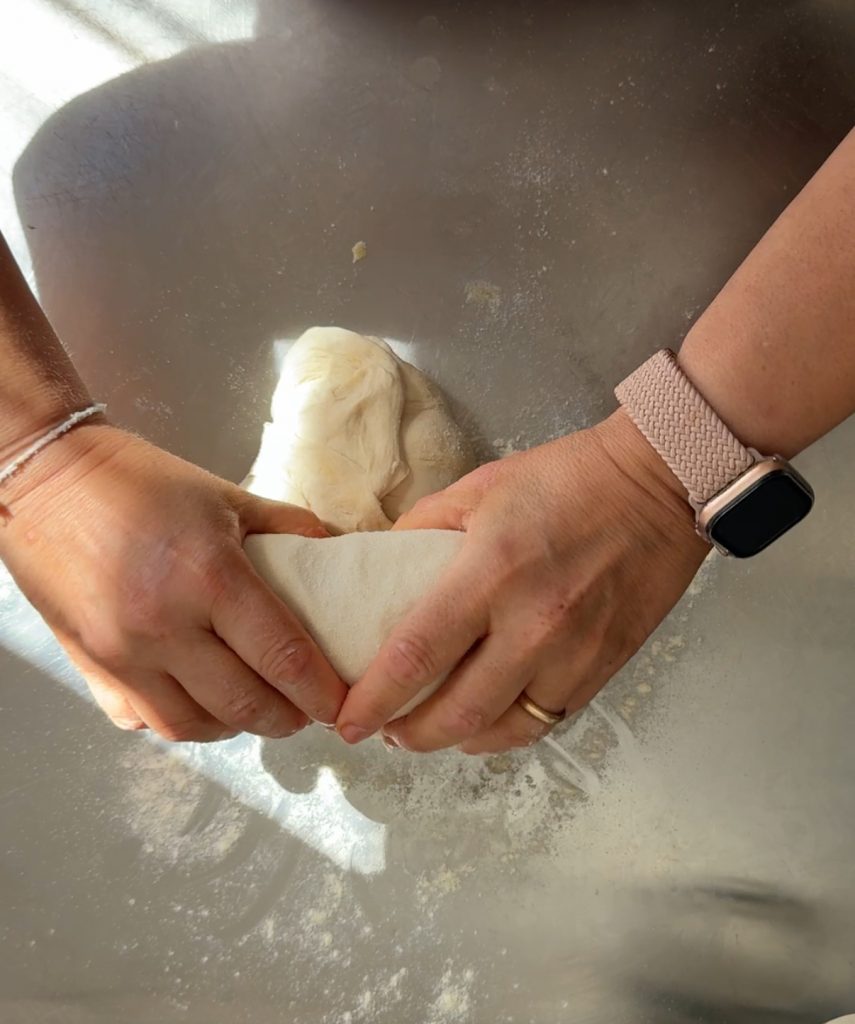
Gently spread the dough with your fingers, being careful not to break the fermentation bubbles that you will feel under your hands. Try to obtain a more or less rectangular shape.
Starting from the top, fold the edges of the dough inward, as shown in the photo, making sure to seal them well.
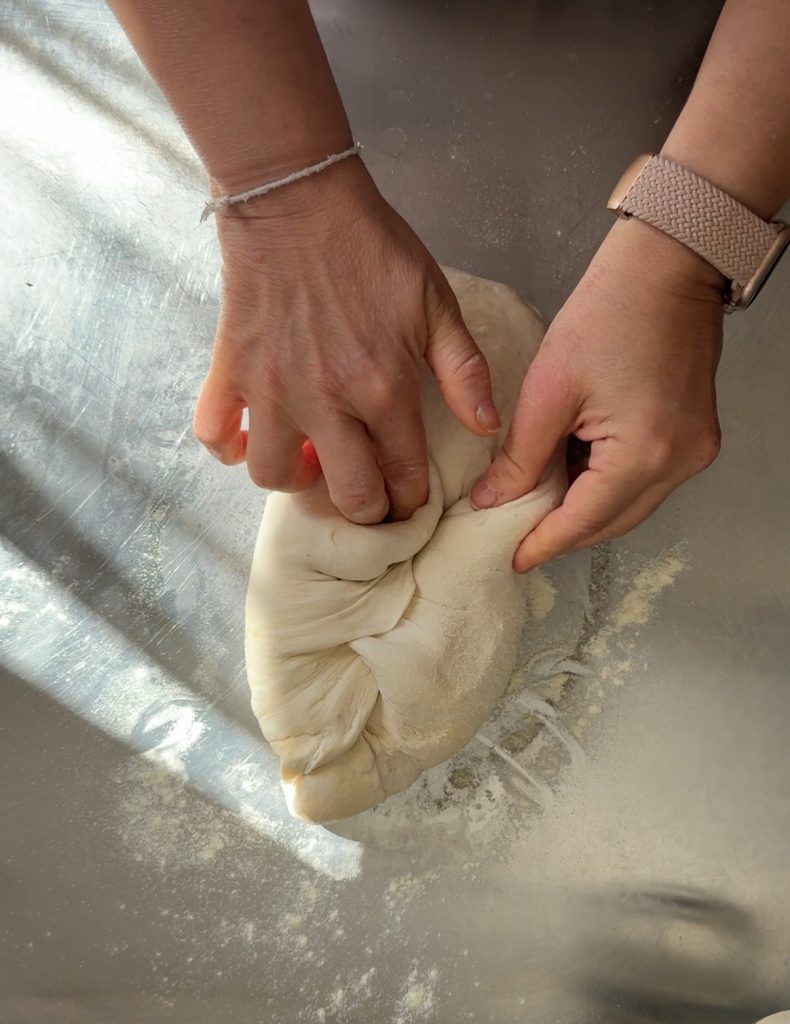
Once all the edges are sealed, roll the dough onto itself to form a loaf. Make sure to seal the dough well to avoid defects in the final shape of the loaf.
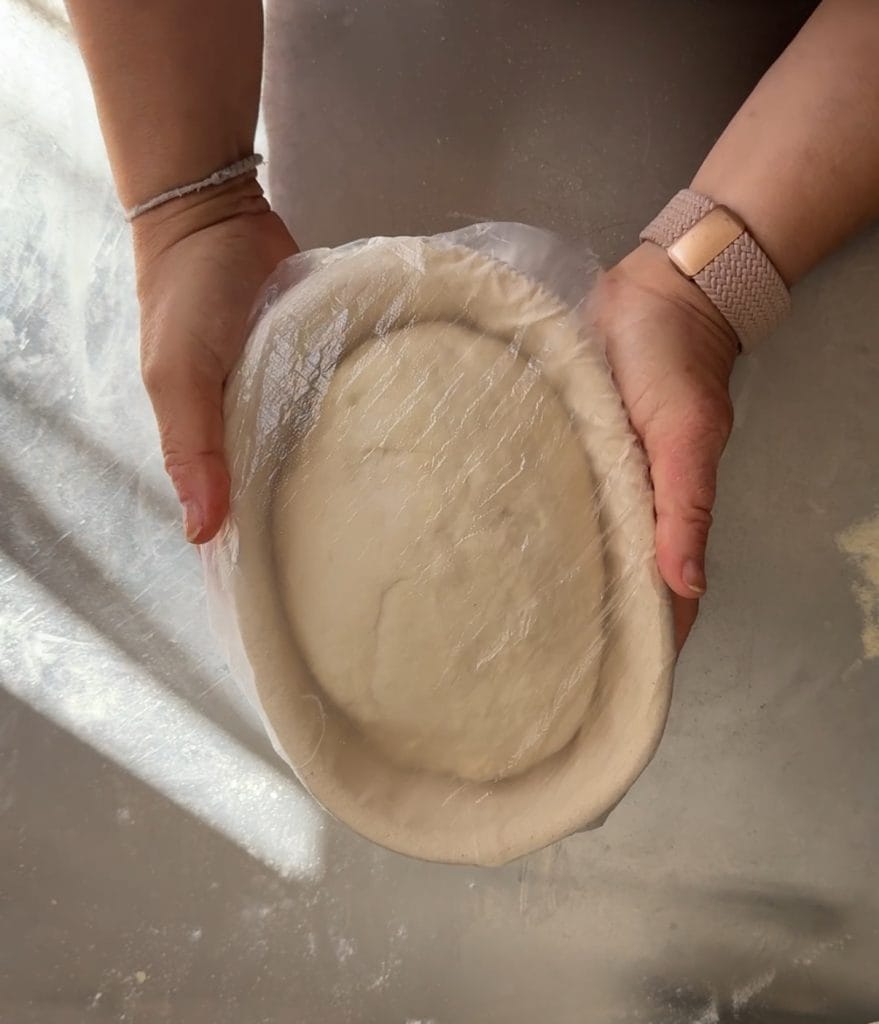
Take the formed loaf and place it in a proofing basket previously dusted with some semolina.

Cover the basket with plastic wrap, a silicone lid, or a food bag, so the dough has the ideal environment to rise. My bread, in summer, almost doubles in an hour and a half.
Preheat the oven to 356°F and place a pan full of water inside to create steam. Meanwhile, place the Pan de pueblo in the fridge: cooling down, it will undergo a thermal shock once in the oven, which will help the loaf to grow more. When the oven has reached the temperature, turn the bread onto a floured peel and score the bread with a razor or a very sharp knife.
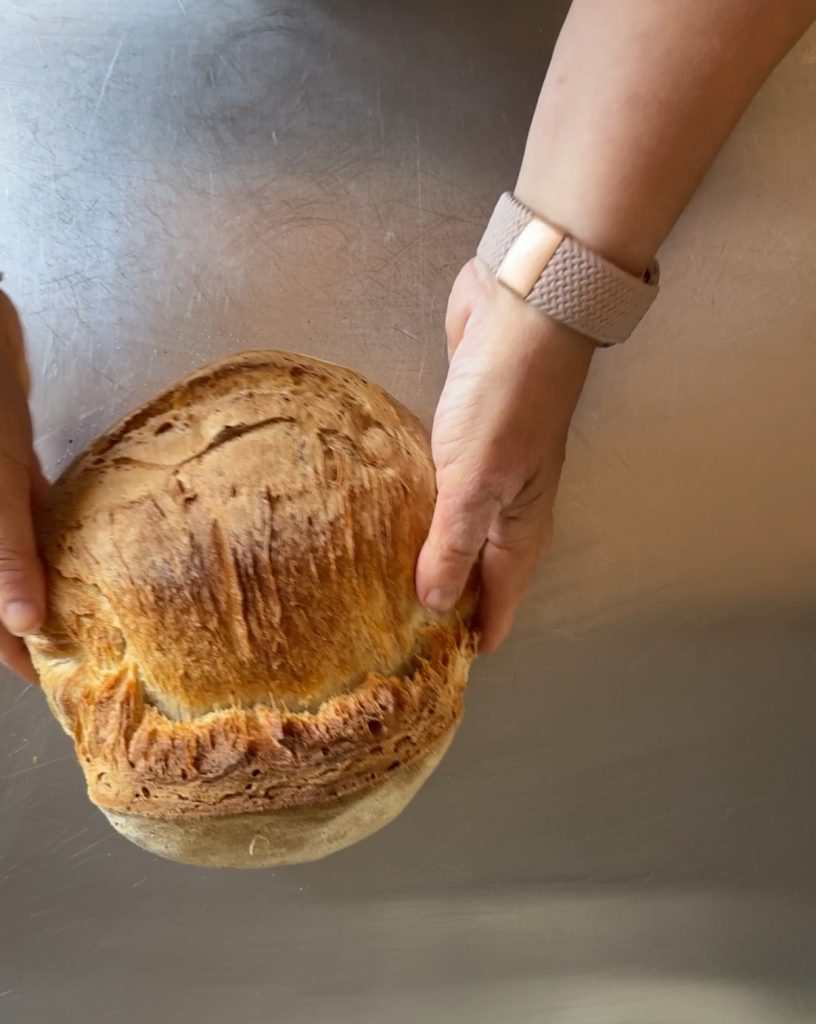
Bake the bread for about 55 minutes. After 20 minutes, remove the pan with the water and, when about 10 minutes are left, turn on the fan with ventilation mode. This bread, like Tuscan bread, benefits from a gentle bake that creates a beautiful crust and a wonderful hazelnut color.
Once the baking time is over, take the bread out and let it cool standing up, so the internal moisture can escape. And voilà: your Pan de pueblo, the Spanish country bread, is ready to be enjoyed!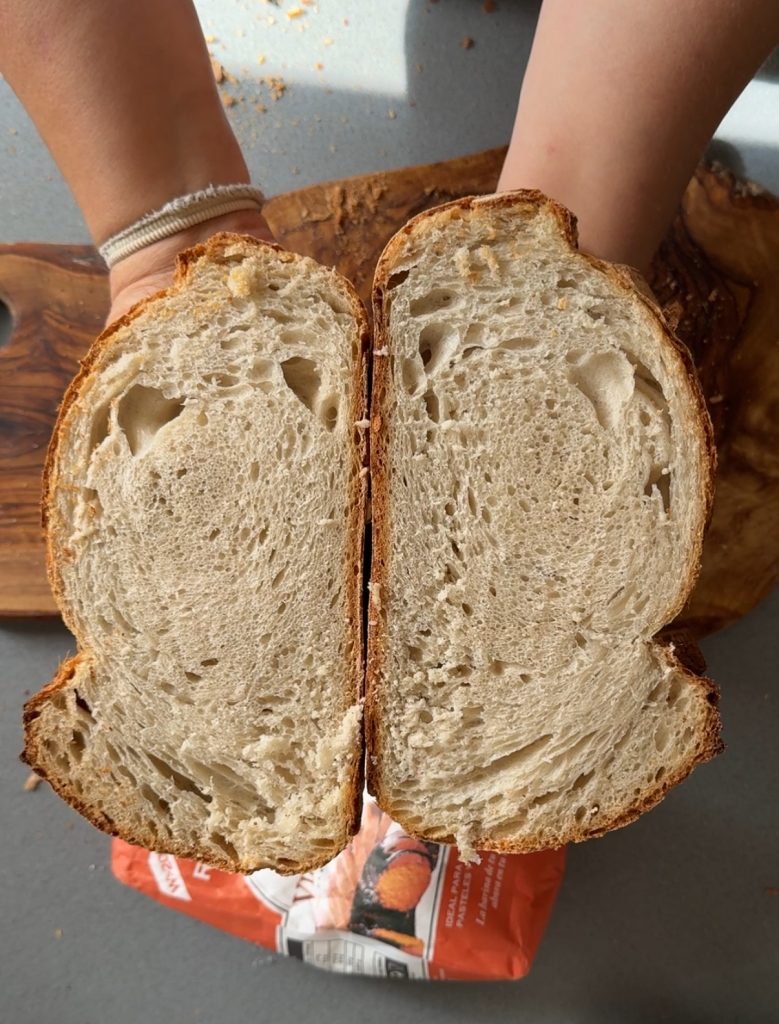
If you want to try gluten-free Pan de pueblo, I recommend my colleague’s version, which uses a rice flour sourdough starter. You can find her complete recipe HERE
A perfect solution for those who want to enjoy a rustic Spanish bread without gluten!
Storing Pan de pueblo, the Spanish country bread
The Pan de pueblo, like all breads made with sourdough starter, has a long shelf-life. If stored correctly, in a cotton cloth or in a bread box inside a cotton bag, it can last up to 5 days. Once it dries out, don’t throw it away: it can become breadcrumbs or a delicious panzanella!
