The classic layered pandoro is another version of the pandoro that I had already posted on my blog, but that was a faster version and without layering… very good, but this is truly the perfect pandoro recipe.
You do need to take some time to make it, but the result is truly exceptional.
The quantity I am providing is for a 1 kg pandoro mold, the dough once placed in the mold will need to rise until it almost overflows before baking it.
If you start in the morning, you can bake it by the next morning or late at night, this will also depend on the right temperature and how the dough has been worked, and that results in a good rise.
I am sure you are dying to make a pandoro with your own hands… so get to work and you will see what a beautiful satisfaction it is!
Let’s prepare the classic layered pandoro together!
Approx. 581 Kcal per slice
- Difficulty: Medium
- Cost: Moderate
- Rest time: 12 Hours
- Preparation time: 30 Minutes
- Portions: 8 people
- Cooking methods: Electric oven
- Cuisine: Italian
- Seasonality: Christmas, New Year
Ingredients for the Classic Layered Pandoro
- 2/3 cup All-purpose flour
- 1/4 cup Whole milk
- 1 tsp Fresh brewer's yeast
- 2 tbsp Sugar
- 1 Egg yolk
- Starter dough
- 1 2/3 cup Manitoba flour (or all-purpose flour)
- 1 tsp Fresh brewer's yeast
- 1/4 cup Whole milk
- 2 tbsp Sugar
- 1 1/2 tbsp Butter
- 1 Egg
- First dough
- 2 cups Flour w300 (or all-purpose flour)
- 2/3 cup Sugar
- 2 Medium eggs
- 1 tbsp Wildflower honey
- Lemon zest (grated)
- 1 tsp Vanilla essence
- 2 tbsp Rum
- 1 pinch Salt
- 10 tbsp Butter
- 3/4 cup All-purpose flour
- 1/4 cup Powdered sugar
- 1 tbsp Butter (before baking)
Tools
- 1 Mold Pandoro mold
Preparation of the Classic Layered Pandoro
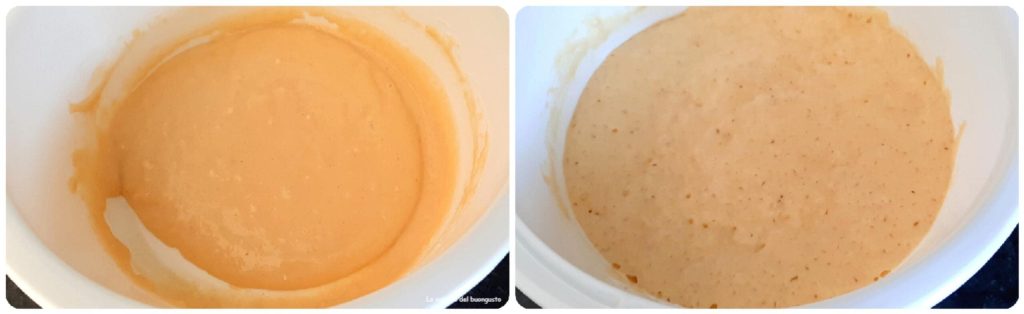
First, prepare the starter dough by putting the yeast in a bowl with the milk and letting it dissolve, then add the sugar, flour, butter, egg yolk and knead well.
It will be a not too firm mixture, but rather soft, it must be this way, cover and place it in a warm place to rise (the turned-off oven with the light on will work) for about 2 hours.
For the first dough dissolve the 1 tsp of yeast in a tablespoon of warm water and then add it to the risen starter, start kneading by adding some flour, then add an egg, softened butter, milk and finish kneading with the flour provided for the first dough.
For this dough, it would be best to use a mixer, but if you don’t have one, use a food processor with the dough blade.
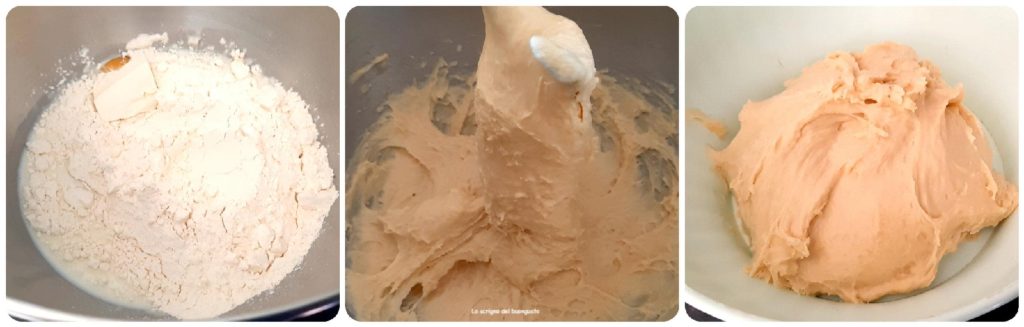
The dough will need to be worked for a few minutes, cover with plastic wrap and let rise in a turned-off oven for about two hours or until it doubles.
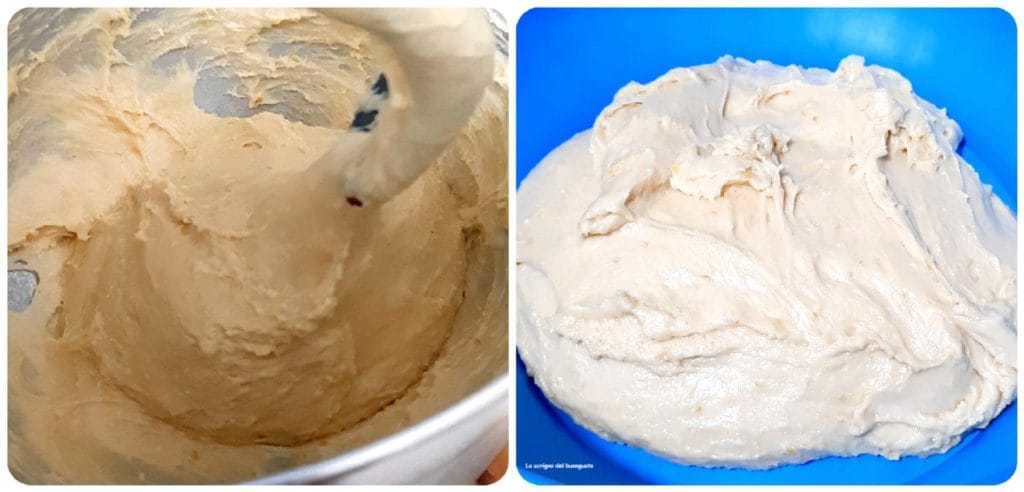
To the risen dough add honey, flour alternating with eggs and knead for a few minutes.
Add vanilla, rum, sugar, grated lemon zest, a pinch of salt and mix well to obtain the second dough… it will be soft and a bit sticky, but this also depends on the flour you will be using, anyway, it’s right this way.
Even for this second dough I recommend using the mixer or food processor, because everything will incorporate better.
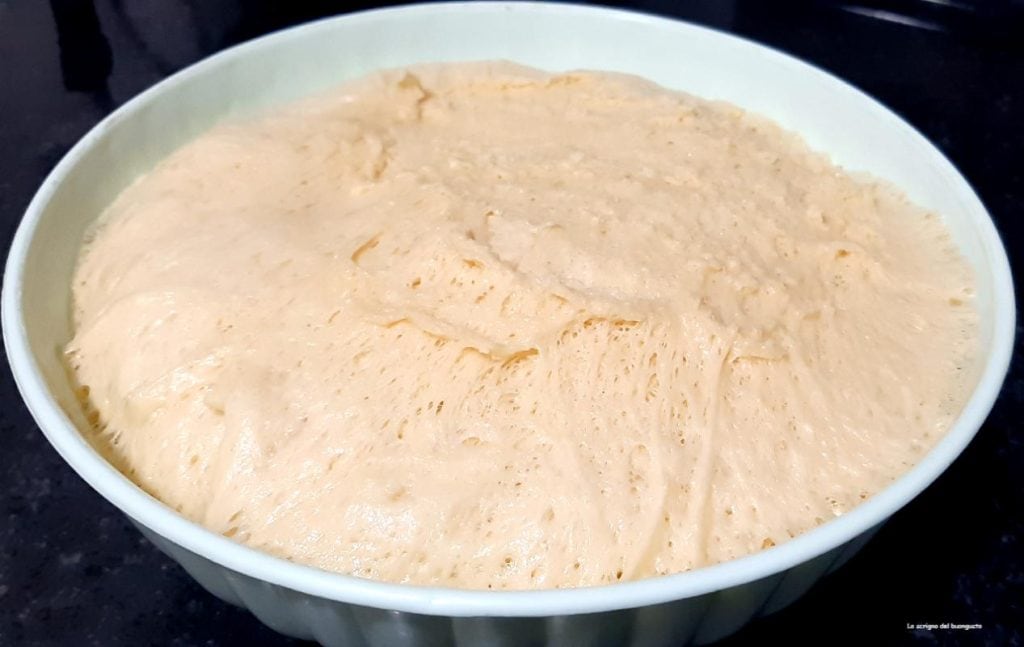
Place in a bowl, cover with plastic wrap and let it rise in a turned-off oven (if you like, turn the oven light on) for 5-6 hours or overnight (with the oven light off).
The rising could be longer than expected or less, but this is not a problem, take your time to make it, without rushing.
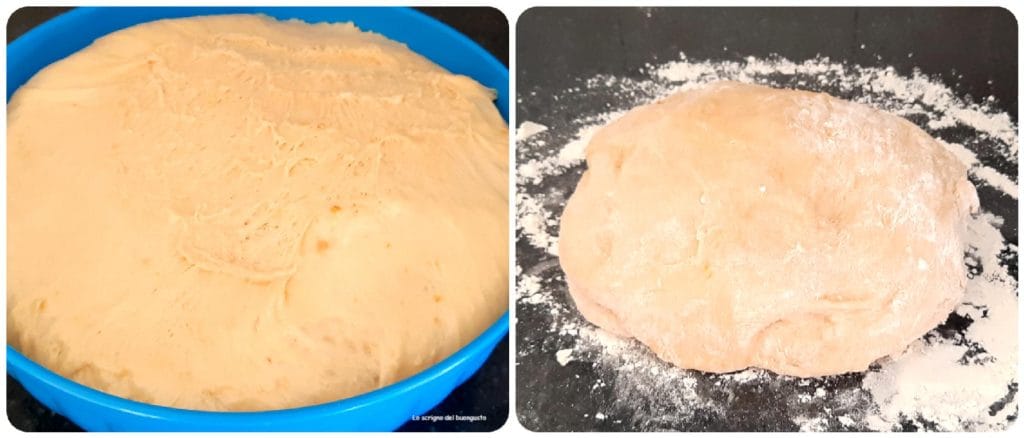
Once the rising is complete, take the dough and let’s prepare for the layering!
Flour the work surface, work the dough a bit, just enough to obtain a firm dough…..
Soften the butter for the layering, just enough to become like a cream, but not too melted, mind you.
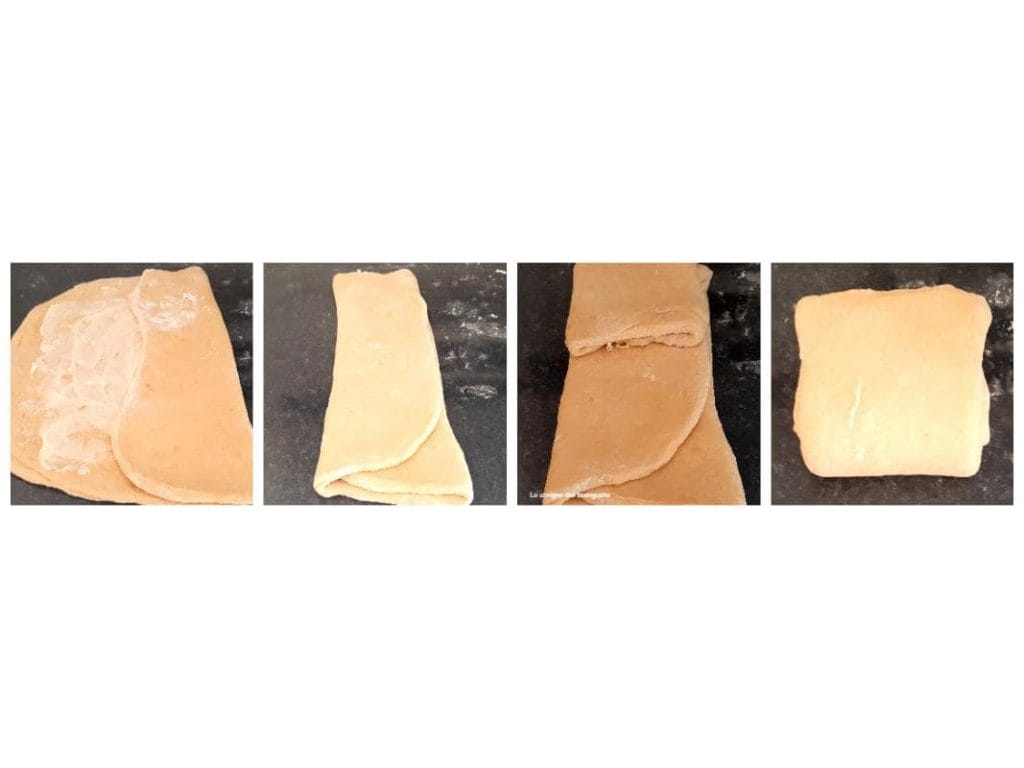
Form a rectangle and in the center place a part of the soft butter…..
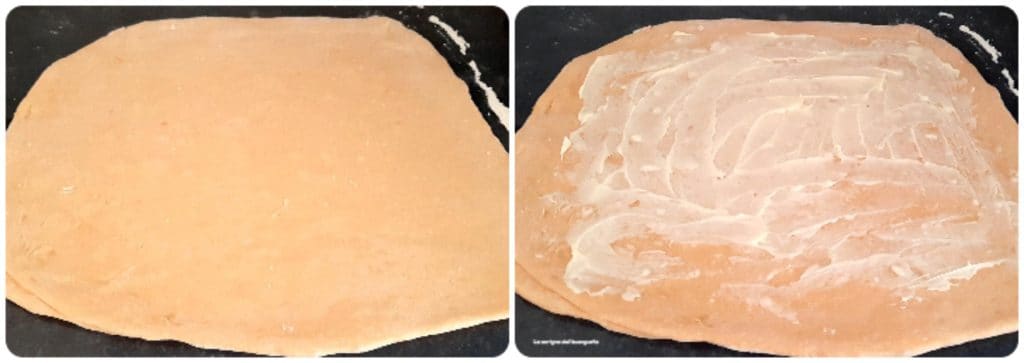
then fold the edges of the dough to the center, fold in three and rotate the dough.
Repeat the operation 2-3 times until all the butter is used and at the end of each folding roll the dough into a rectangle, starting from scratch.
Wait 5 minutes between each turn of folding.
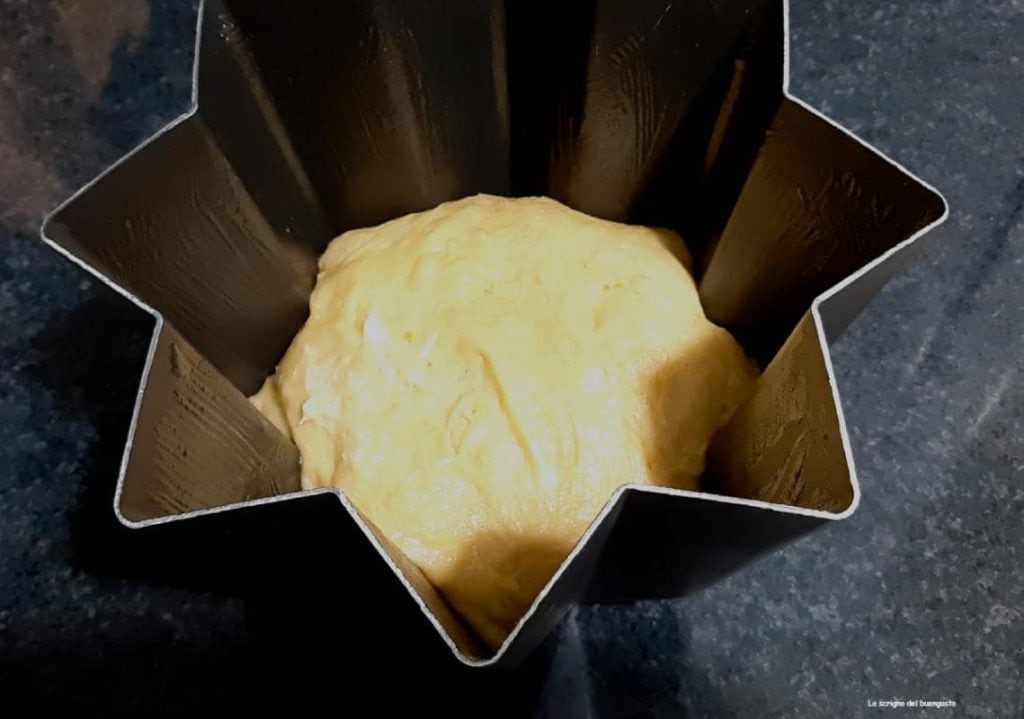
Once the folds are completed, form a ball, butter the pandoro mold and place the dough ball in the mold with the closed side facing up.
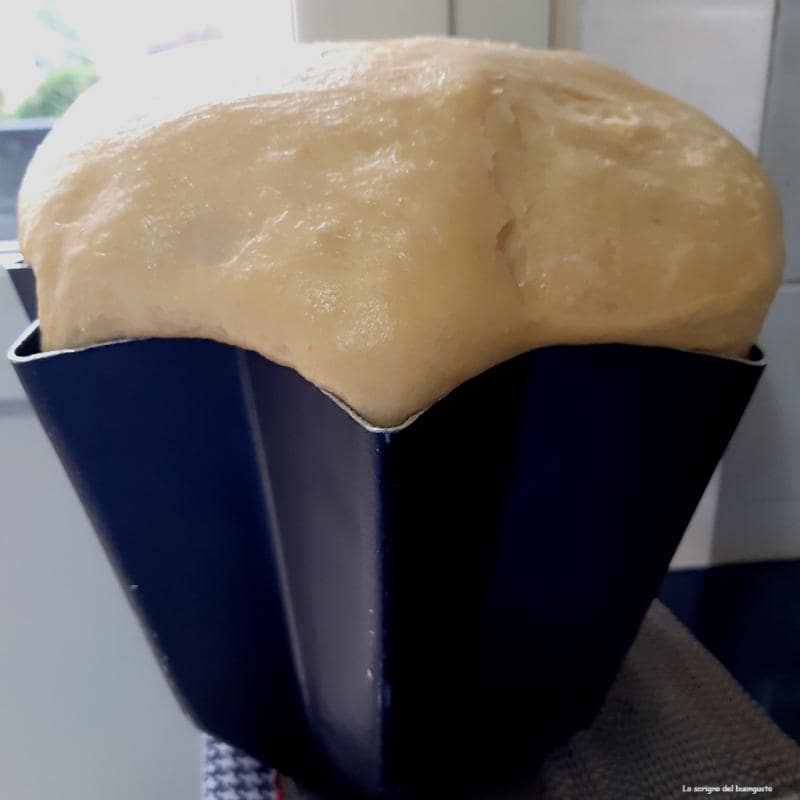
At this point, let it rise covered with transparent wrap in the turned-off oven with the light on.
The dough must reach the rim of the mold and even a little more, only then it will be ready to bake, it will take about 5-6 hours at least.
Before baking, brush the surface with melted butter, then bake in a preheated oven at 300°F for about 45-50 minutes checking the cooking and if it should brown too much on the surface, cover it with a sheet of aluminum foil.
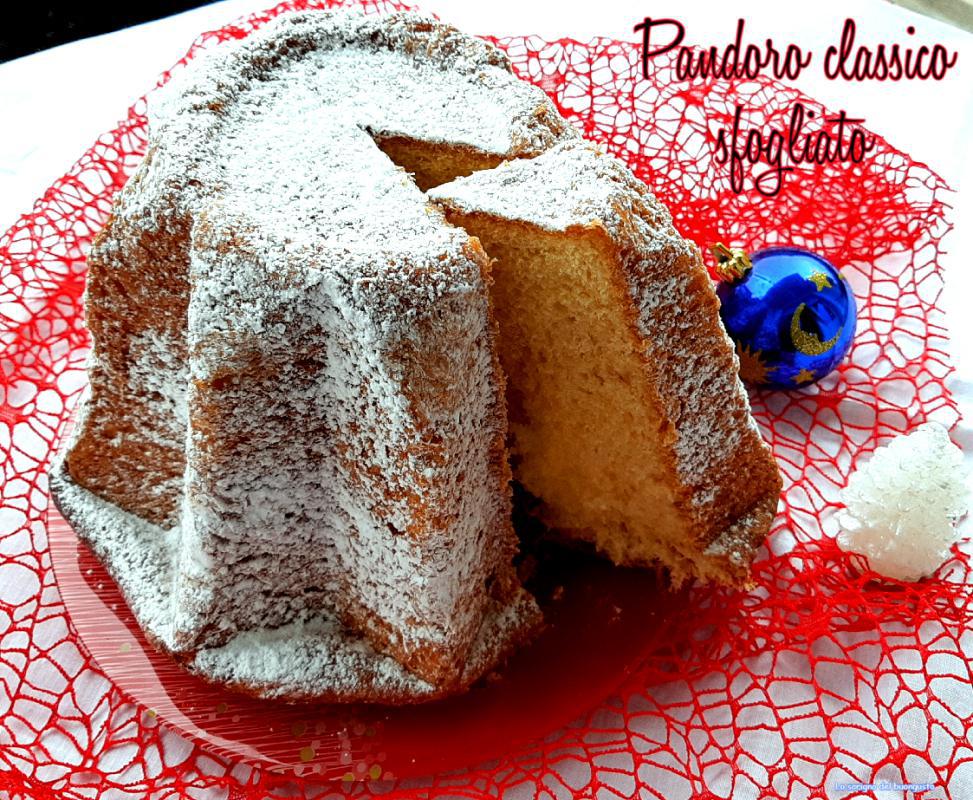
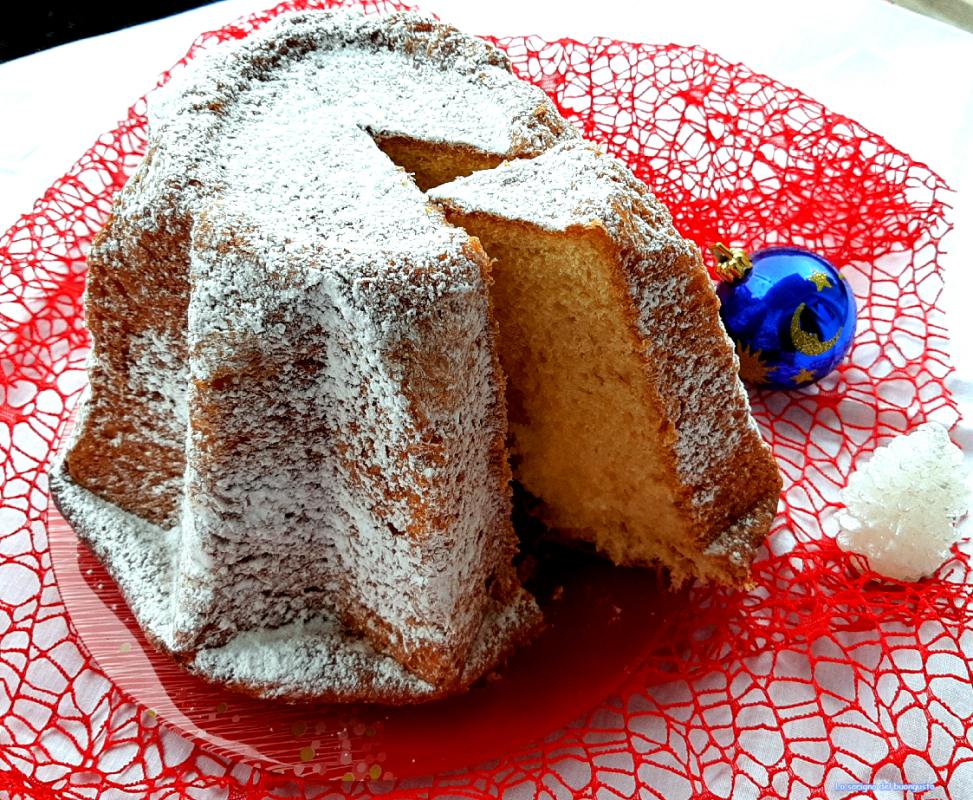
Once baked, let it cool in the mold and then dust with powdered sugar, plate to serve.