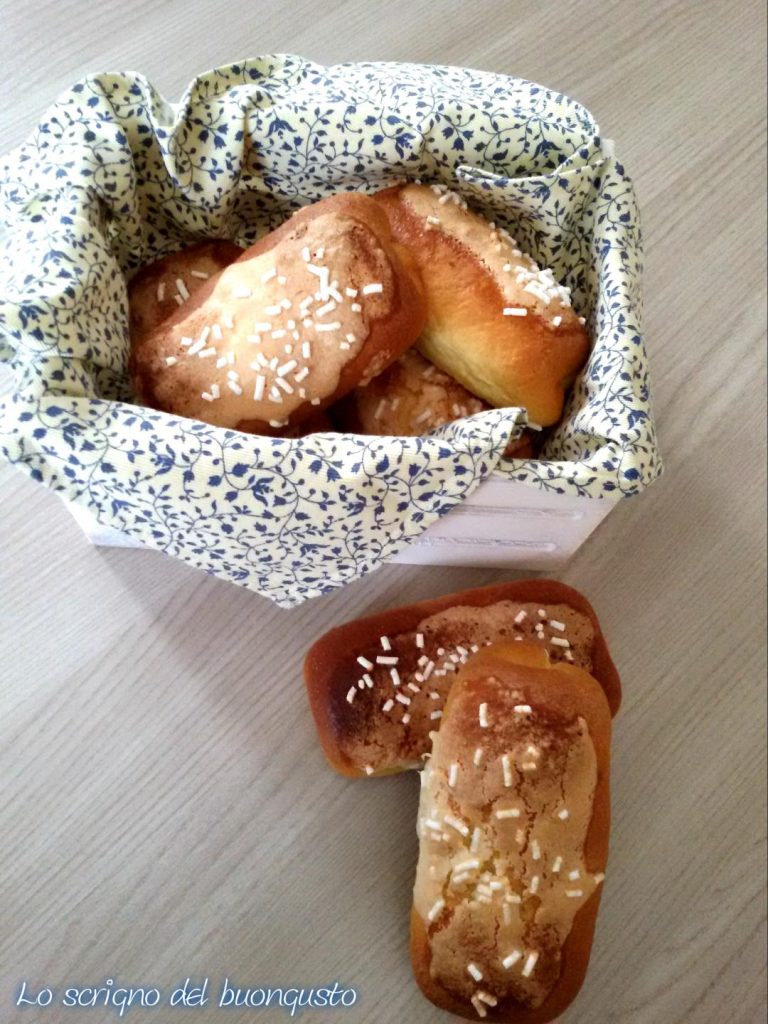
Stuffed snack cakes are a classic snack from our childhood, but I honestly rarely buy packaged snacks now, so I try to make them at home.
Have you ever tried making these cakes similar to those you find in stores?
It’s certain that they are more wholesome, and we can choose to fill them with Nutella or jam and enjoy them at any time of the day.
Mine turned out really soft, and if you store them in a plastic bag, you can keep them for several days!
Let’s make the stuffed snack cakes together, and if you make this or any other of my recipes from my blog, feel free to send me your photos, and I’ll post them on my FB page in your name.
Approx. 310 Kcal per cake
- Difficulty: Medium
- Cost: Medium
- Rest time: 2 Hours
- Preparation time: 20 Minutes
- Portions: 16 snack cakes
- Cooking methods: Electric oven
- Cuisine: Italian
- Seasonality: All seasons
Ingredients to make Stuffed Snack Cakes
- 4 1/4 cups All-purpose flour
- 7/16 cup Whole milk
- 0.42 oz Fresh yeast
- 3 1/2 cups Manitoba flour + 1 tablespoon
- 2/3 cup Sugar
- 1 tsp Honey
- 2 Egg yolks
- 1 Egg
- 7/16 cup Whole milk
- 3.5 oz Vegetable margarine
- 2 packets Vanilla or 1/2 teaspoon of liquid vanilla
- 1 pinch Salt
- Grated peel of 1/2 orange
- 6 oz Peach jam (or other flavor of choice)
- 1 Egg white (approx. 1 oz)
- 1 1/4 oz Sugar
- 1 tbsp Potato starch
- 1 1/4 oz Almond flour
- 1 oz Sugar sprinkles
Preparation of Stuffed Snack Cakes
First, prepare the starter by dissolving the yeast in lukewarm water and milk, then add the flour and mix well.
Let rise for about 40 minutes.
In a separate bowl, mix the flour required for the dough with the sugar, then add milk and mix well.
Next, add the eggs, adding one yolk at a time and then the whole egg, being careful to mix everything well and ensure all ingredients are well combined.
Add the starter to the dough, incorporating it well.
Continue adding ingredients, incorporating half the butter each time, and ensure each added ingredient is well absorbed into the dough.
Also, add the vanilla, salt, and orange peel, and use the tablespoon of flour to achieve a dough suitable to form into a ball, and let it rise for about 5 hours or until the dough is well risen.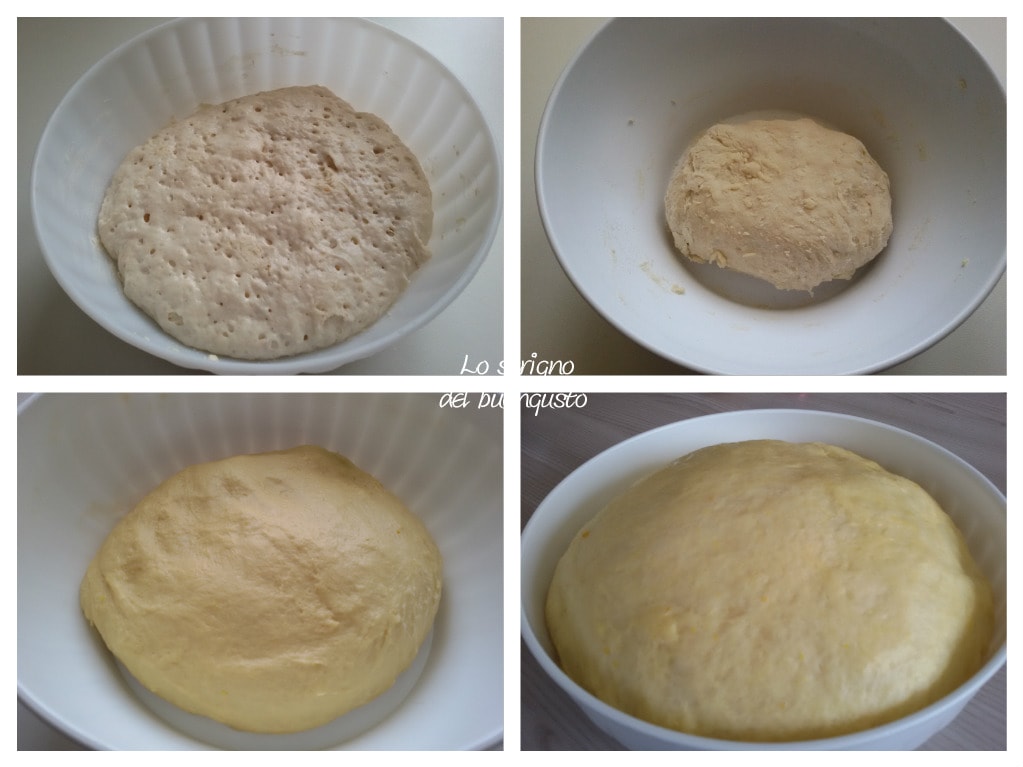
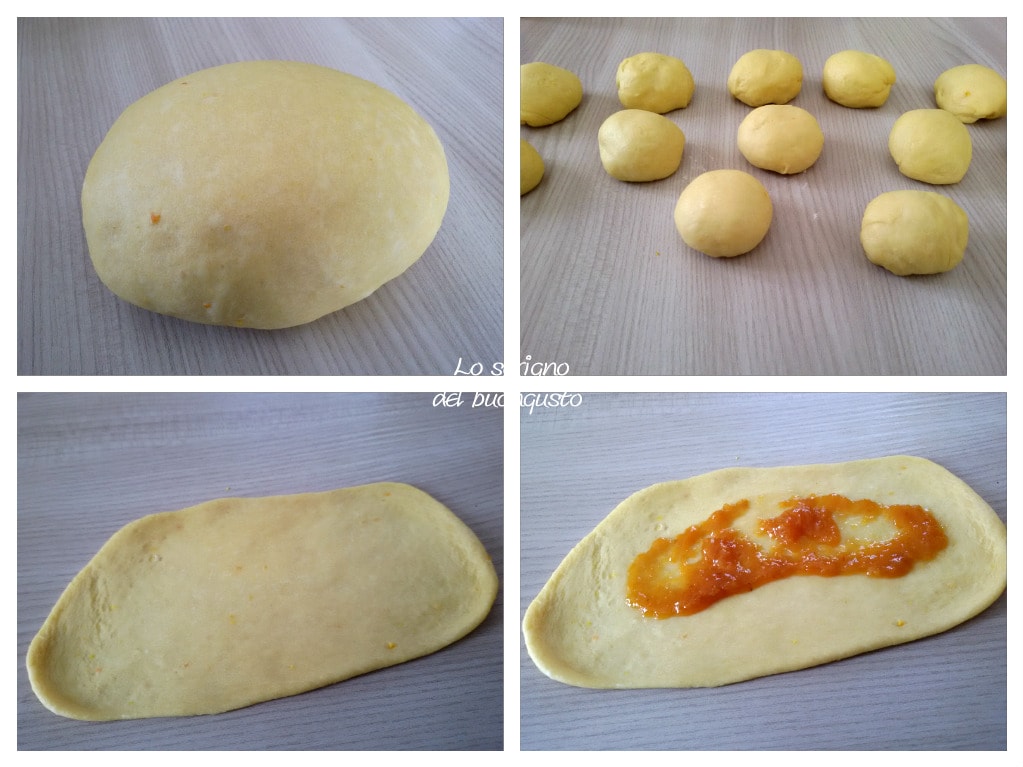
Once the dough has risen, take it without working it and form small balls of about 2 oz each, flatten them into a strip, and place 2 teaspoons of jam in the center, covering the center along the length of the brioche.
First fold the narrow part to the inside by a finger’s width, then fold the long part by bringing one half towards the center and the other half to overlap it, sealing well.
Once we’ve made our homemade snack cakes, gently press them to avoid having higher ends. Otherwise, there will be an uneven rise during proofing.
For this operation, refer to the photos.
Line the baking sheet with parchment paper and place the cakes on it, ensuring they are spaced apart.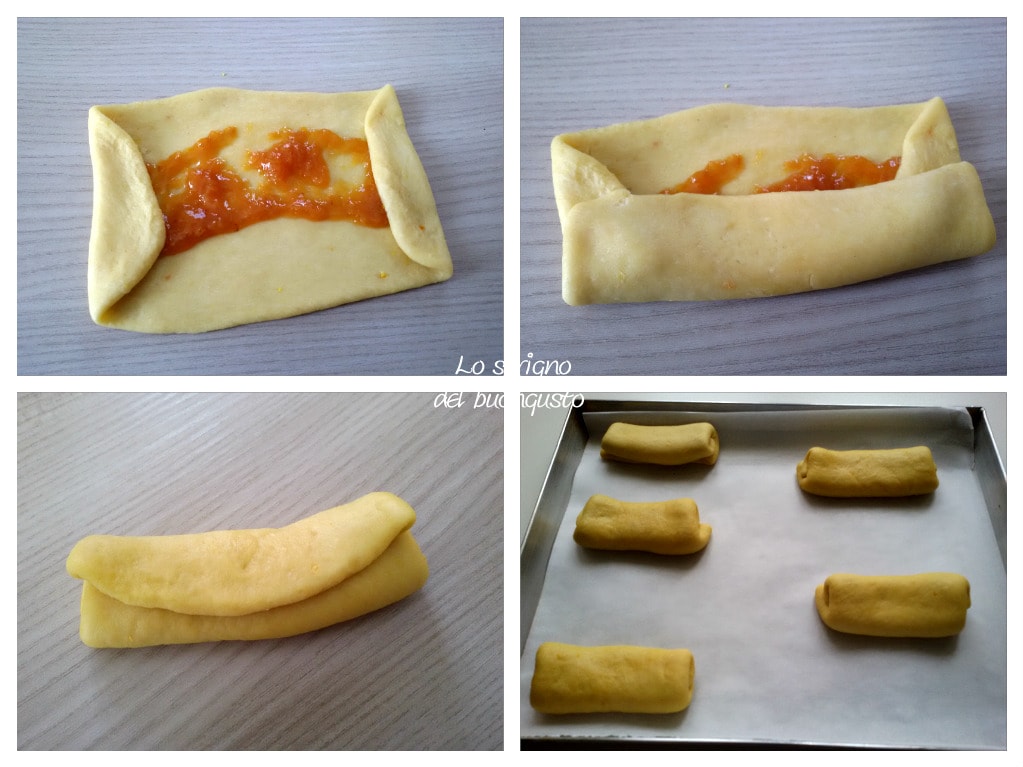
Prepare the glaze by mixing the almond flour, potato starch, egg white, and sugar.
Brush the cakes with the glaze, then sprinkle with the sugar sprinkles and let rise for about 1 hour. Bake in a preheated oven at 356°F for about 20 minutes, keeping an eye on the baking process.Follow me on Facebook Pinterest Twitter Instagram Youtube Telegram
If you want to stay updated, subscribe to the newsletter
by clicking here