Upside-down orange cake: the recipe for a very moist and fragrant dessert
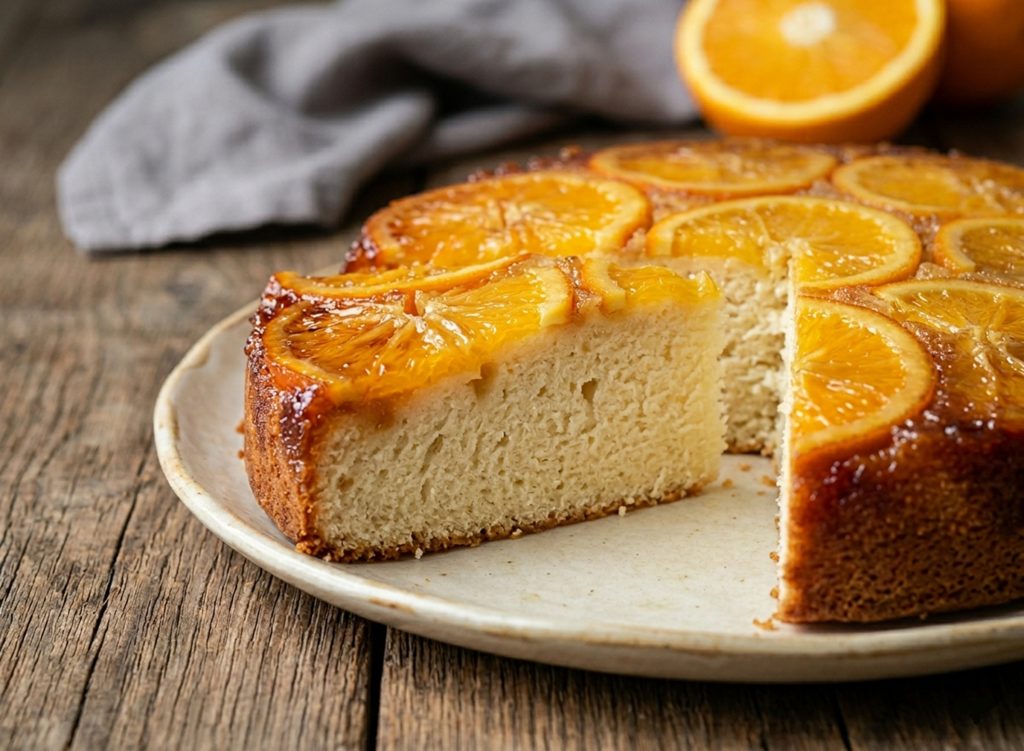
There is something magical about flipping an upside-down orange cake: the fear that the fruit will remain stuck to the bottom turns into wonder in front of a glossy, caramelized surface with vibrant color.
The main problem many encounter with this type of dessert is moisture control: often the fruit releases too much juice making the base soggy, or the sugar doesn’t caramelize properly, leaving the oranges pale and lacking flavor.
To solve this issue and give you a pâtisserie-level result, the secret is balancing melted butter and brown sugar on the pan base, which creates a dense syrup capable of “sealing” the crumb’s softness.
In this recipe I’ll show you how to get a tall, spongey batter that welcomes the citrus aroma without becoming heavy.
It is a versatile method that, once learned, you can adapt with any seasonal fruit.
Get ready to have a heavenly scent fill your kitchen — perfect to enjoy on its own or with a dollop of whipped cream.
Upside-down orange cake: the secret to perfectly caramelized slices
- Preparation time: 20 Minutes
- Cooking time: 35 Minutes
- Portions: 8-inch springform pan
- Cooking methods: Oven
- Cuisine: Italian
Ingredients for the upside-down orange cake
- 2 1/3 cups all-purpose flour
- 2/3 cup granulated sugar
- 3.4 fl oz orange juice (strained)
- 7 tbsp butter
- 3 eggs
- 2 tsp baking powder
- 1 orange zest (grated)
- to taste vanilla extract
- 1 pinch fine salt
- 3 oranges (Tarocco or Navel type)
- 1.5 tbsp brown sugar
- 1.5 tbsp butter
- A few leaf mint (for garnish)
Tools
- Kitchen scale
- Bowl
- Electric hand mixer
- Spatula
- Sieve
- Springform pan
How to make the upside-down orange cake that doesn’t stick to the pan
In a large bowl, beat the sugar with the eggs, orange zest and vanilla. Use an electric mixer for at least 10 minutes: the secret to softness is incorporating as much air as possible until the mixture becomes pale and nearly doubles in volume.
Add a pinch of salt, the orange juice and the warm melted butter to the mixture. Stir gently. Sift the flour and fold it in with a spatula, using upward motions so you don’t deflate the eggs. Only add the baking powder at the end.
Line the base of an 8-inch springform pan with parchment paper. Spread the brown sugar and the butter pieces over it. Arrange the orange slices (about 1/4 inch thick) covering the whole base. Pour in the batter, level and bake at 356°F (conventional oven) for 35 minutes. Always do the toothpick test before removing from the oven!
Wait 5 minutes, then open the springform ring. Place a plate over the cake and, with a decisive movement, flip it over. Gently remove the pan base and the parchment paper while still warm to prevent the caramel from hardening too much.
Notes on ingredients and Substitutions
The Oranges: Choose oranges with thin, untreated skin since they will be eaten whole with the cake.
Flour: You can replace 30 g (about 2 tbsp) of flour with cornstarch for an even more “cloud-like” texture.
Butter: If you prefer, you can use 1/3 cup (about 2.7 fl oz) of neutral oil for a lactose-free version (use a quality margarine for the pan base).
Storage
The cake keeps perfectly under a glass dome at room temperature for 3-4 days. Being a moist cake, it stays soft for a long time.
Tea’s Tips
For an even more show-stopping, glossy finish, once the cake is flipped brush the orange slices with one tablespoon of warmed apricot jam: they will shine like a mirror!
FAQ (Questions and Answers)
Can I use blood oranges?
Absolutely yes! The color effect with blood oranges (Sanguinello or Moro) is stunning and the slightly more acidic flavor balances the sweetness of the caramel very well.
Why do the oranges taste bitter?
Make sure to cut slices that are not too thick and to use fresh oranges. If you fear the bitterness of the albedo (the white part), you can blanch the orange slices for 2 minutes in water with sugar before placing them in the pan.
Can I make it rectangular?
Of course! You can use a loaf pan or a rectangular baking tray; the important thing is that the base is well lined so you don’t lose the syrup that forms during baking.