Today I want to show you how I make sugar-free baked apples. It’s not rocket science to make them, but I thought a dedicated recipe might be useful when you’re browsing my blog looking for something sweet. I’ll also explain how to prepare baked apples without using a traditional oven, utilizing the Versilia pot or more quickly in the air fryer. This way, you’ll also save energy…
Pretty clever, right? If you have time, use the stove, and you’ll be able to enjoy them even in the summer when it’s too hot to turn on the oven. Alternatively, cook them more quickly in the air fryer. If you want, you can also use them to prepare a very light vegan dessert that’s also delicious for those of us on a diet. Serve a baked apple with a bit of yogurt and agave or maple syrup, add a sprinkle of cinnamon or cocoa, and you’ll enjoy a treat without breaking your diet.
And they’re so good, whether you’re on a diet or not, you’ll love them a lot. I’ve noticed that in the Versilia pot, they become less dry, staying juicier. I made six, and of course, I stored and reheated some later: they remained excellent. I’m very satisfied! Let’s take a look at all the cooking methods…
If you like recipes with apples, don’t miss this collection:
- Difficulty: Very Easy
- Cost: Very Cheap
- Preparation time: 5 Minutes
- Portions: 6
- Cooking methods: Stovetop
- Cuisine: Vegan
- Seasonality: All Seasons
Ingredients
- 6 apples (any variety will do)
- 1.8 oz soy yogurt (unsweetened)
- 1 tsp agave syrup (or maple syrup)
- to taste ground cinnamon (or cocoa (don't overdo it))
- Points per apple = 0 WW points
- Points per stuffed apple = 1 WW points
Tools
- Versilia Pot
- Air Fryer
- Baking Pan
- Parchment Paper
Steps
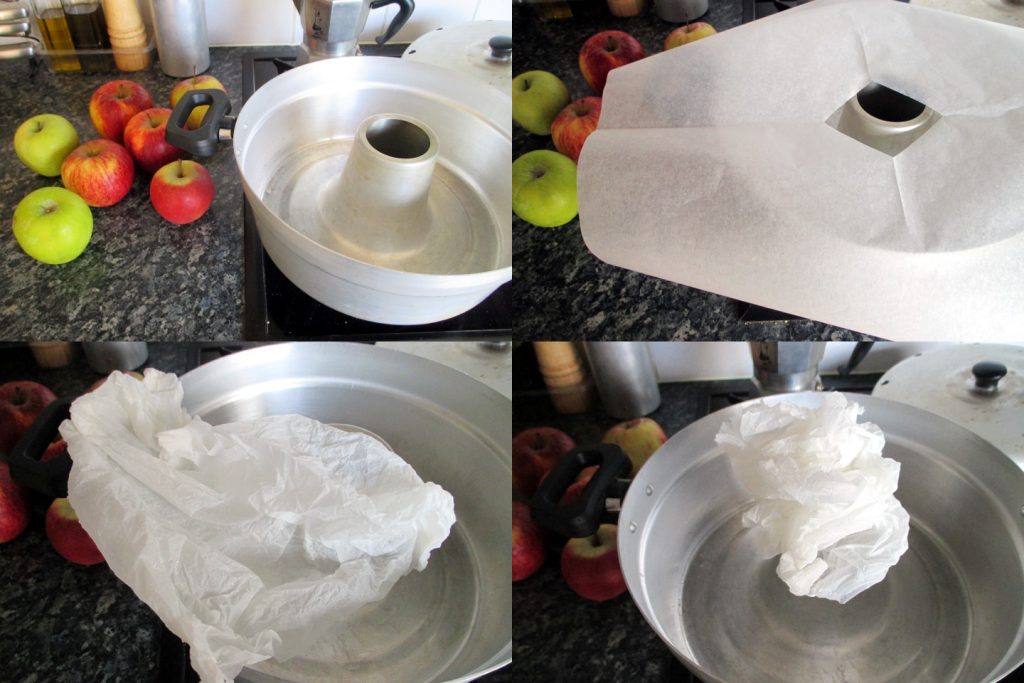
First, line the baking pan you’ll use to cook the apples with well-wet and squeezed parchment paper. In the photo, you can see how to line the Versilia pot, which has a central chimney: just fold the parchment paper in 4 and cut a corner, wet and squeeze the paper, and make it adhere to the sides of the pot, then cut off the excess paper.
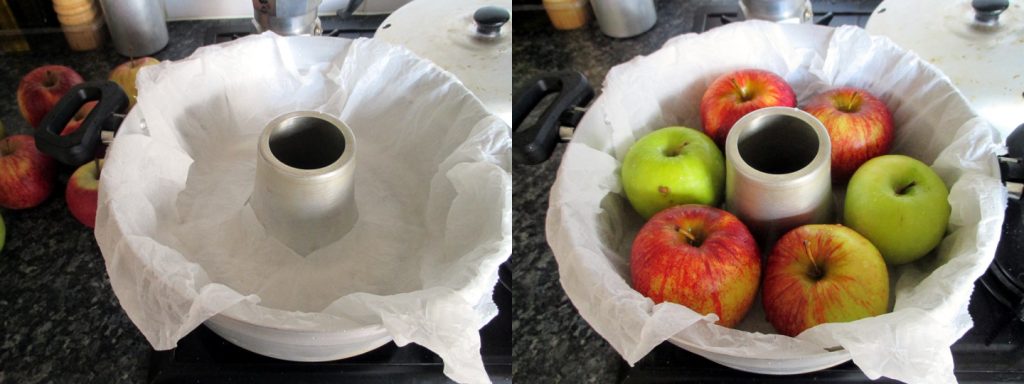
Wash the apples well and place them whole in the baking pan side by side.
The Versilia pot comes with a small plate, a perforated disc like a flame spreader that directs heat into the central chimney of the pot: place this disc on the medium burner with the concave side facing up. Then place the pot on the disc, ensuring it is well inserted. Close the Versilia pot with its characteristic lid with holes designed to let steam escape. Turn on the flame and set it high for 5 minutes, then lower it to just above the minimum and leave it for about 50 minutes, without ever opening the pot to avoid losing heat.
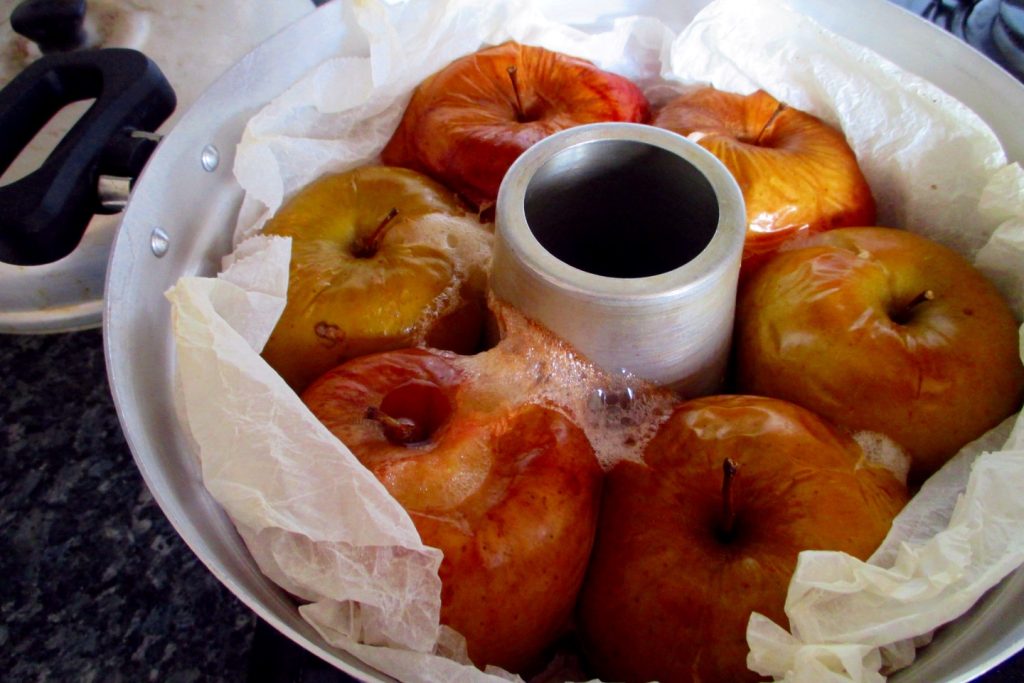
After about 50 minutes, check the apples’ doneness. If they’re not yet soft, close again with the lid and continue for another 10 minutes.
The apples can also be cooked in an air fryer. Cover the basket with some parchment paper and place the apples. The number of apples will depend on the size of your basket, of course. Cook at 356°F for 20 minutes and then check. Continue cooking until the apples are perfectly done!
Preheat the oven to 356°F, then place the parchment-lined baking pan with the apples in the oven. After 50 minutes, check the doneness: the apples should be tender; otherwise, continue baking for another 10 minutes.
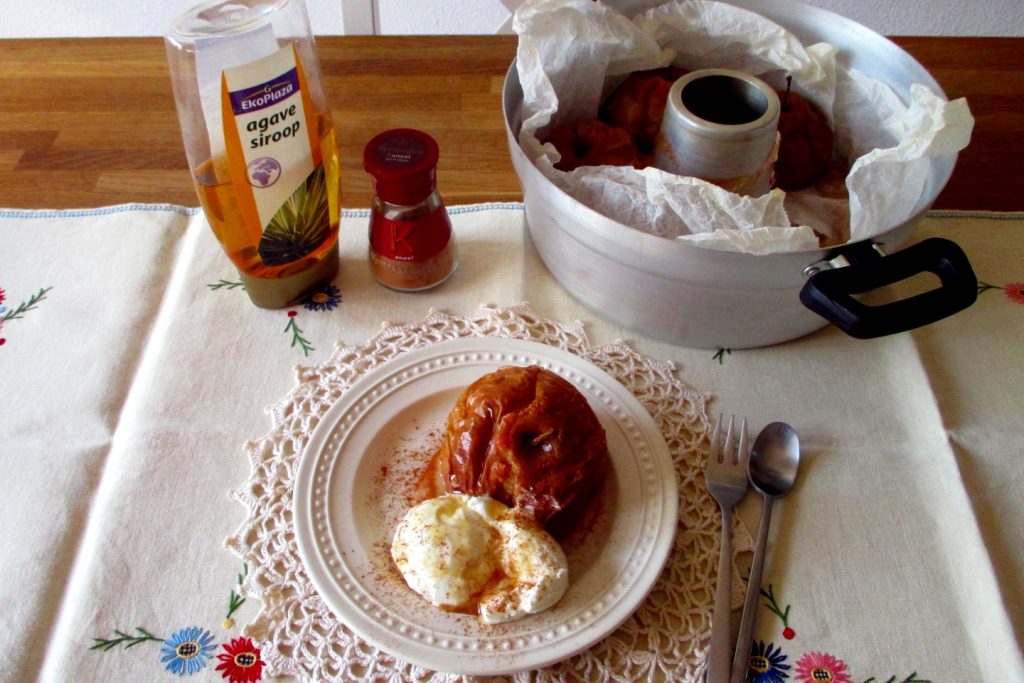
And here are your ready sugar-free baked apples: a wonderful aroma fills the house… You can enjoy them just like that, they’re already great without adding anything else, or do as I suggest: place a warm apple on a small plate and add a couple of tablespoons of yogurt. Pour 1 teaspoon of agave or maple syrup over the apple and yogurt and finish with a generous sprinkle of cinnamon or even cocoa!
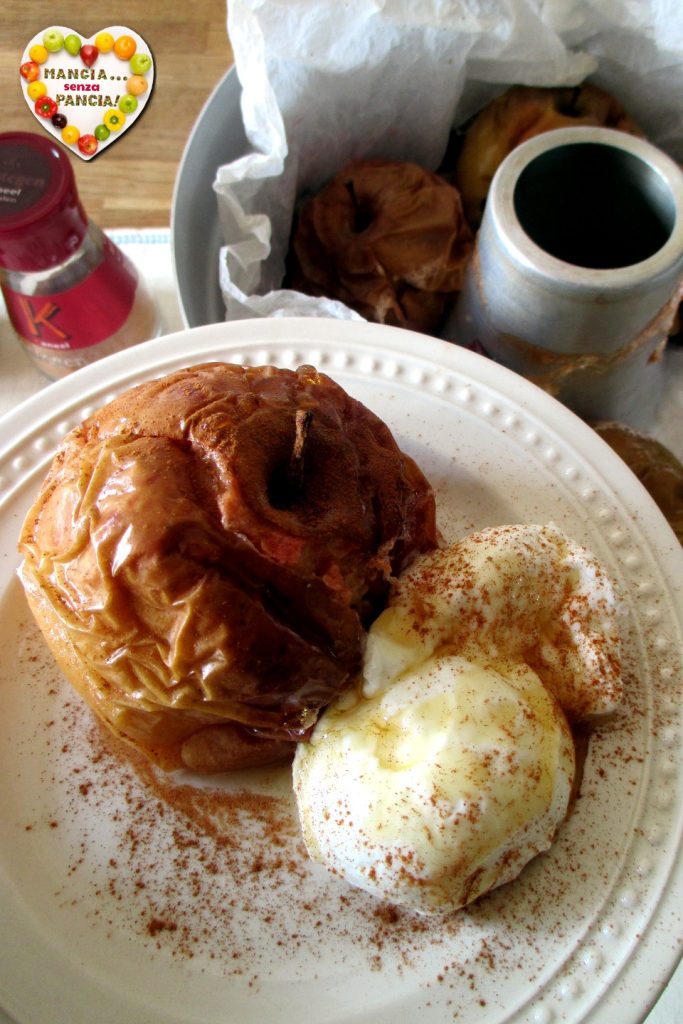
All that’s left to do is enjoy our sugar-free baked apples for a delicious snack or when you get a craving! Quite a simple idea, right? I’m waiting for your comments at the bottom of the recipe or in my Facebook group!
Enjoy!
by Giovanna Buono
Tips
You can use any variety of apples. I prefer the sweeter ones like Royal Gala, but the choice is yours!
If you want to make the soy yogurt a bit firmer, let it drain overnight in the fridge in a colander lined with cheesecloth or muslin over a bowl.
You can store them in the fridge in a glass container and then reheat them for a few minutes in the microwave. They’ll be as good as new!