This vegan orange cream has a little story: some time ago a reader of mine, Mariuccia, who often experiments with my recipes sometimes making a few changes, showed me her version of my light custard without eggs prepared with orange juice.
She used a whole orange, juice and peel, and made an orange cream that immediately inspired me! But I wanted to make it in a vegan version: without eggs and also suitable for those who are lactose intolerant, so I had to make a few additional changes and experiment a bit.
The result was really excellent! Besides being ready in very little time, it’s truly tasty, wonderfully orange-scented and, very importantly: only 2 Weight Watchers ProPoints per serving and if you want you can even eat it all yourself! Let’s see how to make it.
Other creams from my blog:

- Difficulty: Very easy
- Cost: Very inexpensive
- Preparation time: 5 Minutes
- Cooking time: 5 Minutes
- Portions: 2
- Cooking methods: Stovetop
- Cuisine: Healthy
- Seasonality: Autumn, Winter and Spring
Ingredients
- 2/3 cup soy milk (unsweetened or other plant milk)
- 1 tbsp agave syrup (or maple syrup)
- 2 1/2 tbsp flour
- 1 orange (juice and zest)
- Total points = 4 WW points
- Points per serving = 2 WW points
- 1 pinch turmeric powder (optional)
Tools
- Knife
- Citrus juicer
- Zester
- Wooden spoon
- Small saucepan
Steps
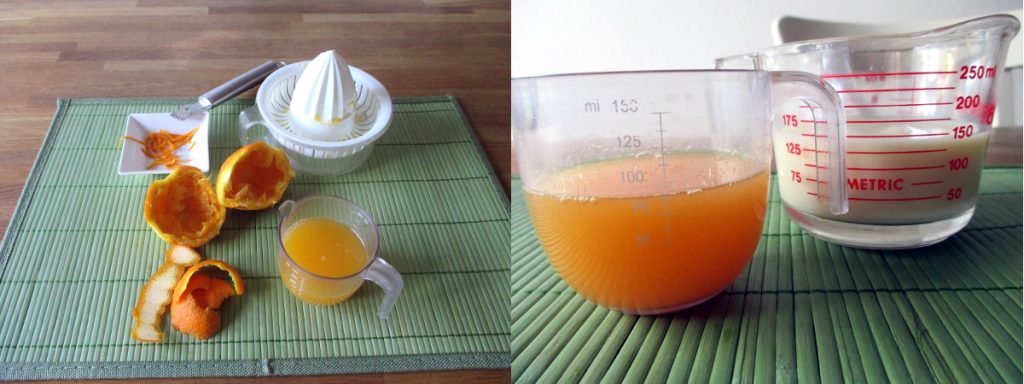
First, wash the orange well and cut some strips of peel avoiding the white part that is bitter. For the final decoration cut thin strips from the remaining peel with the appropriate tool. Cut the orange in half and squeeze it. Measure the juice obtained and then measure the soy milk so that you reach about 250 ml (about 1 cup) of total liquid. In my case I got about 100 ml of juice and therefore I used 150 ml of soy milk (about 2/3 cup).
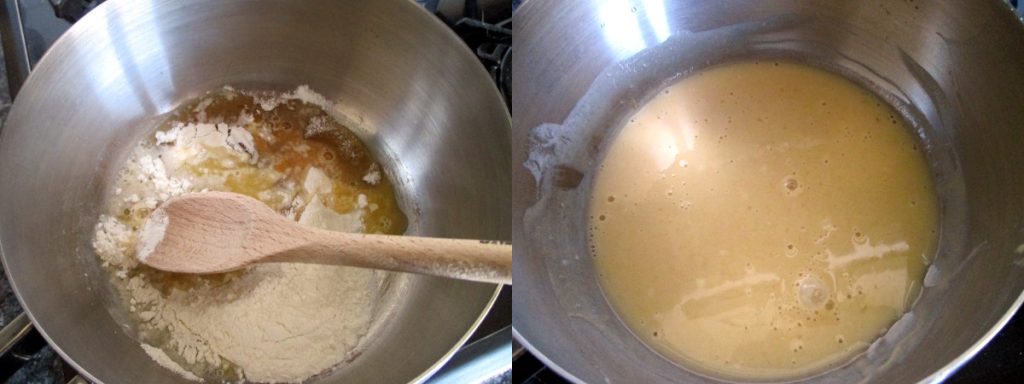
In a small saucepan mix the flour, agave syrup and orange juice to form a little cream. Put it over low heat.
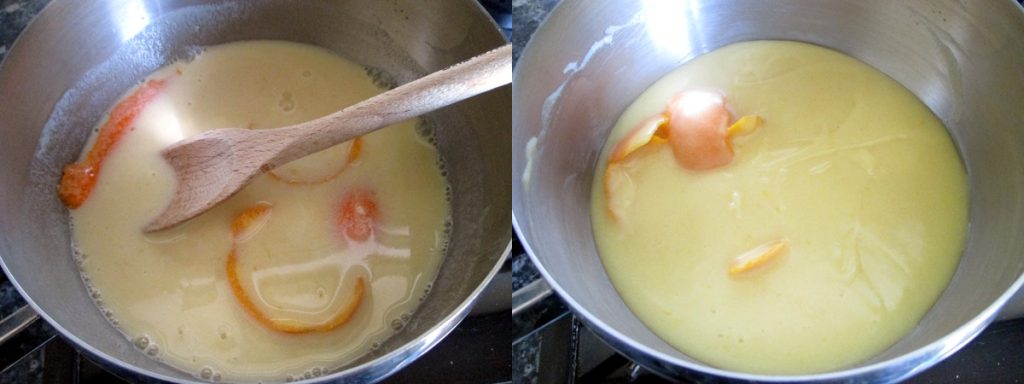
Add the orange peel and the cold soy milk little by little, stirring to incorporate it well. Continue stirring and as soon as it starts to boil lower the heat and let the cream thicken.
If you want the cream to become even more yellow/orange you can add a pinch of turmeric now: I didn’t use it, I forgot, so in the photos you see the version without turmeric.
If lumps form, after removing the peel, use an electric whisk for a few seconds.
Even if the cream may seem a bit runny, when it cools it will reach the right consistency to be used even in a piping bag.
Remove the cream from the heat and let it cool. If you’re in a hurry you can pour it into a metal container immersed in cold water. To avoid the formation of a skin, cover it with some plastic wrap in contact with the surface of the cream.

This vegan orange cream is really indulgent; you can enjoy it simply with a spoon even adding a few drops of dark chocolate: remember, though, to count the extra WW points. Or you can use it to fill cakes and cream puffs: it’s very versatile.
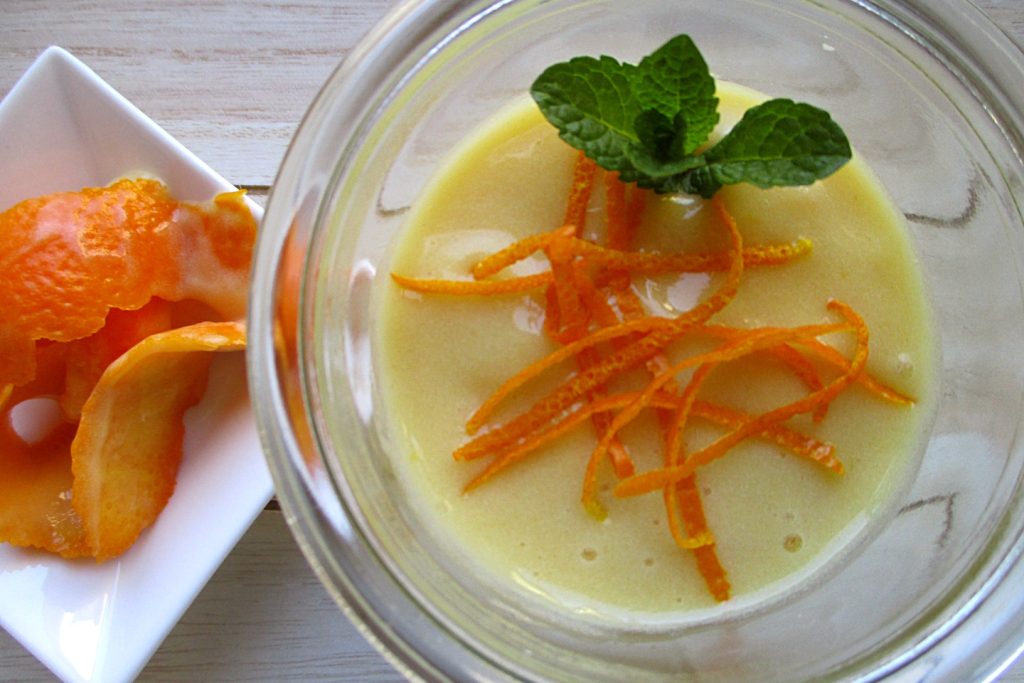
And it’s also delicious served with fresh fruit or with a couple of light cookies for a snack or as a tasty dessert at the end of a meal.
I found it delicious and not only I did: it disappeared in no time here. Thanks again to Mariuccia for the idea. Leave me a comment to let me know if you liked it.
Enjoy!
by Giovanna Buono
Storage
You can keep it in the fridge for 3-4 days or freeze it for 4 months. Let it thaw well, stir vigorously again and it will be ready to use!
FAQ (Questions and Answers)
It’s not orange season, can I use store-bought juice?
Certainly you can, but take unsweetened juice and of course the total WW points will be 5 and not 4.
Can I use another type of milk?For the vegan orange cream any unsweetened plant milk will work fine, even homemade.