The chocolate colomba is a decadent variation of the classic Easter cake, featuring a soft dough enriched with chocolate chips and often covered with a dark glaze. Let’s prepare it together with this step-by-step photo recipe — it will be very easy. I used fresh brewer’s yeast since not everyone has access to sourdough starter.
- Difficulty: Difficult
- Cost: Medium
- Cooking time: 1 Hour
- Portions: One mold for a 1 kg (about 2.2 lb) colomba
- Cooking methods: Oven
- Cuisine: Italian
- Seasonality: Easter
CHOCOLATE COLOMBA
- 70 about 1/4 cup + 1 tbsp water
- 70 g Manitoba flour (15/16 g protein)
- 18 about 0.6 oz fresh brewer's yeast
- 1 tsp honey
- 50 oz dark chocolate (Milk or gianduia are alternatives)
- 30 tbsp butter
- 15 tbsp honey
- 2 tbsp amaretto (liqueur)
- 15 tbsp unsweetened cocoa powder
- to taste vanilla extract
- orange zest
- as needed Manitoba flour
- 430 cups Manitoba flour (15/16 g protein)
- 140 cups granulated sugar
- 80 cups water
- 80 cups milk
- 110 cups egg yolks (About 7 yolks)
- 110 cups butter
- 6 tsp salt
- 200 oz dark chocolate chips (Or mixed dark and white)
- 300 oz dark chocolate
- 10 tsp vegetable oil
- to taste pearl sugar
CHOCOLATE COLOMBA
To make this Easter colomba remember to take the butter out of the refrigerator a few hours in advance so it softens. Put the butter (the 110 g) in a bowl, add a pinch of salt, the orange zest, and vanilla (or vanillin or vanilla extract). Cover and let soften and infuse well.
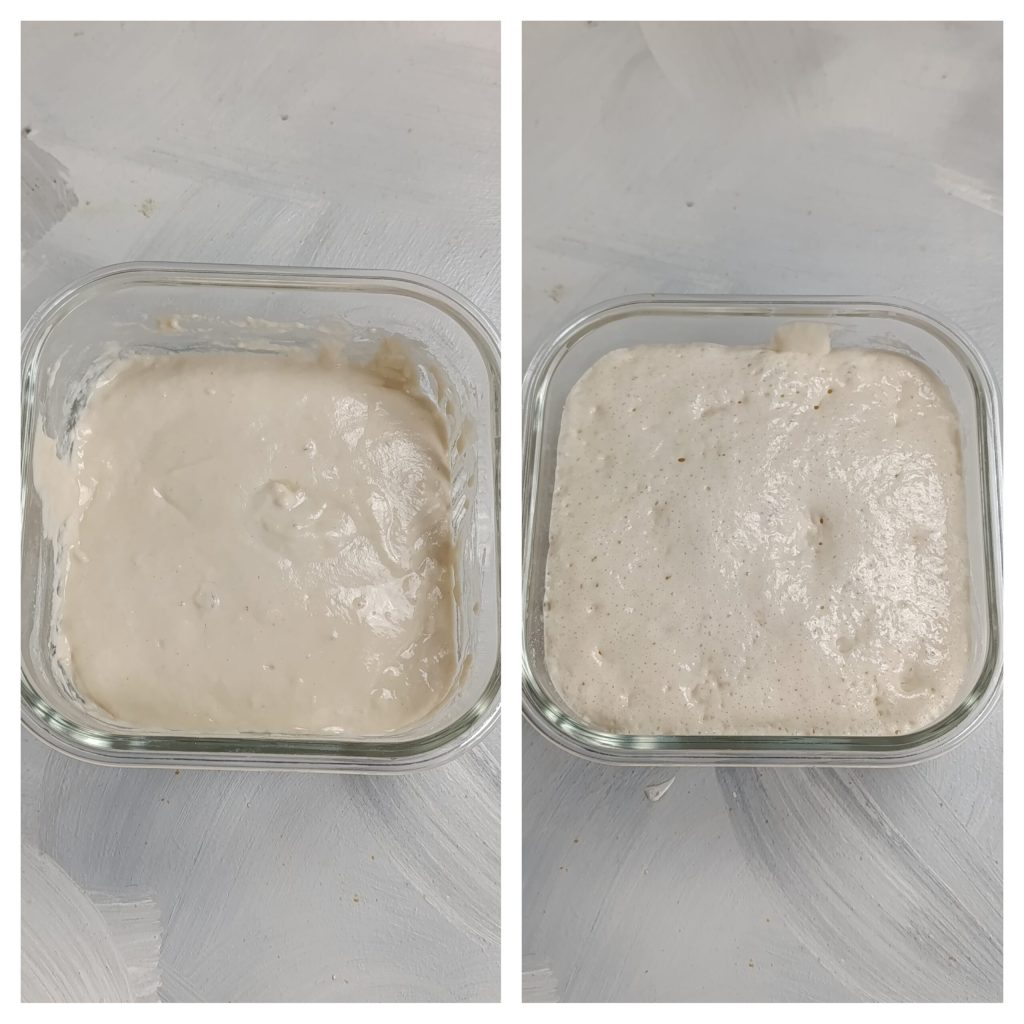
To prepare the sponge starter (lievitino), warm the water slightly and dissolve the yeast (we can use 15 g to 18 g depending on how much time we have for rising). Pour it over the flour, add the honey and mix. Cover with plastic wrap and let rise until doubled (about 30/40 minutes).
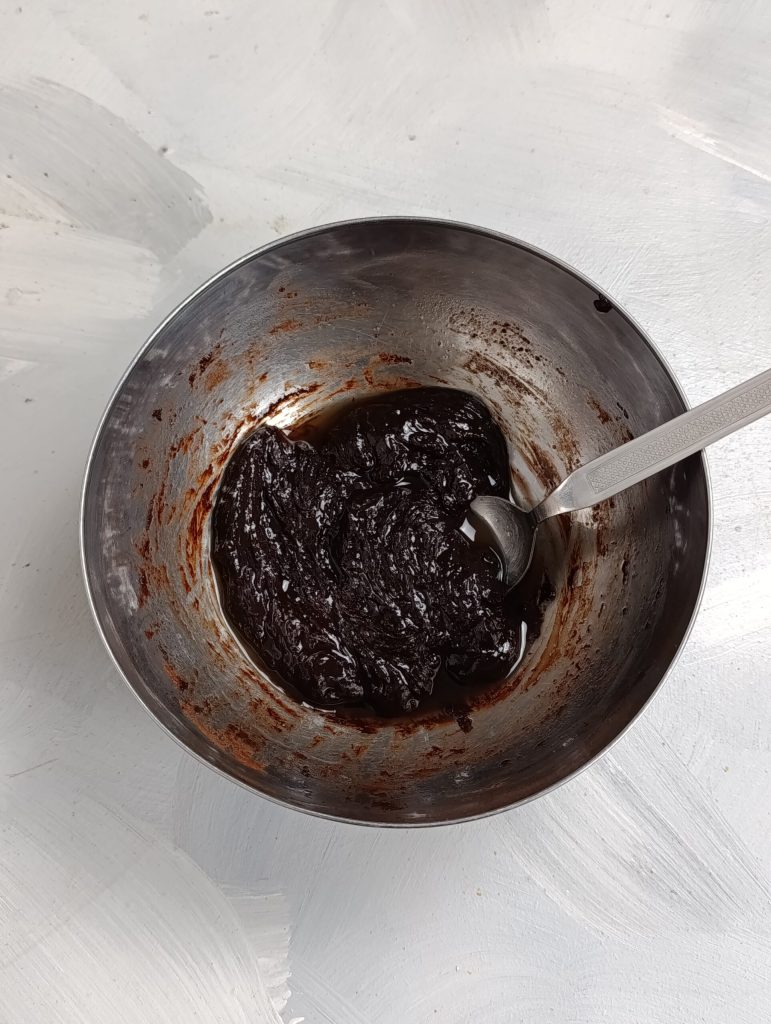
Put the butter (the 30 g), the chocolate (dark, milk or gianduia), the honey, the vanilla (or vanillin) and the liqueur into a bowl or small saucepan. Melt in the microwave or over the lowest heat on the stove or in a bain-marie, then stir and add the cocoa.
Cover with plastic wrap and chill in the fridge until use. You can prepare this emulsion the night before.
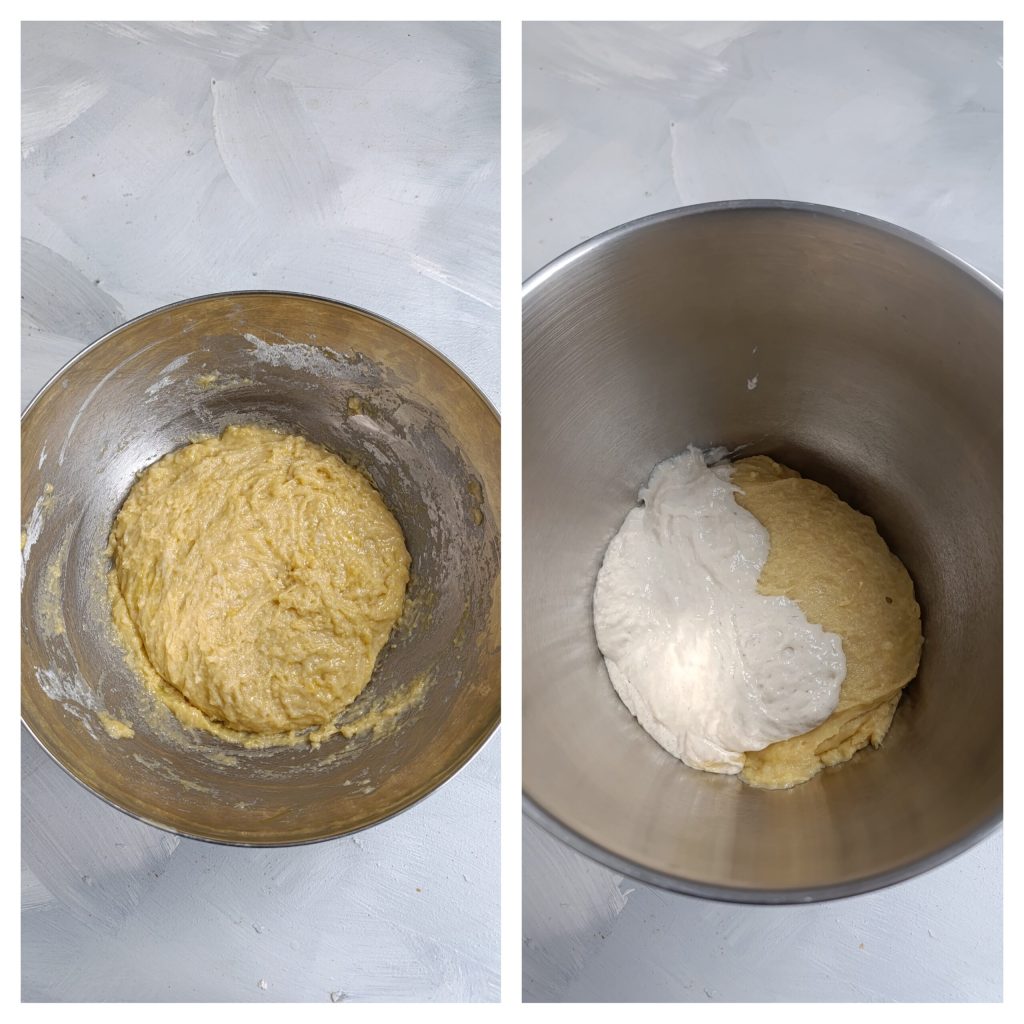
In a bowl add the flour, the sugar, the water, the milk and the egg yolks. Mix with the paddle at low speed and as soon as you obtain a combined mixture put it in the fridge for a couple of hours, or, if you prefer, it can rest in the fridge overnight. Resting will help develop the gluten network more effectively.
When the sponge starter is ready, take the dough from the fridge and put it in the bowl of the stand mixer. Add the sponge starter and start working with the paddle at medium speed. This step will take about 15/20 minutes.
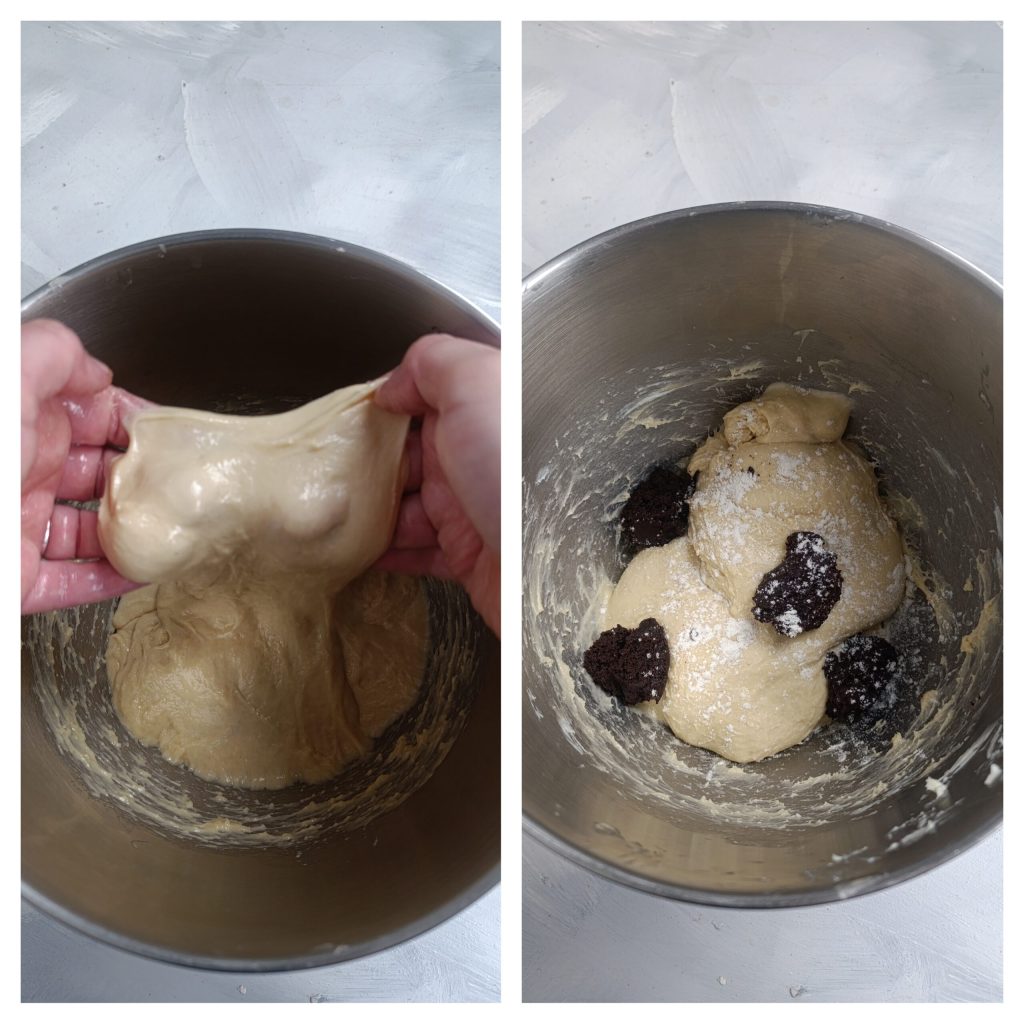
You need to form a good gluten network — you will know it’s ready when, using oiled hands, you can stretch a piece of dough and it forms a thin translucent membrane. Once the dough is well structured you can start adding the flavored butter little by little in several additions. Occasionally stop the mixer, let the dough rest and fold it over. Always remove any dough stuck to the bowl walls. Once the butter is absorbed, add the emulsion little by little while sprinkling a bit of flour at the same time.
Remove the paddle and put on the dough hook, continue to mix a little more until the dough detaches from the bowl and wraps around the hook.
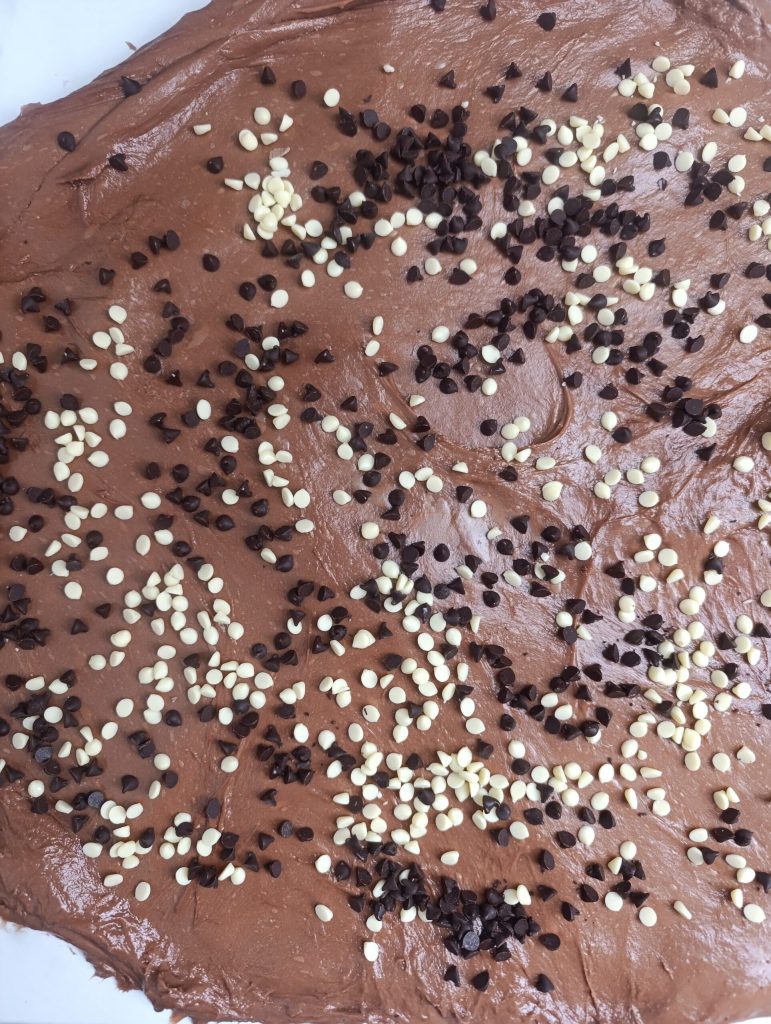
Butter the work surface and turn the dough out onto it. Cover with the bowl and let rest for about 10 minutes. After this time, with oiled hands spread it out on the work surface, add the chocolate chips (I also added some white chocolate chips) and fold it like a book — fold the two sides inward. Add more chocolate chips whenever you see a bare area. Gradually close it up, turn the opening underneath and shape into a smooth ball (pirlate). Place in an airtight container and let rest in a warm place until doubled. The oven with the light on works well for this.
When doubled, take the dough, turn it out onto the buttered work surface and, with oiled hands, perform a few reinforcing folds.

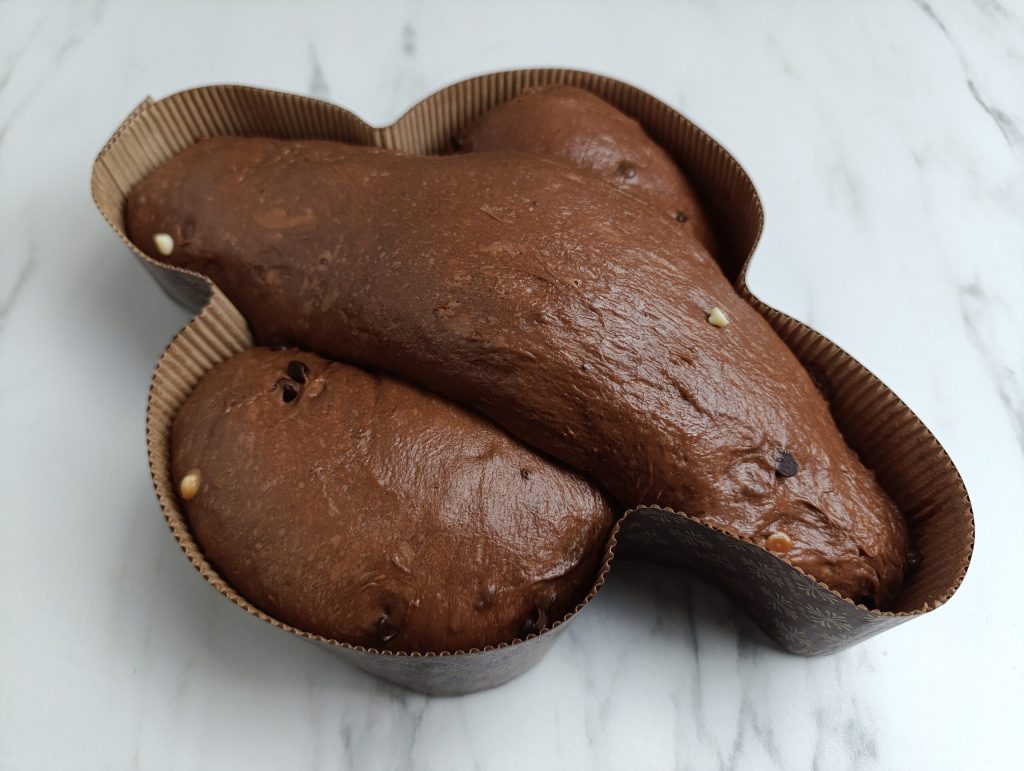
Divide the dough into two pieces, one larger than the other. With the larger piece form the wings: fold them onto themselves and gently stretch them. Place them into the mold where the wings go. In the same way fold and stretch the other piece to form the body. Lay it on top of the wings. Cover the colomba with plastic wrap and let it rise at room temperature or in the oven with the light on. Rising time depends on the temperature in your home. It should always rise up to the edge of the mold.
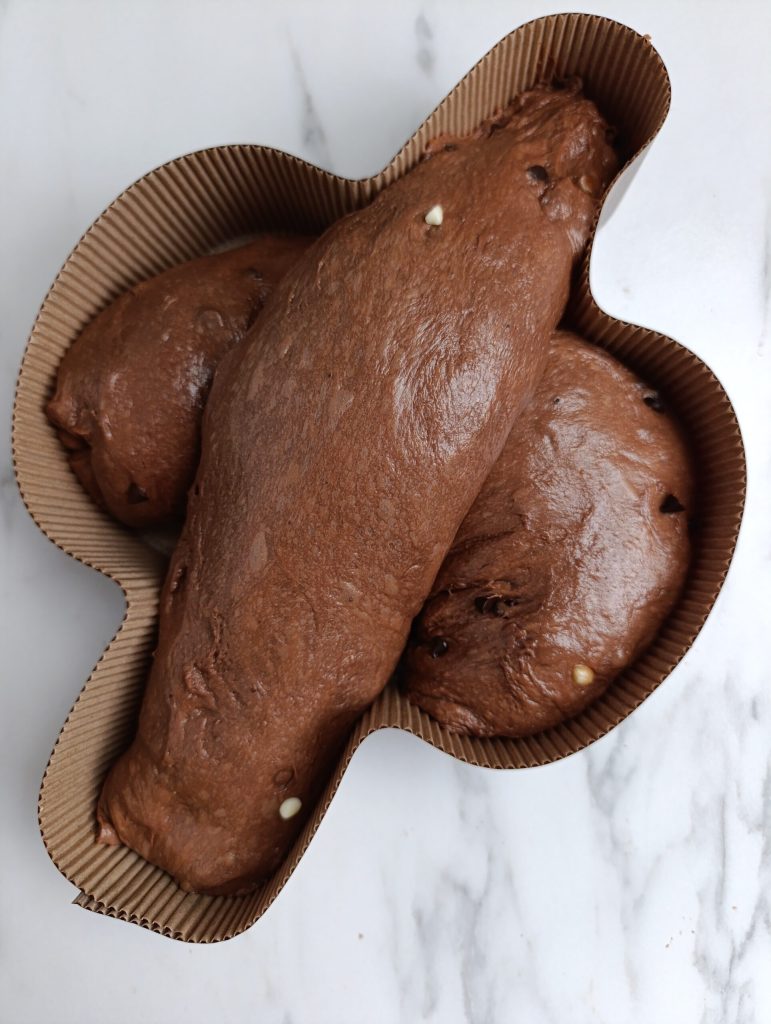
colomba before the final rise
colomba after rising
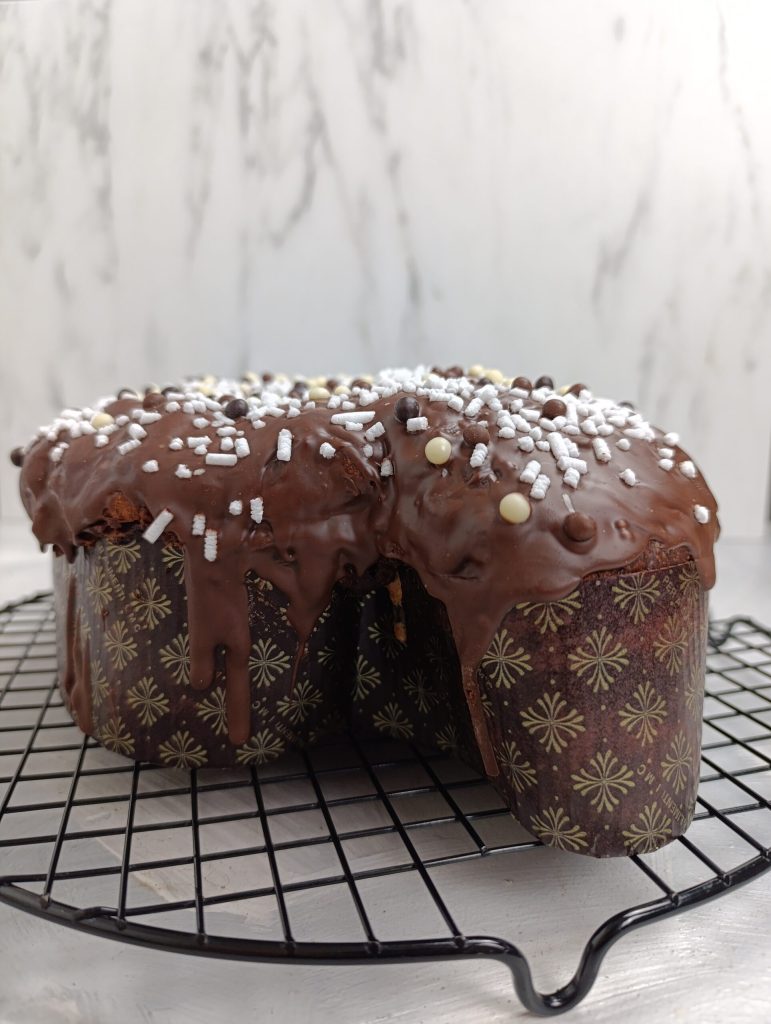
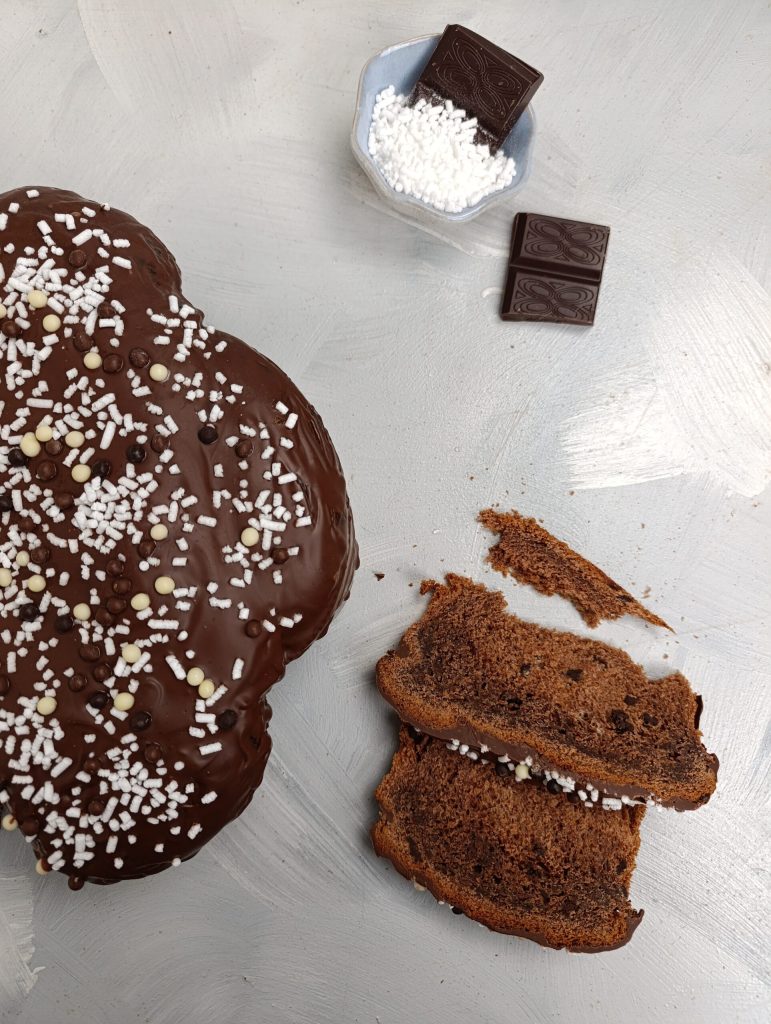
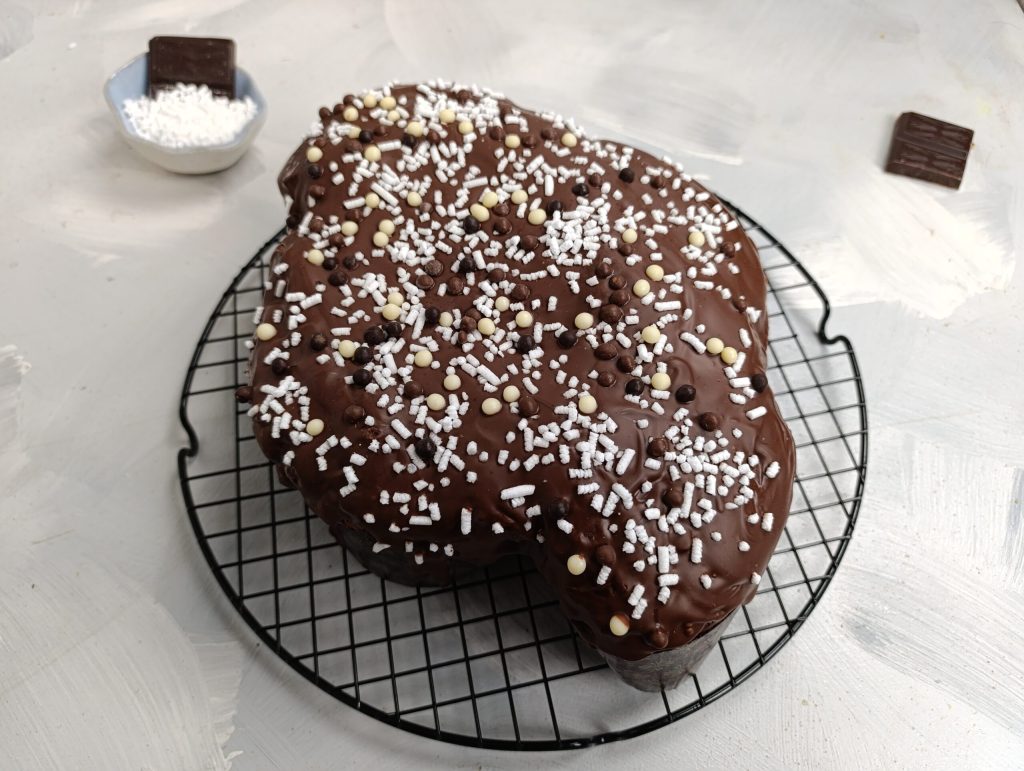
Bake in a preheated fan-forced or conventional oven at 329°F (165°C) for about 50/60 minutes. Do the skewer test or, if you have a thermometer, remove when the internal temperature reaches about 197–199°F (92/93°C). As soon as it comes out of the oven, let it cool on a rack covered with a cotton dish towel. Once cooled, melt the chocolate in the microwave or in a small saucepan over a bain-marie. Add the vegetable oil and stir. Let cool slightly and then pour over the colomba, topping with pearl sugar, chocolate chips or chopped nuts as desired.