Fried ricotta balls are a tasty egg-free finger food to serve with aperitifs, as an appetizer, at buffets, homemade happy hours with friends; or when you crave something delicious and want to use up leftover ricotta. You can accompany them with fresh vegetables or with homemade dipping sauces, tasty and very easy. You can enrich the ricotta balls with spices, cured meats, cheeses according to taste, to make several different versions. It is preferable to use ricotta (cow, sheep or buffalo) that is compact and dry in texture, definitely not creamy. You can make fried ricotta balls not only without eggs but also gluten-free, preparing the batter with appropriate ingredients.
- Difficulty: Very easy
- Cost: Very inexpensive
- Rest time: 1 Hour
- Preparation time: 10 Minutes
- Cooking time: 1 Minute
- Portions: 20
- Cooking methods: Frying
- Cuisine: Italian
- Seasonality: Autumn, Winter and Spring
Ingredients
- 7 oz (about 3/4 cup) ricotta (also lactose-free)
- 1 1/4 tbsp cornstarch (maizena) (also gluten-free)
- to taste fine salt
- 3 tbsp grated cheese (Grana Padano and Pecorino to taste)
- to taste black pepper (optional)
- to taste spices and cured meats (optional)
- to taste sunflower oil
- 2/3 cup (about 80 g) all-purpose flour (or another gluten-free flour)
- 2 tbsp + 1 tsp (about 35 ml) water
- to taste breadcrumbs (also gluten-free)
Tools
- 2 Milk cups
- 2 Forks
- Parchment paper
- 3 Spoons
- 1 Bowl
- 1 Air fryer
Steps
A few suggestions before starting.
-If you use a gluten-free flour to make the batter, you may need to add a little more water until you reach the right consistency.
–About the batter: if you want to prepare a tasty and very easy gluten-free batter, or simply give an extra touch to this delicious finger food, you can use chickpea flour as described here.
-Let any whey drain from the ricotta by placing it in a strainer; it is important that it is well drained.
–As containers for the batter and breadcrumbs I chose to use milk cups (rather than the classic small bowls), because, thanks to their shape, they are very convenient for mixtures that should be handled as little as possible, like in this case; easily and quickly we can form the balls without difficulty.
Prepare the batter of water and flour.
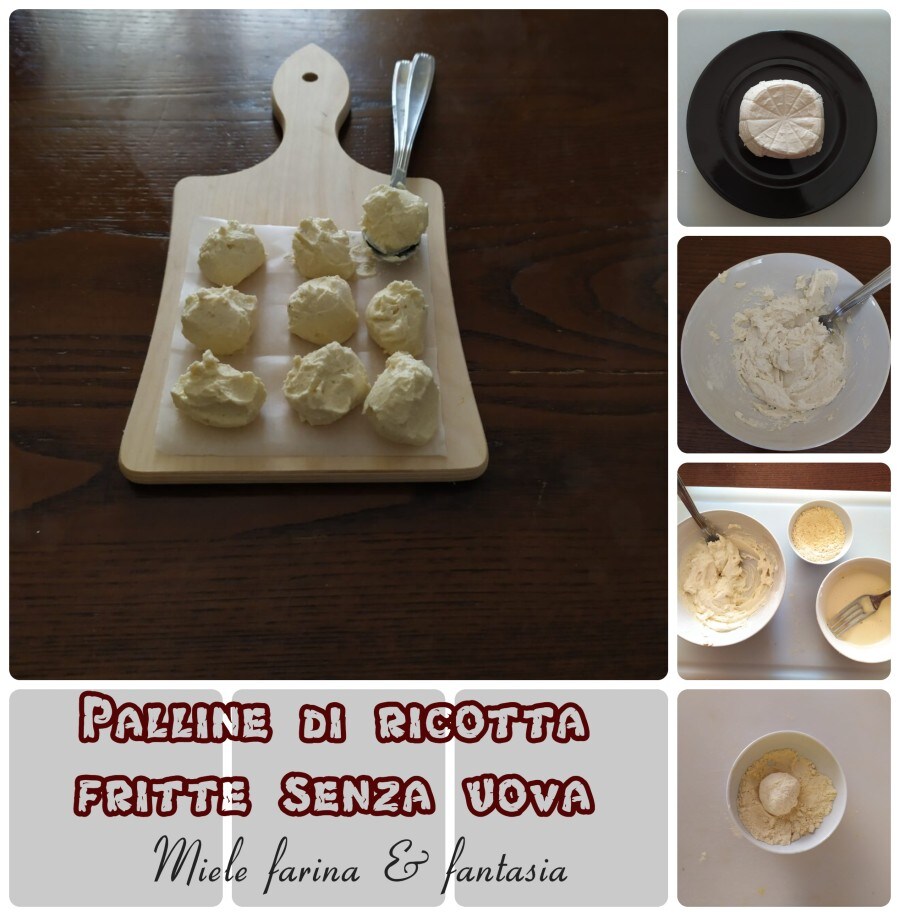
1) Place the ricotta in a large bowl, add the cornstarch (it will help the balls hold together), the grated cheese, a pinch of ground pepper and any finely chopped spices or cured meats. Mix well and form walnut-sized balls. The mixture will be fairly soft, but do not worry because it should be like that.
2) Using two spoons or long-handled teaspoons, take a small walnut of mixture and try to shape it into a sphere. Place them, as you go, on a cutting board or tray lined with parchment paper, cover them and leave them at room temperature (if it’s very warm, choose a cool place) for about an hour so they gain more firmness.
After an hour, prepare the batter.
3) In a wide milk cup place the sifted flour, adding the water little by little until you form a fluid, semi-thick mixture that should not slide off the ricotta balls too easily.
4) Fill the other cup halfway with the breadcrumbs (or rice flour or chickpea flour).
5) Dip each ricotta ball into the batter. With the help of a fork, lift it, let some excess batter drip off and plunge it into plenty of breadcrumbs.
6) Hold the cup with the breadcrumbs by the handle and give it a slight rotating motion. The balls will be nicely coated on all sides without breaking, given their delicacy. Take them out with another fork and place them on a plate lined with parchment paper or simply with a little breadcrumbs on the bottom. Continue until the mixture is used up.
Frying
7) In a nonstick pan put plenty of oil and bring it to temperature (you can use a handy air fryer to save oil and time). As soon as the oil is ready, start frying the ricotta balls, adding them one at a time to avoid cooling the oil too much. As soon as they are golden on all sides, remove them and place them on absorbent paper.
Salt is not included among the ingredients due to the abundant presence of cheese; if you deem it necessary, you can salt them on the surface after cooking.
Bon appetit