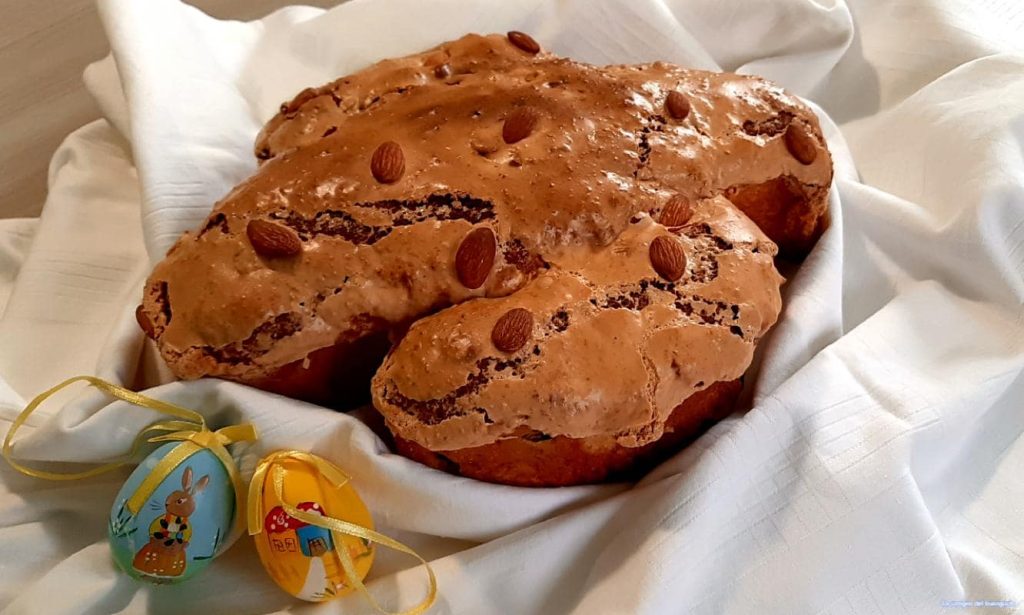
Classic almond-glazed Colomba: the symbol of Easter on your table.
If there is one dessert that unites all of Italy during the Easter festivities, it is without a doubt the Colomba.
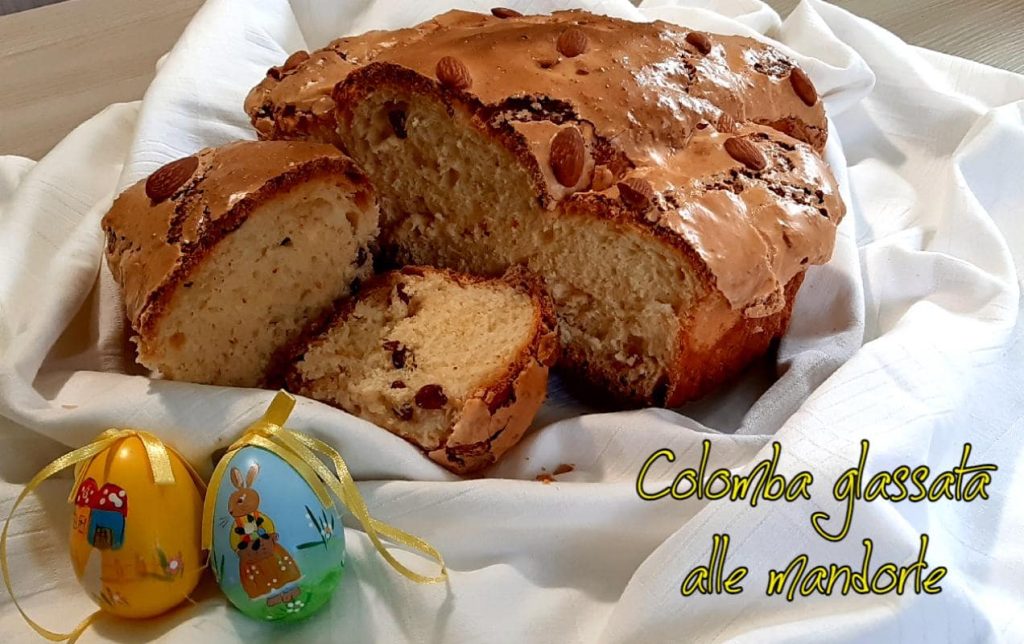
With its iconic shape evoking peace and rebirth, this almond-glazed cloud of sweetness is the undisputed queen of every after-dinner or festive breakfast.
Today I want to present my version, cared for in every detail to achieve a professional result right in your home oven.
The Easter Colomba, as we know it commercially, has a fascinating and relatively recent history.
It was invented in Lombardy around 1930 by Motta, born as a brilliant idea to use panettone machinery and ingredients also during the spring.
Since then, it has spread across the peninsula becoming the most beloved dessert.
However, Italy boasts even older traditions: we must not forget the Sicilian Easter colomba, also called i palummeddi or pastifuorti, a very different but equally fascinating sturdy pastry.
Both of these wonders have been officially included in the list of Italian Traditional Agri-food Products (PAT), testimony to the immense cultural value this leavened cake represents for our country.
Let’s be honest: preparing the classic Colomba is an undertaking that requires commitment.
The process is quite long and laborious, but the true secret for guaranteed success is just one: do not rush.
Long fermentation is fundamental to allow the aromas to develop and to obtain that soft, alveolated texture that melts in the mouth.
Every step, from kneading the dough to spreading the crunchy almond glaze, must be carried out calmly and precisely.
The satisfaction of seeing the Colomba rise in the paper mold and pulling from the oven a tall cake, fragrant with butter and citrus, is indescribable.
The signature of this cake is its almond glaze: it must be crunchy, rich in sugar grains and whole almonds that create that irresistible contrast with the soft interior.
Follow my recipe step by step, respect the resting times and let yourself be guided by the process photos.
I’m sure that once you bring your homemade Colomba to the table, you won’t want the industrial one anymore!
Kcal 420 approx per person
- Difficulty: Medium
- Cost: Medium
- Rest time: 4 Hours
- Preparation time: 1 Hour
- Cooking time: 1 Hour
- Portions: 10 people
- Cooking methods: Electric oven
- Cuisine: Italian
- Seasonality: Easter
Ingredients to make the Classic Almond-Glazed Colomba
For a 1 kg Colomba (about 2.2 lb)
- 0.63 oz Fresh yeast
- 2 tbsp Whole milk
- 1/4 cup Manitoba flour
- First dough
- 2/3 cup Manitoba flour
- 1/2 cup Warm water
- Second dough
- 1 tbsp Butter
- 1 1/2 tbsp Sugar
- 2/3 cup Manitoba flour
- Third dough
- Zest of 2 oranges, grated
- Zest of 1 lemon, grated
- 5 tbsp Butter
- 2/3 cup Sugar
- 2 medium eggs
- 1 pinch Salt
- 1 tsp Vanilla extract
- 1/3 cup Almond flour
- 2 1/2 cup All-purpose flour (type 0)
- 1/3 cup Raisins
- 1 oz Whole almonds
- 1 Egg white
- 3/4 cup Powdered sugar (confectioners')
- 1/2 cup Almond flour
Tools
- Molds colomba molds
Preparation of the Classic Almond-Glazed Colomba
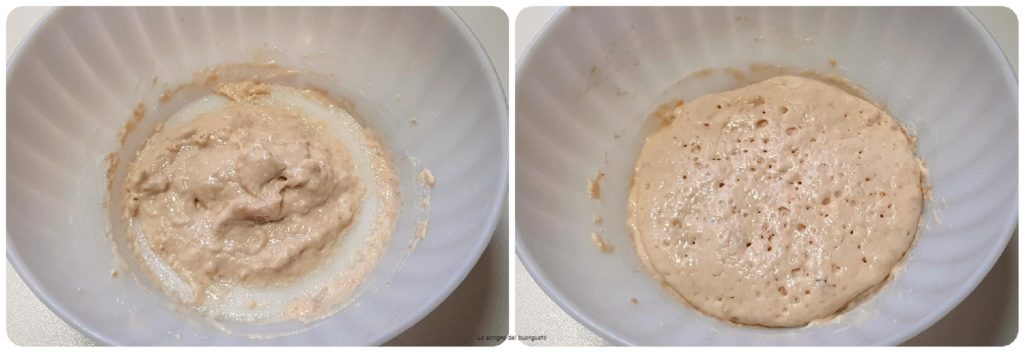
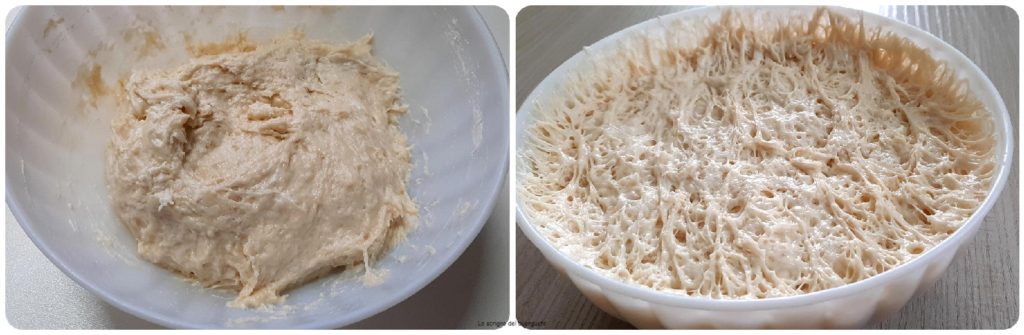
First of all prepare the sponge by dissolving the yeast in the warm milk, add the flour and knead.
You will obtain a thick batter — and that’s how it should be!
Let it rise for about 30 minutes, covered, in a warm place.
After that time, take the risen dough and add the warm water and the flour indicated for the second dough.
Leave it to rise covered for about 45 minutes.
With the rise achieved on this second dough we will add the ingredients for the third dough starting with the sugar and knead well, then add the softened butter and knead until absorbed, finally add the flour little by little until you have added all that is needed for the third dough.
Up to this point I worked with a spatula and by hand; of course if you have a stand mixer it will be much better to continue the work.
Let it rise again covered in a warm place for about 1 hour.
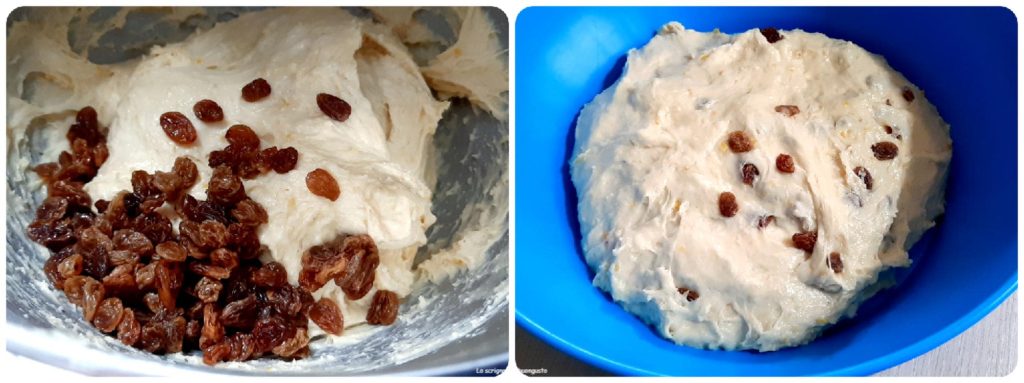
Meanwhile, soak the raisins in water.
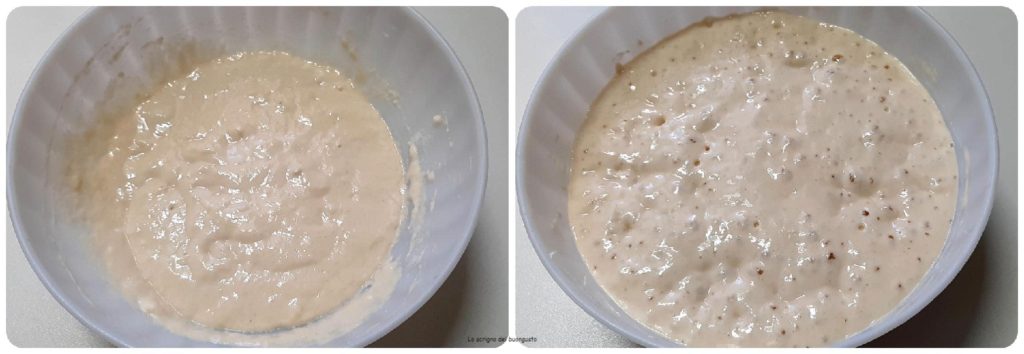
To the risen dough we will add the last ingredients for the fourth dough and here I used the planetary mixer, but other times I simply used the hand mixer for pastries.
Start by adding the sugar and knead until it is incorporated, then add the grated orange and lemon zest, mixing until absorbed.
Add the flour little by little and knead for a few minutes until the dough becomes homogeneous again.
At this point, add a pinch of salt, knead and then add the eggs one at a time, kneading well after each addition.
Add the softened butter, knead well, add the almond flour and knead again for a few minutes.
Finally add the vanilla, knead again and then drain the raisins well and add them to the dough, working for a long time until everything is very homogeneous and, when you take the dough in your hands and stretch a little, it will not be transparent and will be elastic.
If the dough remains a little too soft and sticky, try adding a little more flour and knead well; this may depend on eggs that are sometimes too large.
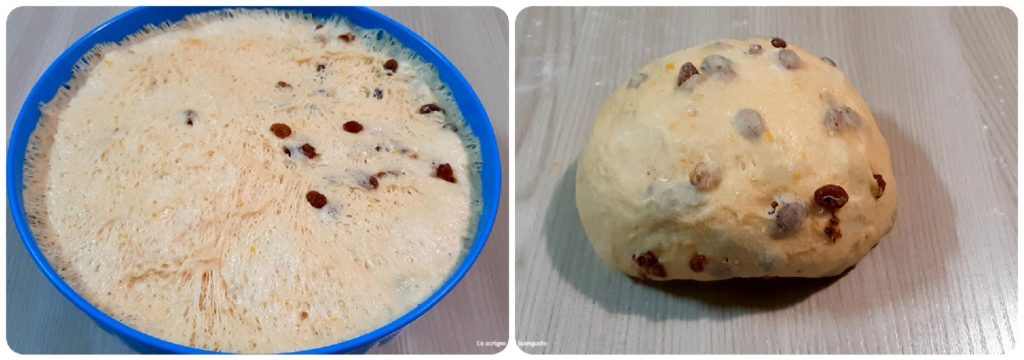
Place in a container to rise for at least 2 hours.
When the rise is finished, take the dough and place it on a lightly floured work surface, shaping it into a ball.
…then divide it so that it is distributed in 2/3 and 1/3: one part for the body and the other for the wings.
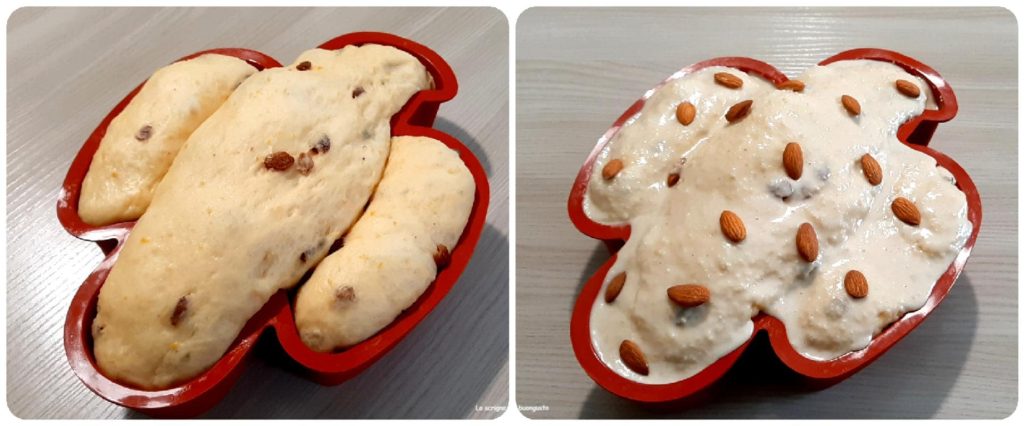
Work the larger portion and create a log that you will place to form the body in the Colomba mold; divide the smaller piece into two to create two small logs for the wings.
At this point let our Colomba rise covered in a warm place for about 1 hour or until doubled in volume.
When risen, prepare the glaze by whisking one egg white, then add the powdered sugar and the almond flour, mixing well until the result is a thick but not too runny paste.
Spread it gently and evenly over the entire Colomba, then take whole almonds and distribute them across the surface.

At this point we can bake in a preheated oven at 338°F for 1 hour and a few minutes, checking the cooking.
Baking times may vary from oven to oven, but the surface at the end of baking should be slightly browned.
Generally the Colomba, after baking, should be cooled upside down suspended, but I must say I did not do this and it rose beautifully — and if I may say so… better than store-bought ones!
Follow me on Facebook Pinterest Twitter Instagram YoutubeTelegram
If you want to stay updated subscribe to the newsletter by clicking here
Cooling: To prevent the Colomba from collapsing as soon as it comes out of the oven, pierce it at the base with the proper skewers (or long grilling skewers) and let it cool upside down for at least 6 hours. This is the secret to maintaining a perfect crumb!